
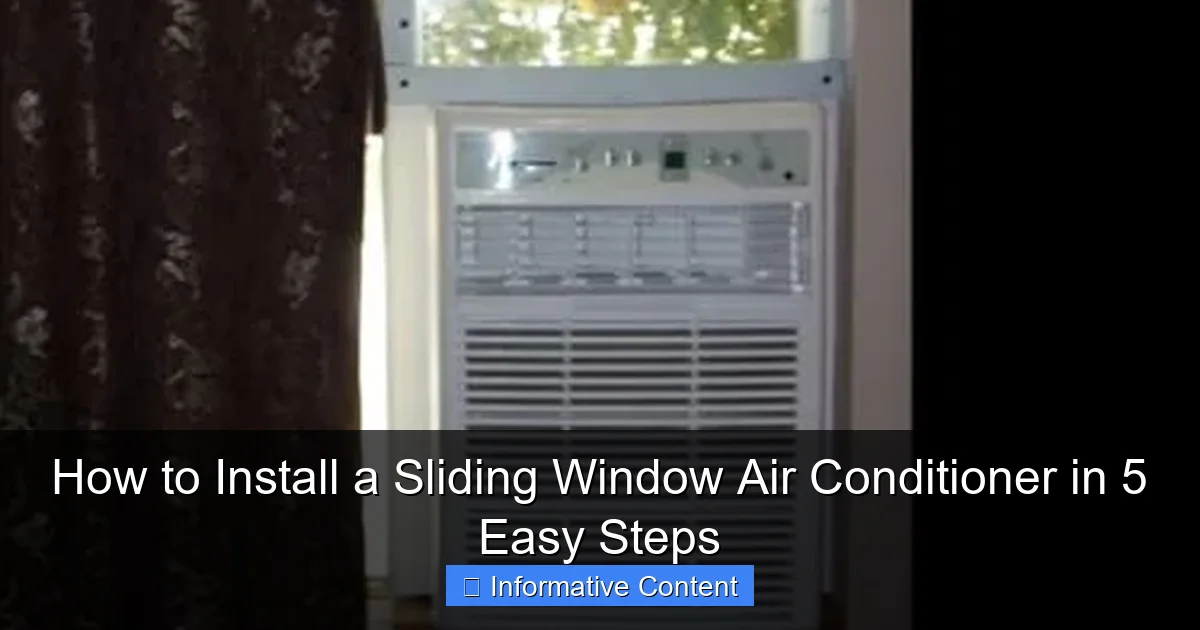
Featured image for how to install a sliding window air conditioner
Image source: hvachowto.com
Installing a sliding window air conditioner is quick and straightforward when you follow the right steps. Begin by measuring your window and securing the mounting bracket, then carefully place the unit and seal gaps with included side panels or foam. With basic tools and under an hour, you can enjoy cool, efficient comfort—no professional help needed.
Key Takeaways
- Measure your window to ensure the AC unit fits securely and safely.
- Remove obstructions like screens or locks before installation begins.
- Secure the unit with brackets or supports to prevent slipping or tipping.
- Seal gaps properly using foam or weatherstripping to maximize efficiency.
- Check drainage slope to avoid water leaks or interior damage.
- Test operation immediately to confirm cooling and airflow are working.
📑 Table of Contents
- How to Install a Sliding Window Air Conditioner in 5 Easy Steps
- Step 1: Choose the Right Air Conditioner and Gather Your Tools
- Step 2: Prepare Your Window and Workspace
- Step 3: Install the Side Panels and Mounting Brackets
- Step 4: Seal Gaps and Secure the Installation
- Step 5: Test, Maintain, and Enjoy Your Cool Space
- Common Mistakes and Pro Tips
How to Install a Sliding Window Air Conditioner in 5 Easy Steps
Let’s be honest: summer heat can be brutal. One minute you’re sipping iced tea on the couch, and the next, you’re a sweaty mess wondering why you didn’t just invest in a window AC unit sooner. If you’ve got a sliding window (also known as a horizontal sliding or double-hung window), you might be thinking, “Wait, can I even install an AC in this?” Good news: yes, you absolutely can. And the best part? It’s easier than you think.
I remember the first time I tried installing a sliding window air conditioner. I was convinced I’d need a contractor, a toolbox full of power tools, and at least three YouTube videos. But after a sweaty afternoon (ironically), a few trial-and-error moments, and a surprisingly simple process, I had a cool, comfortable room—no handyman required. The truth is, most sliding window AC units come with adjustable side panels and mounting kits designed specifically for horizontal windows. With the right prep, tools, and a little patience, you can have your unit up and running in under an hour. So grab your screwdriver, roll up your sleeves, and let’s walk through how to install a sliding window air conditioner—step by step, no stress, no jargon, just real talk.
Step 1: Choose the Right Air Conditioner and Gather Your Tools
Before you even think about lifting the AC unit out of the box, you need to make sure you’ve got the right one for your space and window. This isn’t a “one size fits all” situation—and trust me, buying the wrong model can lead to frustration, leaks, or even a window that won’t close properly.

Visual guide about how to install a sliding window air conditioner
Image source: img.lazcdn.com
Measure Your Window and Room Size
Start by measuring the width of your sliding window opening. Most sliding windows range from 24 to 48 inches wide. You’ll want an AC unit with a mounting kit that fits within that range. Also, measure the height—this ensures the unit won’t be too tall when the side panels are extended.
Next, calculate your room’s square footage. A 5,000 BTU unit works great for small rooms (up to 150 sq ft), while a 10,000–12,000 BTU unit handles medium to large spaces (up to 500 sq ft). Oversizing can cool the room too quickly without dehumidifying, leaving you clammy. Undersizing? You’ll be running it nonstop with no relief.
Check the Mounting Kit and Compatibility
Look for models labeled “sliding window compatible” or “horizontal window kit included.” Brands like Frigidaire, Midea, LG, and GE offer excellent sliding window kits with adjustable side panels (often called accordion panels). These expand to fill the gap on either side of the AC unit.
Pro tip: Read the product description carefully. Some kits are universal, while others are model-specific. Don’t assume the kit from your old AC will work with the new one—measure and verify.
Gather Your Tools and Supplies
Here’s what you’ll need (most are probably in your junk drawer):
- Measuring tape
- Level (a small one works fine)
- Phillips screwdriver (manual or electric)
- Drill with a small drill bit (optional, but helpful)
- Scissors or utility knife
- Silicone sealant (clear, waterproof)
- Foam weather stripping (if gaps remain after installation)
- Gloves (to protect your hands—AC units are heavy and have sharp edges)
Bonus tip: If you’re installing on an upper floor, ask a friend to help lift the unit. Most window ACs weigh 40–70 pounds, and you don’t want to drop it—or yourself.
Step 2: Prepare Your Window and Workspace
Now that you’ve got the right AC and tools, it’s time to prep. This step is often overlooked, but it’s critical for a secure, leak-free installation.
Clear the Window Area
Remove any curtains, blinds, or window screens. You need full access to the window frame. If you have a screen, you’ll either remove it permanently (not ideal if you like fresh air) or install the AC below it. Most people opt for removal—just store it safely for winter.
Clean the window track and sill. Dust, dirt, or debris can prevent a tight seal, leading to air leaks and reduced efficiency. A quick wipe with a damp cloth does the trick.
Inspect the Window Frame
Check for damage. Cracked wood, warped metal, or loose tracks can make installation tricky. If the frame is weak, consider reinforcing it with a small wooden support (more on that later). Also, make sure the window opens and closes smoothly. You’ll need to slide the top sash down to install the unit, so any sticking could be a problem.
Test-Fit the AC Unit (Without Installing)
Before drilling or sealing, place the AC unit (still in its packaging or on a towel) in the open window. Slide the top sash down so the unit rests on the sill. Adjust the side panels to see how they fill the gaps. This dry run helps you spot issues—like the unit being too wide or the side panels not extending enough—before you commit.
Example: I once bought a 12,000 BTU unit that looked perfect on paper. But during the dry run, I realized the side panels only extended 8 inches—my window was 10 inches wider on each side. I ended up returning it and getting a model with 12-inch extendable panels. Saved me a headache later!
Mark Your Drill Points
Once the unit fits snugly, use a pencil to mark where the mounting brackets will attach to the window frame. This ensures you drill in the right spots later. Use a level to make sure the marks are even—this keeps the AC from tilting, which can cause drainage issues.
Step 3: Install the Side Panels and Mounting Brackets
This is where the magic happens. The side panels and brackets are what hold your AC in place and seal the window. Don’t rush this step—precision here means better performance and fewer bugs in your room.
Attach the Side Panels to the AC Unit
Most kits include two accordion-style panels (one for each side). Slide them into the grooves on the sides of the AC unit. They usually click or snap into place. If they’re loose, use the included screws to secure them. Make sure they’re fully extended and locked in position.
Tip: Some panels have foam or rubber seals on the edges. These help create an airtight fit. If yours don’t, you can add weather stripping later.
Position the AC Unit in the Window
With a friend’s help (or using a sturdy table for support), carefully lift the AC and place it on the window sill. The front of the unit should face into the room, and the back (with the exhaust vents) should face outside. Slide the top sash down so it rests on top of the AC unit. The unit should be tilted slightly backward (about 1–2 degrees) to allow condensation to drain outside.
Why tilt it? Without a slight backward tilt, water can pool inside the unit and drip into your room. A level helps you check this—just make sure the back is slightly lower than the front.
Secure the Mounting Brackets
Most kits include L-shaped brackets that attach to the window frame and the AC unit. Position them so they sit just below the top sash. Use your pencil marks as a guide. Drill pilot holes first (to prevent wood splitting), then screw the brackets in place. Tighten them firmly, but don’t over-torque—this can crack plastic or strip the screws.
Some models use a different system—like a support arm that extends from the AC to the window sill. Follow the manufacturer’s instructions carefully. If your kit includes a support arm, make sure it’s anchored securely to the sill (use screws or a clamp).
Adjust the Side Panels
Now, extend the side panels to fill the gaps on either side. They should press firmly against the window frame. If there’s a small gap (less than 1/2 inch), use foam weather stripping or the included foam tape to seal it. For larger gaps, you may need to cut a piece of rigid foam board or wood to fill the space.
Example: My neighbor had a 1-inch gap on one side. He cut a thin piece of plywood, painted it to match the window, and screwed it into the frame. It looked professional and kept bugs out.
Step 4: Seal Gaps and Secure the Installation
You’re almost there! But a secure AC unit isn’t just about holding it in place—it’s about keeping cool air in, hot air out, and bugs where they belong: outside.
Apply Silicone Sealant
Run a bead of clear, waterproof silicone sealant along the top and sides where the AC unit meets the window frame. This prevents air leaks and stops rainwater from dripping in. Don’t seal the bottom—you need that slight tilt for drainage.
Tip: Use a caulking tool or your finger (with a glove) to smooth the sealant for a clean, professional look. Wipe off excess with a damp cloth before it dries.
Check for Drafts and Gaps
Turn on the AC and run your hand around the edges. If you feel cool air escaping, you’ve got a gap. Use foam weather stripping, foam tape, or even a rolled-up towel (temporarily) to plug it. For larger gaps, consider a custom-fit foam insert or a piece of insulation board.
Pro tip: If the side panels aren’t sealing well, you can add extra screws to pull them tighter against the frame. Just drill through the panel into the frame—use a drill bit slightly smaller than the screw for a snug fit.
Secure the Top Sash
To prevent the window from being opened from the outside (a security risk), use a sliding window lock or install a small bracket that stops the sash from sliding past the AC unit. Some kits include this; if not, a simple wooden dowel or metal rod works.
Example: I use a 12-inch piece of 1/2-inch dowel that slides into the track above the AC. It’s cheap, invisible, and stops anyone from prying the window open.
Test the Drainage
Run the AC for a few minutes and check for water leaks. If you see water dripping inside, the tilt might be wrong, or the drain plug (if your unit has one) might be loose. Adjust the tilt or tighten the plug. If the unit doesn’t have a drain plug, make sure the back is tilted enough to let water flow out.
Step 5: Test, Maintain, and Enjoy Your Cool Space
You’ve done the hard work—now it’s time to kick back and enjoy that cool breeze. But a little maintenance now saves headaches later.
Turn On the AC and Check Performance
Plug in the unit and turn it on. Set it to a cool temperature (like 72°F) and listen for unusual noises. The fan and compressor should run smoothly. If you hear rattling, something might be loose—double-check the brackets and side panels.
Feel the airflow. It should be strong and consistent. If it’s weak, the filter might be dirty (even new units can have debris), or the unit might be too big for the room (causing short cycling).
Clean the Filter and Coils
Most AC units have a removable filter. Pull it out, rinse it under water, and let it dry before reinstalling. Do this every 2–4 weeks during heavy use. A dirty filter reduces airflow and efficiency.
For the coils (inside the unit), use a soft brush or vacuum with a brush attachment. Don’t use water—this can damage the internal components.
Inspect the Seal Seasonally
Every few months, check the silicone seal and weather stripping. If it’s cracked or peeling, reapply. This keeps your unit efficient and bug-free.
Example: My seal cracked after a hot summer. Bugs started sneaking in, and my electric bill went up. A 10-minute reseal fixed both problems.
Remove and Store in Winter (If Needed)
If you live in a cold climate, consider removing the AC in winter. It keeps cold air out and prevents damage from snow or ice. Store it in a dry, clean place—cover it with a breathable cloth to keep dust off.
If you leave it in year-round, seal any gaps with extra foam or tape, and cover the outside with a breathable AC cover (not plastic, which traps moisture).
Common Mistakes and Pro Tips
Even with a perfect installation, little things can go wrong. Here’s what to watch out for—and how to fix it.
Table: Common Sliding Window AC Installation Issues and Fixes
| Issue | Cause | Solution |
|---|---|---|
| Air leaks around the unit | Gaps between AC and window frame | Use foam tape, weather stripping, or silicone sealant |
| Water dripping inside | Incorrect tilt or clogged drain | Adjust tilt (back lower than front); clean drain pan |
| Window won’t close securely | No top sash lock | Install a dowel, bracket, or sliding window lock |
| AC unit vibrates or rattles | Loose brackets or side panels | Tighten all screws; add rubber pads under the unit |
| Reduced cooling efficiency | Dirty filter or poor seal | Clean filter; check and reseal gaps |
Pro Tips from Real Users
- Use a support bracket: If your window sill is weak, add a support arm that screws into the sill. This takes pressure off the frame.
- Label your tools: Tape a note to your screwdriver or drill reminding you which screws go where. Saves time next year!
- Install in the morning: Cooler temps make lifting and adjusting easier.
- Keep the manual: Tuck it in a drawer. You’ll need it for troubleshooting or removing the unit later.
Installing a sliding window air conditioner isn’t just about beating the heat—it’s about doing it smart, safely, and affordably. With these five steps, you’ve got everything you need: the right tools, a snug fit, a sealed window, and a well-maintained unit. No more sweating through summer nights. No more overpriced HVAC calls. Just cool, comfortable air—on your terms.
Remember, every window is different. Don’t get discouraged if your first try isn’t perfect. Adjust, seal, and test until it’s just right. And when that first blast of cool air hits your face? You’ll know it was worth it. Now go enjoy your oasis. You’ve earned it.
Frequently Asked Questions
How do I install a sliding window air conditioner properly?
To install a sliding window air conditioner, first measure your window opening, secure the mounting brackets, attach the side panels, place the unit in the frame, and seal gaps with foam or weatherstripping. Always follow the manufacturer’s instructions for safe and efficient installation.
Can I install a sliding window AC unit by myself?
Yes, you can install a sliding window air conditioner solo if you follow step-by-step instructions and have basic tools. However, for heavier units or safety concerns, having a helper is recommended to avoid injury or damage.
What tools do I need to install a sliding window air conditioner?
Common tools include a screwdriver, measuring tape, level, drill (if required), and foam or vinyl side panels for sealing. Some kits include all necessary hardware, so check your AC’s manual before starting the installation.
How do I seal a sliding window AC to prevent air leaks?
Use expandable foam, vinyl accordion panels, or foam tape to close gaps between the AC unit and window frame. Proper sealing improves efficiency and keeps hot air from entering your room.
Is it safe to leave a sliding window air conditioner installed year-round?
While possible, it’s best to remove and store the unit during extreme weather to prolong its life and prevent drafts or water leaks. If left in, ensure all gaps are tightly sealed and inspect regularly for damage.
What’s the best way to secure a sliding window AC unit?
Secure the unit with mounting brackets, L-brackets, or support arms to prevent shifting or falling. Additionally, lock the window track and use safety brackets to ensure the sliding window air conditioner stays firmly in place.