
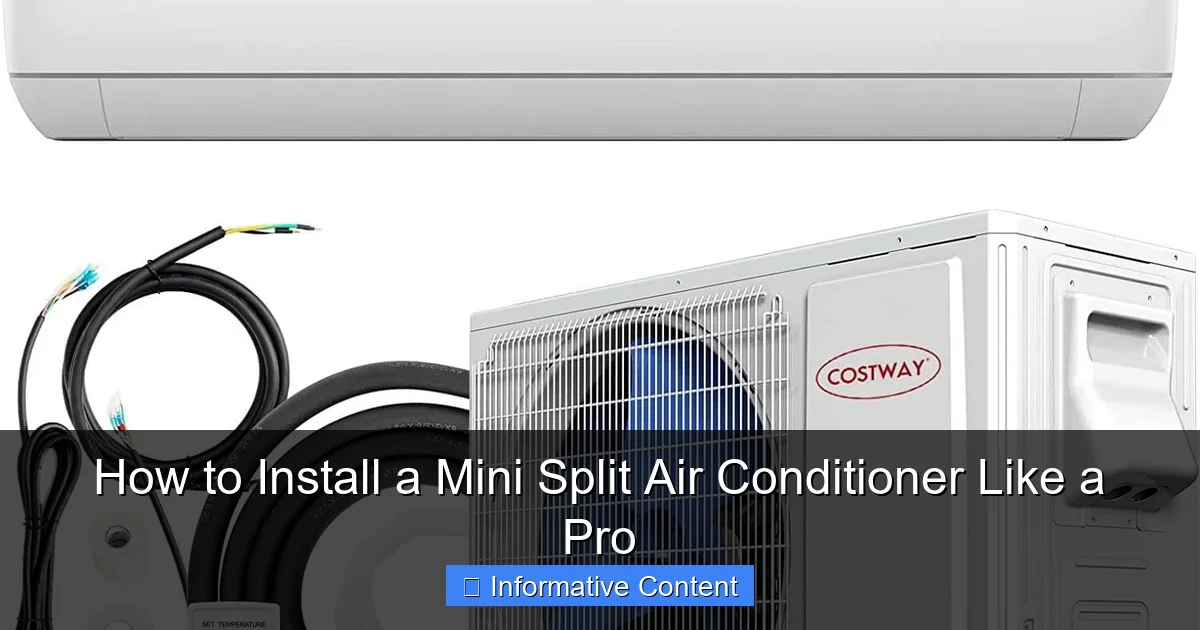
Featured image for how to install a mini split air conditioner
Image source: media.smallbiztrends.com
Installing a mini split air conditioner yourself is achievable with the right tools, preparation, and attention to detail. Follow a step-by-step process—choosing the ideal indoor and outdoor unit locations, drilling a precise hole for refrigerant lines, mounting the indoor unit, and securely connecting the lineset, drain, and electrical wiring—to ensure optimal performance and efficiency. Always adhere to local codes and safety guidelines, and consider hiring a licensed pro for the final refrigerant charge and inspection to guarantee a professional-grade result.
Key Takeaways
- Plan carefully: Choose the right location for indoor and outdoor units to maximize efficiency.
- Drill precisely: Ensure a 3-inch hole at a slight downward angle for proper drainage.
- Secure mounting: Use a level and heavy-duty brackets to prevent future vibration or damage.
- Vacuum linesets: Remove moisture and debris before connecting refrigerant lines to avoid system failure.
- Test thoroughly: Run a full system check to confirm airflow, cooling, and no leaks.
- Follow codes: Adhere to local electrical and building regulations for safe, legal installation.
📑 Table of Contents
- How to Install a Mini Split Air Conditioner Like a Pro
- 1. Choosing the Right Mini Split System for Your Space
- 2. Planning Your Mini Split Layout and Mounting
- 3. Tools, Materials, and Safety Precautions
- 4. Step-by-Step Installation Process
- 5. Testing, Troubleshooting, and Final Checks
- 6. Maintenance Tips to Keep Your System Running Like New
How to Install a Mini Split Air Conditioner Like a Pro
Installing a mini split air conditioner might sound like a job for a licensed HVAC technician—and in some cases, it absolutely is. But if you’re the kind of homeowner who likes to get hands-on, save a few bucks, and still get professional results, you’re in the right place. I’ve been there. A few years ago, I stood in my garage, staring at a box containing a shiny new mini split system, wondering if I’d bitten off more than I could chew. Spoiler: I pulled it off, and so can you—with the right prep, tools, and mindset.
This guide isn’t about selling you on DIY heroics. It’s about giving you the real, practical steps to install a mini split air conditioner safely and effectively, whether you’re cooling a sunroom, finishing a basement, or just tired of window units that rattle and leak. We’ll walk through everything: choosing the right system, planning the layout, making the connections, and avoiding the common mistakes that trip up even experienced DIYers. Think of this as a friendly, step-by-step chat with someone who’s been in your shoes—and lived to tell the tale.
1. Choosing the Right Mini Split System for Your Space
Before you even think about drilling holes, you need to pick the right unit. This is the foundation of a successful install. A mismatched system—too weak or too strong—will underperform, cost more to run, or fail prematurely. So let’s get this right.
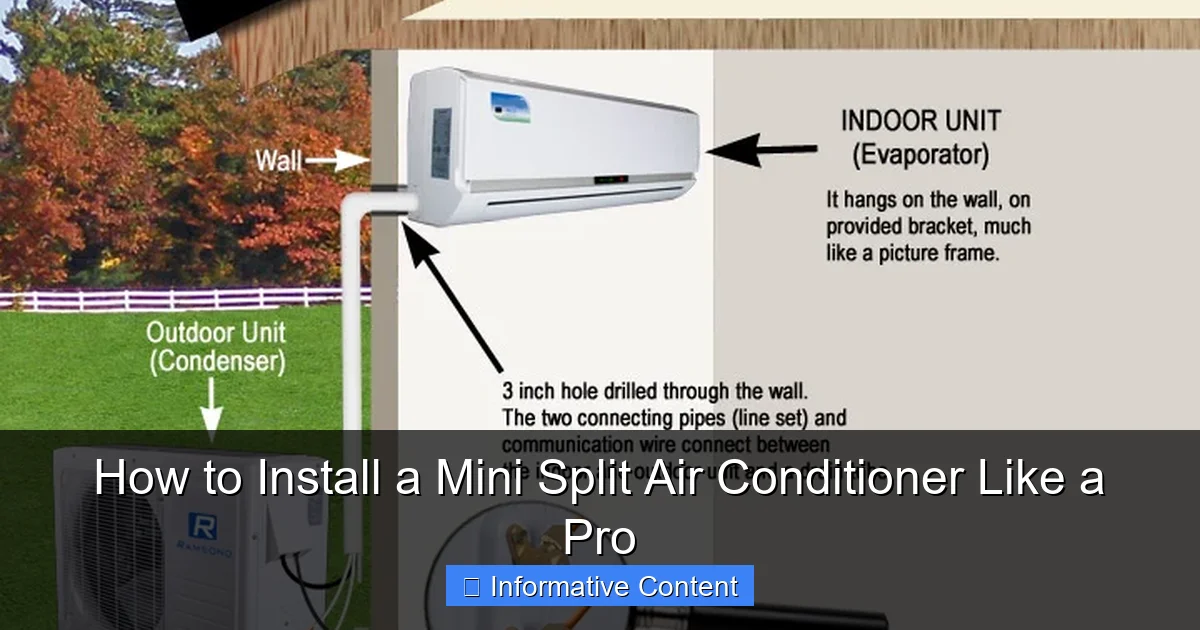
Visual guide about how to install a mini split air conditioner
Image source: cdn2.bigcommerce.com
Understand BTU and Sizing
The first rule: size matters. A mini split’s cooling capacity is measured in BTUs (British Thermal Units). A 9,000 BTU unit cools about 300–400 sq ft, while a 24,000 BTU unit can handle 1,000–1,200 sq ft. But it’s not just square footage. Consider:
- Insulation quality: Poorly insulated rooms need more power.
- Ceiling height: Rooms over 8 feet high require more BTUs.
- Sun exposure: South- or west-facing rooms absorb more heat.
- Occupancy: More people = more body heat.
- Appliances: Kitchens or home gyms add heat load.
For example, I installed a 12,000 BTU unit in my 500 sq ft home office. It had two large windows facing west and no attic insulation. I sized it for 15,000 BTU to be safe, but the 12,000 BTU model actually worked better—because it ran longer, dehumidifying more effectively. Oversizing causes short cycling, which reduces efficiency and comfort.
Single-Zone vs. Multi-Zone
A single-zone system has one outdoor unit and one indoor unit—ideal for a single room. A multi-zone setup connects one outdoor unit to two or more indoor units, letting you cool different areas independently. If you’re cooling a detached garage and a bedroom, multi-zone makes sense. But it’s pricier and more complex to install.
Pro tip: If you plan to expand later, choose a multi-zone outdoor unit with extra ports, even if you only install one indoor unit now. It saves money down the road.
Efficiency and Features
Look for a high SEER (Seasonal Energy Efficiency Ratio) rating—18+ is great for savings. Also consider:
- Inverter technology: Adjusts compressor speed for better efficiency and quieter operation.
- Wi-Fi control: Lets you manage temps from your phone.
- Heating mode: Many mini splits are heat pumps—great for year-round comfort.
- Noise level: Indoor units should be under 40 dB for quiet rooms.
2. Planning Your Mini Split Layout and Mounting
Once you’ve got the right unit, it’s time to plan where everything goes. This step is often rushed, but it’s crucial. A bad layout leads to poor airflow, water leaks, or even structural issues.
Choose the Indoor Unit Location
The indoor unit (also called the air handler) should be:
- High on the wall, ideally 7–8 feet up, to allow cool air to sink and circulate.
- Centered in the room or near the main activity area.
- At least 6 feet from heat sources like lamps, TVs, or stoves.
- Away from direct sunlight to avoid false temperature readings.
I once installed a unit directly above a bookshelf. Big mistake. The warm air rising from the bookshelf confused the thermostat, causing the unit to short cycle. I moved it to the opposite wall, and the problem vanished.
Pick the Outdoor Unit Spot
The condenser (outdoor unit) needs:
- Clear airflow: At least 12 inches on all sides, 3 feet in front.
- Shade or partial shade: Direct sun lowers efficiency.
- Stable, level ground: Use a concrete pad or anti-vibration mounts.
- Accessibility: For maintenance and cleaning.
Avoid placing it near bedrooms or neighbors’ windows. Even quiet units can be heard up close. I placed mine behind the garage, facing the backyard—far enough to avoid noise complaints.
Plan the Refrigerant Line and Drain Route
The copper refrigerant lines and drain hose run from the indoor unit to the outdoor unit. You’ll drill a 3-inch hole through the wall to pass them through. Plan this path carefully:
- Minimize bends: Each 90-degree turn reduces efficiency. Max 3–4 per run.
- Keep it short: Most kits support up to 25–35 feet. Longer runs need larger lines.
- Ensure a downward slope from indoor to outdoor for proper drainage.
Pro tip: Use a line set cover (a PVC channel) to protect the lines and hide them from view. It also keeps pests out.
3. Tools, Materials, and Safety Precautions
You don’t need a full HVAC toolkit, but having the right gear makes the job smoother—and safer. Here’s what I used (and what I wish I’d had).
Essential Tools
- Drill and hole saw (3-inch bit for the wall penetration)
- Vacuum pump (to evacuate the refrigerant lines)
- Flaring tool (to create tight copper connections)
- Torque wrench (for precise flare nut tightening)
- Level (to ensure units are perfectly horizontal)
- Measuring tape
- Stud finder (to avoid drilling into framing)
- Pipe cutter (if cutting refrigerant lines)
- Manifold gauge set (to monitor pressure during charging)
Materials You’ll Need
- Mini split kit (includes indoor/outdoor units, refrigerant lines, drain hose, power cable)
- Wall mounting bracket (often included)
- Refrigerant line insulation (to prevent condensation)
- Drain hose extension (if needed)
- Concrete pad or mounting feet (for outdoor unit)
- Line set cover (optional but recommended)
- Electrical disconnect box (required by code)
Safety First
Mini split installation involves electricity, refrigerant, and working at height. Never skip safety:
- Turn off power at the breaker before wiring.
- Wear safety goggles and gloves when drilling or handling copper.
- Never touch refrigerant lines without proper training. They can leak harmful chemicals.
- Use a ladder stabilizer when working on walls.
- Check local codes: Some areas require permits or licensed electricians for electrical connections.
I learned the hard way: I once drilled into a wall without checking for studs. The hole saw bit into a 2×4, and the drill kicked back. No injuries, but it scared me enough to always use a stud finder.
4. Step-by-Step Installation Process
Now the fun begins. Let’s walk through the actual installation of a mini split air conditioner, from mounting to startup.
Step 1: Mount the Indoor Unit Bracket
- Use the mounting template (included with the unit) to mark screw holes.
- Drill pilot holes and secure the bracket with lag bolts. Use a level to ensure it’s straight.
- Double-check that the bracket is anchored into wall studs or solid masonry.
Tip: If you can’t hit a stud, use heavy-duty wall anchors rated for at least 50 lbs.
Step 2: Drill the Wall Penetration
- Drill a 3-inch hole at a slight downward angle (1–2 degrees) from inside to outside.
- This slope helps drain condensation away from the indoor unit.
- Cover the hole edges with silicone to prevent water intrusion.
Step 3: Mount the Outdoor Unit
- Place the unit on a level concrete pad or anti-vibration feet.
- Secure it with bolts or straps to prevent movement in high winds.
- Ensure all sides have proper clearance for airflow.
Step 4: Run the Refrigerant Lines and Drain Hose
- Feed the pre-flared copper lines and drain hose through the wall hole.
- Connect the lines to the indoor unit using a torque wrench (check the manual for exact ft-lb specs).
- Wrap the lines with insulation. Overlap seams and secure with tape.
- Route the drain hose downward and outside, avoiding sharp bends.
Common mistake: Not insulating the lines. I skipped this once, and condensation dripped down the wall. Never again.
Step 5: Connect Electrical Wiring
- Run a dedicated 240V circuit from your panel to the outdoor unit (or indoor unit, depending on model).
- Install a disconnect box near the outdoor unit.
- Connect wires per the manufacturer’s diagram. Use wire nuts or terminal blocks.
- Never splice wires inside the wall. Use a junction box if needed.
Pro tip: Label all wires before disconnecting anything. I once mixed up the low-voltage control wires and had to troubleshoot for hours.
Step 6: Vacuum the Lines and Charge Refrigerant
- Connect the manifold gauges to the service ports on both units.
- Attach the vacuum pump and evacuate the lines for at least 30 minutes (longer for longer runs).
- Check for leaks with a micron gauge. Should hold below 500 microns.
- Close the valves and disconnect the pump.
- Open the refrigerant valves on the outdoor unit to release the factory charge.
Important: Never release refrigerant into the air. It’s illegal and harmful. Most mini splits come pre-charged for standard line lengths. Only add more if the run exceeds the limit—and use a scale to measure precisely.
5. Testing, Troubleshooting, and Final Checks
You’re almost done! But don’t fire it up yet. A few final checks ensure everything runs safely and efficiently.
Power Up and Test
- Turn on the breaker and power to the disconnect box.
- Press the power button on the remote. The indoor unit fan should start.
- Set to cooling mode. After 3–5 minutes, the outdoor compressor should kick on.
- Check airflow: Hold your hand in front of the indoor unit. You should feel strong, cool air.
- Verify the drain is working: Pour a cup of water into the drain pan and watch it flow out the hose.
Common Issues and Fixes
- No power: Check breaker, disconnect, and wiring connections.
- Compressor won’t start: Low refrigerant, bad capacitor, or control board issue. Call a pro.
- Water leaks: Clogged drain, improper slope, or disconnected hose. Clear the drain and check alignment.
- Weak airflow: Dirty filter, blocked vents, or frozen coil. Clean and inspect.
- Strange noises: Loose parts, refrigerant flow, or fan issues. Tighten screws and listen closely.
I had a unit that hummed loudly. Turns out, the mounting bolts were loose, and the unit was vibrating against the wall. A few turns of the wrench fixed it.
Final Inspection
- Seal the wall hole with silicone or foam.
- Secure all cables and lines with clips or tape.
- Clean the indoor unit filter and wipe down both units.
- Keep the manual and warranty info handy.
6. Maintenance Tips to Keep Your System Running Like New
A well-installed mini split can last 15+ years with proper care. Here’s how to keep it in top shape.
Monthly Checks
- Clean the air filter: Rinse under water every 2–4 weeks. Dry completely before reinstalling.
- Inspect the outdoor unit: Remove leaves, debris, and spider webs.
- Check for leaks: Look under the indoor unit and along refrigerant lines.
Seasonal Maintenance
- Winterize: Cover the outdoor unit with a breathable cover to protect from snow and ice.
- Spring cleaning: Wash the outdoor coil with a garden hose (never high pressure).
- Drain check: Ensure the hose isn’t clogged and slopes downward.
Annual Professional Service
Even with DIY care, have a technician check:
- Refrigerant levels
- Electrical connections
- Compressor health
- Thermostat accuracy
I schedule mine every fall. It’s $100–150 well spent for peace of mind.
| Task | Frequency | DIY or Pro? |
|---|---|---|
| Clean air filter | Every 2–4 weeks | DIY |
| Inspect outdoor unit | Monthly | DIY |
| Check refrigerant lines | Every 6 months | DIY (visual) |
| Clean outdoor coil | Annually (spring) | DIY (gently) |
| Professional tune-up | Annually | Pro |
Installing a mini split air conditioner is a big project, but it’s absolutely doable with patience and attention to detail. You’ll save hundreds—maybe thousands—compared to hiring a pro, and you’ll have the satisfaction of doing it yourself. Just remember: take your time, follow the manual, and don’t cut corners on safety or sealing.
When I turned on my system for the first time, the cool air felt like a victory. But the real win? Knowing I did it right. No leaks, no noise, perfect temperature control. Whether you’re cooling a tiny studio or a sprawling workshop, a well-installed mini split delivers comfort, efficiency, and quiet operation.
So grab your drill, double-check your layout, and go for it. And if you hit a snag? That’s normal. Every installer—pro or DIY—has stories of late-night troubleshooting. The key is to stay calm, refer to the manual, and remember: you’ve got this. With the right approach, you can install a mini split air conditioner like a pro—and enjoy the rewards for years to come.
Frequently Asked Questions
How to install a mini split air conditioner by yourself?
Installing a mini split air conditioner yourself is possible if you have basic HVAC knowledge, but professional help is recommended for electrical and refrigerant line work. Always follow the manufacturer’s instructions and local building codes to ensure safety and efficiency.
What tools do I need to install a mini split air conditioner?
You’ll need a drill, level, hole saw, wrenches, vacuum pump, manifold gauge, and refrigerant charging equipment. Proper tools ensure a precise installation and prevent leaks or performance issues.
Can I install a mini split without a permit?
Most areas require a permit for mini split installation due to electrical and refrigerant handling regulations. Skipping the permit may void warranties or cause issues during resale.
How long does it take to install a mini split air conditioner?
A typical DIY installation takes 4–8 hours, but complex setups may require a full day. Professional installers often complete the job faster due to experience and specialized tools.
What’s the best location for the indoor unit of a mini split?
Mount the indoor unit on an exterior wall, high up for even airflow, and away from heat sources or direct sunlight. Ensure the location allows proper drainage and access to the outdoor unit.
Do I need to hire a pro for mini split installation?
If you’re uncomfortable handling electrical wiring, refrigerant lines, or vacuuming the system, hiring a pro is wise. Improper installation can lead to inefficiency, leaks, or costly repairs.