

Featured image for how to install a central air conditioner
Image source: canadaenergysolution.ca
Installing a central air conditioner requires careful planning, proper tools, and adherence to local codes to ensure optimal performance and safety. This step-by-step guide walks you through selecting the right unit, preparing the site, connecting refrigerant lines, and wiring the system—critical steps that prevent costly mistakes. Whether you’re a DIY enthusiast or hiring a pro, understanding the process ensures efficient, reliable cooling for years to come.
Key Takeaways
- Plan carefully: Assess home size and ductwork needs before purchasing.
- Hire a pro: Complex electrical and refrigerant work require licensed technicians.
- Secure permits: Always check local codes to ensure compliance.
- Install the condenser: Place on level ground, away from obstructions.
- Test thoroughly: Verify airflow, pressure, and thermostat functionality post-install.
- Maintain regularly: Clean filters and coils to maximize efficiency and lifespan.
📑 Table of Contents
- Why Installing a Central Air Conditioner Is Worth the Effort
- 1. Assess Your Home and Choose the Right AC Unit
- 2. Gather Tools, Materials, and Permits
- 3. Install the Indoor and Outdoor Units
- 4. Handle Electrical and Refrigerant Work
- 5. Seal and Insulate Ductwork
- 6. Final Checks and Maintenance Tips
- Final Thoughts: You’ve Got This!
Why Installing a Central Air Conditioner Is Worth the Effort
Let’s face it: summer heat can be brutal. I remember the first summer in my new house—no central air. We had a few window units, but they were noisy, inefficient, and didn’t cool the whole house evenly. My wife and I would argue over who got the “cool room,” and our energy bills were through the roof. That’s when I decided it was time to install a central air conditioner.
Installing a central air conditioner isn’t just about comfort—it’s about efficiency, air quality, and long-term savings. While it may seem like a daunting project, the process is manageable with the right preparation, tools, and knowledge. In this guide, I’ll walk you through every step of how to install a central air conditioner—from choosing the right unit to sealing the ductwork. Whether you’re a DIY enthusiast or just want to understand what’s involved before hiring a pro, this guide has you covered.
1. Assess Your Home and Choose the Right AC Unit
Before you even think about buying a unit, you need to understand your home’s cooling needs. Installing the wrong size or type of central air conditioner can lead to inefficiency, high energy bills, and poor comfort. Here’s how to get started.
Visual guide about how to install a central air conditioner
Image source: canadaenergysolution.ca
Calculate Your Home’s Cooling Load
Every home is different. The size, insulation, number of windows, and even your local climate affect how much cooling power you need. The standard way to measure this is in British Thermal Units (BTUs) or tons of cooling.
- As a rough rule of thumb, you need about 20 BTUs per square foot of living space.
- For example, a 1,500 sq ft home would need a 30,000 BTU (2.5-ton) unit.
- But don’t rely on rules of thumb alone. Use a Manual J Load Calculation for accuracy. Many HVAC contractors offer this for free, or you can use online tools like CoolCalc or HVAC Load Calculator.
Why is this important? A unit that’s too small will run constantly and never cool your home. One that’s too large will cycle on and off too quickly (called short-cycling), which wastes energy and reduces humidity control.
Choose the Right Type of Central Air Conditioner
There are two main types:
- Split System: The most common. Has an outdoor condenser and an indoor air handler (usually attached to your furnace). Great for homes with existing ductwork.
- Packaged Unit: All components are in one outdoor unit. Ideal for homes without a basement or attic space.
Most homeowners go with a split system. It’s efficient, quiet, and integrates well with forced-air heating systems. Look for units with a SEER (Seasonal Energy Efficiency Ratio) rating of 16 or higher. Higher SEER = better efficiency and lower energy bills. For example, upgrading from a 10 SEER to a 16 SEER unit can cut cooling costs by up to 40%.
Consider Additional Features
- Variable Speed Compressor: Adjusts cooling output to match demand. Saves energy and reduces temperature swings.
- Smart Thermostat Compatibility: Lets you control cooling remotely and schedule usage.
- Humidity Control: Especially helpful in humid climates like the Southeast.
Pro Tip: Check for ENERGY STAR certification. These units meet strict efficiency guidelines and may qualify you for local rebates or tax credits.
2. Gather Tools, Materials, and Permits
You’ve picked your unit. Now it’s time to get ready for the installation. Don’t skip this step—having the right tools and permits can make or break your project.
Essential Tools and Materials
Here’s what you’ll need (or your contractor will bring):
- Refrigerant gauges and vacuum pump
- Pipe cutter and flaring tool
- Wrenches (adjustable and line set)
- Drill and masonry bits
- Electrical tester and wire strippers
- Level and measuring tape
- Condensate drain pump (if needed)
- Line set (copper refrigerant pipes, typically 3/8″ and 5/8″)
- Insulated copper tubing
- Electrical disconnect box
- Duct sealant (mastic, not duct tape!)
- Condenser pad (concrete or composite)
Real Talk: I once tried to save money by reusing old copper lines from a previous AC unit. Big mistake. The lines were corroded and leaked refrigerant within a week. Always use new, properly sized line sets.
Get the Right Permits
Most municipalities require permits for HVAC work, especially for electrical and refrigerant handling. Here’s what to do:
- Check your local building department website or call them.
- Submit plans showing the unit location, electrical wiring, and refrigerant line routing.
- Pay the permit fee (usually $100–$300).
- Schedule inspections at key points (e.g., after electrical work, before final refrigerant charge).
Skipping permits can lead to fines, failed home inspections, or even voided warranties. I learned this the hard way when selling my last house—the buyer’s inspector flagged an unpermitted AC install. I had to pay a contractor to re-inspect and document everything.
Prepare Your Space
- Clear a 2-foot clearance around the outdoor unit for airflow.
- Ensure the indoor air handler has access for maintenance (don’t box it in with storage).
- Turn off power to the furnace and any nearby circuits.
3. Install the Indoor and Outdoor Units
This is where the physical work begins. Installing a central air conditioner involves setting up both the outdoor condenser and the indoor air handler. Let’s break it down.
Install the Outdoor Condenser
- Set the Condenser Pad: Place a concrete or composite pad on level ground. The pad should be slightly larger than the unit and at least 3 inches thick. I used a 24″x24″ concrete pad for my 3-ton unit.
- Position the Unit: Place the condenser on the pad. Use a level to ensure it’s perfectly flat. Even a small tilt can cause refrigerant flow issues.
- Secure the Unit: Bolt it to the pad using the manufacturer’s hardware. This prevents shifting during storms.
- Create a Slope: Tilt the pad slightly (about 1/4″ per foot) away from your house to help with drainage.
Tip: Avoid placing the unit under trees or near sprinklers. Debris and moisture can damage the coils and reduce efficiency.
Install the Indoor Air Handler
Most people connect the air handler to their existing furnace. Here’s how:
- Turn Off Power: Shut off the furnace circuit at the breaker box.
- Attach the Air Handler: Bolt it to the side or top of the furnace. Follow the manufacturer’s instructions—some units require a transition plenum.
- Connect the Drain Line: Attach a PVC pipe to the air handler’s condensate pan. Run it to a floor drain or install a condensate pump. Use a trap in the line to prevent sewer gases from entering your home.
- Seal the Connection: Use mastic sealant (not duct tape) to seal all joints. I once skipped this step and ended up with a 15% airflow loss—don’t make my mistake!
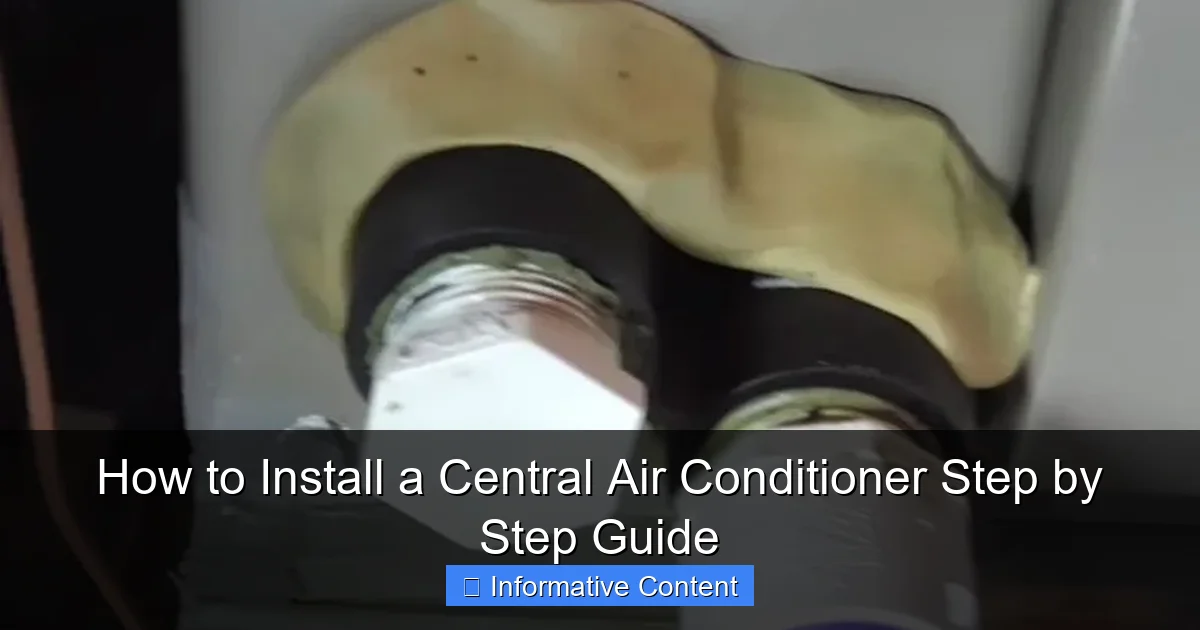
Route the Refrigerant Lines
- Measure the distance between the indoor and outdoor units. Add 20% extra for bends and routing.
- Use a hole saw to drill through the exterior wall (usually 2–3 inches in diameter).
- Feed the line set (copper pipes) through the hole. Insulate them with rubber or foam sleeves to prevent condensation.
- Flare the ends of the pipes and connect them to the units using wrenches. Don’t overtighten—this can crack the fittings.
Pro Tip: Label the lines (“liquid line” and “suction line”) to avoid confusion during charging.
4. Handle Electrical and Refrigerant Work
This is the most technical part of how to install a central air conditioner. If you’re not confident with wiring or refrigerant, hire a licensed pro. Safety first!
Electrical Connections
- Run a Dedicated Circuit: Most central AC units need a 240-volt circuit. Use 10- or 12-gauge copper wire (check your unit’s specs).
- Install a Disconnect Box: Place it within sight of the outdoor unit (usually 1–2 feet away). This allows you to shut off power for maintenance.
- Connect the Wires: Run the circuit from your main panel to the disconnect box, then to the condenser. Use wire nuts or terminal blocks to secure connections.
- Wire the Thermostat: Run a 18/5 thermostat wire from the air handler to your thermostat location. Connect it to the control board (follow the wiring diagram).
Warning: Never work on live circuits. Use a non-contact voltage tester to confirm the power is off.
Refrigerant Charging and Evacuation
- Evacuate the Lines: Connect a vacuum pump to the service ports on the outdoor unit. Run the pump for at least 30 minutes to remove moisture and air from the system.
- Check for Leaks: Use a refrigerant leak detector or soapy water on connections. Even a tiny leak can ruin efficiency.
- Charge the System: Add refrigerant (usually R-410A) using gauges and scales. Follow the manufacturer’s charge chart—over- or under-charging harms performance.
Real Example: My first AC install, I charged by “feel” (not recommended). The unit froze up in a week. A pro had to recover the refrigerant and start over. Always use a scale and follow the manual.
Test the System
- Turn on the power and thermostat.
- Check for airflow from vents.
- Measure the temperature difference between return and supply air (should be 18–22°F).
- Listen for unusual noises (buzzing, rattling).
5. Seal and Insulate Ductwork
Even the best AC unit won’t cool your home efficiently if your ducts are leaky or poorly insulated. This step is often overlooked but makes a huge difference.
Inspect Existing Ducts
- Go into your attic, basement, or crawlspace.
- Look for disconnected joints, gaps, or crushed sections.
- Feel for air leaks (use a lit incense stick—if the smoke wavers, there’s a leak).
I found a 3-inch gap in my attic ductwork. No wonder my upstairs was always hotter!
Seal and Insulate
- Seal Joints: Use mastic sealant (not duct tape) on all seams and connections. Apply it with a brush and let it cure.
- Insulate Ducts: Wrap them with R-6 or R-8 insulation, especially in unconditioned spaces (attics, garages). Use foil-faced insulation for vapor barriers.
- Balance the System: Adjust dampers in the ducts to ensure even airflow to all rooms.
Pro Tip: Hire a duct blaster test if you’re unsure. It measures air leakage and ensures your ducts are tight.
Install Air Filters
- Use a MERV 8–13 filter for good air quality and airflow.
- Change it every 1–3 months.
6. Final Checks and Maintenance Tips
You’re almost done! But before you declare victory, do these final checks to ensure your central air conditioner runs smoothly.
Run a System Test
- Set the thermostat to “cool” and lower the temperature.
- Check that both indoor and outdoor units start.
- Verify the condensate drain is working (no leaks or backups).
- Measure airflow with an anemometer or by holding your hand to the vents.
- Let it run for 30 minutes. The temperature should drop steadily.
Schedule a Professional Inspection
Even if you DIYed most of the work, have a licensed HVAC tech inspect the system. They’ll:
- Verify refrigerant charge
- Check electrical connections
- Test safety controls
- Issue a completion certificate (required for permits)
I paid $150 for this, but it saved me from a $500 repair later.
Maintenance Tips for Longevity
- Clean the outdoor coil annually with a garden hose (turn off power first).
- Trim vegetation around the condenser to maintain airflow.
- Check refrigerant lines for insulation damage.
- Schedule annual tune-ups (like an oil change for your AC).
Here’s a quick reference table for common maintenance tasks:
| Task | Frequency | Notes |
|---|---|---|
| Change air filter | Every 1–3 months | More often with pets or allergies |
| Clean outdoor coil | Annually (spring) | Use gentle spray; avoid high pressure |
| Inspect refrigerant lines | Every 2 years | Look for cracks or missing insulation |
| Professional tune-up | Annually | Includes electrical and refrigerant checks |
| Clear condensate drain | Every 6 months | Prevent clogs and water damage |
Final Thoughts: You’ve Got This!
Installing a central air conditioner is a big project, but it’s one of the best investments you can make in your home. When I finished my install, the first cool night was magical—no more sweating in bed, no more arguing over window units. The house felt like a sanctuary.
Remember, how to install a central air conditioner isn’t just about following steps—it’s about attention to detail, safety, and long-term planning. Take your time, don’t cut corners, and don’t hesitate to call a pro for the electrical or refrigerant work if you’re unsure.
Now, sit back, adjust that thermostat, and enjoy the cool. You’ve earned it.
Frequently Asked Questions
How do I install a central air conditioner for the first time?
Installing a central air conditioner involves sizing the unit, placing the outdoor condenser, running refrigerant lines, and connecting ductwork. Always follow local building codes and manufacturer instructions to ensure safety and efficiency.
Can I install a central air conditioner myself, or do I need a professional?
While DIY installation is possible for those with HVAC experience, hiring a licensed professional is recommended for proper refrigerant handling, electrical connections, and code compliance. Incorrect installation can void warranties and reduce efficiency.
What tools are needed to install a central air conditioner?
Essential tools include a refrigerant manifold gauge set, vacuum pump, drill, pipe cutter, wrenches, and a multimeter. Specialized tools like a flaring tool and refrigerant recovery machine may also be required for a proper central air conditioner installation.
How long does it take to install a central air conditioner?
A typical installation takes 1-3 days, depending on system complexity, ductwork modifications, and permitting. Professional teams often complete standard installations in a single day if the site is prepped.
Where should I place the outdoor unit when installing a central air conditioner?
Position the condenser on a level surface, at least 2 feet from walls or obstructions, and in a shaded area to improve efficiency. Ensure proper drainage and easy access for maintenance during your central air conditioner installation.
What permits are required for central air conditioner installation?
Most areas require electrical and HVAC permits for central air conditioner installation. Check with your local building department to ensure compliance with zoning laws, refrigerant handling rules, and energy efficiency standards.