
Featured image for how to instal air conditioner
Image source: instal-design.pl
Installing an air conditioner yourself is achievable with the right tools and careful planning. This beginner-friendly guide walks you through selecting the ideal unit, preparing the installation site, securing the mounting bracket, and connecting refrigerant lines and electrical wiring safely. Always follow manufacturer instructions and local codes to ensure efficiency, safety, and warranty compliance.
Key Takeaways
- Measure carefully: Ensure correct unit size for your room dimensions.
- Turn off power: Always disconnect electricity before starting installation.
- Seal gaps tightly: Prevent air leaks with proper insulation and sealing.
- Follow the manual: Adhere strictly to manufacturer instructions for safety.
- Use a level: Keep the unit balanced to avoid drainage issues.
- Test after install: Run a trial to confirm cooling and stability.
📑 Table of Contents
How to Install Air Conditioner A Step by Step Guide for Beginners
It was a sweltering summer afternoon when I first realized my old fan just wasn’t cutting it anymore. The air felt thick, and every breath seemed to add to the heat. That’s when I decided: it was time for an air conditioner. But as I stood in the store, staring at rows of sleek units, one question kept nagging at me: How on earth do I install this thing? I’m no handyman, and the thought of drilling into walls and dealing with electrical wires made me nervous. Sound familiar?
Installing an air conditioner doesn’t have to be a stressful or intimidating task. With the right tools, a clear plan, and a bit of patience, even a complete beginner can get their home cool and comfortable in no time. Whether you’re tackling a window unit for your bedroom or a split-system for the living room, this guide walks you through every step—safely, simply, and with real-life tips I wish I’d known when I started. By the end, you’ll feel confident, prepared, and ready to beat the heat like a pro.
Choosing the Right Air Conditioner for Your Space
Before you even think about drilling or wiring, the most important step is choosing the right air conditioner. Picking the wrong type or size can lead to poor cooling, high energy bills, or even installation headaches. Let’s break this down so you can make a smart, informed choice.
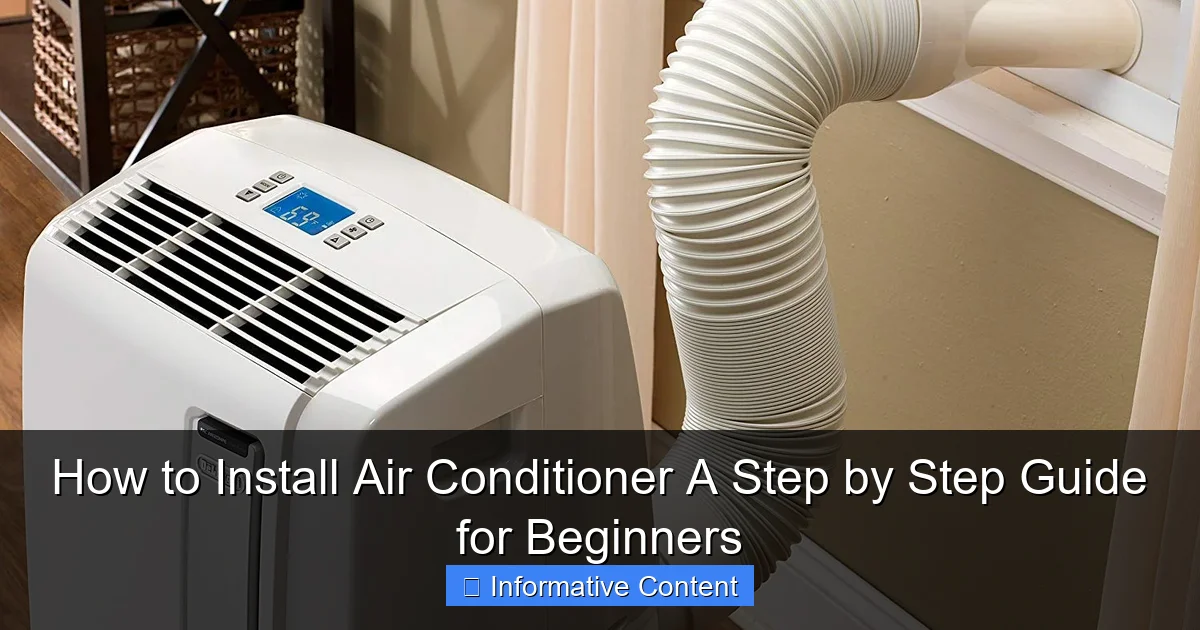
Visual guide about how to instal air conditioner
Image source: mydecorative.com
Types of Air Conditioners
There are several types of air conditioners, each with its own installation requirements and best-use cases. Here’s a quick rundown:
- Window Air Conditioners: Ideal for single rooms. They’re compact, affordable, and relatively easy to install. Perfect for renters or small apartments.
- Portable Air Conditioners: These roll on wheels and vent through a window or sliding door. Great for renters or if you want flexibility, but they’re less efficient than window units.
- Mini-Split (Ductless) Systems: These include an indoor unit (mounted on the wall) and an outdoor compressor. They’re quiet, energy-efficient, and cool multiple rooms. Installation is more involved but very rewarding.
- Central Air Systems: These require ductwork and are best installed during home construction or major renovations. Not ideal for DIY beginners.
For most beginners, a window unit or mini-split system is the best starting point. I went with a window unit for my bedroom and a mini-split for the living room—both were manageable with a little research.
Calculate the Right Size (BTUs)
One of the biggest mistakes people make is choosing an AC that’s too small or too big. Too small? It’ll run constantly and never cool the room. Too big? It’ll cool too fast without removing humidity, leaving you with a chilly, damp space.
Use the British Thermal Units (BTUs) to size your unit. Here’s a simple rule of thumb:
- 150–250 sq. ft. → 6,000–8,000 BTUs
- 250–400 sq. ft. → 8,000–12,000 BTUs
- 400–600 sq. ft. → 12,000–18,000 BTUs
- 600–800 sq. ft. → 18,000–24,000 BTUs
For example, my bedroom is about 200 sq. ft., so I chose an 8,000 BTU window unit. It cools the room perfectly in under 15 minutes. If your room gets direct sunlight or has high ceilings, add 10% more BTUs.
Check Window and Wall Compatibility
For window units, measure your window opening—both width and height. Most window ACs fit double-hung or sliding windows. Check the manufacturer’s specs to ensure your window type is compatible.
For mini-split systems, you’ll need a solid, exterior wall for the outdoor unit and a nearby electrical source. The indoor unit should be placed high on a wall, away from direct sunlight or heat sources like lamps or ovens.
Tip: If you’re unsure, take photos of your window or wall and bring them to the store. Staff can help match you with a unit that fits.
Gathering Tools and Materials
Once you’ve chosen your AC, it’s time to gather your tools and supplies. Having everything ready before you start saves time and prevents mid-installation trips to the hardware store. Trust me—I’ve been there, and it’s frustrating.
Essential Tools for Installation
Here’s what you’ll likely need, depending on the type of AC:
- Measuring tape – For checking window size and unit fit.
- Level – Ensures your unit is perfectly horizontal (critical for drainage and performance).
- Screwdrivers (Phillips and flathead) – For securing mounting brackets and panels.
- Drill with drill bits – Needed for mini-split systems or if your window frame requires pilot holes.
- Wrench or adjustable pliers – For tightening connections on split systems.
- Utility knife – For trimming foam insulation or plastic seals.
- Stud finder (for mini-splits) – Helps locate wall studs for secure mounting.
- Ladder – For reaching high windows or outdoor units.
Materials and Supplies
Beyond tools, you’ll need these materials:
- Foam insulation panels or window seal kit – Prevents hot air from leaking in around the unit.
- Mounting brackets or support brackets – Many window units come with these, but check if they’re included.
- Weather stripping or caulk – For sealing gaps after installation.
- Drain pan or tray (optional) – Catches condensation if your window doesn’t slope outward.
- Refrigerant line set, electrical conduit, and mounting hardware (for mini-splits) – Usually included with the kit, but double-check.
- Extension cord (only if approved by manufacturer) – Most ACs should plug directly into a wall outlet. Never use a standard extension cord—fire hazard!
Pro Tip: Before buying anything, open your AC box and check the manual. Many units come with brackets, screws, and even foam seals. You might not need everything on the list.
Safety Gear
Don’t skip this! Even simple installations involve risks:
- Work gloves – Protects hands from sharp edges and heavy lifting.
- Safety goggles – Essential when drilling or handling metal parts.
- Non-slip shoes – Especially important if you’re on a ladder or slippery surface.
I learned this the hard way when I sliced my hand on a metal bracket—wish I’d worn gloves!
Preparing the Installation Site
Now that you’ve got your tools and AC, it’s time to prep your space. A clean, well-prepared site makes installation faster, safer, and more effective. This step is often overlooked, but it’s crucial.
Clear the Area
Start by removing furniture, curtains, or blinds that might get in the way. For window units, clear the sill completely. For mini-splits, make sure the wall is free of pictures, shelves, or electrical outlets you’ll need to relocate.
Also, check the exterior side of the wall. For window units, ensure there’s nothing blocking the back of the AC (like a bush or fence). For split systems, the outdoor unit needs at least 12 inches of clearance on all sides for airflow.
Check Electrical Requirements
This is critical. Air conditioners draw a lot of power. Most window units run on standard 120V outlets, but larger units (10,000+ BTUs) may require a dedicated 240V circuit.
- Plug your AC into a grounded outlet (three-prong).
- Don’t overload the circuit—avoid using other high-power devices (like space heaters or microwaves) on the same circuit.
- For 240V units, you may need a licensed electrician to install a new outlet. Never attempt this yourself unless you’re qualified.
I once tried to run my 12,000 BTU unit on a shared circuit—it kept tripping the breaker. After some research, I found it needed a dedicated line. Lesson learned!
Measure and Mark
For window units:
- Open the window and measure the width.
- Center the AC unit and mark where the side panels will extend.
- Check that the window sill slopes outward (for drainage). If not, plan to use a support bracket.
For mini-split indoor units:
- Use a stud finder to locate wall studs.
- Mark the mounting bracket location, ensuring it’s level and at least 7 feet high.
- Mark where you’ll drill a hole (3–4 inches) through the wall for the refrigerant lines, drain hose, and electrical cable.
Tip: Use painter’s tape to mark drill points—it’s easier to remove than pencil marks and won’t damage the wall.
Prepare the Window or Wall
For windows, clean the sill and remove any old caulk or debris. If you’re using foam panels, cut them to size with a utility knife. For walls, patch any holes and sand rough spots.
If you’re installing a mini-split, now’s the time to drill the hole for the lines. Use a hole saw bit and go slowly to avoid cracking the wall. Cover the hole with plastic or tape until you’re ready to run the lines.
Installing the Air Conditioner
Now comes the main event—installing your AC. This is where the magic happens. Follow these steps carefully, and take your time. Rushing leads to mistakes.
Installing a Window Air Conditioner
- Attach side panels: Extend the accordion panels on the AC unit. They should slide out and fit snugly against the window frame.
- Position the unit: With a helper, carefully lift the AC and place it on the sill. The back of the unit should extend outside, and the front should be inside. Make sure it’s level.
- Secure with brackets: Use the included brackets or support arms to anchor the unit to the window frame. Tighten screws, but don’t over-torque—this can warp the frame.
- Close the window: Lower the top sash onto the unit. It should rest securely on the AC’s top rail.
- Seal gaps: Fill any gaps around the sides and top with foam panels or weather stripping. This keeps hot air out and improves efficiency.
- Plug it in: Connect to the outlet. Turn on the AC and check that it’s running smoothly. Listen for unusual noises and check for condensation.
My experience: I installed my first window unit solo and almost dropped it! Always have a helper—ACs are heavy and awkward to maneuver.
Installing a Mini-Split (Ductless) System
This is more complex, but very doable with patience.
Indoor Unit
- Mount the bracket: Use a level and drill into the studs. Secure the bracket with screws.
- Drill the hole: Use a hole saw to create a 3-inch hole through the wall at a slight downward angle (for drainage).
- Hang the unit: Carefully hook the indoor unit onto the bracket. Connect the refrigerant lines, drain hose, and electrical cable through the hole.
- Seal the hole: Use foam or caulk to seal around the lines. This prevents air leaks and pests.
Outdoor Unit
- Place the unit: Put the outdoor unit on a concrete pad or wall-mounted bracket. Keep it level and away from direct sunlight or debris.
- Connect the lines: Carefully connect the refrigerant lines and electrical wires to the outdoor unit. Use wrenches to tighten—don’t over-tighten.
- Vacuum the lines: This removes moisture and air. You’ll need a vacuum pump (available for rent at tool shops).
- Charge the system: Add refrigerant according to the manual. This step is tricky—many DIYers hire a pro for it.
Tip: If you’re not comfortable with refrigerant handling, hire an HVAC tech for the final connection. It’s worth the $100–$200 to avoid leaks or damage.
Troubleshooting Common Issues
Even with careful installation, you might run into problems:
- Unit won’t turn on: Check the outlet, breaker, and power cord. Test with another device.
- Leaking water: Ensure the unit is tilted slightly backward (for window ACs) or downward (for mini-splits). Clean the drain hose.
- Weak cooling: Check for dirty filters, blocked vents, or refrigerant leaks (for split systems).
- Noisy operation: Loose parts, vibration, or debris in the fan can cause noise. Tighten screws and clean the unit.
Sealing, Testing, and Final Checks
You’re almost done! But before you kick back and enjoy the cool air, do these final steps to ensure your AC runs efficiently and safely.
Seal All Gaps
Even small gaps let hot air in and cool air out. For window units:
- Use foam panels on the sides.
- Apply weather stripping between the window sash and AC.
- Caulk around the outside of the unit (if it’s permanent).
For mini-splits, seal around the hole with foam or silicone caulk. This also prevents insects and rodents from entering.
Test the Unit
Turn on your AC and run it for at least 15–30 minutes. Check for:
- Cool air output: Feel the airflow. It should be strong and cold.
- Drainage: Look for water dripping from the back of the unit (window AC) or the outdoor unit (split system).
- Noise: Listen for rattling, grinding, or buzzing. These indicate loose parts or motor issues.
- Thermostat accuracy: Set it to a low temp and see if it shuts off when the room cools.
Pro tip: Use an infrared thermometer (under $20) to check the air temperature coming out of the vents. It should be 10–20°F cooler than the room.
Clean and Maintain
Maintenance starts now! A clean AC runs better and lasts longer.
- Wash the filter: Most units have a removable filter. Wash it monthly with water and mild soap.
- Clean the coils: For window units, wipe the evaporator and condenser coils with a soft brush. For split systems, clean the indoor and outdoor coils annually.
- Check the drain: Ensure it’s clear of clogs. Pour a cup of vinegar down the drain hose to kill algae.
I clean my AC filters every month and coils every spring. It’s a small effort that keeps my unit running smoothly.
Data Table: Recommended Maintenance Schedule
| Task | Frequency | Notes |
|---|---|---|
| Wash air filter | Monthly | Use water and mild soap. Let dry completely. |
| Clean coils | Every 6–12 months | Use a soft brush or coil cleaner. |
| Check drain hose | Every 3 months | Flush with vinegar or water. |
| Inspect seals and brackets | Annually | Replace cracked foam or loose screws. |
| Professional tune-up (split systems) | Every 2–3 years | For refrigerant checks and electrical safety. |
Final Thoughts: Enjoy Your Cool, DIY Success
Congratulations! You’ve just installed your air conditioner—no handyman needed. Whether it’s a simple window unit or a sleek mini-split, you’ve taken control of your comfort and saved money on installation fees.
Looking back, I remember how nervous I was before my first install. But with the right prep, tools, and a bit of patience, it turned into one of my most satisfying DIY projects. Now, every time I walk into my cool bedroom, I feel a quiet pride. And honestly? There’s nothing better than sipping iced tea on a hot day, knowing you did it yourself.
Remember, the key to a successful installation is preparation, safety, and attention to detail. Don’t rush the steps. Double-check your work. And if something feels wrong, stop and reassess—or call a pro. Your safety matters most.
As the seasons change, keep up with regular maintenance. A little care goes a long way in extending your AC’s life and efficiency. And when next summer rolls around, you’ll be ready—cool, calm, and in control.
So go ahead, flip the switch, and enjoy the breeze. You’ve earned it.
Frequently Asked Questions
How do I choose the right location to install an air conditioner?
Select a spot on an exterior wall with proper ventilation, away from direct sunlight and heat sources. Make sure the location allows for easy access to a power source and proper drainage for the condensate line.
What tools do I need to install an air conditioner unit?
You’ll need a drill, level, screwdriver, measuring tape, wrench, and safety gear like gloves and goggles. Having these tools ready ensures a smooth installation process and helps avoid common mistakes.
How do I prepare the wall for air conditioner installation?
Mark the mounting area, check for studs or obstructions, and drill a hole for the refrigerant lines and electrical wiring. Use a level to ensure the mounting bracket is perfectly aligned before securing it.
Can I install an air conditioner without professional help?
Yes, if you follow the manufacturer’s instructions carefully and have basic DIY skills. However, for split systems or complex setups, hiring a licensed technician for the refrigerant and electrical work is recommended.
How do I connect the refrigerant lines during installation?
Route the pre-charged lines through the wall hole and connect them to the indoor and outdoor units using flare nuts. Ensure all connections are tight and leak-free to maintain efficiency and cooling performance.
What safety precautions should I take when installing an air conditioner?
Always disconnect power before working on electrical components and use a stud finder to avoid drilling into pipes or wires. Secure the unit properly to prevent it from falling, especially in high-wind areas.