

Featured image for how to cover air conditioner in wall
Image source: m.media-amazon.com
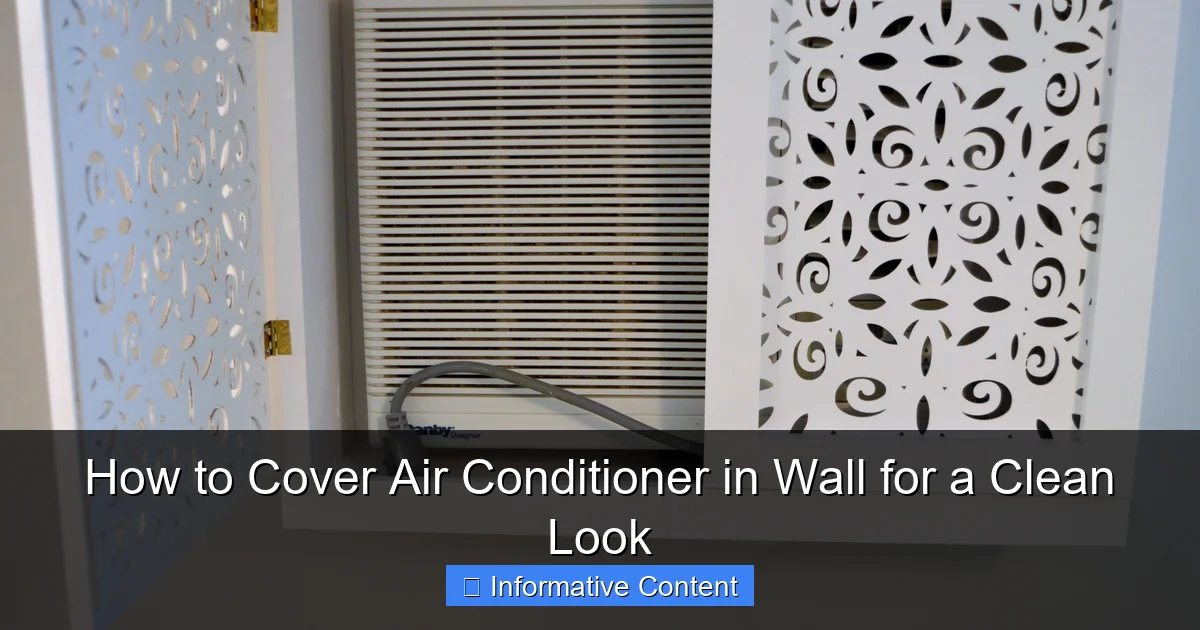
Seamlessly integrate your wall-mounted air conditioner into your home’s design by using a custom-fit, vented cover that conceals the unit while maintaining optimal airflow. These sleek, easy-to-install covers come in various finishes to match your décor and can be paired with magnetic or framed designs for a polished, built-in appearance. Always prioritize safety and efficiency by ensuring the cover allows proper ventilation and doesn’t block airflow or access to controls.
Key Takeaways
- Plan the layout first: Measure your AC unit and wall space to ensure a precise, seamless cover design.
- Use breathable materials: Choose mesh or slatted panels to maintain airflow and prevent overheating.
- Ensure easy access: Install removable or hinged panels for convenient maintenance and filter changes.
- Match your decor: Paint or finish the cover to blend with your wall for a cohesive, stylish look.
- Secure safely: Anchor the cover firmly to avoid sagging or damage from weight and vibrations.
- Check local codes: Verify that modifications comply with building and HVAC safety regulations.
📑 Table of Contents
- Why Covering Your Wall Air Conditioner Is Worth the Effort
- Understanding Your Wall Air Conditioner: The First Step
- Popular Methods to Cover Air Conditioner in Wall (With Pros and Cons)
- Design Tips for a Seamless, Professional Look
- DIY vs. Hiring a Pro: What’s Right for You?
- Maintenance and Long-Term Care
- Final Thoughts: Beauty and Function Can Coexist
Why Covering Your Wall Air Conditioner Is Worth the Effort
Let’s be honest—wall air conditioners are lifesavers during those sweltering summer months. They cool down your space efficiently, often more so than portable units or central systems. But let’s also be honest about something else: they can be ugly. That bulky box sticking out of your wall, with its plastic grilles, exposed vents, and visible mounting frame, can totally ruin the vibe of an otherwise stylish room. I remember installing a wall unit in my bedroom a few years ago. It worked like a dream—until I tried to photograph the space for my interior design blog. Every shot had that AC unit awkwardly peeking into the frame. It was like trying to ignore a loud, plastic elephant in the room. That’s when I started asking: how to cover air conditioner in wall for a clean look—without sacrificing performance.
Good news: it’s absolutely possible. Covering your wall air conditioner isn’t just about aesthetics. It’s about creating a more cohesive, intentional living space. Whether you’re going for a minimalist Scandinavian look, a cozy farmhouse feel, or sleek modern design, a well-covered AC unit can blend into the background—or even become a design feature. And no, you don’t have to block airflow or risk damaging your unit. With the right approach, you can achieve a clean, professional finish that makes your room look like it was designed by a pro. In this post, I’ll walk you through the best methods, materials, and tips I’ve learned—both from my own DIY attempts and from consulting HVAC experts and interior designers. Let’s turn that eyesore into an afterthought.
Understanding Your Wall Air Conditioner: The First Step
Before you start shopping for wood, fabric, or 3D-printed covers, it’s crucial to understand what you’re working with. Not all wall AC units are the same. Some are through-the-wall (installed directly into an exterior wall), while others are mini-split systems with indoor air handlers mounted high on the wall. The type of unit you have will determine your covering options, safety considerations, and even local building code requirements.
Visual guide about how to cover air conditioner in wall
Image source: i.pinimg.com
Types of Wall Air Conditioners
Let’s break it down:
- Through-the-wall units: These are self-contained units that sit entirely within a wall opening, with the front panel flush or slightly proud of the wall surface. They’re common in older homes and apartments. They have intake and exhaust vents on the back (outside) and front (inside).
- Mini-split indoor handlers: Part of a ductless mini-split system, these are sleek, wall-mounted units that connect to an outdoor compressor. They’re often installed high on the wall and have a more modern, low-profile design. They require refrigerant lines and electrical connections through the wall.
- Window units modified for wall use: Some people install window units in a custom wall sleeve. These are trickier to cover because they often protrude more and have less standardized shapes.
Why Covering Matters—Beyond Looks
Covering your air conditioner isn’t just about hiding it. A well-designed cover can:
- Protect the unit from dust, pet hair, and accidental bumps
- Reduce noise from the fan and compressor (especially with sound-dampening materials)
- Improve airflow by guiding it in a more controlled direction
- Prevent small objects from being pushed into the intake vents
- Enhance safety—especially around kids and pets
But here’s the catch: you must never fully enclose the unit. Air conditioners need intake and exhaust airflow to function. Blocking these can lead to overheating, reduced efficiency, and even system failure. The goal is to integrate, not isolate.
Check Manufacturer Guidelines
Before you start, dig up your AC unit’s manual (or search online by model number). Some manufacturers explicitly warn against covering the unit. Others provide guidelines on safe clearance distances. For example, most recommend at least 6–12 inches of clearance on all sides for proper airflow. Ignoring this can void your warranty or create fire hazards. When in doubt, call the manufacturer or a licensed HVAC technician.
Popular Methods to Cover Air Conditioner in Wall (With Pros and Cons)
Now that you know what you’re working with, let’s explore the most effective and popular ways to cover your wall AC unit. Each method has its own trade-offs in terms of cost, difficulty, aesthetics, and functionality. I’ve tried most of these myself—some worked beautifully, others… not so much.
1. Custom Wooden Enclosure with Louvers
This is the gold standard for a clean, built-in look. A wooden frame or box is built around the unit, with decorative louvers or slats to allow airflow. It’s often painted or stained to match the wall or surrounding trim.
- Pros: Looks high-end, fully customizable, excellent airflow control, can double as a shelf or decorative feature
- Cons: More expensive and time-consuming, requires carpentry skills, not ideal for renters
- Best for: Permanent installations in homes where you want a seamless, designer look
Pro tip: Use moisture-resistant wood like cedar or MDF with a sealant. Avoid solid wood that can warp in temperature changes. Install the louvers at a 45-degree angle to allow airflow while hiding the unit from direct view.
2. Fabric or Mesh Covers (Removable)
These are pre-made or DIY covers made from breathable fabric, mesh, or even lace. They slip over the front of the unit or attach with magnets, Velcro, or adhesive hooks.
- Pros: Affordable, easy to install and remove, great for renters, wide variety of colors and patterns
- Cons: Can look cheap if not well-made, may block airflow if too tight, not durable long-term
- Best for: Temporary solutions, seasonal use, or when you want a quick fix
My experience: I once used a sheer white linen cover on my bedroom unit. It looked elegant and softened the look, but I noticed the unit ran longer cycles. Turns out the fabric was too dense. Switching to a fine mesh solved the problem.
3. 3D-Printed or Acrylic Grilles
For a modern, tech-forward look, custom 3D-printed or laser-cut acrylic grilles can be designed to fit perfectly over the front of your AC. These are often used with mini-split units.
- Pros: Ultra-sleek, modern, precise fit, allows full airflow, can be customized with patterns or logos
- Cons: Expensive (if custom-made), limited availability, may not suit traditional decor
- Best for: Modern homes, tech enthusiasts, or as a statement piece
Pro tip: Search Etsy or local makerspaces for designers who create custom AC grilles. Some even offer templates based on your model number.
4. Built-In Cabinet or Shelf Unit
Turn the AC into a functional feature. Build a cabinet or floating shelf around the unit, with the AC hidden behind a louvered door or recessed panel. The top can hold books, plants, or decor.
- Pros: Adds storage, looks intentional, excellent airflow if designed right
- Cons: Requires advanced carpentry, permanent modification, may block remote sensor
- Best for: Living rooms, home offices, or bedrooms where extra storage is needed
Real-life example: My neighbor built a slim, floor-to-ceiling cabinet around her through-the-wall unit. She used white shaker-style doors with small vents. Now it looks like a built-in linen closet. Brilliant.
5. Paint or Wallpaper Integration
For a minimalist approach, paint the AC unit to match the wall or apply removable wallpaper to the visible front panel. This doesn’t hide the unit but makes it less noticeable.
- Pros: Super easy, low-cost, no airflow issues, great for renters
- Cons: Only works if the unit is flush with the wall, doesn’t hide bulk, paint can chip
- Best for: Units that are already low-profile or when you want a subtle fix
Caution: Use heat-resistant, non-conductive paint. Never paint the vents or internal components. Remove the front panel if possible before painting.
Design Tips for a Seamless, Professional Look
You’ve chosen your method—now let’s make sure it looks intentional, not like a last-minute cover-up. Design is in the details. A poorly executed cover can draw more attention than the unit itself. Here’s how to get it right.
Match the Surrounding Aesthetic
Your cover should feel like it belongs in the room. If you have dark wood trim, use a dark-stained wood cover. In a light, airy space? Go for white or pastel fabric. Avoid clashing styles. For example, a rustic barn-wood cover won’t work in a sleek, minimalist bedroom.
Example: In my living room, I have a mid-century modern theme. I used a teak-veneer MDF cover with horizontal slats—it mimics the wood accents in my furniture and blends perfectly.
Ensure Proper Airflow (The Non-Negotiable)
Airflow is everything. Use these guidelines:
- Maintain at least 6 inches of clearance on all sides (check your manual)
- Use slats, louvers, or mesh with at least 50% open area
- Never cover the intake (usually the bottom or sides) or exhaust (top or back)
- Test the unit after installation: if it runs longer cycles or shuts off unexpectedly, airflow is blocked
Pro tip: Hold a piece of tissue paper near the vents while the unit is on. It should flutter gently—no movement means airflow is blocked.
Consider Access for Maintenance
You’ll need to clean filters, check refrigerant lines, or service the unit eventually. Design your cover with access in mind:
- Use removable panels with magnetic or snap-on closures
- Include a service door or hinged section
- Keep tools like a screwdriver or Allen key nearby
I learned this the hard way. My first wooden cover had no access—I had to pry it off with a crowbar when the filter got clogged. Now I use magnetic side panels. Game-changer.
Lighting and Ambiance
Use lighting to your advantage. A small LED strip behind the cover can cast a soft glow, making the unit look like a design feature. Or, place a floor lamp nearby to draw attention away.
Bonus idea: Install a smart plug to turn off the LED when the AC isn’t running. Saves energy and looks intentional.
Color and Texture Play
Don’t be afraid to use texture. A rattan-wrapped frame or a cover with fabric pleats adds visual interest. Just make sure it doesn’t trap dust. For color, go neutral if you want it to disappear, or bold if you want it to pop (e.g., a bright red cover in a white room).
DIY vs. Hiring a Pro: What’s Right for You?
This is a big decision. Can you do it yourself, or should you call in the experts? The answer depends on your skills, budget, and the complexity of your project.
When DIY Makes Sense
- You’re covering a flush-mount unit with a simple fabric or mesh cover
- You’re handy with basic tools (drill, saw, sandpaper)
- You want to save money (DIY can cost 50–70% less)
- You enjoy the process and want a custom, personal touch
DIY-friendly projects: Fabric covers, paint integration, simple wooden frames with pre-cut louvers.
When to Hire a Professional
- You’re building a custom cabinet or built-in unit
- You’re working with expensive materials (real wood, acrylic, metal)
- You’re unsure about airflow or electrical safety
- You’re renting and need a reversible solution (a pro can design a no-damage system)
Cost comparison: A custom wooden enclosure might cost $300–$800 in materials and labor. A DIY version could be $100–$200. But if you mess it up, repairs could cost more.
Finding the Right Pro
Look for:
- HVAC technicians with carpentry experience
- Custom cabinet makers
- Interior designers who specialize in built-ins
Ask for photos of past AC cover projects. And always get a detailed quote upfront.
My Hybrid Approach
I often do a hybrid: I design and source materials, then hire a carpenter for the tricky parts (like precise measurements and finish work). It saves money while ensuring quality.
Maintenance and Long-Term Care
Once your cover is in place, you’re not done. Like any part of your home, it needs care to look good and function well for years.
Cleaning Your Cover
- Wooden covers: Wipe with a dry microfiber cloth. Use a wood-safe cleaner monthly. Avoid water near electrical components.
- Fabric/mesh covers: Machine wash (if removable) or hand-wash with mild detergent. Air dry completely.
- Acrylic/3D-printed: Clean with isopropyl alcohol and a soft cloth. Avoid abrasives.
Inspecting Airflow Regularly
Check every 3–6 months:
- Are vents clogged with dust or pet hair?
- Has the cover shifted or warped?
- Is the unit running efficiently (no longer cycles, no strange noises)?
Seasonal Adjustments
In winter, if you’re not using the AC, consider:
- Adding a temporary insulated panel to reduce heat loss
- Using a heavier fabric cover to block cold drafts
- But always ensure the unit can still “breathe” if it’s in a sealed space
When to Replace or Update
Signs it’s time for a new cover:
- Visible wear (peeling paint, frayed fabric)
- Persistent airflow issues
- You’ve changed your decor style
Most covers last 3–7 years with proper care. A well-made wooden one can last even longer.
Final Thoughts: Beauty and Function Can Coexist
Covering your wall air conditioner isn’t about hiding a necessary evil. It’s about respecting your space and making every element—even the functional ones—work together. When done right, a covered AC unit doesn’t disappear—it becomes part of the room’s story. I’ve seen covers that look like art, shelves, or even secret doors. The possibilities are endless.
Remember the key principles: prioritize airflow, match your design style, ensure access for maintenance, and never compromise safety. Whether you choose a $20 fabric cover or a $500 custom cabinet, the goal is the same: a clean, intentional look that makes you smile every time you walk into the room.
And if you’re still unsure? Start small. Try a simple paint job or a mesh cover. See how it feels. You can always go bigger later. The important thing is to take the first step. Because a clean look isn’t just about aesthetics—it’s about feeling at home in your own space. Now go cover that AC and reclaim your room’s vibe.
| Covering Method | Cost Estimate | Difficulty Level | Best For | Airflow Safety |
|---|---|---|---|---|
| Wooden Louvered Enclosure | $150–$600 | Intermediate to Advanced | Permanent home installations | High (if designed properly) |
| Fabric/Mesh Cover | $20–$100 | Easy | Renters, temporary use | Medium (depends on material) |
| 3D-Printed/Acrylic Grille | $80–$300 | Intermediate | Modern homes, tech lovers | High |
| Built-In Cabinet | $400–$1,000+ | Advanced | Living rooms, storage needs | High (with proper design) |
| Paint/Wallpaper Integration | $10–$50 | Easy | Low-profile units, subtle fixes | High |
Frequently Asked Questions
How can I cover an air conditioner in a wall without blocking airflow?
Use a louvered or slatted cover that matches your wall design to ensure proper ventilation. Leave at least 6 inches of clearance around the unit to prevent airflow restriction and maintain efficiency.
What are the best materials to cover an air conditioner in a wall?
Durable, weather-resistant materials like aluminum, PVC, or treated wood are ideal for covering an AC unit in a wall. Avoid solid materials that trap heat—opt for perforated or gridded designs instead.
Can I build a permanent wall around my air conditioner?
No, a permanent wall can trap heat, reduce efficiency, and violate HVAC safety codes. Instead, install a removable panel or decorative cover for easy access and maintenance.
How do I hide an air conditioner in a wall while keeping it accessible?
Install a hinged or magnetic cover with a hidden latch for quick access during servicing. Ensure the design blends with your wall, like a faux vent or framed panel.
Are there ready-made covers to hide an air conditioner in a wall?
Yes, brands offer pre-made AC wall covers in metal, wood, or resin with built-in ventilation. Measure your unit first to ensure a proper fit and check local HVAC clearance requirements.
Does covering an air conditioner in a wall affect its performance?
Yes, improper covers can cause overheating or reduced efficiency. Always prioritize ventilation, follow manufacturer guidelines, and avoid sealing the unit completely.