
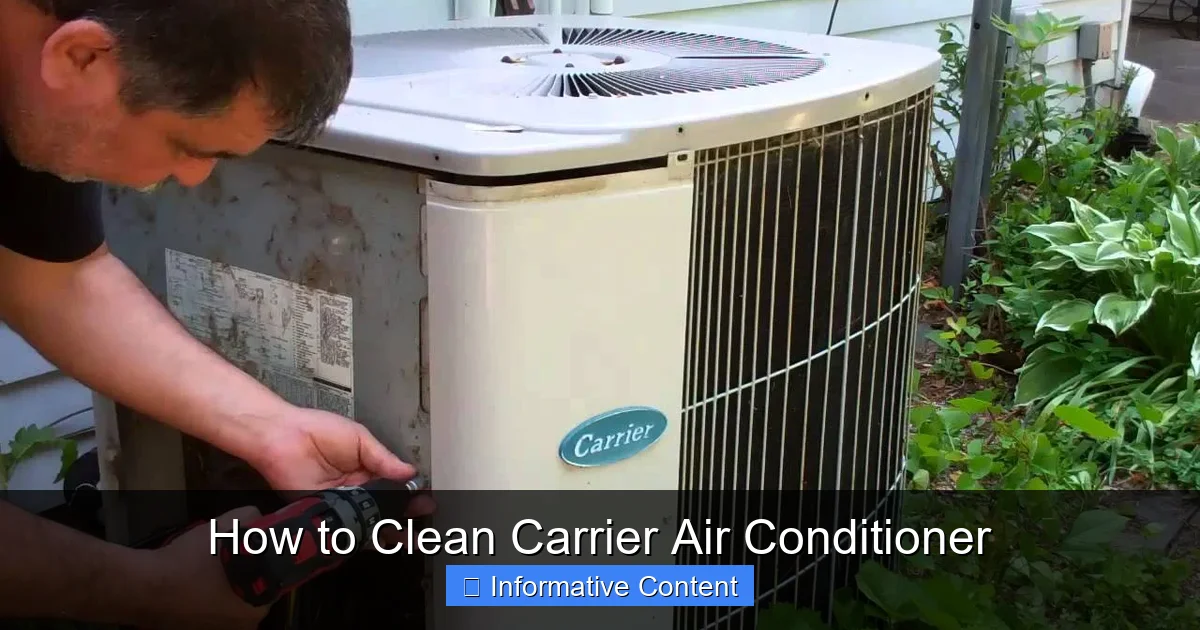
Keeping your Carrier air conditioner clean is essential for efficiency, air quality, and longevity. Regular cleaning prevents dust buildup, improves cooling performance, and reduces energy bills—all while extending the life of your unit.
Key Takeaways
- Turn off power before cleaning: Always shut off the electrical supply to avoid shocks or damage.
- Clean or replace air filters monthly: Dirty filters restrict airflow and reduce efficiency.
- Clean evaporator and condenser coils: Use a soft brush and coil cleaner to remove dirt and debris.
- Clear the drain line to prevent clogs: A clogged drain can cause water leaks and mold growth.
- Inspect and straighten fins: Bent fins block airflow; use a fin comb to gently straighten them.
- Schedule professional maintenance annually: Experts can detect issues early and ensure peak performance.
- Keep the surrounding area clear: Remove leaves, grass, and debris from around the outdoor unit.
📑 Table of Contents
Why Cleaning Your Carrier Air Conditioner Matters
Your Carrier air conditioner works hard to keep your home cool and comfortable, especially during sweltering summer months. But like any hardworking machine, it needs regular care to keep performing at its best. Over time, dust, dirt, pollen, and debris accumulate on both the indoor and outdoor components of your AC unit. This buildup doesn’t just look messy—it can seriously affect how well your system cools your home.
When your Carrier air conditioner isn’t clean, it has to work harder to circulate air and maintain the desired temperature. That extra effort translates into higher energy bills and increased wear and tear on internal parts. In fact, a dirty unit can reduce efficiency by up to 15%, according to HVAC experts. Plus, poor maintenance can lead to poor indoor air quality, triggering allergies or respiratory issues for you and your family. Cleaning your Carrier air conditioner isn’t just about aesthetics—it’s a smart investment in comfort, health, and savings.
When to Clean Your Carrier Air Conditioner
Knowing when to clean your Carrier air conditioner is just as important as knowing how. While some tasks should be done monthly, others are seasonal or annual. A good rule of thumb is to perform a basic cleaning at the start of each cooling season—typically in spring—and then maintain it throughout the summer. If you live in a dusty area, have pets, or use your AC heavily, you may need to clean it more often.
Visual guide about How to Clean Carrier Air Conditioner
Image source: smartacsolutions.com
Monthly Maintenance Tasks
The most frequent task is checking and cleaning (or replacing) your air filters. These filters trap dust, pet dander, and other airborne particles, preventing them from entering your home. But when they get clogged, they restrict airflow and force your system to work harder. Check your filters every 30 days, especially during peak usage months. If they look dirty or discolored, it’s time to clean or replace them.
Seasonal Cleaning Routine
At the beginning of each cooling season, give your Carrier air conditioner a thorough once-over. This includes inspecting the outdoor unit, cleaning the coils, checking the drain line, and ensuring the area around the unit is clear. Doing this before the heat sets in ensures your system starts the season running smoothly.
Annual Professional Inspection
Even if you’re diligent about DIY cleaning, it’s wise to schedule a professional maintenance visit once a year. HVAC technicians have the tools and expertise to inspect refrigerant levels, test electrical connections, and detect potential problems before they become costly repairs. Think of it like a tune-up for your car—it keeps everything running efficiently and safely.
Tools and Supplies You’ll Need
Before you start cleaning your Carrier air conditioner, gather the right tools and supplies. Having everything ready will make the process faster and more effective. You don’t need fancy equipment—most items are affordable and easy to find at your local hardware store or online.
Basic Cleaning Supplies
- Soft-bristle brush or vacuum with brush attachment: Ideal for gently removing dust from coils and fins.
- Coil cleaner (foam or spray): Specifically designed to dissolve grime on evaporator and condenser coils.
- Garden hose with spray nozzle: For rinsing outdoor components (use low pressure to avoid damage).
- Fin comb: A small tool that helps straighten bent aluminum fins on the coils.
- Screwdriver or wrench: To remove access panels on the indoor and outdoor units.
- Microfiber cloths: For wiping down surfaces without scratching.
- Bucket and mild detergent: Useful for cleaning the drain pan and other accessible parts.
Safety Gear
Safety should always come first. Wear gloves to protect your hands from sharp edges and cleaning chemicals. Safety goggles are also recommended, especially when working with coil cleaners or spraying water near electrical components. If you’re cleaning the outdoor unit on a roof or ladder, make sure it’s stable and secure.
Optional but Helpful Tools
- Wet/dry vacuum: Great for sucking up debris from the base of the outdoor unit.
- Flashlight: Helps you see into dark or tight spaces.
- Compressed air can: Useful for blowing dust out of hard-to-reach areas.
Step-by-Step Guide to Cleaning Your Carrier Air Conditioner
Now that you’re prepared, let’s walk through the actual cleaning process. We’ll break it down into clear, manageable steps for both the indoor and outdoor units. Follow these instructions carefully to ensure a thorough and safe cleaning.
Step 1: Turn Off the Power
This is the most important step—don’t skip it! Before touching any part of your Carrier air conditioner, turn off the power at the main electrical panel. Locate the breaker labeled “AC” or “Air Conditioner” and switch it to the “Off” position. For extra safety, also turn off the power at the disconnect switch near the outdoor unit. This is usually a metal box mounted on the wall next to the condenser. Use a non-contact voltage tester to confirm the power is off before proceeding.
Step 2: Clean or Replace the Air Filters
Start with the indoor unit. Open the front panel of your air handler or return air grille to access the filters. Most Carrier units have washable or replaceable filters. If yours is washable, remove it and rinse it under lukewarm water. Let it air dry completely before reinstalling. If it’s a disposable filter, replace it with a new one of the same size and type. A clean filter ensures proper airflow and keeps dust from building up on the coils.
Step 3: Clean the Evaporator Coils (Indoor Unit)
The evaporator coils are located inside the air handler, behind the access panel. These coils absorb heat from indoor air, but they can get coated with dust and grime over time. Use a soft brush or vacuum to remove loose debris. Then spray a no-rinse coil cleaner onto the coils and let it sit for 5–10 minutes. The foam will expand and lift dirt away. Wipe away any residue with a clean cloth. Avoid using high-pressure water, as it can damage the delicate fins.
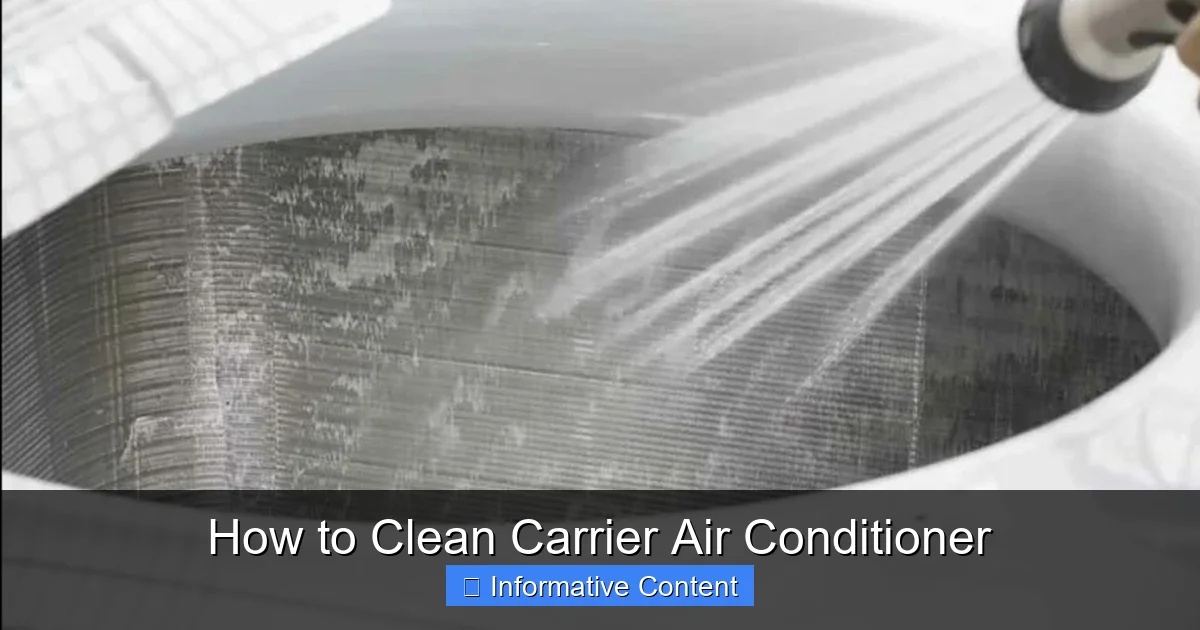
Step 4: Clean the Condenser Coils (Outdoor Unit)
Move to the outdoor unit, also known as the condenser. Remove the top grille and any side panels to access the coils. Use a garden hose with a gentle spray to rinse away dirt, leaves, and grass clippings. Never use a pressure washer—it can bend the fins or force water into electrical components. If the coils are heavily soiled, apply a coil cleaner, let it foam up, and then rinse thoroughly. Allow the unit to dry completely before reassembling.
Step 5: Straighten Bent Fins
While cleaning, you might notice that some of the aluminum fins on the coils are bent or crushed. This blocks airflow and reduces efficiency. Use a fin comb—a small, inexpensive tool available at hardware stores—to gently straighten the fins. Insert the comb between the fins and pull it through to align them. Be careful not to apply too much pressure, as the fins are fragile.
Step 6: Clean the Drain Line and Pan
Your Carrier air conditioner removes moisture from the air, which drains out through a condensate line. Over time, this line can get clogged with algae, mold, or debris, leading to water leaks or overflow. Locate the drain line (usually a PVC pipe near the indoor unit) and pour a cup of distilled white vinegar or a commercial drain cleaner into it. Let it sit for 30 minutes, then flush it with water. Also, check the drain pan beneath the evaporator coil. Wipe it clean with a cloth and mild detergent to prevent mold growth.
Step 7: Clear Debris Around the Outdoor Unit
The area around your outdoor unit should be free of obstructions. Trim back any plants, shrubs, or grass within 2 feet of the unit. Remove leaves, twigs, and dirt from the base and top. This ensures proper airflow and prevents pests from nesting inside. A clean, open space helps your Carrier air conditioner operate efficiently.
Step 8: Reassemble and Restore Power
Once everything is clean and dry, reattach any panels or grilles you removed. Make sure all screws are tight and nothing is loose. Double-check that the power is still off, then turn the breaker back on. Wait a few minutes before turning the thermostat back to “Cool” to allow the system to reset.
Tips for Maintaining Your Carrier Air Conditioner
Cleaning your Carrier air conditioner isn’t a one-and-done task. Regular maintenance is key to keeping it in top shape year after year. Here are some practical tips to help you stay on top of it.
Set a Cleaning Schedule
Create a simple calendar reminder to check your filters every month and perform a full cleaning every spring. You can even use a smartphone app or digital calendar to set recurring alerts. Consistency is more effective than occasional deep cleans.
Use High-Quality Filters
Not all air filters are created equal. Choose filters with a MERV rating between 8 and 13 for the best balance of filtration and airflow. Higher MERV ratings trap more particles but can restrict airflow if your system isn’t designed for them. Check your owner’s manual for recommendations.
Keep the Thermostat Clean
Wipe down your thermostat with a dry cloth every few months. Dust buildup can interfere with temperature sensors, causing your AC to run longer than necessary. Avoid using water or cleaning sprays directly on the device.
Monitor for Unusual Noises or Smells
If your Carrier air conditioner starts making strange noises, emitting odd smells, or cooling less effectively, it could be a sign of a deeper issue. Don’t ignore these warning signs—address them promptly to avoid bigger problems.
Upgrade to a Smart Thermostat
Consider installing a smart thermostat, which can help optimize your cooling schedule and alert you when it’s time to change the filter. Some models even monitor system performance and send maintenance reminders.
Common Mistakes to Avoid
Even with the best intentions, it’s easy to make mistakes when cleaning your Carrier air conditioner. Avoiding these common pitfalls will help you get the best results and protect your investment.
Using High-Pressure Water
Never use a pressure washer or high-pressure hose on your coils or fins. The force can bend or damage the delicate aluminum fins, reducing airflow and efficiency. Stick to a gentle spray from a garden hose.
Skipping the Power Off Step
Working on an energized unit is extremely dangerous. Always turn off the power at the breaker and disconnect switch before cleaning. This protects you from electrical shock and prevents accidental damage to the system.
Overlooking the Drain Line
Many homeowners focus on the coils and filters but forget about the condensate drain. A clogged drain line is a leading cause of water damage and mold growth. Make it a habit to clean it at least once a year.
Using Harsh Chemicals
Avoid using bleach, ammonia, or abrasive cleaners on your AC components. These can damage coils, seals, and electrical parts. Stick to mild detergents or products specifically designed for HVAC systems.
Ignoring Professional Maintenance
DIY cleaning is great, but it doesn’t replace professional service. Technicians can check refrigerant levels, inspect electrical connections, and perform tasks that require specialized tools. Skipping annual maintenance can void your warranty and lead to costly repairs.
Conclusion
Cleaning your Carrier air conditioner doesn’t have to be a daunting task. With the right tools, a clear plan, and a little time, you can keep your system running efficiently and effectively. Regular maintenance not only improves cooling performance but also extends the life of your unit and lowers your energy bills. By following the steps outlined in this guide—turning off the power, cleaning filters and coils, clearing the drain line, and scheduling professional checkups—you’ll enjoy cleaner air, better comfort, and peace of mind.
Remember, a well-maintained air conditioner is a happy air conditioner. Whether you’re a seasoned DIYer or new to HVAC care, taking the time to clean your Carrier unit is one of the best things you can do for your home. Start today, and your AC will thank you all summer long.
Frequently Asked Questions
How often should I clean my Carrier air conditioner?
You should clean or replace the air filters every 30 days and perform a full cleaning of the indoor and outdoor units at least once a year, preferably in spring before the cooling season begins.
Can I clean my Carrier AC unit myself?
Yes, most cleaning tasks like changing filters, cleaning coils, and clearing debris can be done safely at home. However, annual professional maintenance is recommended for a thorough inspection and tune-up.
What happens if I don’t clean my air conditioner?
A dirty air conditioner works less efficiently, uses more energy, and may fail to cool your home properly. It can also lead to poor indoor air quality, water leaks, and costly repairs.
Is it safe to use a garden hose on the outdoor unit?
Yes, but use a gentle spray setting. High-pressure water can damage the fins or force moisture into electrical components, so avoid pressure washers.
How do I know if my AC coils need cleaning?
If your unit is struggling to cool, your energy bills are rising, or you see visible dirt buildup on the coils, it’s time to clean them. Reduced airflow is another common sign.
Can I use vinegar to clean my air conditioner?
Yes, distilled white vinegar is safe and effective for cleaning the drain line and removing mildew. Avoid using it on electrical parts or sensitive components.