
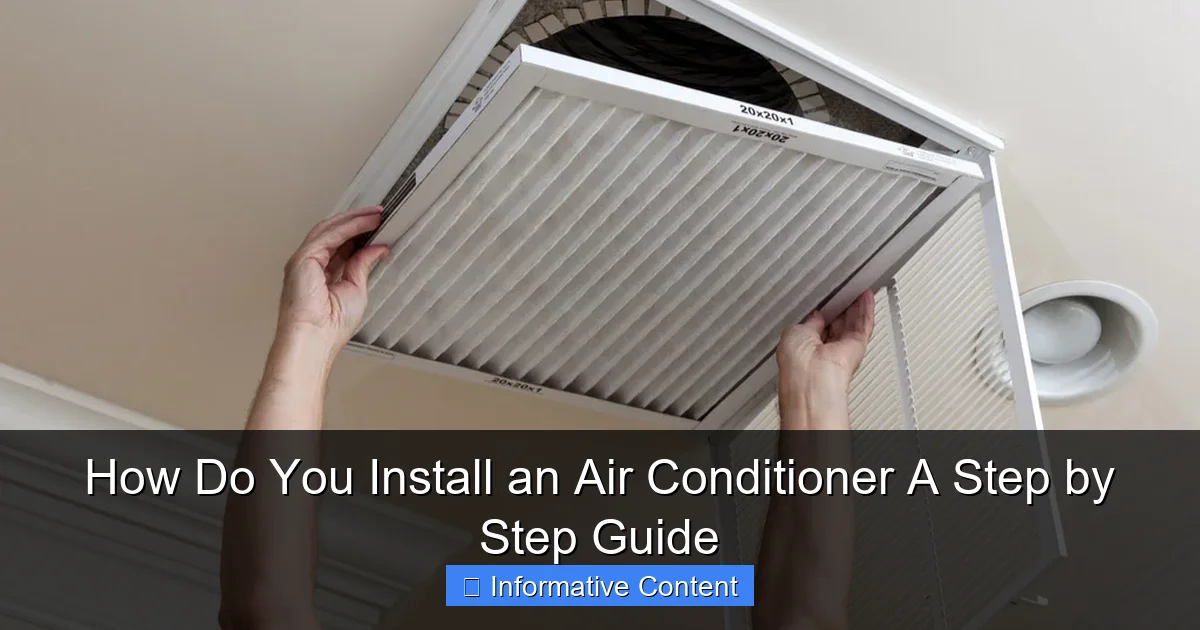
Featured image for how do you install an air conditioner
Image source: kandsac.com
Installing an air conditioner starts with choosing the right unit and location—proper sizing and placement ensure maximum efficiency and cooling performance. Follow with secure mounting, correct electrical connections, and airtight sealing to prevent energy loss and water leaks. Always consult local codes and consider professional help for electrical or refrigerant line work to ensure safety and compliance.
Key Takeaways
- Choose the right unit: Match AC size to room dimensions for optimal cooling efficiency.
- Turn off power: Always disconnect electricity before starting installation to prevent hazards.
- Seal gaps properly: Use weatherstripping to block drafts and improve energy efficiency.
- Secure mounting brackets: Ensure window or wall supports are stable and level.
- Test before finishing: Run the AC briefly to check leaks, noise, and cooling performance.
- Follow local codes: Check permits and regulations for safe, legal installation compliance.
📑 Table of Contents
- How Do You Install an Air Conditioner? A Step by Step Guide
- 1. Choosing the Right Air Conditioner for Your Space
- 2. Gather Your Tools and Prepare the Installation Area
- 3. Installing a Window Air Conditioner Step by Step
- 4. Installing a Portable Air Conditioner
- 5. Installing a Ductless Mini-Split System (When to Call a Pro)
- 6. Maintenance Tips to Keep Your AC Running Smoothly
How Do You Install an Air Conditioner? A Step by Step Guide
So, it’s summer. The kind where stepping outside feels like walking into a sauna. You’ve finally had enough of sweating through your clothes and tossing and turning at night. You’ve bought an air conditioner—maybe a portable one, a window unit, or even a ductless mini-split—and now you’re staring at the box, wondering, “How do you install an air conditioner?”
You’re not alone. Installing an AC isn’t as simple as plugging it in and hoping for the best. It’s a mix of planning, measuring, safety, and a little bit of DIY courage. But here’s the good news: with the right tools, clear instructions, and a calm mindset, you can do it. I’ve been there—sweating in my living room, wrestling with a window unit that didn’t quite fit, and realizing I’d forgotten to check the power outlet. But over the years, I’ve learned what works, what doesn’t, and how to avoid common (and expensive) mistakes. This guide is for you—whether you’re a first-timer or just need a refresher. We’ll walk through the entire process, step by step, so you can stay cool and confident.
1. Choosing the Right Air Conditioner for Your Space
Before you even think about how to install an air conditioner, you need to pick the right one. It’s not just about size or brand. It’s about matching the unit to your room, window, and electrical setup. Get this wrong, and you’ll end up with poor cooling, high energy bills, or a unit that won’t even fit.
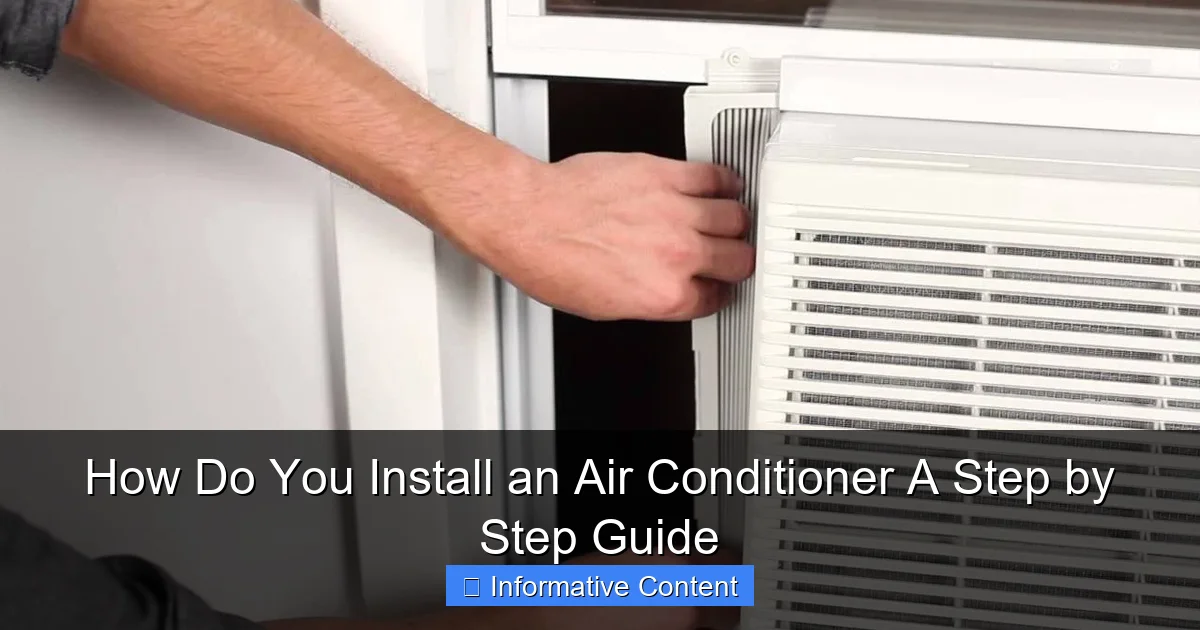
Visual guide about how do you install an air conditioner
Image source: i.ytimg.com
Types of Air Conditioners
- Window Units: The classic choice. Affordable, easy to install, and great for single rooms. Best for standard double-hung windows.
- Portable ACs: Wheels make them mobile, but they’re less efficient and require venting through a window or sliding door.
- Through-the-Wall Units: Permanent, more efficient than windows, but require a custom wall sleeve and professional help for installation.
- Ductless Mini-Split Systems: High efficiency, quiet, and cool multiple rooms. But they’re more expensive and often need a pro for refrigerant line work.
I once tried to save money by buying the cheapest window unit I could find. It was too small for my 300 sq ft living room. It ran nonstop, barely cooled the space, and my electricity bill skyrocketed. Lesson learned: size matters.
Calculate the Right BTU Size
BTUs (British Thermal Units) measure cooling power. Too few, and your room stays hot. Too many, and you waste energy and risk humidity issues.
| Room Size (sq ft) | Recommended BTUs | Best For |
|---|---|---|
| 100–150 | 5,000–6,000 | Small bedrooms, home offices |
| 150–250 | 6,000–8,000 | Bedrooms, small living rooms |
| 250–350 | 8,000–10,000 | Medium living rooms, open kitchens |
| 350–450 | 10,000–12,000 | Large living rooms, master bedrooms |
| 450–550 | 12,000–14,000 | Open-concept spaces |
| 550–700 | 14,000–18,000 | Great rooms, small apartments |
Pro tip: If your room gets a lot of sun, has poor insulation, or is on the top floor, add 10% more BTUs. If it’s shaded or has good insulation, you can go 10% lower.
Check Window Compatibility
Most window units need a double-hung or sliding window with a minimum opening of 24–36 inches wide and at least 16 inches tall. Measure your window before buying. Some units come with adjustable side panels or accordion-style seals. Make sure the unit you choose fits your window type and can be secured properly.
Also, check the electrical requirements. Most window units run on standard 120V outlets, but high-BTU models (12,000+ BTUs) may need a 240V circuit. Don’t plug a 240V unit into a regular outlet—it won’t work and could damage the unit.
2. Gather Your Tools and Prepare the Installation Area
Now that you’ve chosen the right air conditioner, it’s time to prep. This step is often overlooked, but it can make or break your installation. A little prep saves time, frustration, and potential damage.
Essential Tools and Materials
- Measuring tape
- Level (a small bubble level works fine)
- Drill and drill bits (for screws)
- Screwdriver (Phillips and flathead)
- Adjustable wrench
- Safety gloves and goggles
- Weather stripping or foam sealant
- Support brackets (if not included with the unit)
- Extension cord (only if the unit doesn’t reach the outlet—use a heavy-duty one rated for ACs)
- Vacuum or damp cloth (for cleaning the window area)
Don’t skip the gloves and goggles. Air conditioners are heavy, and metal edges can be sharp. I once cut my hand on a window unit’s frame while lifting it. Not fun.
Prepare the Window and Area
- Clear the area: Move furniture, rugs, and anything near the window. You’ll need space to work and to avoid blocking airflow.
- Clean the window sill: Wipe down the sill and tracks. Remove dust, debris, and old weather stripping. A clean surface ensures a tight seal.
- Check for obstructions: Look for blinds, curtains, or window locks. You may need to remove or adjust them.
- Test the window operation: Make sure the window opens and closes smoothly. If it’s sticky, lubricate the tracks with silicone spray.
Plan for Drainage and Venting
Most window units have a built-in drain hole or drip tray. Some models have a “no-drip” feature, but condensation still happens. Position the unit so it tilts slightly backward (about 1/4 inch). This allows water to drain outside instead of pooling inside your room.
For portable ACs, you’ll need a vent hose. Make sure it’s not kinked and vents directly outside through a window kit. A 90-degree bend or long hose reduces efficiency.
Safety First: Electrical and Structural Checks
- Use a dedicated outlet: Avoid power strips or extension cords for high-BTU units. Overheating is a real risk.
- Check the circuit: Make sure the outlet is on a circuit that can handle the load. If other appliances are on the same circuit, unplug them during operation.
- Inspect the window frame: Ensure it’s solid and not rotting. A weak frame can’t support the unit’s weight.
- Use support brackets: Even if the unit comes with a sill bracket, adding an L-shaped bracket from below adds extra security, especially on older windows.
I once installed a unit without a support bracket. One windy night, it shifted and started rattling. I fixed it the next day—with a bracket and some foam sealant. Lesson: better safe than sorry.
3. Installing a Window Air Conditioner Step by Step
This is the moment you’ve been waiting for. Installing a window air conditioner is straightforward if you follow the steps carefully. Let’s break it down.
Step 1: Open the Window and Install the Side Panels
Open the window to the height specified in the manual. Most units require the window to open at least 16–18 inches. Attach the side panels (or accordion seals) to the unit. These fill the gap between the AC and the window frame.
Pro tip: Install the panels on the unit before lifting it. Trying to attach them once the unit is in the window is awkward and risky.
Step 2: Position the Air Conditioner
With a helper, lift the unit and place it on the window sill. The front (indoor side) should be inside the room, and the back (condenser coils) should extend outside. The unit should sit flat, with the drain holes at the back slightly lower than the front.
Use a level to check. If it’s not level, adjust by shimming under the front with thin wood or plastic strips.
Step 3: Secure the Unit to the Window
Lower the window sash onto the unit’s top rail. Most units have a slot or groove for this. Tighten the screws or bolts provided in the kit to clamp the window down.
Then, secure the side panels to the window frame with screws. This prevents the unit from moving and improves insulation.
Step 4: Install Support Brackets (If Needed)
If your unit is heavy (over 60 lbs) or the window is high off the ground, use a support bracket. Attach the L-bracket to the window sill or exterior wall, then secure it to the AC with screws. This takes stress off the window frame.
For sliding windows, you may need a vertical support that screws into the wall below the window.
Step 5: Seal the Gaps
Use foam weather stripping or rubber seals around the edges to prevent air leaks. Pay special attention to the top and sides. You can also use a small piece of rigid foam board cut to size and placed between the unit and window sash.
Don’t overstuff—just enough to create a tight seal without warping the window.
Step 6: Plug It In and Test
Plug the unit into a grounded outlet. Turn it on and set it to “cool” mode. Listen for unusual noises. Check that air is blowing out the back (outside) and cold air is coming from the front (inside).
Feel around the edges for drafts. If you feel air, add more sealant or adjust the side panels.
One thing I learned: don’t skip the test run. I once installed a unit, closed the window, and realized it wasn’t cooling. Turns out, the air filter was clogged. A quick clean fixed it—but I wasted 20 minutes troubleshooting.
4. Installing a Portable Air Conditioner
Portable ACs are great for renters or rooms without suitable windows. But they’re not as simple as “roll it in and plug it in.” Venting is key.
Step 1: Choose the Right Location
Place the unit on a flat, stable surface near a window. Avoid placing it on rugs or soft floors—it needs ventilation underneath. Keep it at least 12 inches from walls or furniture.
Step 2: Install the Window Vent Kit
Most portable ACs come with a window kit—usually a plastic or metal panel with a hole for the vent hose. Attach the panel to the window frame using the provided clamps or screws. For sliding windows, use a vertical kit. For double-hung, use a horizontal one.
Cut the panel to fit if needed. Use foam tape to seal gaps.
Step 3: Connect the Vent Hose
Attach one end of the vent hose to the AC’s exhaust port. The other end goes through the window kit. Make sure the hose is as straight as possible—no sharp bends. A 10-foot hose loses about 20% efficiency if it’s bent.
Some kits have a second hose for fresh air intake. If yours has one, make sure it’s also vented outside.
Step 4: Drain the Water (If Needed)
Portable ACs collect condensation. Some models have a self-evaporative system, but others need a drain hose. If your unit has a drain plug, attach a hose and route it to a floor drain or bucket.
Tip: If you’re using a bucket, set a reminder to empty it every few days.
Step 5: Power It On and Adjust Settings
Plug it in. Turn it on and set the temperature. Most portables have a “fan-only” and “dehumidify” mode too. Use “cool” for maximum cooling.
Check that the vent is blowing hot air outside and not back into the room. If it’s not, recheck the hose connection.
One thing I love about portable units: they’re easy to move. I once used mine in my home office during the day and rolled it to my bedroom at night. Just remember to close the window when you move it!
5. Installing a Ductless Mini-Split System (When to Call a Pro)
Ductless mini-splits are the gold standard for efficiency and quiet operation. But they’re not DIY-friendly for most people. Here’s why.
Components of a Mini-Split
- Indoor unit (air handler): Mounts on the wall, blows cold air.
- Outdoor unit (condenser): Sits outside, houses the compressor.
- Refrigerant lines: Copper tubes that connect the two units.
- Drain line: Removes condensation from the indoor unit.
- Electrical wiring: Connects to a dedicated circuit.
Why It’s a Professional Job
- Refrigerant handling: You need EPA certification to work with refrigerants. DIY charging is illegal and dangerous.
- Vacuuming the lines: Air and moisture in the refrigerant lines can ruin the system.
- Mounting and leveling: The indoor unit must be perfectly level. Even a small tilt affects drainage and performance.
- Electrical connections: Requires a dedicated 240V circuit. Improper wiring can cause fires.
What You Can DIY (If You’re Confident)
You can help by:
- Choosing the location for the indoor and outdoor units
- Drilling the hole for the lines (use a 3-inch hole saw)
- Running the electrical conduit (if you’re licensed)
- Mounting the wall bracket for the indoor unit
But the refrigerant lines, vacuuming, and final connections should always be done by a licensed HVAC technician. I’ve seen people try to DIY mini-splits—only to end up with a $1,000 repair bill because the lines weren’t properly charged.
Cost vs. Value
Mini-splits cost $2,000–$5,000 installed. But they last 15–20 years, are 30–40% more efficient than window units, and can heat your home in winter (heat pump models). For long-term value, they’re worth the investment.
6. Maintenance Tips to Keep Your AC Running Smoothly
Installing your air conditioner is just the start. Regular maintenance keeps it efficient, quiet, and long-lasting.
Monthly Checks
- Clean or replace the air filter: A dirty filter reduces airflow and efficiency. Washable filters can be rinsed; disposable ones should be replaced every 1–3 months.
- Check the vents: Make sure nothing is blocking the intake or exhaust.
- Inspect the window seal: Look for gaps or wear. Reseal if needed.
Seasonal Tasks
- Clean the condenser coils (outdoor side): Use a coil cleaner or mild detergent. Rinse with a garden hose. Dirty coils reduce cooling power.
- Clear debris around the outdoor unit: Remove leaves, grass, and dirt.
- Drain the condensate pan: For window and portable units, check for algae or mold. Clean with a bleach solution (1 part bleach to 4 parts water).
Before Winter Storage
If you’re not using your window or portable AC in winter:
- Unplug it and remove it from the window (or cover it with a weatherproof cover).
- Drain all water from the unit and hoses.
- Store it in a dry, cool place—not a damp garage.
I once left my window unit in all winter. When I turned it on in spring, it smelled musty and barely cooled. A deep clean fixed it—but it would’ve been easier to store it properly.
When to Call a Pro
Even with maintenance, some issues need professional help:
- Unit won’t turn on (could be electrical or control board issue)
- Blowing warm air (low refrigerant or compressor problem)
- Strange noises (loose parts or motor failure)
- Leaking water inside the room (clogged drain or improper tilt)
Don’t wait—small problems can become big, expensive ones.
Installing an air conditioner isn’t rocket science, but it does take care, patience, and attention to detail. Whether you’re sliding a window unit into place, setting up a portable AC with a vent hose, or planning for a mini-split, the key is preparation and safety.
Remember: the right size, the right location, and the right tools make all the difference. Take your time. Measure twice, lift once. And don’t be afraid to ask for help—especially with heavy units.
Once it’s running, you’ll enjoy cool, quiet comfort for years. And every time you feel that crisp, refreshing air, you’ll know: you did it. You figured out how to install an air conditioner—and you did it right.
Stay cool, stay safe, and enjoy your summer.
Frequently Asked Questions
How do you install an air conditioner in a window?
To install a window air conditioner, first secure the unit in the open window using the included mounting brackets or side panels. Then, seal gaps with foam strips or weatherstripping to prevent air leaks and ensure efficient cooling.
Can I install a portable air conditioner without professional help?
Yes, portable air conditioners are designed for easy DIY installation—simply vent the exhaust hose through a window or sliding door using the included adapter kit. No permanent modifications are needed, making them ideal for renters or quick setups.
What tools do you need to install an air conditioner?
Basic tools include a screwdriver, level, measuring tape, and possibly a drill for mounting brackets. For split systems, you may also need refrigerant gauges and a vacuum pump, which are best handled by a professional.
How do you install a split air conditioner system safely?
Installing a split air conditioner requires mounting the indoor and outdoor units, connecting refrigerant lines, and wiring—all tasks that demand technical expertise. Hire a licensed HVAC technician to ensure proper refrigerant handling and system performance.
Is it necessary to insulate the air conditioner during installation?
Yes, insulating the refrigerant lines and gaps around window units improves energy efficiency and reduces noise. Use foam insulation tubes for split systems and weatherstripping for window units to seal air leaks.
How long does it take to install an air conditioner?
A window or portable unit can take 1–3 hours for DIY installation, while a split system may require 4–8 hours or more by a professional. Time varies based on complexity, tools, and whether electrical or ductwork modifications are needed.