
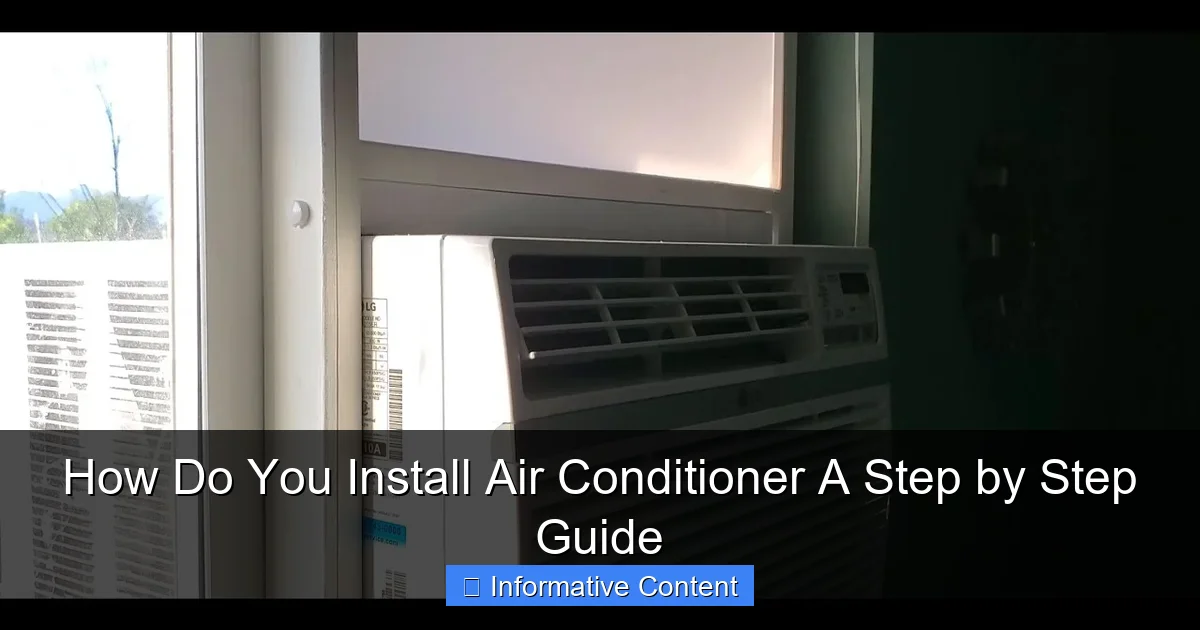
Featured image for how do you install air conditioner
Image source: i.ytimg.com
Installing an air conditioner properly ensures maximum efficiency, safety, and long-term performance. This step-by-step guide walks you through selecting the right unit, preparing the installation site, mounting the indoor and outdoor components, connecting refrigerant lines, and wiring for power—all while emphasizing safety precautions and manufacturer guidelines. Whether you’re a DIY enthusiast or prepping for a pro, getting the basics right from the start prevents costly mistakes.
Key Takeaways
- Turn off power first: Always disconnect electricity before starting installation for safety.
- Measure window size: Ensure correct AC unit fit to avoid gaps or instability.
- Seal gaps tightly: Use weather stripping to prevent air leaks and improve efficiency.
- Level the unit: Slight tilt outward ensures proper drainage and performance.
- Secure brackets properly: Anchor the AC to prevent accidents or falls.
- Test before finalizing: Run the unit to check for noise, leaks, or cooling issues.
📑 Table of Contents
- How Do You Install Air Conditioner: A Step by Step Guide
- 1. Choosing the Right Air Conditioner for Your Space
- 2. Preparing for Installation: Tools, Safety, and Setup
- 3. Installing a Window Air Conditioner (Step by Step)
- 4. Installing a Portable or Split System Air Conditioner
- 5. Post-Installation Checks and Maintenance
- 6. Common Mistakes and How to Avoid Them
How Do You Install Air Conditioner: A Step by Step Guide
Imagine it’s the middle of July, and the sun is beating down relentlessly. The air is thick, sticky, and every breath feels like a chore. You finally decide enough is enough—it’s time to install an air conditioner. But how do you install air conditioner without turning your living room into a construction zone or breaking the bank on professional help? Whether you’re a DIY enthusiast or someone who just wants to understand the process before calling in the experts, this guide will walk you through every step with clarity and confidence.
Installing an air conditioner isn’t just about plugging it in and hoping for the best. It’s about understanding your space, choosing the right unit, preparing properly, and executing the installation safely and effectively. I’ve been there—standing in my garage, staring at a box labeled “Window AC Unit,” wondering if I could really pull this off. Spoiler: I did, and so can you. In this comprehensive guide, we’ll cover everything from selecting the right type of AC to sealing gaps and testing performance. No fluff, no jargon—just real, practical advice that anyone can follow.
1. Choosing the Right Air Conditioner for Your Space
Before you even think about how do you install air conditioner, you need to pick the right one. Not all ACs are created equal, and installing the wrong type can lead to inefficiency, noise, and wasted money. Let’s break down your options based on space, budget, and lifestyle needs.
Visual guide about how do you install air conditioner
Image source: i0.wp.com
Types of Air Conditioners
The first thing to consider is which type of air conditioner suits your home:
- Window Units: These are the most common for single rooms. They fit directly into a window frame and vent hot air outside. Great for apartments or small homes. For example, if you’re cooling a 200 sq ft bedroom, a 5,000–6,000 BTU window unit should do the trick.
- Portable ACs: Ideal for renters or those without suitable windows. These sit on the floor and use an exhaust hose that goes out a window or door. Slightly less efficient than window units but offer flexibility.
- Split (Mini-Split) Systems: These consist of an outdoor compressor and an indoor air handler. They’re quieter, more energy-efficient, and require professional installation for the refrigerant lines and electrical work—but they’re perfect for larger rooms or whole-house cooling.
- Central Air Conditioning: Best for entire homes. Requires ductwork and professional installation. If you already have ducts, this might be worth considering, but it’s far more involved than DIY options.
When I moved into my first apartment, I went with a window unit. It was affordable, easy to move, and kept my bedroom cool during summer nights. But after a year, I realized the noise and draftiness were getting old. So I upgraded to a mini-split—and wow, what a difference! The lesson? Think long-term. A slightly higher upfront cost can save you years of discomfort.
Calculating the Right Size (BTUs)
Size matters—especially when it comes to air conditioners. Too small, and it won’t cool the room. Too big, and it cycles on and off too quickly, wasting energy and failing to dehumidify properly.
Here’s a simple way to estimate:
- 150–250 sq ft: 6,000–7,000 BTUs
- 250–400 sq ft: 7,000–8,000 BTUs
- 400–600 sq ft: 8,000–10,000 BTUs
- 600–800 sq ft: 10,000–12,000 BTUs
Adjust based on room conditions:
- Add 10% for sunny rooms or high ceilings.
- Subtract 10% for heavily shaded or insulated rooms.
- For kitchens or rooms with lots of electronics, add 4,000 BTUs.
Pro tip: Use online BTU calculators from reputable HVAC websites. I once ignored this advice and bought a 5,000 BTU unit for my 350 sq ft living room. It ran nonstop, barely made a dent in the heat, and my electric bill skyrocketed. Lesson learned: always size correctly.
Energy Efficiency and Features to Look For
Look for the Energy Star label and check the SEER rating (Seasonal Energy Efficiency Ratio). The higher the SEER, the more efficient the unit. Modern units often have smart features like Wi-Fi control, programmable timers, and eco modes. While these aren’t essential, they make managing your AC easier—especially if you’re not home all day.
Also, pay attention to noise levels. A unit rated at 55 dB is about as loud as a quiet conversation. Anything above 65 dB can be disruptive, especially at night. My current mini-split runs at 48 dB—I forget it’s even on!
2. Preparing for Installation: Tools, Safety, and Setup
Now that you’ve chosen your air conditioner, it’s time to prep. This stage is often overlooked, but it sets the foundation for a smooth, safe installation. Rushing here can lead to mistakes, leaks, or even injury.
Gather Your Tools and Materials
Here’s what you’ll likely need:
- Measuring tape
- Level
- Screwdriver (Phillips and flathead)
- Drill with masonry and wood bits (for split systems or mounting brackets)
- Adjustable wrench or pliers
- Caulk and caulking gun (for sealing gaps)
- Foam insulation strips or weather stripping
- Ladder (if installing at height)
- Work gloves and safety goggles
For window units, you may also need support brackets or extension panels depending on your window type. Don’t forget a helper—ACs are heavy, and lifting them solo is risky.
Assess the Installation Site
Take a good look at where you plan to install the unit:
- Window Units: Measure the width and height of your window opening. Most units fit standard sizes (usually 23–36 inches wide, 15+ inches high). Make sure the window opens fully and the sill is strong enough to support the weight (typically 60–100 lbs).
- Portable ACs: Ensure there’s a window or sliding door nearby to vent the exhaust hose. The shorter the hose, the better—long hoses reduce efficiency.
- Split Systems: Choose an indoor location with clear airflow (away from furniture or curtains) and an outdoor spot with good drainage and minimal debris. You’ll also need access to electrical wiring and a way to run refrigerant lines between units.
When I installed my first window AC, I assumed any window would work. But the one I picked had a cracked sill. Mid-installation, the whole thing nearly fell out! I had to pause, reinforce the sill with a wooden board, and restart. Moral of the story: inspect your site thoroughly.
Safety First: Electrical and Structural Checks
Never skip this step. Air conditioners draw a lot of power—typically 110–120 volts, but some larger units need 220V. Check your circuit breaker to ensure the outlet you’re using isn’t overloaded. If you’re unsure, consult an electrician.
Also, verify that your wall or window frame can handle the weight. Use studs or masonry anchors when mounting brackets. For older homes, consider consulting a structural expert—especially if you’re drilling into brick or stucco.
And please: turn off the power at the breaker before doing any electrical work. I know it sounds obvious, but I’ve seen too many DIYers skip this and end up with a costly (or dangerous) mistake.
3. Installing a Window Air Conditioner (Step by Step)
Window ACs are the most DIY-friendly option, and millions of people install them every year. If you’ve chosen this route, here’s how to do it right.
Step 1: Prepare the Window
Open the window and clean the sill. Remove any debris, old caulk, or loose paint. Measure the width of the opening and compare it to your AC’s dimensions. If the window is too wide, you’ll need extension panels (often included with the unit).
Use a level to make sure the sill is flat. If it slopes outward, place a shim or thin board under the unit to level it—this prevents water from pooling inside.
Step 2: Install Support Brackets (If Needed)
Many modern window ACs come with adjustable support arms. Slide them into place under the unit and secure them to the sill or wall with screws. These prevent the AC from sagging or falling.
For older or heavier units, you might need a separate support bracket. I once used a metal L-bracket anchored to the brick wall outside—worked perfectly and gave me peace of mind.
Step 3: Position the AC Unit
With a helper, lift the AC and slide it into the window. The back of the unit (the part with vents) should face outside. The front should sit snugly inside your room.
Lower the window sash gently onto the unit’s top rail. Don’t force it—if it doesn’t close smoothly, adjust the position slightly. The goal is a tight, secure fit.
Step 4: Secure and Seal
Once in place, attach the side panels (if included) to cover the gaps. Use the provided screws or clips to lock them in.
Now, seal everything:
- Apply foam insulation strips along the sides and top of the unit.
- Use weather stripping between the window sash and the AC frame.
- Caulk the exterior where the AC meets the window frame to prevent water intrusion.
Pro tip: Don’t over-caulk. Too much can make it hard to remove the unit later. A thin, continuous bead is enough.
Step 5: Plug In and Test
Plug the unit into a grounded outlet. Avoid extension cords—they can overheat and cause fires. Turn it on and check for cool air. Listen for unusual noises or vibrations.
Wait 10–15 minutes and measure the temperature drop. A well-installed AC should lower the room temp by 10–15°F in that time.
4. Installing a Portable or Split System Air Conditioner
While window units are straightforward, portable and split systems come with unique challenges. Let’s tackle each.
Portable AC Installation
Portable units are easier than they look. Here’s how:
- Place the unit on a flat, stable surface near a window. Keep it at least 18 inches away from walls for proper airflow.
- Attach the exhaust hose to the back of the unit. Extend it to the window and connect it to a vent kit (a plastic or foam panel that fits in the window opening).
- Seal the gap around the vent kit with foam or tape. The tighter the seal, the better the efficiency.
- Empty the water reservoir regularly, or use a continuous drain hose if your model supports it.
One downside: portable ACs are noisier and less efficient than window units. But for renters or rooms without suitable windows, they’re a solid choice.
Split (Mini-Split) System Installation
This is where things get serious. While the indoor unit can be DIY’d, the outdoor unit and refrigerant lines require professional help—unless you’re certified. But you can still handle part of the process:
- Mount the indoor unit on an interior wall, 6–7 feet above the floor. Use a level and anchor it to studs or masonry.
- Drill a hole (2–3 inches) through the wall for the refrigerant lines, drain hose, and electrical wiring. Angle it slightly downward toward the outside to prevent water ingress.
- Connect the lines (this is the pro part). A licensed HVAC technician will vacuum the lines, charge the system with refrigerant, and test for leaks.
- Mount the outdoor unit on a concrete pad or brackets. Ensure it’s level and has good airflow.
When I installed my mini-split, I handled the indoor mounting and hole drilling. Then I called a pro for the refrigerant work. It cost about $300, but it was worth it for the peace of mind and efficiency gains.
5. Post-Installation Checks and Maintenance
You’ve installed your air conditioner—congrats! But the job isn’t done yet. A few final checks and regular maintenance will keep it running smoothly for years.
Test Performance and Efficiency
Run the AC for at least 30 minutes and check:
- Is cold air blowing steadily?
- Are there unusual noises (grinding, squealing, rattling)?
- Is the unit draining properly (for models with condensate pumps)?
- Is the room cooling as expected?
If the airflow is weak, check the filter—it might be dirty. Also, ensure all vents are open and unobstructed.
Seal and Insulate Gaps
Even small gaps can let in hot air and reduce efficiency. Use foam strips, weather stripping, or caulk to seal around the unit. For split systems, insulate the refrigerant lines with foam sleeves.
I once noticed my window AC was struggling. After inspection, I found a 1-inch gap at the top. A few minutes with foam tape fixed it—and my energy bill dropped by 15% the next month.
Regular Maintenance Tips
To extend your AC’s life and efficiency:
- Clean or replace the filter every 1–2 months.
- Vacuum the indoor and outdoor coils annually.
- Check the condensate drain for clogs.
- Inspect seals and insulation every season.
- Store window units properly in winter (cover and keep dry).
Think of maintenance like changing the oil in your car—skip it, and you’ll pay the price later.
6. Common Mistakes and How to Avoid Them
Even experienced DIYers make mistakes. Here are the most common ones—and how to dodge them.
Overloading the Circuit
Plugging your AC into an outlet shared with a fridge or microwave can trip the breaker. Always use a dedicated circuit. If you’re unsure, hire an electrician to install one.
Improper Sealing
Leaks around the unit let in hot air and moisture. This reduces efficiency and can cause mold. Always seal gaps thoroughly. Use a flashlight at night to spot light leaks—they’ll show you where air is escaping.
Ignoring the Manual
Every AC is different. Read the manufacturer’s instructions carefully. For example, some units require the window to be locked in place for safety. Skipping this step could void your warranty.
Installing in Direct Sunlight
Placing a window unit in a south- or west-facing window increases heat load. Use blinds or a sunshade to block direct sunlight. Or, install the unit on the shadier side of the room.
Neglecting Professional Help When Needed
DIY is great, but some tasks—like refrigerant handling or electrical upgrades—require expertise. Don’t risk safety or performance for a few dollars. When in doubt, call a pro.
| AC Type | DIY Feasibility | Tools Needed | Estimated Time | Cost (Unit + Installation) |
|---|---|---|---|---|
| Window Unit | High | Basic hand tools, ladder | 1–2 hours | $150–$500 |
| Portable AC | High | None (plug-and-play) | 30 minutes | $300–$700 |
| Split System | Medium (indoor), Low (outdoor) | Drill, level, ladder | 1–3 days (with pro) | $1,000–$3,000 |
| Central Air | Low | N/A (professional only) | 1–5 days | $3,000–$7,000 |
Installing an air conditioner can feel daunting, but with the right preparation, tools, and knowledge, it’s totally doable. Whether you’re tackling a simple window unit or a more complex split system, the key is patience and attention to detail. Remember, a well-installed AC doesn’t just cool your home—it improves your comfort, health, and even your mood during those sweltering summer months.
From choosing the right size to sealing gaps and maintaining performance, every step matters. Don’t rush. Take your time, follow the instructions, and don’t hesitate to call in a pro when needed. At the end of the day, the goal isn’t just to install an air conditioner—it’s to create a cool, comfortable space where you can relax and recharge.
So go ahead, grab your tools, and get started. The next time someone asks, “How do you install air conditioner?” you’ll have a story to tell—and a perfectly cool home to show for it.
Frequently Asked Questions
How do you install an air conditioner in a window?
To install a window air conditioner, first secure the unit in the open window using the included brackets and side panels. Then, seal gaps with foam strips and ensure the unit tilts slightly outward for proper drainage.
What tools do you need to install an air conditioner?
Basic tools for air conditioner installation include a screwdriver, level, tape measure, and drill. For split systems, you may also need pipe cutters and a vacuum pump for refrigerant lines.
Can you install an air conditioner yourself, or do you need a professional?
Window and portable air conditioners can typically be installed yourself using the manufacturer’s guide. However, ducted or split systems often require a licensed HVAC technician for safe and code-compliant installation.
How do you install a split air conditioner system?
Installing a split air conditioner involves mounting the indoor and outdoor units, connecting refrigerant lines, and wiring the system to power. A vacuum pump must be used to remove air from the lines before charging the refrigerant.
What are the steps to install an air conditioner safely?
Always turn off power at the breaker before installation and verify the mounting surface is stable. Follow the manual’s instructions to avoid electrical hazards and ensure proper airflow and drainage.
How do you install an air conditioner without damaging walls or windows?
Use adjustable mounting brackets and foam insulation to minimize drilling and seal gaps effectively. For renters, consider removable solutions like portable units or tension-rod window mounts.