
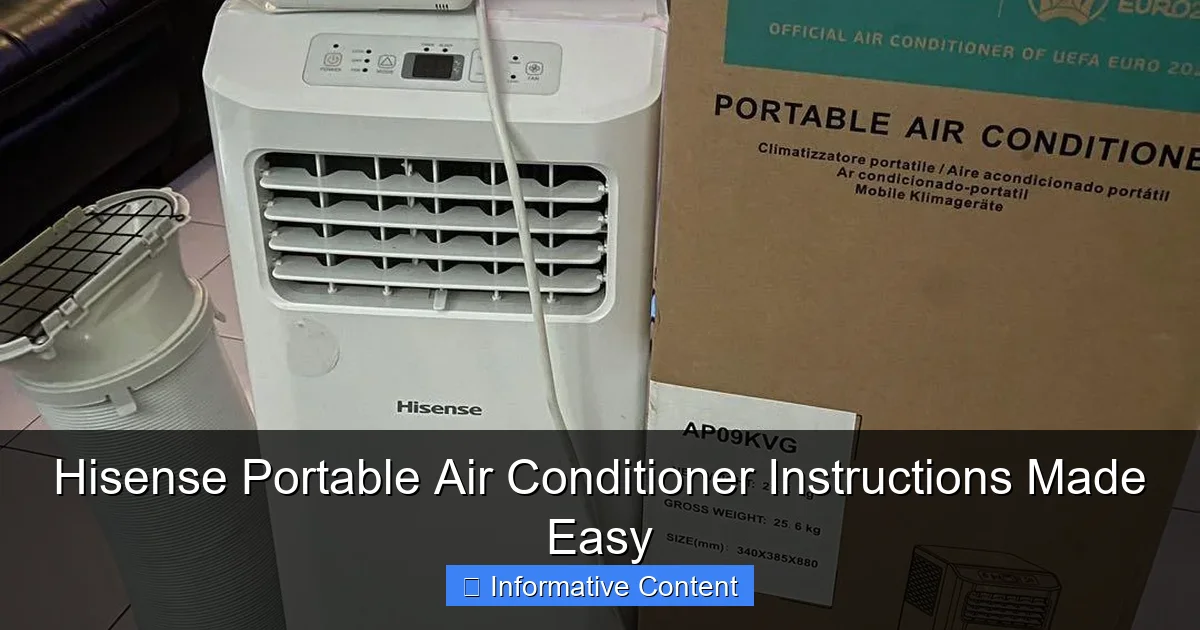
Featured image for hisense portable air conditioner instructions
Image source: media.karousell.com
Master your Hisense portable air conditioner effortlessly with clear, step-by-step instructions designed for quick setup and optimal performance. From unboxing to troubleshooting, this guide simplifies every feature—including remote control pairing, drainage, and energy-saving modes—so you stay cool without the confusion. Say goodbye to guesswork and hello to hassle-free comfort in minutes.
Key Takeaways
- Read the manual first: Always start with the Hisense guide for model-specific setup and safety tips.
- Proper venting is key: Ensure the exhaust hose is securely connected to avoid cooling inefficiency.
- Clean filters regularly: Maintain airflow and performance by cleaning filters monthly.
- Use the remote wisely: Master remote settings for optimal temperature and timer control.
- Check error codes: Decode alerts quickly using the manual’s troubleshooting section.
- Drain water often: Empty the tank before it overflows to prevent leaks.
📑 Table of Contents
- Why Hisense Portable Air Conditioners Are a Summer Game-Changer
- Getting Started: Unboxing and Initial Setup
- Understanding the Control Panel and Remote
- Daily Operation and Maintenance
- Troubleshooting Common Issues
- Maximizing Efficiency and Longevity
- Final Thoughts: Your Cool, Stress-Free Summer Starts Here
Why Hisense Portable Air Conditioners Are a Summer Game-Changer
Let’s face it—summer heat can turn your cozy home into a sauna. Whether you’re working from home, trying to sleep, or just surviving another sweltering day, a reliable portable air conditioner is a lifesaver. That’s where Hisense steps in. Known for making smart, budget-friendly appliances, Hisense portable air conditioners offer a great balance of performance, ease of use, and portability. But here’s the catch: even the best AC unit can leave you frustrated if you don’t know how to set it up or use it properly. That’s why understanding Hisense portable air conditioner instructions is more than just a box-checking exercise—it’s the key to staying cool, saving energy, and avoiding costly mistakes.
I remember the first time I unboxed my Hisense portable AC. I was excited, but within 10 minutes, I was staring at the manual like it was written in ancient hieroglyphics. The buttons, the hose, the water tank—it all felt overwhelming. Sound familiar? You’re not alone. Many people skip the manual and end up with a unit that’s loud, inefficient, or worse, not cooling at all. The good news? Once you know the basics, operating your Hisense portable air conditioner is actually pretty straightforward. In this guide, I’ll walk you through everything—from unboxing to daily use—so you can get the most out of your unit without the stress. Whether you’re a first-time owner or just need a refresher, these Hisense portable air conditioner instructions will make cooling your space a breeze.
Getting Started: Unboxing and Initial Setup
What’s in the Box?
Before you even plug in your Hisense portable air conditioner, take a moment to unpack it carefully. Most models come with the following:

Visual guide about hisense portable air conditioner instructions
Image source: smartacsolutions.com
- The main AC unit
- Exhaust hose (usually 5–6 feet long)
- Window venting kit (plastic panels, foam seals, and clamps)
- Drain hose (for models with continuous drainage)
- Remote control with batteries
- User manual (yes, read it!)
I learned the hard way that skipping this step led to a missing foam seal—which meant my first attempt at setup was a leaky, inefficient mess. So, lay everything out and check the manual’s packing list. If anything’s missing, contact Hisense customer support right away. They’re usually quick to send replacements.
Choosing the Right Spot
Location matters more than you think. Your Hisense portable air conditioner needs:
- At least 18–24 inches of clearance on all sides for proper airflow
- A nearby window for the exhaust hose
- A grounded electrical outlet (no extension cords!)
- A flat, stable surface—tilting the unit can damage internal components
Pro tip: Avoid placing it behind furniture or under shelves. I once set mine up in a corner behind a couch, and the airflow was so restricted that the unit kept overheating. After moving it to a more open area, the cooling performance improved dramatically.
Venting Through the Window
The exhaust hose is essential—it removes hot air from your room. Here’s how to install it:
- Attach the hose to the back of the AC unit (it usually twists or clips in).
- Extend the hose to your window and connect it to the venting kit.
- Use the adjustable plastic panels to seal the window opening. Secure with clamps or tape.
- Seal gaps with foam strips to prevent hot air from sneaking back in.
Example: I live in a rental apartment with sliding windows. I used the Hisense kit with the included foam seal and a small piece of plexiglass to block the gap. It worked perfectly and didn’t damage the window. For casement or double-hung windows, the process is similar—just adjust the panel height.
Remember: Never run the AC without venting. It won’t cool effectively and could damage the compressor.
Understanding the Control Panel and Remote
Buttons and Display: What They Mean
Hisense models vary slightly, but most have a simple, intuitive control panel. Here’s a breakdown:
- Power: Turns the unit on/off
- Mode: Cycles between Cool, Fan, Dry (dehumidify), and Auto
- Fan Speed: Low, Medium, High, or Auto
- Temp +/-: Adjusts cooling temperature (usually 61°F–88°F)
- Timer: Sets auto on/off times
- Sleep Mode: Gradually adjusts temp and fan for nighttime comfort
- Swing: Oscillates airflow (if available)
The LED display shows the current room temperature and your set temperature. Some models also display error codes (more on that later).
Remote Control Tips
The remote is your best friend—especially at night. But there are a few things to keep in mind:
- Point it directly at the unit. Obstructions (like curtains) can block the signal.
- Replace the batteries if the remote stops working. I once thought mine was broken, but it just needed fresh AAA batteries.
- Use the Lock function (if available) to prevent kids or pets from changing settings.
Fun tip: I keep my remote in a magnetic holder on the side of my fridge. No more lost remotes!
Common Settings and When to Use Them
- Cool Mode: Use during hot days. Set your desired temp (I recommend 72°F–75°F for balance of comfort and efficiency).
- Fan Mode: Great for mild days or when you just want airflow. No cooling, but uses less power.
- Dry Mode: Ideal for humid climates. Reduces moisture without overcooling. Perfect for muggy nights.
- Auto Mode: The unit adjusts based on room temp. Good for hands-off cooling, but can be less precise.
- Sleep Mode: Gradually raises temp by 2–4°F over 8 hours to save energy and prevent chills.
Example: On a 90°F day, I set my Hisense to Cool Mode at 72°F with High Fan. After 30 minutes, the room felt great. At night, I switch to Sleep Mode with Medium Fan—it’s quiet enough to sleep through.
Daily Operation and Maintenance
Starting and Stopping the Unit
To turn on your Hisense portable air conditioner:
- Plug it into a grounded outlet.
- Press the Power button. The display will light up.
- Select your mode and temperature.
- Adjust fan speed if needed.
To turn it off: Press Power. The unit will shut down, but the display may stay lit for a few minutes (this is normal). Unplug it only if you’re storing it or cleaning.
Water Management: When to Empty the Tank
Most Hisense portable ACs collect condensation in a built-in tank. When the tank is full, the unit will stop cooling and display a “Full” or “E2” error. Here’s what to do:
- Turn off and unplug the unit.
- Pull out the tank (usually at the bottom rear).
- Empty it into a sink or bucket.
- Wipe the tank with a clean, damp cloth.
- Reinsert it firmly until it clicks.
How often you empty it depends on humidity. In dry climates, it might be once a week. In humid areas, it could be daily. I live in Florida and empty mine every 2–3 days in summer.
Pro tip: For continuous drainage, attach the included drain hose to the back of the unit and run it to a floor drain or bucket. This eliminates manual emptying—but make sure the hose is lower than the drain port to avoid backflow.
Cleaning the Air Filter
A dirty filter reduces airflow and efficiency. Clean it every 2 weeks (or more if you have pets or allergies):
- Turn off and unplug the unit.
- Remove the filter (usually behind a front panel).
- Rinse it gently under warm water. No soap needed.
- Let it air dry completely (about 1–2 hours).
- Reinstall it.
I once neglected this for a month, and my AC sounded like a jet engine. After cleaning the filter, it was quiet and cool again. Don’t skip this step!
Seasonal Storage Tips
If you’re not using your Hisense AC in winter:
- Drain all water from the tank and hose.
- Clean the filter and interior (use a soft brush to remove dust).
- Wipe the exterior with a damp cloth.
- Store in a dry, cool place. Cover it with a breathable cloth to prevent dust buildup.
Never store it in a garage or attic with extreme temps—it can damage the compressor.
Troubleshooting Common Issues
Error Codes and What They Mean
Hisense portable air conditioners display error codes to help you diagnose problems. Here are the most common:
| Error Code | Meaning | Solution |
|---|---|---|
| E1 | Room temperature sensor issue | Unplug for 10 mins. If it persists, contact support. |
| E2 | Water tank is full | Empty the tank and reinsert it. |
| E3 | Compressor overheat | Turn off, wait 30 mins, ensure proper ventilation. |
| E4 | Exhaust hose not connected | Check hose installation and window seal. |
| E5 | Internal fan issue | Unplug, wait, restart. If it continues, call support. |
Example: I once got an E3 code after running my AC for 12 hours straight. I turned it off, let it cool, and made sure the exhaust hose wasn’t kinked. After 30 minutes, it worked fine.
Unit Not Cooling? Try This
- Check the exhaust hose: Is it properly vented? A kinked or loose hose lets hot air back in.
- Inspect the filter: A clogged filter restricts airflow.
- Room too large? Most Hisense units cool 250–450 sq ft. If your room is bigger, it’ll struggle.
- Direct sunlight: Close blinds or curtains to reduce heat load.
My neighbor’s AC wasn’t cooling. Turns out, the exhaust hose was only half-attached. Once he fixed it, the room cooled in 20 minutes.
Excessive Noise or Vibration
- Place the unit on a level surface. Uneven floors cause vibration.
- Check for loose parts (hose, panels).
- Clean the fan blades—dust buildup can cause rattling.
- Ensure it’s not touching walls or furniture (causes echo).
I once had a buzzing noise. A quick wipe of the fan blades solved it.
Maximizing Efficiency and Longevity
Energy-Saving Tips
- Set a reasonable temperature: Every degree below 72°F increases energy use by 6–8%.
- Use a fan: A ceiling fan or box fan helps circulate cool air, letting you raise the AC temp by 2–4°F.
- Close doors and windows: Cool air escapes fast. Seal gaps with weatherstripping.
- Use a timer: Set it to turn off when you leave and on before you return.
Example: I set my Hisense to turn off at 8 AM (when I leave for work) and on at 5 PM. My apartment is cool when I get home, and I save energy.
Smart Use of Modes and Settings
- Auto Mode: Lets the unit adjust fan speed and temp based on room conditions. Great for hands-off use.
- Eco Mode: (On select models) Reduces power consumption by cycling the compressor.
- Swing Function: Spreads air evenly. Use it in larger rooms.
I use Eco Mode at night. It’s a bit slower to cool, but it’s quieter and saves electricity.
When to Call a Professional
Some issues need expert help:
- Persistent error codes (E1, E5)
- Refrigerant leaks (hissing sound, poor cooling)
- Electrical issues (sparks, burning smell)
- Compressor failure (unit runs but doesn’t cool)
Hisense offers a 1-year warranty (extendable). Save your receipt and register the product online for faster support.
Final Thoughts: Your Cool, Stress-Free Summer Starts Here
Let’s be real—no one wants to spend their summer wrestling with a complicated appliance. But with the right knowledge, your Hisense portable air conditioner can be your best ally against the heat. From proper setup to daily maintenance, these Hisense portable air conditioner instructions are designed to make your life easier. You don’t need to be a tech genius. You just need to follow a few simple steps, stay consistent with care, and listen to what your unit is telling you (yes, even the error codes!).
I’ve used my Hisense AC for three summers now. It’s survived power surges, curious cats, and a few forgetful days without filter cleaning. But because I took the time to understand how it works—and how to fix common hiccups—it’s kept me cool year after year. Whether you’re cooling a home office, a small apartment, or a stuffy bedroom, these tips will help you get the most out of your investment. So go ahead: set it up right, use it smart, and enjoy that sweet, cool breeze. Your summer just got a whole lot more comfortable.
Frequently Asked Questions
How do I set up my Hisense portable air conditioner for the first time?
To set up your Hisense portable air conditioner, place it near a window for exhaust hose installation, plug it into a grounded outlet, and secure the window kit. Refer to the Hisense portable air conditioner instructions manual for detailed steps on hose alignment and safety checks.
Why is my Hisense portable AC not cooling effectively?
Ensure the air filter is clean, the exhaust hose is properly vented, and all windows/doors are closed. If issues persist, check the thermostat settings and verify the unit is sized correctly for your room (per the Hisense portable air conditioner instructions).
How do I clean the filter on my Hisense portable air conditioner?
Turn off and unplug the unit, then remove the filter panel (usually on the back or side). Rinse the filter under lukewarm water and let it dry completely before reinserting. Regular cleaning prevents airflow blockages and maintains efficiency.
Can I use my Hisense portable AC without the window exhaust hose?
No—the exhaust hose is essential to release hot air outdoors. Operating the unit without it will reduce cooling performance and strain the system. Always follow the manufacturer’s guidelines for proper venting.
What do the error codes on my Hisense portable AC mean?
Error codes (e.g., E1, E4) indicate issues like water tank fullness or sensor malfunctions. Consult the troubleshooting section of your manual or the Hisense portable air conditioner instructions for specific code explanations and fixes.
How do I switch between cooling, dehumidifying, and fan modes?
Press the “Mode” button on the control panel or remote to cycle through options. Cooling mode lowers temperature, dehumidifying removes moisture without cooling, and fan mode circulates air—all adjustable via the settings menu.