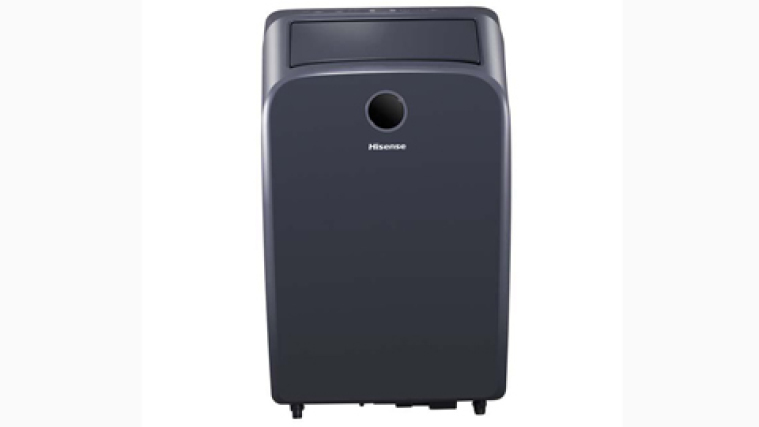
If you are experiencing issues with your Hisense portable AC, troubleshooting can help identify and resolve the problem. Portable air conditioners can be a convenient solution for cooling a room or space, but like any appliance, they can encounter problems.
If you own a Hisense portable AC and it’s not functioning as it should be, it’s essential to troubleshoot to pinpoint the issue. By following a few simple steps, you may be able to identify and resolve the problem without the need for professional assistance.
We will outline some common troubleshooting steps for Hisense portable AC units, empowering you to get your AC up and running efficiently again in no time.
Importance of Regular Cleaning
Keeping the inside of your Hisense portable AC clean is vital for several reasons. Regular cleaning enhances air quality by reducing dust and allergens, ensures the unit runs more efficiently, and prolongs the lifespan of your appliance. Neglecting this maintenance may lead to decreased performance, higher energy bills, and potential health issues.
Preparing for Cleaning
Before you start, gather the following items:
- Screwdriver
- Mild detergent
- Soft cloth
- Vacuum cleaner with a brush attachment
- Compressed air (optional)
Steps to Prepare:
- Unplug the Unit: Always unplug your AC to avoid electrical hazards.
- Move to a Well-Ventilated Area: If possible, move the unit to a well-ventilated space to prevent any cleaning fumes from accumulating indoors.
- Prepare Your Cleaning Supplies.
Cleaning the Filter
The filter is crucial for capturing dust and particles, so regular cleaning is essential.
Steps to Clean the Filter:
- Locate and Remove the Filter:
- Open the back panel using a screwdriver if necessary.
- Carefully slide out the filter.
- Clean the Filter:
- Rinse the filter under lukewarm water.
- Use mild detergent if necessary but avoid harsh chemicals.
- Gently scrub with a soft brush if needed.
- Dry the Filter Completely:
- Allow the filter to air dry thoroughly before reinstalling it.
- Reinstall the Filter:
- Slide the filter back into place and secure the back panel.
Cleaning the Coils
Dirty coils can reduce the efficiency of your AC.
Steps to Clean the Coils:
- Access the Coils:
- Remove the front cover of the unit to access the evaporator and condenser coils.
- Clean the Evaporator Coils:
- Use a soft brush or vacuum with a brush attachment to remove dust.
- For more stubborn dirt, use a coil cleaner (following the manufacturer’s instructions).
- Clean the Condenser Coils:
- Again, use a soft brush or vacuum to clean these coils.
- Optional:
- Use compressed air to blow out any remaining dust.
Reassembling and Testing
After you’ve cleaned the unit, it’s time to put it back together.
Steps to Reassemble:
- Reinstall Any Removed Panels and Covers:
- Ensure everything is securely in place.
- Reconnect the Unit:
- Plug the AC back in.
- Test the Unit:
- Turn on the AC to check if it operates smoothly and efficiently.
1. Common Issues And Solutions
Having trouble with your Hisense portable air conditioner? Don’t fret, as we have you covered with common issues that may arise and their simple solutions. By identifying and resolving these problems, you can ensure that your portable AC unit functions efficiently, providing the cool comfort you desire.
leaking Water From The Air Conditioner
If you notice water leaking from your Hisense portable air conditioner, it may indicate a clogged condensate drain or a tilt in the unit. Here’s what you can do:
- Check the condensate drain: Inspect the drain hole and tube, ensuring they are clear of any debris. Clear any obstructions by using a small brush or pipe cleaner gently.
- Level the air conditioner: Ensure that the unit is positioned on a level surface, as tilting can lead to water leakage. Use a leveling tool to adjust the unit accordingly.
AC Not Cooling The Room Efficiently
If your Hisense portable air conditioner is not cooling the room as efficiently as before, follow these troubleshooting steps:
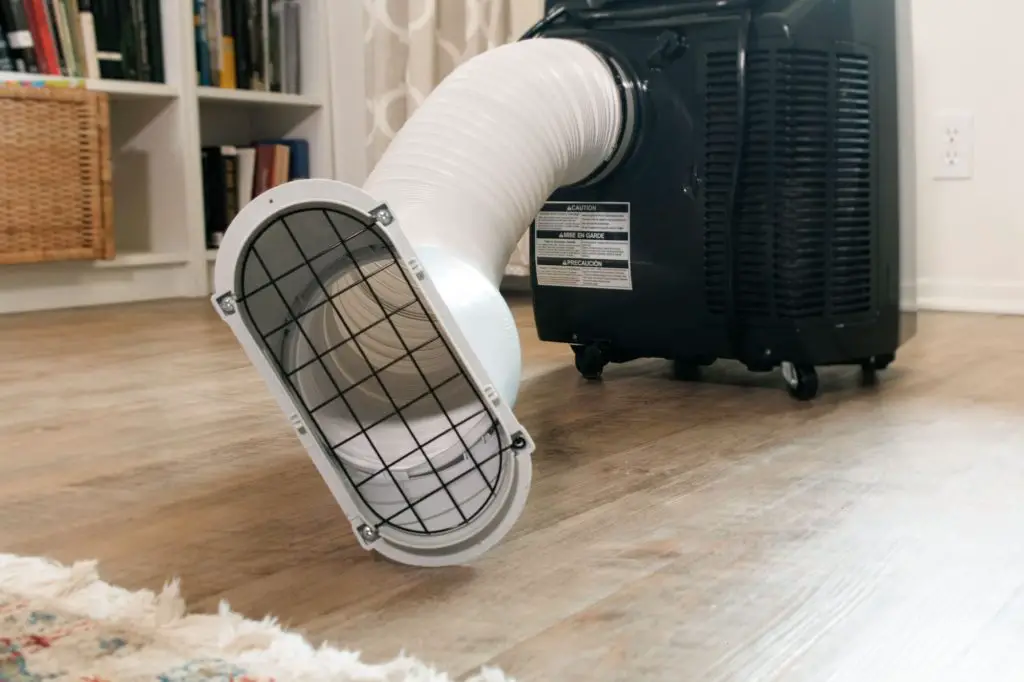
- Check the venting: Confirm that the exhaust hose is properly connected and not obstructed. Ensure that the venting window kit is installed correctly to prevent warm air from re-entering the room.
- Clean or replace the air filter: A dirty or clogged filter can hinder the unit’s cooling performance. Remove and clean the filter according to the manufacturer’s instructions, or replace it if necessary.
- Reduce heat sources: Minimize electronic devices, appliances, or direct sunlight in the room, as they can increase the overall temperature and strain the AC’s cooling ability.
AC Not Draining Properly
Improper draining can lead to reduced cooling performance, water leaks, and other issues. Here are some reasons why your portable air conditioner might not be draining properly:
- Clogged drain line: A blockage in the drain line can prevent water from flowing freely. Use a wet/dry vacuum to remove loose debris, then flush the line with soapy water. A long, flexible brush or pipe cleaner can help reach tough spots if needed.
- Full drain pan: If your unit features a drain pan, it may need to be emptied. While doing so, inspect the pan for stains or damage. Clean any buildup with a brush and soapy water to ensure proper drainage.
By addressing these draining issues and implementing the cooling efficiency tips, you can optimize your portable air conditioner’s performance for a more comfortable environment.
Unusual Noises Coming From The AC
If you hear strange or loud noises emanating from your Hisense portable air conditioner, try the following steps to address the issue:
- Inspect for loose parts: Ensure that all screws, panels, and components are securely fastened. Tighten any loose parts carefully using the appropriate tools.
- Clean the fan blades: Dust or debris on the fan blades can cause noise during operation. Gently clean the blades using a soft cloth or brush to maintain smooth and silent airflow.
- Contact customer support: If the above steps do not resolve the issue, consider reaching out to Hisense customer support for further assistance.
Remote Control Not Working Properly
If you’re facing difficulties with your Hisense portable air conditioner’s remote control, try the following troubleshooting tips:
- Replace the batteries: Ensure that the batteries in the remote control are fresh and properly inserted. A low battery can cause the control board to lose connection with your AC unit, leading to operational issues.
- Reset the remote control: Remove the batteries, press each button for a few seconds, and then reinsert the batteries. This can help reset the remote control’s functions and resolve any temporary glitches.
- Check for signal interference: Ensure that there are no obstructions between the remote control and the AC unit. Remove any objects that may block the infrared signal, as even minor obstructions can interrupt connectivity.
Additionally, consider these factors that might be affecting your remote’s performance:
- Proximity and Range: Always point the remote directly at the AC unit and stay within the recommended range for optimal signal transmission. Signals can be disrupted by distance or misalignment.
- Cleanliness of the Remote: Dust and dirt can accumulate on your remote over time, potentially interfering with its buttons and sensors. Gently wipe down the remote with a damp microfiber cloth to remove any impurities.
By addressing these common issues, you can improve the functionality of your remote control and ensure seamless operation of your portable air conditioner.
AC Not Turning On Or Off
If your Hisense portable air conditioner does not turn on or off, try these troubleshooting steps:
- Check the power supply: Confirm that the AC unit is plugged into a functional power outlet and that the power cord is securely connected.
- Reset the circuit breaker: If the AC unit still does not turn on, inspect the circuit breaker or fuse box to ensure the circuit has not tripped. Reset it if necessary.
- Consult a professional: If the issue persists, it may require professional assistance. Contact Hisense customer support or a certified technician for further troubleshooting and repairs.
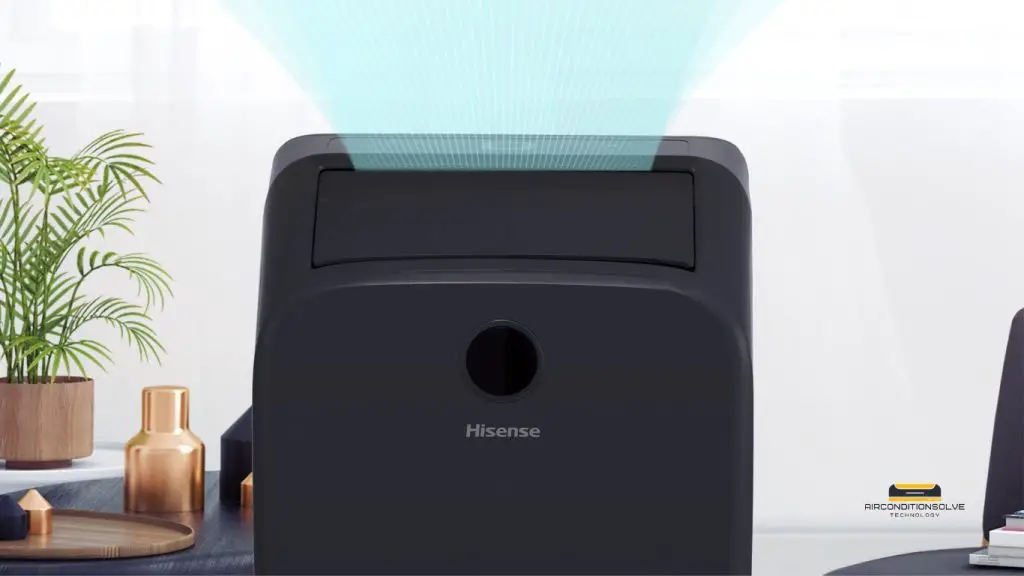
Possible Reasons Why the Compressor of a Hisense Portable Air Conditioner Isn’t Working
If your portable air conditioner’s compressor has stopped functioning, several issues could be at play:
- Electrical Issues: One of the most frequent causes is an electrical problem. A blown fuse or a tripped circuit breaker could be the culprits. It’s advisable to contact a qualified professional to inspect and resolve any electrical issues safely.
- Dirty Condenser Coils: Accumulated dirt and debris on the condenser coils can hinder the compressor’s operations. To clean the coils, use a wet/dry vacuum to remove loose particles, then spray them with soapy water. Allow the solution to sit for 5 to 10 minutes before rinsing and drying the coils with a microfiber cloth.
- Low Refrigerant Levels: Insufficient refrigerant can impact the compressor’s efficiency. It’s essential to have a professional HVAC technician check and replenish refrigerant levels to ensure optimal performance.
- System Contaminants: Foreign substances within the air conditioning system can disrupt compressor function. Regular deep cleaning by an air conditioner servicing company can help prevent and address such issues.
By identifying and addressing these potential problems, you can improve the chances of restoring your air conditioner’s compressor to full functionality.
What Could Cause a Hisense Portable Air Conditioner to Freeze Up?
If your Hisense portable air conditioner is freezing up, several factors might be at play. Understanding these causes can help you troubleshoot and resolve the issue efficiently.
- Clogged Air Filter: When the air filter accumulates dust and debris, air circulation is obstructed, leading to the freezing of the unit. To prevent this, regularly inspect the filter and clean it as needed. Simply use a brush and soapy water for effective cleaning.
- Blocked Coils: Dust-covered coils can also lead to ice formation within the unit. To maintain the system’s efficiency, start by vacuuming off loose dirt. Follow this with a spray of soapy water and let it sit for 5 to 10 minutes. Use a soft brush to gently scrub away any remaining grime, then rinse and allow the coils to dry completely.
By addressing these common issues, you can ensure your portable air conditioner runs smoothly without the hassle of ice buildup. Regular maintenance is key to avoiding these problems and prolonging the unit’s lifespan.
Common Error Codes for Hisense Air Conditioners and Their Meanings
When troubleshooting your Hisense air conditioner, understanding the error codes can be incredibly helpful. Each code corresponds to a specific issue, allowing for targeted repairs or adjustments. Below is a breakdown of common error codes and their meanings:
General Issues
- 0: Everything is functioning properly—no issues detected.
- 13: There’s a high temperature in the compressor exhaust, requiring attention.
- 19: The DC compressor has issues with stepping properly, possibly requiring a restart.
Sensor-Related Errors
- 1: The outdoor coil temperature sensor is malfunctioning.
- 14: Problems with the outdoor ambient temperature sensor.
- 33: The room temperature sensor is not working correctly.
- 34: Malfunction detected in the indoor coil temperature sensor.
Communication Failures
- 7: Disruption in general communication within the system.
- 35: Connectivity problems between the wired remote controller and the indoor unit.
- 36: Communication issues between indoor and outdoor units.
- FE: The main control board is having trouble communicating with the wired remote controller.
Component-Specific Errors
- 3: Voltage transformer is experiencing issues.
- 5: The IPM module is activating its protection mode, indicating possible problems.
- 18: The DC compressor isn’t starting as it should.
- 39: Anomalies detected in the indoor fan motor operation.
EEPROM and Board Concerns
- 11: There are issues with the outdoor EEPROM.
- 73: The EEPROM on the panel board is displaying an error.
- 80: Fault detected with the display board.
Protection and Control Alerts
- 6: Over-voltage and under-voltage are being controlled within the system.
- 15: The compressor housing temperature needs regulation.
- 16: Antifreeze conditions or overload concerns are being controlled automatically.
Additional Sensor and Controller Issues
- 81: A room sensor error has occurred.
- F1: The temperature sensor on the remote control is not functioning properly.
- F3: Humidity readings from the remote control are unreliable.
Use this guide to identify and address specific error codes, ensuring your air conditioner functions efficiently and effectively. Regular maintenance and professional consultation can prevent many of these issues from recurring.
Possible Causes for a Non-Functioning Front Display Screen on a Portable Air Conditioner
If the front display screen on your Hisense portable air conditioner stops working, there are several possible reasons behind this issue. Here’s a breakdown of common culprits:
- Dimmed LED Screen: Sometimes, the LED screen may appear non-functional simply because the brightness settings are low. Check the display settings using your remote control to ensure the brightness is adequately set.
- Screensaver Mode Activation: Your air conditioner’s display might enter a screensaver mode. This often means the screen will remain dark until you make any adjustments to the settings, prompting it to light up again.
- Technical Glitches: Occasionally, technical glitches can cause the screen to malfunction. A straightforward fix might be resetting your portable air conditioner, which can often resolve such issues.
By identifying these potential causes, you can troubleshoot the problem more effectively and potentially resolve the issue without needing professional assistance.
How to Change the Temperature Unit on Your Hisense Portable Air Conditioner
Wondering how to switch between Celsius and Fahrenheit on your Hisense portable air conditioner? Follow these simple steps to adjust the temperature unit according to your preference:
- Locate the Remote’s MODE Button
Begin by finding the “MODE” button on your air conditioner’s remote control. - Press and Hold for Three Seconds
Simultaneously press and hold the “MODE” button along with the button used to lower the temperature. Maintain this hold for three seconds. - Observe the Change
After completing these steps, the temperature display should automatically convert from Fahrenheit to Celsius or vice versa, based on its starting unit.
And there you have it! A quick and easy way to switch between temperature units on your Hisense portable air conditioner, ensuring you always have the readings in your preferred unit.
Causes of a Portable Air Conditioner Freezing Up
If your portable air conditioner is freezing up, several common issues may be to blame:
1. Impeded Airflow Due to Filter Issues
A clogged or dirty air filter can severely restrict airflow. When air can’t circulate properly, it leads to internal freezing. To prevent this, consistently inspect your air filter. Clean it routinely with a brush and mild detergent in warm water, ensuring it’s free of dust and debris.
2. Accumulated Dirt on Coils
The evaporator coils in your unit can freeze when covered with dust and grime. This layer prevents proper heat exchange, leading to ice buildup. To clean these coils, start by using a vacuum to remove loose dirt. Follow up with a spray of soapy water. Let it soak for a few minutes before gently scrubbing with a soft brush. Finally, rinse it off and allow it to dry completely.
Additional Factors to Consider
- Low Refrigerant Levels: Reduced refrigerant can cause coils to become too cold and freeze. If you suspect this, it’s best to call a professional technician.
- Thermostat Settings: Setting the temperature too low for extended periods can also cause freezing. Adjust to a moderate setting to avoid this issue.
- Ambient Temperature: Operating your AC in a room that is too cold or has poor insulation can contribute to freezing. Ensure your environment is suitable for air conditioner use.
Regular maintenance and awareness of these potential pitfalls can help keep your portable air conditioner running smoothly and free from ice buildup.
Why Is My Portable Air Conditioner’s Compressor Not Working?
If your portable air conditioner’s compressor isn’t functioning, several potential issues could be the culprit. Here’s a breakdown of common reasons and solutions:
- Electrical Problems: One of the leading causes of compressor malfunction is an electrical issue. Check for a blown fuse or a tripped circuit breaker, which should be handled by a professional electrician to ensure safety.
- Dirty Condenser Coils: Accumulated dirt on the condenser coils can impede performance. To clean these, first remove any loose dirt with a vacuum. Then, apply soapy water, wait for 5 to 10 minutes, and rinse thoroughly before drying with a cloth.
- Refrigerant Levels: Insufficient refrigerant can lead to poor compressor performance. This situation requires the expertise of an HVAC technician to properly assess and refill refrigerant levels.
- System Contaminants: Foreign particles in the system can also disrupt the compressor’s operation. Regular deep cleaning by a professional air conditioning service ensures contaminants are removed and the system runs smoothly.
For best results and to prevent further issues, consider having your air conditioner regularly serviced by experts.
Common Error Codes for Portable Air Conditioners and Their Meanings
When dealing with a portable air conditioner, understanding error codes can be crucial for troubleshooting. Here’s a helpful list of common error codes and what they signify:
General Sensor Issues:
- Error 1: Problem with the outdoor coil temperature sensor, indicating it might not be reading correctly.
- Error 2: Indicates a malfunction with the compressor’s temperature sensor, possibly causing cooling issues.
- Error 14: An issue with the outdoor ambient temperature sensor, which can affect unit performance.
- Error 33: Signals that there is a problem with the room temperature sensor.
- Error 34: Issue with the indoor coil temperature sensor, possibly affecting heat exchange.
- Error 81 & 83: General sensor errors, involving any of the unit’s temperature monitoring systems.
Communication Troubles:
- Error 7: Points to a communication disruption within the unit’s components.
- Error 10: Communication fault between the outdoor unit and the driver module, which might require a reset.
- Error 35: Connection issues between the wired remote controller and the indoor unit.
- Error 36: Disruption between indoor and outdoor components, affecting coordinated operation.
- Error FE: Faulty communication between the main control board and the wired remote controller.
- Error ER: Indicates a failure in communication between the main control board and the display panel.
Component and Electrical Faults:
- Error 3: Voltage transformer problems, potentially affecting power distribution.
- Error 4: Indicates a malfunction in the current transformer.
- Error 5: IPM (Intelligent Power Module) protection has been triggered, due to a power surge or similar issue.
- Error 6: Over or under-voltage detected, suggesting electrical supply issues.
- Error 16: Either antifreeze has been activated, or there is an overload situation.
- Error 18: DC compressor is unable to start, hinting at a mechanical or electrical failure.
- Error 19: DC compressor is out of sync, possibly requiring mechanical adjustment.
EEPROM and Memory Errors:
- Error 11: Trouble with the outdoor EEPROM, a memory component that may impair functionality.
- Error 38: Indicates an issue with the indoor EEPROM.
- Error 73: Problem detected in the EEPROM of the panel board.
- Error F0: Associated with the EEPROM of the wired remote control.
Fan and Motor Issues:
- Error 39: Abnormal indoor fan motor operation, leading to airflow problems.
- Error E4: Indicates a problem with indoor fan speed consistency.
Miscellaneous Errors:
- Error 13: The compressor’s exhaust temperature is too high, which might lead to overheating.
- Error 15: Managing the compressor housing temperature, usually indicating overheating protection.
- Error E2: Evaporator pipe temperature is excessively high.
- Error EA: Communication fault between the display and control board.
Recognizing these error codes can help address operational disruptions in your portable air conditioning unit efficiently, often requiring simple resets or professional repairs.
How to Switch the Temperature Unit on Your Portable Air Conditioner
Changing the temperature unit on your portable air conditioner from Celsius to Fahrenheit, or vice versa, is a simple process. Here’s how you can do it:
- Find the MODE Button on Your Remote: Start by locating the MODE button on your air conditioner’s remote control.
- Activate the Temperature Toggle: Press and hold the MODE button together with the button that decreases the temperature (often represented by a down arrow).
- Wait for the Change: Keep holding both buttons for about 3 seconds. This action will toggle the temperature display between Celsius and Fahrenheit.
That’s it! Your air conditioner should now display the temperature in the unit you prefer. Remember that this method is applicable to many portable air conditioners, though specific models might have slight variations in button labels or procedures. If you encounter issues, it’s advisable to check your user manual for details tailored to your unit.
2. Checking And Cleaning The Filters
One of the most important maintenance tasks for your Hisense portable AC is to regularly check and clean the filters. Clean filters are crucial for ensuring proper functioning of your air conditioner. They not only improve the air quality and cooling efficiency but also prevent the system from overworking, which can lead to higher energy consumption and potential damage to the unit.
Importance Of Clean Filters For Proper Ac Functioning
Clean filters are essential for the efficient operation of your Hisense portable AC. They help in several ways:
- Improved Air Quality: As your AC circulates the air in your room, it passes through the filters. Clean filters trap dust, pollen, pet dander, and other airborne particles, preventing them from recirculating back into the room. This helps in maintaining a cleaner and healthier indoor environment.
- Enhanced Cooling Efficiency: When the filters are clogged with dirt and debris, the airflow is restricted. This puts additional strain on the fan and compressor, making them work harder to cool the room. By cleaning the filters regularly, you ensure maximum airflow and optimum cooling performance, which reduces energy consumption and saves you money on utility bills.
- Extended Lifespan of the AC: A clean filter prevents dust and debris from accumulating on the internal components of the AC. This reduces the risk of overheating and potential damage, thereby increasing the lifespan of your Hisense portable AC.
Step-by-step Guide To Cleaning The Filters
Cleaning the filters of your Hisense portable AC is a simple and straightforward process. Follow these steps:
- Turn off the AC and unplug it from the power source for safety.
- Locate the filter compartment which is usually at the back or side of the AC.
- Open the compartment to access the filters.
- Remove the filters carefully and inspect them for any visible dirt or debris.
- Using a vacuum cleaner or a soft brush, gently remove the accumulated dirt from the filters.
- If the filters are heavily soiled, consider washing them with mild soap and water. Make sure to rinse them thoroughly and allow them to dry completely before reinserting them back into the AC.
- Once the filters are clean and dry, place them back into the compartment, ensuring they are properly aligned and secured.
- Close the filter compartment and plug in the AC.
- Restart the AC and enjoy the improved air quality and cooling efficiency.
How Frequently The Filters Should Be Cleaned
The frequency of cleaning the filters depends on several factors such as usage, indoor air quality, and environmental conditions. However, as a general guideline, it is recommended to clean the filters of your Hisense portable AC every 2-4 weeks.
If you live in a dusty environment or have pets, you may need to clean the filters more frequently. Regularly checking and cleaning the filters ensures optimal performance and extends the lifespan of your AC.
3. Maintaining Adequate Ventilation
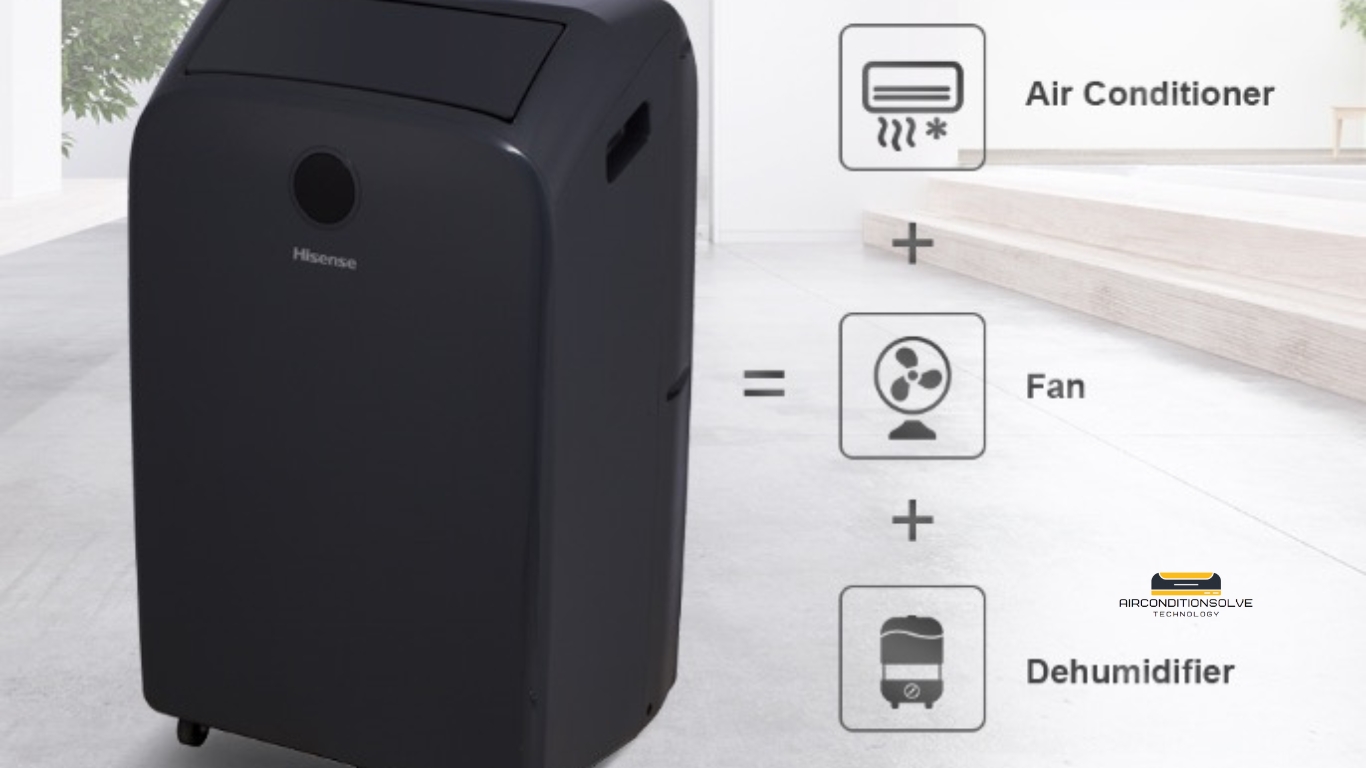
Proper ventilation is crucial for ensuring optimal cooling performance of your Hisense Portable AC. Without adequate airflow, your unit may struggle to provide sufficient cooling, leading to reduced efficiency and potentially even malfunctioning. In this section, we will explore the importance of proper ventilation and provide you with tips on how to ensure proper airflow around your AC unit.
Importance Of Proper Ventilation For Optimal Cooling
A well-ventilated environment is key to maximizing the cooling capabilities of your Hisense Portable AC. Without proper ventilation, the hot air generated by the unit cannot escape efficiently, making it difficult for the AC to effectively cool your space. Inadequate ventilation can also lead to the accumulation of condensation and moisture, which may result in mold growth and other issues.
To prevent these problems and ensure optimal cooling performance, it is crucial to maintain adequate ventilation in the vicinity of your portable AC unit.
How To Ensure Proper Airflow Around The AC
To ensure proper airflow around your Hisense Portable AC, follow these tips:
- Place the AC unit at least 20 inches away from any obstructions, such as walls, furniture, or curtains. This allows for unrestricted airflow and prevents the unit from recycling its own exhaust air.
- Consider using a stand or shelf to elevate the AC unit, allowing air to circulate freely underneath it.
- Remove any objects that may obstruct the airflow, such as plants, decorations, or clutter.
- Keep doors and windows closed in the room where the AC is operating to maintain a controlled environment.
- Regularly clean the air filters of your portable AC unit to ensure optimal airflow. Refer to the manufacturer’s instructions for proper maintenance.
By adhering to these guidelines, you can ensure that your Hisense Portable AC receives the necessary airflow for efficient cooling, helping to prolong its lifespan and enhance its overall performance.
Remember, maintaining proper ventilation around your portable AC unit is crucial for optimal cooling efficiency. By following the tips outlined above, you can ensure that your Hisense Portable AC performs at its best and provides you with a cool and comfortable living environment.
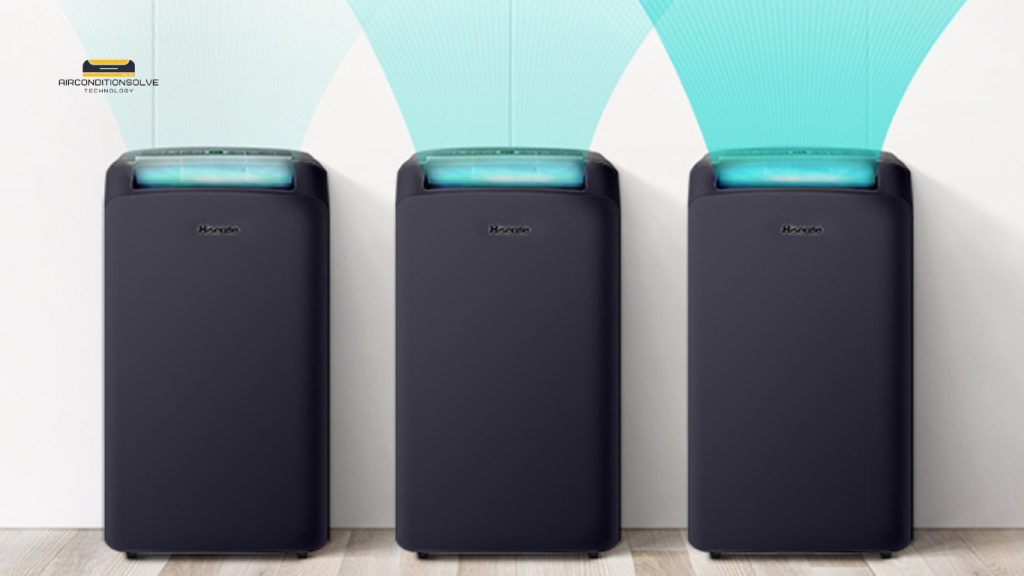
4. Troubleshooting Electrical Issues
Problems with the electrical components of your Hisense portable AC unit can be frustrating, but luckily, many issues can be resolved with a little troubleshooting. In this section, we will discuss the most common electrical problems that you may encounter and their solutions.
1. Resetting Your Hisense Portable Air Conditioner
After ensuring the circuit breaker is properly set, the next step involves resetting the portable air conditioner itself. This process can help resolve common issues you might face during regular use:
- Power Down: Turn off the air conditioner and unplug the power cord from its socket. This action helps cut off the power supply completely, ensuring a fresh start.
- Wait Time: Allow the unit to remain unplugged for about 30 seconds. This pause is crucial as it gives the system time to reset internally.
- Reconnect: Plug the power cord back into the socket and power on the unit. This step re-establishes the electrical connection and allows the air conditioner to reboot its operations.
By following these steps, you can effectively reset both the power supply and the air conditioning unit, addressing a wide range of potential issues efficiently.
2. Resetting The Circuit Breaker
If your Hisense portable AC suddenly stops working or loses power, the first step is to check the circuit breaker. The circuit breaker is designed to protect against electrical overloads that can cause damage or fire hazards. To reset the circuit breaker:
- Locate your circuit breaker panel. It is usually found in the basement, utility room, or garage.
- Open the panel door and look for the breaker that corresponds to the air conditioner circuit. It is often labeled as “AC” or “Air Conditioner”.
- If the breaker is in the “Off” position, switch it to the “On” position. If it is already in the “On” position, switch it to “Off” and then back to “On” to reset it.
- Wait for a few minutes to allow the air conditioner to reset before turning it back on.
By following these steps, you can address basic issues with your Hisense portable air conditioner, ensuring it runs smoothly and efficiently.
3. Common Electrical Problems And Their Solutions
This section will cover some common electrical problems that may occur with your Hisense portable AC and their solutions:
| Electrical Problem | Solution |
|---|---|
| The AC unit does not turn on at all. | Check if the power cord is securely plugged into the power outlet and the AC unit. Also, ensure that the circuit breaker is in the “On” position and has not tripped. |
| The AC unit keeps tripping the circuit breaker. | There may be an electrical overload. Try unplugging other devices on the same circuit and see if the AC functions properly. If the problem persists, contact a qualified electrician. |
| The AC unit emits a burning smell. | Immediately turn off the AC unit and unplug it. There may be a wiring issue or other electrical problem that could pose a fire hazard. Consult a professional technician to inspect and repair the unit. |
By following these troubleshooting steps and solutions, you can resolve many common electrical issues with your Hisense portable AC unit. However, if the problem persists or you are unsure about performing any electrical repairs yourself, it is always best to seek help from a qualified technician.
5. Contacting Hisense Support
For troubleshooting your Hisense portable AC, reach out to Hisense Support by submitting a request through their contact form or by calling their customer service hotline. They are available to assist you with any issues you may encounter with your appliance.
How To Reach Out To Hisense Customer Support
If you encounter any issues with your Hisense portable air conditioner and require assistance, reaching out to Hisense customer support is your best course of action. Their support team is readily available to help you troubleshoot and resolve any problems you may be experiencing.
There are several ways to reach out to Hisense customer support:
- Phone: You can contact Hisense support via phone by calling their toll-free number: 1-800-555-5555. This allows for direct communication with a support representative who can guide you through the troubleshooting process.
- Email: Another option is to send an email to Hisense support at [email protected]. Make sure to provide a detailed explanation of the issue you are facing, as well as any relevant information such as the model number and serial number of your portable air conditioner.
- Live Chat: Hisense also offers a live chat feature on their website, allowing you to connect with a support agent in real-time. This option can be particularly convenient if you prefer instant messaging or if you have any quick questions or concerns.
What Information To Provide When Seeking Assistance
When reaching out to Hisense customer support for assistance, it is essential to provide them with the necessary information to help diagnose and resolve the issue effectively. Here are some important details to include:
- Model number: Locate the model number of your Hisense portable air conditioner, typically found on the unit’s label or in the owner’s manual. This information helps the support team identify the specific product you have and provide accurate guidance.
- Serial number: Alongside the model number, include the serial number of your portable air conditioner. This unique identifier enables Hisense support to access additional information about your unit if needed.
- Description of the issue: Provide a clear and concise description of the problem you are facing. Include any relevant symptoms, error messages, or unusual behaviors that you have noticed. The more details you provide, the better equipped the support team will be to assist you.
- Steps taken so far: Mention any troubleshooting steps you have already attempted. This information helps prevent redundancy and allows the support team to provide targeted advice.
Warranty Coverage And Repair Options
Before seeking assistance from Hisense customer support, it is important to familiarize yourself with the warranty coverage and repair options available for your portable air conditioner.
Hisense provides a limited manufacturer’s warranty for their products, which typically covers defects in materials and workmanship for a specific period, such as one year from the date of purchase. Warranty terms may vary, so consult your product documentation to determine the exact coverage and duration applicable to your unit.
If your Hisense portable air conditioner is still within the warranty period, the support team may guide you through troubleshooting steps or arrange for a repair or replacement, depending on the nature of the issue.
If your warranty has expired or the issue is not covered under warranty, Hisense customer support can provide information on repair options and recommend authorized service centers in your area. They may also assist in obtaining replacement parts if necessary.
Remember to keep any relevant purchase receipts or documents in a safe place, as they may be required when seeking warranty coverage or repairs.
Frequently Asked Questions Of Hisense Portable Ac Troubleshooting
What Are The Common Issues With Hisense Portable Ac?
Some common issues with Hisense portable AC include insufficient cooling, unusual noises, and water leakage. It is important to troubleshoot these issues to ensure optimal performance and efficiency of the AC unit.
Why Is My Hisense Portable Ac Not Cooling Enough?
There could be several reasons why your Hisense portable AC is not cooling enough. Check if the air filter is clean, the thermostat is set correctly, and the room temperature is within the AC’s operating range. Additionally, make sure there are no obstructions blocking the air flow and that the unit is properly sized for the room.
How Can I Fix The Water Leakage From My Hisense Portable Ac?
If your Hisense portable AC is leaking water, try cleaning the drain pan and drainage tube to remove any clogs or debris. Make sure the unit is on a level surface and that the drainage tube is properly connected. If the problem persists, it is recommended to contact a professional technician for further assistance.
Addressing Draining Issues
Your portable air conditioner naturally produces condensation during the cooling process, so improper draining can impact its performance. Here are some steps to ensure proper drainage:
- Check for Clogs: The drain line might be clogged, preventing water from flowing smoothly. Use a wet/dry vacuum to remove any loose debris. For a thorough clean, flush the line with soapy water and use a long, flexible brush or pipe cleaner if needed.
- Empty the Drain Pan: If your unit includes a drain pan, it’s important to empty it regularly. Inspect the pan for any stains or damage. If you notice any buildup, scrub it off with a brush and soapy water.
- Ensure Proper Setup: Verify that the air conditioner is placed on a level surface to prevent water from pooling improperly. Double-check that the drainage tube is securely connected to avoid leaks.
Following these steps can help maintain your air conditioner’s efficiency and prevent further issues. However, if the water leakage continues despite these efforts, consider reaching out to a professional technician for assistance.
Maintenance Tips
To keep your Hisense portable AC in top condition, consider the following maintenance tips:
- Frequency:
- Clean the filter every two weeks during heavy use.
- Clean the coils every month or two.
- Signs it Needs Cleaning:
- Reduced airflow
- Unpleasant odors
- Increased energy bills
- Regular Maintenance Schedule:
- Mark your calendar to remind yourself to clean the unit regularly.
Conclusion
Troubleshooting issues with your Hisense portable AC can be a frustrating task. However, by following the steps outlined in this blog post, you can effectively diagnose and resolve common problems. Remember to check the power supply, clean the filters, and adjust the settings based on the room’s temperature.
With these tips in mind, you can enjoy a cool and comfortable environment all summer long.
By following this guide, you’ll keep your Hisense portable AC running smoothly and efficiently, ensuring a comfortable and clean home environment.

