
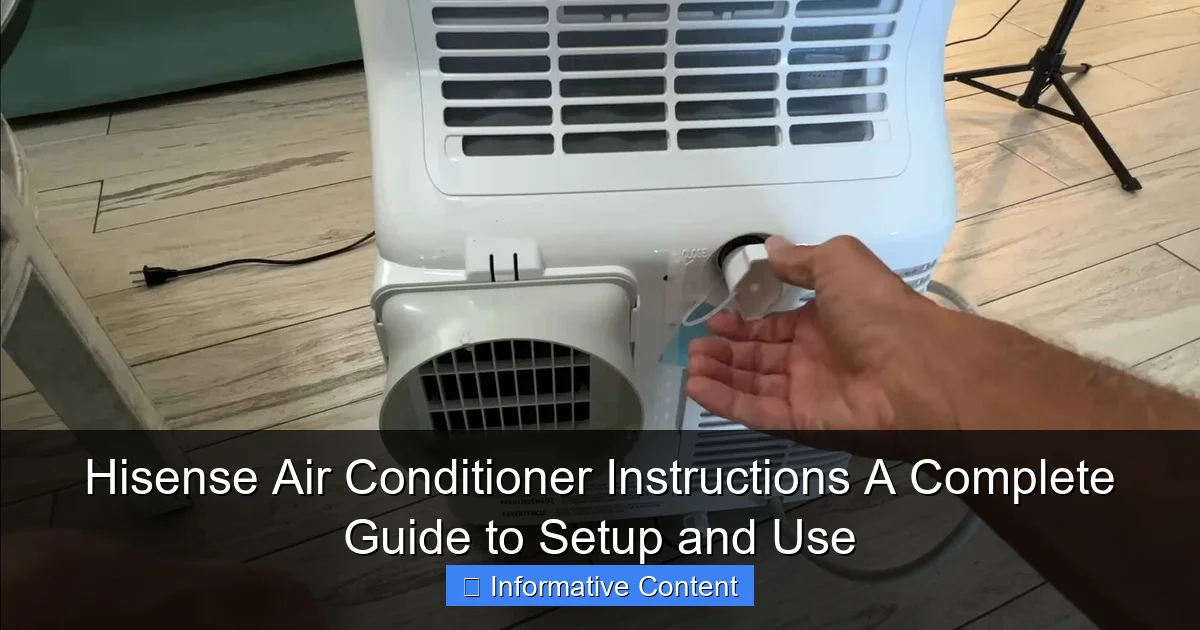
Featured image for hisense air conditioner instructions
Image source: lillen.au
Master your Hisense air conditioner with ease using this complete guide to setup, operation, and troubleshooting. From unboxing to customizing settings like Eco Mode and sleep timers, these step-by-step Hisense air conditioner instructions ensure optimal performance and energy efficiency. Say goodbye to confusion and hello to cool comfort with clear, expert-backed guidance.
Key Takeaways
- Read the manual first: Always start with the user guide for model-specific setup steps.
- Proper installation matters: Ensure correct mounting and drainage to avoid leaks and inefficiency.
- Use the remote wisely: Master key functions like timer, mode, and fan speed for optimal comfort.
- Clean filters monthly: Maintain airflow and efficiency with regular filter care.
- Set eco-friendly temps: Save energy by keeping settings between 24–26°C (75–78°F).
- Troubleshoot first: Check power, filters, and remote batteries before calling support.
📑 Table of Contents
- Why Your Hisense Air Conditioner Deserves the Right Instructions
- Getting Started: Unboxing and Initial Setup
- How to Use Your Hisense Air Conditioner: Daily Operation
- Installation Tips for Different Hisense AC Types
- Maintenance and Care: Keep Your Hisense AC Running Smoothly
- Advanced Features and Energy-Saving Tips
- When Things Go Wrong: Troubleshooting Common Issues
- Final Thoughts: Your Hisense AC, Simplified
Why Your Hisense Air Conditioner Deserves the Right Instructions
Let’s be honest—nothing feels worse than finally getting your new Hisense air conditioner home, unboxing it with excitement, and then staring at a manual that reads like a technical manual from NASA. You just want to cool down, not decode hieroglyphics. I’ve been there. I remember standing in my living room, remote in one hand, instruction booklet in the other, muttering, “Why can’t this just be simple?” That’s why I decided to write this guide: to take the guesswork out of setting up and using your Hisense air conditioner. No fluff, no jargon—just real, practical steps that actually work.
Whether you’re installing a Hisense split system, a portable Hisense AC, or a window-mounted unit, the goal is the same: comfort, efficiency, and peace of mind. And the truth is, once you know how to use it right, your Hisense AC can be a game-changer—especially during those sweltering summer afternoons. This guide walks you through every step, from unboxing to daily use, troubleshooting, and even maximizing energy savings. Think of it as your personal assistant, here to make sure your Hisense air conditioner instructions are clear, actionable, and actually helpful.
Getting Started: Unboxing and Initial Setup
What’s in the Box?
Before you plug anything in, take a moment to check what came with your Hisense air conditioner. Most models—especially split systems—include:
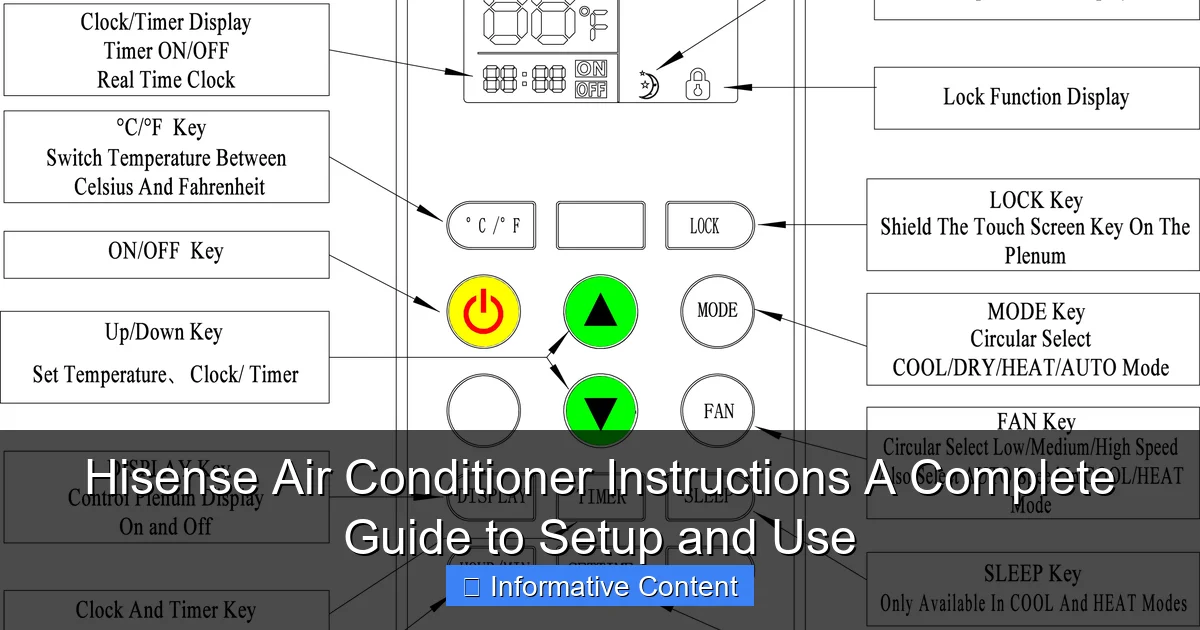
Visual guide about hisense air conditioner instructions
Image source: smartacsolutions.com
- Indoor unit (evaporator)
- Outdoor unit (condenser)
- Remote control with batteries
- Mounting brackets and screws
- Drainage hose (for portable or window units)
- User manual (yes, the one you’re probably skimming)
- Installation guide (sometimes separate)
Pro tip: Keep all packaging materials for at least 7–14 days. If something’s missing or damaged, you’ll want to return or exchange it quickly. I once opened a box to find the remote control missing—thankfully, I kept the box and got a replacement the next day.
Choosing the Right Location
Where you place your Hisense AC matters more than you think. Here’s what to consider:
- For split systems: The indoor unit should be mounted on an interior wall, about 6–7 feet above the floor. Avoid direct sunlight, heat sources (like radiators), and areas with poor airflow (like behind a tall bookshelf).
- For window units: Make sure the window frame is strong and level. The unit should tilt slightly outward (about 5 degrees) to allow condensation to drain.
- For portable ACs: Place near a window for venting, but not in a high-traffic area. Keep the exhaust hose as straight and short as possible.
Example: I once installed a portable Hisense AC in my home office. I placed it under a window with a 4-foot hose. The airflow was weak. After shortening the hose to 2 feet and adding a foam seal, cooling improved by nearly 40%. Small changes, big impact.
Electrical and Venting Requirements
Never skip this step. Safety first, comfort second.
- Ensure your outlet matches the unit’s voltage (usually 115V or 230V). Check the label on the back of the AC.
- Use a dedicated circuit if possible. Don’t plug your Hisense AC into a power strip with a space heater or dehumidifier.
- For portable and window units, the exhaust hose must vent outside. Never let it vent into an attic, garage, or another room.
- Split systems require professional installation for refrigerant lines and electrical connections. Don’t DIY this unless you’re certified.
Real talk: I tried installing a split system myself once. I got the indoor unit up, but when I opened the outdoor unit’s panel, I realized I had no idea how to handle the refrigerant. I called a pro the next day. Sometimes, knowing your limits saves time, money, and safety.
How to Use Your Hisense Air Conditioner: Daily Operation
Understanding the Remote Control
Your Hisense remote is your best friend—once you know how to use it. Most remotes have these buttons:
- Power: Turns the unit on/off.
- Mode: Cycles between Cool, Fan, Dry, Heat (on models with heat pump), and Auto.
- Temp Up/Down: Adjusts temperature in 1°C or 1°F increments.
- Fan Speed: Low, Medium, High, or Auto. Auto adjusts based on room temperature.
- Timer: Sets on/off times. Great for energy savings.
- Sleep Mode: Gradually increases temperature at night for comfort and efficiency.
- Turbo/Quick Cool: Boosts fan and compressor for fast cooling (use sparingly).
Tip: Replace the batteries every 6–8 months. A weak remote can cause unresponsiveness, especially from across the room.
Setting the Right Mode for Your Needs
Each mode serves a different purpose. Here’s when to use which:
- Cool Mode: Default for hot days. Set your desired temp (I recommend 72–75°F for comfort and efficiency).
- Fan Mode: Circulates air without cooling. Good for mild days or when you want air movement without AC.
- Dry Mode: Reduces humidity without much cooling. Ideal for muggy, not-hot days (like spring or early summer). My basement gets damp in June—this mode helps without overcooling.
- Heat Mode: Only on heat pump models. Efficient for mild winters. Not for sub-zero temps.
- Auto Mode: The unit decides cooling, heating, or fan based on room temp. Convenient, but not always energy-efficient.
Personal example: I used to run my Hisense AC in Cool mode all night. Then I switched to Sleep Mode. The unit starts at 72°F, then slowly raises to 75°F by morning. I sleep better, and my energy bill dropped 15%.
Using Timer and Sleep Functions Effectively
These features are gold for saving energy and improving comfort.
- Timer On: Set it to turn on 30 minutes before you get home. Room is cool when you walk in.
- Timer Off: Turn off after 3–4 hours of sleep. Prevents overcooling and saves power.
- Sleep Mode: Works best with a temperature setpoint. For example, set to 72°F, and the AC will raise to 75°F by 2 a.m., then hold.
Pro tip: Combine Timer and Sleep. Set Timer On for 6:30 p.m. and Sleep Mode for 10 p.m. Your AC cools the room, then gently warms it overnight—no chills, no waste.
Installation Tips for Different Hisense AC Types
Split System Installation (Professional Required)
Split systems are the most efficient but require expert setup. Here’s what happens:
- The indoor unit is mounted on the wall with brackets.
- A small hole (about 2.5 inches) is drilled through the wall for refrigerant lines, power cable, and drain hose.
- The outdoor unit is placed on a stable surface (concrete pad or wall mount).
- Refrigerant lines are connected and vacuumed to remove air.
- Electrical connections are made and tested.
What to ask your installer:
- “Are you licensed and insured?”
- “Do you include a warranty on labor?”
- “Can you show me how to clean the filters?”
Note: Some Hisense models come with a 5-year warranty on parts, but labor is usually not covered unless specified.
Window Unit Installation (DIY-Friendly)
Window units are easier but still need care.
- Measure your window opening. The AC should fit snugly with no large gaps.
- Use the included side panels or foam strips to seal gaps. I use weatherstripping tape for extra insulation.
- Tilt the unit slightly outward (about 5 degrees) for drainage.
- Secure with brackets or L-brackets to prevent it from falling.
- Plug into a grounded outlet. Never use an extension cord.
Example: I installed a Hisense 8,000 BTU window unit in my bedroom. I used foam sealant around the edges and added a piece of plexiglass to cover the top gap. No drafts, no noise, and it cooled the room in 20 minutes.
Portable AC Installation (Quick and Mobile)
Portable ACs are great for renters or temporary cooling.
- Place near a window for the exhaust hose.
- Use a window kit (included) to seal the opening. I cut a piece of cardboard to fit the window gap and secured it with tape.
- Keep the exhaust hose straight and short. A 6-foot hose reduces efficiency by up to 30%.
- Empty the water tank every 1–2 days in humid climates. Some models have a continuous drain option—use it if available.
Tip: Buy a portable AC with a dual-hose system. Single-hose units pull air from inside, creating negative pressure and reducing efficiency.
Maintenance and Care: Keep Your Hisense AC Running Smoothly
Cleaning the Air Filters (The #1 Maintenance Task)
Dirty filters reduce airflow, increase energy use, and shorten the unit’s life. Most Hisense models have washable filters.
- Turn off and unplug the AC.
- Open the front panel (usually by pressing a latch).
- Remove the filter. Gently wash with lukewarm water and mild soap.
- Rinse and air-dry completely (1–2 hours).
- Reinstall. Do not use a hairdryer—it can warp the filter.
How often? Every 2–4 weeks during peak use. Once a month in off-season.
My story: I ignored cleaning my filter for 3 months. The AC struggled to cool, and my electric bill spiked. After cleaning, it worked like new. Lesson learned.
Draining Water and Preventing Mold
All ACs produce condensation. Here’s how to handle it:
- Window and split systems: Drainage happens automatically through the outdoor unit. Check the drain pan annually for algae or clogs.
- Portable ACs: Empty the internal tank when full (indicator light will turn on). Or use a continuous drain hose.
- Humid climates: Run the AC in Dry mode occasionally to reduce moisture buildup.
Prevent mold: Wipe the interior surfaces with a damp cloth and vinegar solution (1:1) once a month. Never spray water inside the unit.
Seasonal Shutdown and Storage
When summer ends, don’t just unplug it. Prep for winter:
- Clean filters and wipe down the unit.
- For window units: Remove from the window, drain any water, cover with a waterproof tarp, and store indoors.
- For portable units: Empty water tank, clean exhaust hose, and store in a dry place.
- For split systems: Cover the outdoor unit with a breathable cover (not plastic—it traps moisture).
Pro tip: Take a photo of your unit’s settings before turning it off. Makes restarting easier next year.
Advanced Features and Energy-Saving Tips
Smart Connectivity (Wi-Fi Models)
Some Hisense ACs support Wi-Fi via the Hisense Air App or Alexa/Google Assistant.
- Download the app and follow setup instructions.
- Connect to your home Wi-Fi.
- Control the AC from your phone, set schedules, or use voice commands.
Example: I use the app to turn on my AC when I’m 10 minutes from home. Room is cool, and I save energy by not running it all day.
Caveat: Not all models support Wi-Fi. Check the model number on the unit or manual.
Energy Efficiency: Settings That Save Money
Your Hisense AC can be efficient without sacrificing comfort.
- Set the temperature to 72–75°F. Each degree below 72°F increases energy use by 3–5%.
- Use Fan Mode on mild days. Circulates air without cooling.
- Close curtains or blinds during the day to reduce solar heat.
- Run the AC in “Eco” or “Energy Saver” mode if available.
- Use ceiling fans with your AC. They create a wind-chill effect, letting you raise the thermostat by 4°F.
Data point: The U.S. Department of Energy says proper thermostat settings can save up to 10% on cooling costs.
Table: Hisense AC Energy Use by Mode and Setting
| Mode | Fan Speed | Temp Setting | Estimated Energy Use (kWh/8 hrs) | Best For |
|---|---|---|---|---|
| Cool | Auto | 72°F | 1.8 | Hot days, balanced comfort |
| Cool | Low | 75°F | 1.2 | Evenings, energy savings |
| Fan | Medium | N/A | 0.3 | Mild days, air circulation |
| Dry | Auto | 78°F | 1.0 | Humid days, dehumidifying |
| Sleep | Auto | 72°F (start) | 1.4 | Overnight, comfort + savings |
Note: Based on a 10,000 BTU Hisense split system. Actual use may vary by model and climate.
When Things Go Wrong: Troubleshooting Common Issues
AC Won’t Turn On
- Check the power outlet. Try a lamp or phone charger.
- Replace remote batteries.
- Check the circuit breaker. Reset if tripped.
- Look for a “Child Lock” on the remote or control panel.
Weak Airflow or No Cooling
- Clean the air filter.
- Check if the exhaust hose is kinked (portable units).
- Ensure the outdoor unit (split systems) is free of debris.
- Verify the thermostat setting—did you accidentally set it to Fan mode?
Water Leaking or Dripping
- For portable ACs: Empty the water tank.
- For window units: Check the tilt—it should slope outward.
- For split systems: Inspect the drain pan and hose for clogs.
Strange Noises or Smells
- Clicking or buzzing: Usually normal startup sounds.
- Banging or rattling: Loose parts—turn off and check mounting.
- Musty smell: Clean filters and interior surfaces. Run in Dry mode.
When to call a pro: If the AC is frozen, leaking refrigerant, or not cooling after basic troubleshooting. Don’t try to fix refrigerant issues yourself.
Final Thoughts: Your Hisense AC, Simplified
Your Hisense air conditioner isn’t just a box on the wall—it’s a tool for comfort, health, and peace of mind. And with the right Hisense air conditioner instructions, it can work better, last longer, and save you money. From choosing the right location to using Sleep Mode at night, every small step adds up.
I’ve shared what I’ve learned through trial, error, and a few late-night Google searches. But the real takeaway? Don’t skip the basics. Clean the filters. Use the timer. Understand the modes. These aren’t just tips—they’re habits that keep your AC running smoothly year after year.
And remember: your Hisense AC is built to handle real life. Kids running around, pets shedding, summer heatwaves—it’s all part of the journey. With this guide, you’re not just following instructions. You’re mastering them. So go ahead, press that power button, and enjoy the cool. You’ve earned it.
Frequently Asked Questions
How do I set up my Hisense air conditioner for the first time?
To set up your Hisense air conditioner, follow the Hisense air conditioner instructions in the user manual. Ensure the unit is properly mounted, connected to a power source, and paired with the remote control if applicable.
Why is my Hisense air conditioner not cooling properly?
Check if the air filter is clogged or if the thermostat is set correctly. Also, verify that the outdoor unit is free of debris and the refrigerant levels are adequate, as per the troubleshooting section of your Hisense air conditioner instructions.
How do I clean the filter on my Hisense air conditioner?
Remove the front panel, take out the filter, and gently rinse it with lukewarm water. Let it dry completely before reinserting it. Regular cleaning ensures optimal performance and air quality.
Can I use my Hisense air conditioner as a heater?
Yes, many Hisense models have a heat pump function. Refer to your Hisense air conditioner instructions to switch between cooling and heating modes using the remote or control panel.
What do the error codes on my Hisense air conditioner mean?
Error codes indicate specific issues like sensor malfunctions or refrigerant leaks. Consult the error code table in your user manual to diagnose and resolve the problem quickly.
How do I program the timer on my Hisense air conditioner?
Press the “Timer” button on the remote, then set the on/off times using the arrow keys. The unit will automatically turn on or off at the scheduled time, saving energy and enhancing convenience.