
Featured image for haier portable air conditioner instructions
Image source: m.media-amazon.com
Master your Haier portable air conditioner in minutes with our straightforward, step-by-step setup guide designed to get you cooling fast. From unboxing to optimal performance, follow simple instructions for venting, drainage, and remote control pairing—no tools or expertise needed. Say goodbye to complicated manuals and hello to instant comfort.
Key Takeaways
- Read the manual first: Always start with Haier’s instructions for safe, correct setup.
- Check window compatibility: Ensure your window fits the included exhaust hose kit.
- Level the unit: Place on flat surfaces to prevent leaks and ensure efficiency.
- Clean filters regularly: Maintain airflow and cooling performance with monthly cleanings.
- Use a dedicated outlet: Avoid overloading circuits by plugging into its own outlet.
- Drain water frequently: Empty the tank to prevent shutdowns in humid conditions.
📑 Table of Contents
- Why a Portable Air Conditioner Could Be Your Summer Savior
- What You Need to Know Before You Start
- Step-by-Step Setup Guide: Your Haier Portable Air Conditioner Instructions
- Operating Your Haier Portable AC: Modes, Settings & Daily Use
- Troubleshooting Common Haier Portable AC Issues
- Maintenance Tips to Extend Your Haier AC’s Life
- Data Table: Haier Portable AC Models & Key Features
- Final Thoughts: Your Cool, Calm, and Collected Summer
Why a Portable Air Conditioner Could Be Your Summer Savior
It’s one of those sweltering summer days when even your ceiling fan feels like it’s blowing hot soup. You’re sticky, restless, and the thought of cranking up your window unit just isn’t cutting it. That’s when you remember: you have a Haier portable air conditioner sitting in the corner, still in its box. You bought it on sale, hoping it would save you from another sleepless, sweaty night—but now you’re staring at the manual, wondering where to even begin.
Trust me, I’ve been there. The first time I tried setting up my Haier portable AC, I was convinced I’d need an engineering degree. The hoses, the exhaust, the window kit—it all felt like assembling a rocket. But after a few trial-and-error moments (and a slightly melted ice pack), I cracked the code. And now, I want to share that knowledge with you. This guide is all about Haier portable air conditioner instructions made simple—no jargon, no stress, just clear, step-by-step help so you can cool down fast and enjoy your space again.
What You Need to Know Before You Start
Before you dive into setting up your Haier portable air conditioner, let’s take a breath and get familiar with what you’re working with. These units are designed to be user-friendly, but like any appliance, they come with a few quirks. Knowing the basics upfront will save you time, frustration, and maybe even a trip to the hardware store.
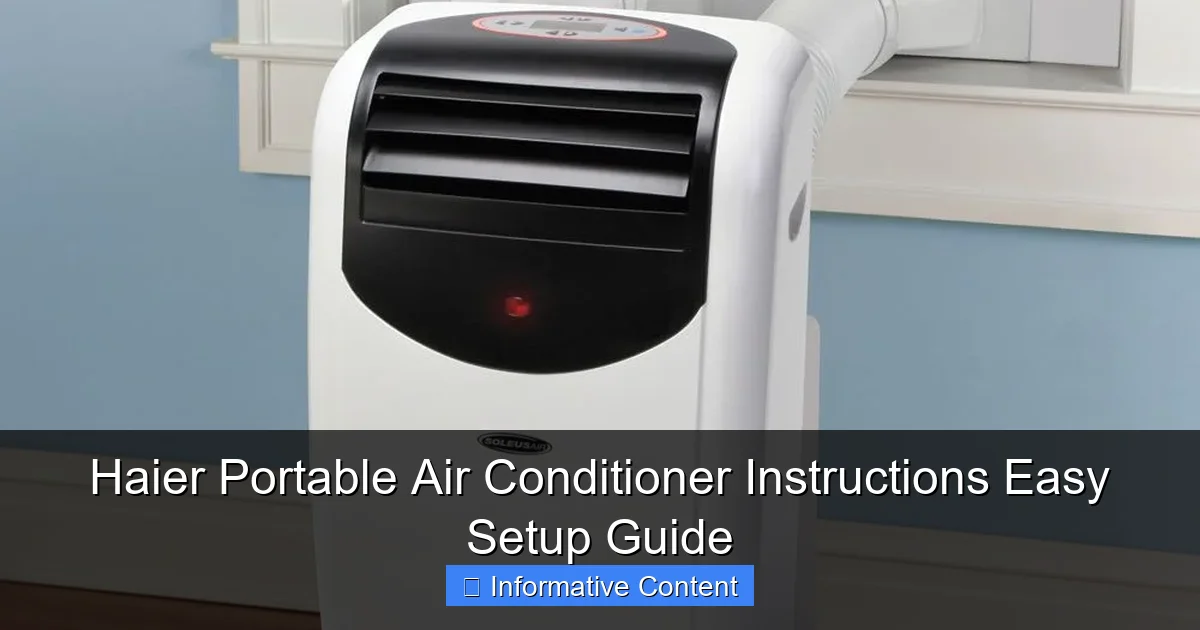
Visual guide about haier portable air conditioner instructions
Image source: i.pinimg.com
Unboxing and Initial Inspection
The first thing you’ll want to do is unbox your Haier unit carefully. I remember opening mine and immediately noticing how sleek and compact it was—perfect for my small studio apartment. Inside the box, you’ll typically find:
- The portable AC unit
- An exhaust hose (usually 5–6 feet long)
- A window vent kit (plastic or foam panels)
- A drainage hose (for manual or continuous drain setup)
- A remote control with batteries
- User manual (yes, keep it handy!)
Pro tip: Lay everything out on the floor and double-check the manual’s packing list. I once forgot to unpack the drainage hose and had to fish it out from the bottom of the box after the unit started beeping like a smoke alarm.
Understanding the Key Components
Let’s break down what each part does so you’re not just blindly connecting things:
- Exhaust Hose: This carries hot air from your room to the outside. It’s crucial—don’t skip this step.
- Window Kit: This creates a seal between your window and the hose. It keeps cool air in and hot air out.
- Drainage Hose: Most Haier models collect condensation. Some can evaporate it automatically, but in humid climates, you may need to drain it manually.
- Air Intake/Exhaust Vents: Located on the back and top. Never block these—your unit needs airflow to work.
- Control Panel & Remote: The brains of the operation. Familiarize yourself with the modes: Cool, Fan, Dehumidify, and Sleep.
Choosing the Right Spot
Where you place your Haier portable air conditioner matters more than you think. Here’s what to consider:
- Near a Window: The exhaust hose needs to reach outside. Ideally, the window should be within 6 feet of the unit.
- Flat, Stable Surface: No wobbly tables. The unit vibrates slightly when running, and you don’t want it tipping over.
- Clear of Obstructions: At least 12–18 inches of space around all sides for airflow.
- Close to a Power Outlet: Use a dedicated 110V outlet. Avoid extension cords—they can overheat.
I learned this the hard way when I tried to run mine through a 20-foot extension cord. The unit kept shutting off because of voltage drop. Not fun.
Step-by-Step Setup Guide: Your Haier Portable Air Conditioner Instructions
Alright, now the fun part: setting it up. I’ll walk you through each step with real-life examples so you can visualize the process. Let’s get your Haier portable AC up and running in under 20 minutes.
Step 1: Install the Exhaust Hose
Attach one end of the exhaust hose to the back of the unit. Most Haier models have a twist-lock or snap-on mechanism. Give it a firm twist clockwise until it clicks. Don’t force it—if it’s not going in, check the alignment.
Then, connect the other end to the window vent kit. The vent kit usually has a round adapter that fits snugly into the hose. Again, twist or snap it in place.
Example: I have a sliding window in my bedroom. I adjusted the window kit panels to fill the gap, then secured the hose adapter. The seal was tight enough that I couldn’t pull the hose out by hand—perfect.
Step 2: Set Up the Window Vent Kit
This is where many people get stuck. The goal is to create an airtight seal so cool air doesn’t leak out and hot air doesn’t sneak in.
- Open your window and place the vent kit panels inside the frame.
- Adjust the panels to fit the width or height of the window (depending on whether it’s vertical or horizontal).
- Secure with the included brackets or Velcro strips.
- Insert the hose adapter into the designated hole in the kit.
Tip: If your window is oddly shaped, use foam weather stripping to seal gaps. I used some leftover foam tape from a door draft stopper, and it worked like a charm.
Step 3: Position the Unit and Plug It In
Roll your Haier unit into place. Most models have smooth casters, so it glides easily. Make sure the hose isn’t kinked or stretched too tight. A gentle curve is fine, but sharp bends can restrict airflow.
Plug the unit directly into the wall outlet. Never use a power strip or extension cord unless it’s a heavy-duty, 14-gauge cord rated for 15 amps.
Step 4: Set Up Drainage (If Needed)
Check your model. Some Haier units, like the HPP08XCR, have a self-evaporating feature that recycles condensation. But in humid areas (looking at you, Florida and Louisiana), you might still need to drain manually.
- Locate the drainage port on the back or bottom of the unit.
- Attach the drainage hose (included) and route it to a bucket or floor drain.
- For continuous drain, place the unit on a slight incline so water flows out easily.
Real talk: I once ignored the “check water level” warning because I thought my unit was self-evaporating. Spoiler: it wasn’t. The unit shut off mid-cooling, and I found a small puddle under it. Lesson learned.
Step 5: Turn It On and Test
Press the power button. You should hear the compressor kick in and feel cool air within a minute. Use the remote or control panel to set your desired temperature (I usually start at 72°F).
Test all modes: Cool, Fan, and Dehumidify. Make sure the exhaust hose is expelling warm air. If it’s blowing cold air, you’ve got a leak in the window seal—go back and fix it.
Operating Your Haier Portable AC: Modes, Settings & Daily Use
Now that your unit is running, let’s talk about how to use it effectively. The Haier portable air conditioner instructions cover a lot, but some features aren’t obvious until you’ve lived with the unit for a while.
Understanding the Control Panel
Most Haier models have a simple digital display with these buttons:
- Power: Turns the unit on/off.
- Mode: Cycles through Cool, Fan, Dehumidify, and Sleep.
- Temp Up/Down: Adjusts temperature in 1°F increments.
- Fan Speed: Low, Medium, High. I use High for quick cooling, then switch to Low for quiet operation.
- Timer: Set the unit to turn on or off after 1–24 hours. Great for cooling your room before you get home.
- Sleep Mode: Gradually adjusts temp and reduces fan speed for comfort during the night.
Best Practices for Daily Use
- Close Doors and Windows: This seems obvious, but I’ve caught myself leaving the bathroom door open while the AC runs. Every open door is a leak in your cooling system.
- Use a Programmable Thermostat: If your model has one, set it to turn off when you leave and on 30 minutes before you return. Saves energy and keeps your space comfortable.
- Clean the Air Filter Monthly: A dirty filter reduces efficiency. Remove it, rinse with water, and let it dry before reinstalling.
- Check the Drain Pan Weekly: Even self-evaporating models collect some water. Empty it if it gets full.
Dealing with Humidity
One of my favorite features is the dehumidify mode. It doesn’t cool as aggressively, but it pulls moisture from the air—perfect for muggy days. I run it in my basement during summer, and it’s like a mini-dehumidifier.
For maximum dehumidification, set the temp to 75°F and fan to Medium. The unit will run longer cycles, removing more moisture.
Troubleshooting Common Haier Portable AC Issues
Even the best appliances have hiccups. Here’s how to handle the most common problems without calling a technician.
Unit Won’t Turn On
- Check the outlet: Plug in another device to test.
- Inspect the power cord: Look for frayed wires or damage.
- Reset the unit: Unplug it for 5 minutes, then plug it back in.
Personal story: My unit wouldn’t turn on after a thunderstorm. I panicked—until I realized the GFCI outlet had tripped. A simple reset fixed it.
Not Cooling Enough
- Check the filter: A clogged filter restricts airflow.
- Inspect the exhaust hose: Make sure it’s not kinked or leaking.
- Close the room: Open doors and windows make it work harder.
- Room size matters: If your unit is undersized for the space, it’ll struggle. Check BTU rating vs. room square footage.
Water Leaking Inside
This usually means the drain pan is full or the drainage hose isn’t properly attached. Shut off the unit, empty the pan, and reattach the hose. If it keeps happening, check for a clog in the drain line.
Strange Noises
A little humming is normal, but loud banging or rattling isn’t. Check that:
- The unit is level and on a flat surface.
- Nothing is vibrating against the walls (like the hose).
- The fan blades aren’t hitting anything.
Maintenance Tips to Extend Your Haier AC’s Life
A little TLC goes a long way. Here’s how to keep your Haier portable air conditioner running smoothly for years.
Monthly Care
- Wash the air filter: Use lukewarm water and mild soap. Let it dry completely.
- Wipe the exterior: A damp cloth removes dust and fingerprints.
- Inspect the exhaust hose: Look for cracks or leaks. Replace if damaged.
Seasonal Storage
When summer ends, don’t just shove your unit in the closet. Do this:
- Drain all water from the unit and hose.
- Clean the filter and interior (if accessible).
- Coil the hoses neatly and store in a dry, cool place.
- Cover with a breathable fabric to prevent dust buildup.
I store mine in a large plastic bin with the manual, remote, and hoses. It’s ready to go next year with zero hassle.
When to Call a Pro
Most issues can be DIYed, but if you notice:
- Refrigerant leaks (oily residue, hissing sounds)
- Electrical issues (sparks, burning smell)
- Compressor failure (unit runs but doesn’t cool)
…it’s time to call a technician. Haier offers a 1-year warranty on parts and labor, so keep your receipt handy.
Data Table: Haier Portable AC Models & Key Features
| Model | BTU Rating | Room Size (sq ft) | Self-Evaporating? | Remote Control? | Energy Efficiency Ratio (EER) | Drain Type |
|---|---|---|---|---|---|---|
| HPP08XCR | 8,000 | 350 | Yes | Yes | 10.5 | Manual/Continuous |
| HPP10XCR | 10,000 | 450 | Yes | Yes | 10.7 | Manual/Continuous |
| HPP12XCR | 12,000 | 550 | Yes | Yes | 10.8 | Manual/Continuous |
| HPP14XCR | 14,000 | 700 | Yes | Yes | 11.0 | Manual/Continuous |
Note: EER measures cooling efficiency. Higher is better. All models include a 24-hour timer and sleep mode.
Choosing the right model depends on your room size and climate. For a small bedroom or home office, the 8,000 BTU model is perfect. For a large living room or open floor plan, go with 12,000+ BTUs.
Final Thoughts: Your Cool, Calm, and Collected Summer
Setting up a Haier portable air conditioner isn’t rocket science—but it does require attention to detail. From choosing the right spot to mastering the control panel, every step matters. And while no appliance is perfect, Haier’s portable units strike a great balance between performance, portability, and ease of use.
After using mine for three summers, I can honestly say it’s one of the best investments I’ve made for my home. No more tossing and turning on hot nights. No more sticky, humid afternoons. Just consistent, reliable cooling—exactly when I need it.
Remember, the key to success is following the Haier portable air conditioner instructions carefully, maintaining your unit regularly, and troubleshooting issues early. With a little patience and this guide, you’ll be enjoying cool, comfortable air in no time.
So go ahead—unbox that unit, set it up, and take back your summer. You’ve got this. And if you ever get stuck? Just think of me, sweating over my own AC, figuring it out one step at a time. We’re all in this together. Stay cool!
Frequently Asked Questions
How do I set up my Haier portable air conditioner for the first time?
To set up your Haier portable air conditioner, place it near a window and power outlet, attach the exhaust hose to the window kit, and ensure proper sealing. Refer to the Haier portable air conditioner instructions for detailed steps on securing the hose and turning on the unit.
Why is my Haier portable AC not cooling properly?
If your AC isn’t cooling, check if the exhaust hose is properly installed and the air filters are clean. Also, ensure the room isn’t too large for the unit’s BTU capacity, as this can affect performance.
Can I use the Haier portable air conditioner without a window kit?
No, the window kit is essential for venting hot air outside. Without it, the unit will recycle warm air, reducing efficiency. Always follow the Haier portable air conditioner instructions for correct venting setup.
How often should I clean the filters in my Haier portable AC?
Clean the filters every 2–4 weeks, depending on usage. Clogged filters restrict airflow and reduce cooling efficiency—remove them, wash with mild soap, and dry before reinstalling.
Does the Haier portable air conditioner require a dedicated circuit?
While not always mandatory, using a dedicated 15-amp circuit is recommended to prevent overloading. Check your model’s manual for specific electrical requirements and safety guidelines.
What do the error codes on my Haier portable AC mean?
Error codes (like E1 or F1) indicate issues like water tank full or sensor faults. Consult the troubleshooting section of your Haier portable air conditioner instructions to identify and resolve the specific error.