
Featured image for ge wall air conditioner repair
Image source: images.homedepot-static.com
Save hundreds on GE wall air conditioner repair with expert DIY tips that tackle common issues like poor cooling, strange noises, and drainage problems—no technician needed. From cleaning clogged filters to checking refrigerant levels and resetting the thermostat, these proven fixes restore efficiency and extend your unit’s lifespan. Regular maintenance and early troubleshooting prevent costly breakdowns and keep energy bills low.
Key Takeaways
- Diagnose first: Identify the issue accurately before attempting repairs to avoid unnecessary costs.
- Clean filters regularly: Prevent airflow issues and improve efficiency with monthly filter maintenance.
- Check thermostat settings: Ensure correct mode and temperature to rule out simple malfunctions.
- Inspect wiring: Look for frayed or loose wires to prevent electrical hazards and system failures.
- Use OEM parts: Always choose genuine GE parts for long-lasting, reliable repairs.
- Schedule professional help: Call experts for refrigerant leaks or compressor issues to ensure safety.
📑 Table of Contents
- Why Your GE Wall Air Conditioner Deserves a Little TLC
- Understanding Your GE Wall Air Conditioner: The Basics
- DIY GE Wall Air Conditioner Repair: Common Issues and Fixes
- Preventive Maintenance: Extend Your Unit’s Lifespan
- Cost-Saving Tips for GE Wall Air Conditioner Repair
- Advanced Troubleshooting: When DIY Isn’t Enough
- Final Thoughts: Keep Your GE Wall AC Running Strong
Why Your GE Wall Air Conditioner Deserves a Little TLC
Let me tell you a story. Last summer, my trusty GE wall air conditioner started making a weird rattling noise. I ignored it for days, hoping it would go away. Big mistake. By the time I called a pro, the compressor had given up the ghost, and I was out $400 for a new unit. Sound familiar? If you’re nodding along, you’re not alone. Wall AC units, especially reliable brands like GE, can last years with proper care. But when they start acting up, many of us panic and either ignore the problem or rush to replace the unit entirely. Here’s the good news: GE wall air conditioner repair doesn’t always mean a costly service call. With a little know-how and some elbow grease, you can tackle many common issues yourself—saving money and extending your unit’s lifespan.
Whether you’re dealing with poor cooling, strange noises, or a unit that won’t turn on, this guide is packed with practical GE wall air conditioner repair tips. I’ve been in your shoes, and I’ve learned the hard way that a little preventive maintenance goes a long way. From simple DIY fixes to recognizing when it’s time to call in a pro, we’ll cover it all. Think of this as your friendly neighborhood repair manual—no jargon, no upselling, just honest advice to keep your home cool and your wallet happy.
Understanding Your GE Wall Air Conditioner: The Basics
Before diving into repairs, it helps to know what you’re working with. GE wall air conditioners are known for their durability and efficiency, but like any appliance, they have quirks. Let’s break down the key components and how they work together.
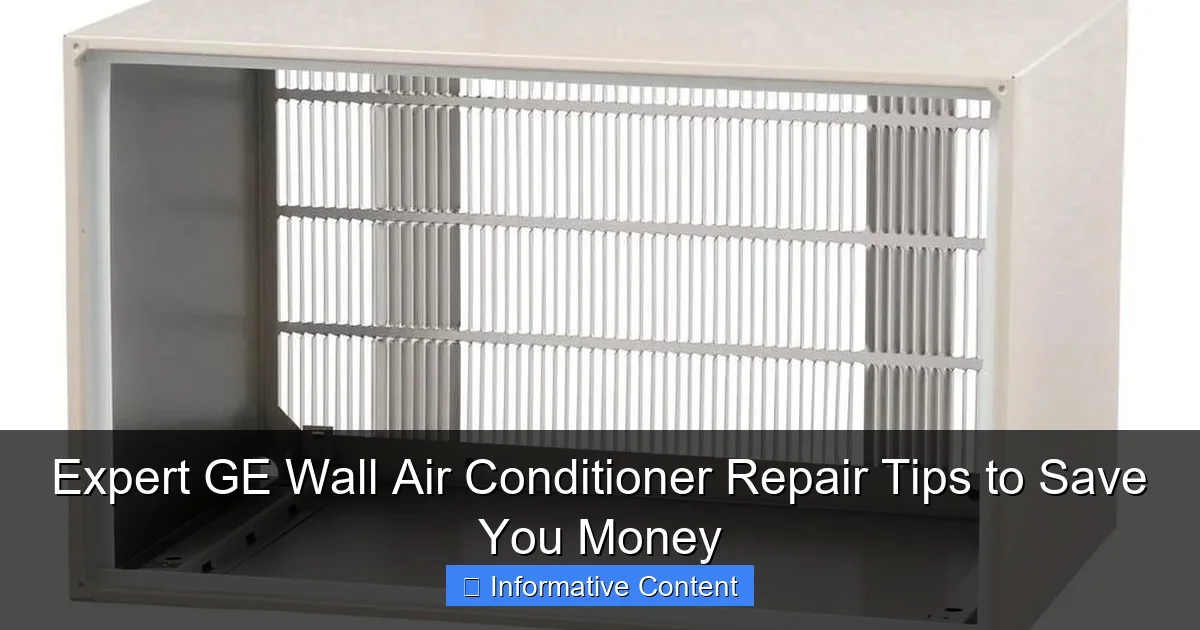
Visual guide about ge wall air conditioner repair
Image source: i.pinimg.com
Key Components and Their Functions
Your GE wall AC is more than just a box on the wall. It’s a mini cooling system with several critical parts:
- Compressor: The heart of the unit, responsible for circulating refrigerant.
- Condenser and Evaporator Coils: These transfer heat from inside your home to the outside.
- Fan Motor: Circulates air across the coils and through your room.
- Air Filter: Traps dust, pollen, and other debris.
- Thermostat: Controls temperature and cycles the unit on/off.
Understanding these parts is the first step in diagnosing issues. For example, if your unit is running but not cooling, the problem might be the compressor, refrigerant levels, or clogged coils. Knowing the basics helps you narrow down the cause and avoid unnecessary repairs.
Common GE Wall AC Models and Their Quirks
GE has several popular wall AC models, each with its own strengths and potential weak spots:
- GE AEL08LY: Compact and energy-efficient, but the fan motor can be noisy if not maintained.
- GE AEL12LZ: Great for medium-sized rooms, but the drain pan sometimes clogs, leading to leaks.
- GE AEL18LY: High cooling capacity, but the compressor is sensitive to voltage fluctuations.
For instance, my AEL12LZ had a persistent drip issue. After some research, I found it was a common problem with this model—the drain pan’s design made it prone to debris buildup. A simple cleaning fixed it. Knowing your model’s quirks can save you time and frustration.
DIY GE Wall Air Conditioner Repair: Common Issues and Fixes
Now, let’s get to the heart of the matter: fixing your GE wall AC yourself. Many common issues are surprisingly easy to resolve with a few tools and a bit of patience.
Problem: Air Conditioner Not Cooling
This is the most dreaded issue. If your GE wall AC is running but blowing warm air, here’s what to check:
- Dirty Air Filter: A clogged filter restricts airflow, reducing cooling efficiency. Remove the filter and clean it with warm water and mild detergent. Let it dry completely before reinstalling.
- Frozen Evaporator Coils: If you see ice on the coils, the unit is overworking. Turn it off, let the ice melt, and check for airflow issues (e.g., blocked vents, dirty coils).
- Low Refrigerant: This requires a pro, but you can check for signs like hissing sounds or oil residue around connections. Never attempt to refill refrigerant yourself—it’s dangerous and often illegal without certification.
Pro Tip: I once spent an hour troubleshooting a “non-cooling” issue only to realize the thermostat was set to “fan” instead of “cool.” Always double-check the settings first!
Problem: Strange Noises (Rattling, Buzzing, Clicking)
Noises can signal anything from loose parts to failing components. Here’s how to diagnose:
- Rattling: Check for loose panels, screws, or debris inside the unit. Tighten any loose fasteners and clear away leaves or twigs from the outdoor side.
- Buzzing: Could indicate electrical issues (e.g., failing capacitor) or a loose fan blade. Turn off power and inspect the capacitor—if it’s bulging or leaking, replace it.
- Clicking: Often a sign of a faulty relay or thermostat. If the unit clicks repeatedly but doesn’t start, this might be the culprit.
Example: My rattling noise turned out to be a loose fan blade. A 5-minute fix with a screwdriver saved me a $100 service call.
Problem: Water Leaks
Leaks can damage walls and floors, so address them quickly:
- Clogged Drain Pan: Algae and mold love damp environments. Pour a mixture of water and vinegar down the drain line monthly to prevent clogs.
- Improper Installation: If the unit isn’t level, water won’t drain properly. Use a level to check and adjust the mounting brackets if needed.
- Frozen Coils: As mentioned earlier, ice buildup can overflow the drain pan. Fix the root cause (e.g., dirty filter) to prevent recurrence.
Problem: Unit Won’t Turn On
If your GE wall AC is completely unresponsive:
- Power Source: Check the outlet and circuit breaker. Plug another device into the outlet to confirm it’s working.
- Thermostat Batteries: Replace them—low batteries can mimic a dead unit.
- Faulty Capacitor: This small component stores energy to start the motor. If it’s failed, the unit won’t start. Test with a multimeter or replace it preemptively if it’s old.
Preventive Maintenance: Extend Your Unit’s Lifespan
Think of your GE wall AC like a car—regular maintenance keeps it running smoothly. Here’s a simple seasonal checklist to prevent costly repairs.
Monthly Maintenance Tasks
- Clean or Replace Air Filters: Do this every 30 days during peak use. A dirty filter can reduce efficiency by up to 15%.
- Inspect Drain Pan and Line: Look for algae growth and clear any blockages. A cup of bleach monthly keeps mold at bay.
- Check for Debris: Remove leaves, dirt, and spider webs from the outdoor unit’s fins.
Seasonal Maintenance Tasks
- Spring Startup: Before the hot season, vacuum the condenser coils and check refrigerant lines for damage.
- Fall Shutdown: Turn off power, clean the entire unit, and cover it with a weatherproof cover to protect it from winter elements.
- Professional Tune-Up: Once a year, consider a pro inspection. They’ll check refrigerant levels, electrical connections, and overall performance. It’s cheaper than an emergency repair.
Real-World Example: A friend of mine skipped maintenance for two years. When her GE unit finally failed, the compressor was beyond repair. The $300 tune-up she skipped would have saved her $600 on a replacement.
DIY vs. Professional Maintenance: When to Call a Pro
Some tasks are best left to experts:
- Refrigerant Handling: Adding or removing refrigerant requires certification and special tools.
- Electrical Repairs: If you’re not comfortable working with high-voltage components, don’t risk it.
- Compressor Replacement: This is a major job involving refrigerant recovery and system recharging.
Rule of Thumb: If it involves opening the sealed refrigerant system or working with live wires, call a pro. Otherwise, DIY is often safe and cost-effective.
Cost-Saving Tips for GE Wall Air Conditioner Repair
Let’s talk money. Repairing your GE wall AC doesn’t have to break the bank. Here are some savvy ways to save.
DIY Repairs: Save Up to 70%
Simple fixes like cleaning coils, replacing capacitors, or fixing loose parts can cost under $50 in parts. Compare that to a $150+ service call, and the savings add up fast.
- Capacitor Replacement: A new capacitor costs $10-$20. Labor for replacement: $100-$200.
- Fan Motor: A replacement motor: $50-$80. Labor: $150-$300.
Example: My neighbor replaced her failing capacitor for $15 and an hour of work. The technician quoted her $175.
Buying Parts: Where to Get the Best Deals
Skip the big-box stores for specialized parts. Try these sources:
- Online Retailers: Amazon, AppliancePartsPros, and RepairClinic offer competitive prices and fast shipping.
- Local HVAC Supply Stores: They often have better expertise and may price-match online deals.
- Used Parts: For older models, check eBay or HVAC salvage yards. Just verify compatibility first.
Warranty and Service Plans: Are They Worth It?
GE offers limited warranties on parts (typically 1-2 years). Check your model’s warranty terms—you might be covered for certain repairs. Extended service plans vary in value:
- Pros: Covers parts, labor, and emergency service.
- Cons: Often exclude wear-and-tear repairs (e.g., capacitor, fan motor). May cost more than the repairs they cover.
Tip: Calculate the plan’s cost vs. potential savings. For a $200 plan, you’d need at least one major repair to break even.
Advanced Troubleshooting: When DIY Isn’t Enough
Sometimes, the problem is more complex. Here’s how to handle advanced issues and know when to throw in the towel.
Refrigerant Leaks and Recharging
If your unit is low on refrigerant, don’t just refill it—find the leak first. Signs include:
- Hissing sounds
- Oil residue on connections
- Reduced cooling capacity
Important: Refrigerant handling is regulated (EPA Section 608 certification required). A pro will use a leak detector, repair the leak, and recharge the system properly.
Compressor Failure
The compressor is the most expensive component to replace. Signs of failure:
- Loud knocking or grinding noises
- Unit runs but doesn’t cool
- Burning smell
If the compressor is dead, weigh the cost of replacement ($800-$1,500) vs. buying a new unit. For older models (10+ years), replacement is often the better option.
Electrical Issues
Faulty wiring, relays, or control boards can be dangerous. If you smell burning, see sparks, or the unit trips the breaker frequently, turn off power immediately and call a pro. Never attempt electrical repairs without proper training.
Data Table: Common GE Wall AC Repair Costs
| Issue | DIY Cost | Professional Cost | When to Call a Pro |
|---|---|---|---|
| Dirty Filter | $0 (clean) / $10 (replace) | $75-$100 | Never |
| Clogged Drain Line | $0 (vinegar/bleach) | $100-$150 | Never |
| Capacitor Replacement | $10-$20 | $100-$200 | If uncomfortable with electrical work |
| Fan Motor | $50-$80 | $150-$300 | If refrigerant lines must be moved |
| Refrigerant Leak | Not recommended | $200-$500 (leak repair + recharge) | Always |
| Compressor | Not recommended | $800-$1,500 | Always |
Final Thoughts: Keep Your GE Wall AC Running Strong
Repairing your GE wall air conditioner isn’t just about fixing a problem—it’s about saving money, reducing waste, and keeping your home comfortable. From simple tasks like cleaning filters to knowing when to call a pro for refrigerant leaks, every step you take adds up. I’ve learned that a little preventive maintenance goes a long way. My own unit, once on its last legs, is now running better than ever thanks to regular care and a few smart DIY fixes.
Remember, not every issue is a crisis. Many common problems—noisy fans, poor cooling, leaks—can be resolved with basic tools and a bit of patience. But don’t hesitate to call in the experts for complex electrical or refrigerant work. Your safety and the unit’s longevity are worth the cost. By following these GE wall air conditioner repair tips, you’re not just extending your appliance’s life—you’re also making a smarter, more sustainable choice for your home and wallet. Now, go give your trusty AC the love it deserves, and stay cool all summer long!
Frequently Asked Questions
What are common signs that my GE wall air conditioner needs repair?
If your GE wall air conditioner is making unusual noises, not cooling properly, or frequently cycling on and off, it may need repair. These symptoms often indicate issues with the compressor, thermostat, or airflow system.
How can I troubleshoot my GE wall air conditioner before calling a technician?
Start by checking the thermostat settings, ensuring the air filter is clean, and verifying that vents are unobstructed. You should also inspect the circuit breaker to rule out electrical issues before seeking GE wall air conditioner repair.
Why is my GE wall AC unit leaking water inside the room?
Water leakage is often caused by a clogged drain line, frozen evaporator coils, or improper installation. Cleaning the drain line and checking for ice buildup can help resolve the issue and prevent water damage.
Can I perform GE wall air conditioner repair myself, or should I hire a professional?
Simple tasks like replacing filters or cleaning coils can be done DIY, but complex issues like refrigerant leaks or electrical problems require a certified technician. Attempting advanced GE wall air conditioner repair without experience can cause further damage.
How often should I service my GE wall air conditioner to avoid repairs?
It’s recommended to service your GE wall air conditioner at least once a year, ideally before the cooling season begins. Regular maintenance helps prevent breakdowns and extends the unit’s lifespan.
What should I do if my GE wall AC unit won’t turn on at all?
First, check the power supply, thermostat settings, and circuit breaker. If everything appears normal but the unit still won’t start, there may be an internal electrical fault requiring professional GE wall air conditioner repair.