
Featured image for ge wall air conditioner filter
Image source: guideabouthvac.com
Keeping your GE wall air conditioner filter clean is essential for maintaining optimal performance and improving indoor air quality. Regularly replacing or cleaning the filter every 1-3 months helps reduce allergens, dust, and pollutants while boosting energy efficiency. Neglecting this simple maintenance task can lead to reduced airflow, higher energy bills, and potential system damage—making filter care a small step with big rewards.
Key Takeaways
- Replace filters every 3 months to maintain optimal airflow and efficiency.
- Use genuine GE filters for perfect fit and superior air quality.
- Clean reusable filters monthly with mild soap and water for longevity.
- Check filter size carefully before purchasing to avoid installation issues.
- Upgrade to HEPA filters for enhanced allergen and particle removal.
- Inspect for mold or debris during changes to prevent health risks.
- Set maintenance reminders to ensure timely filter replacements and peak performance.
📑 Table of Contents
- GE Wall Air Conditioner Filter: Essential Tips for Cleaner Air
- Why the GE Wall Air Conditioner Filter Matters
- How to Locate and Remove Your GE Wall Air Conditioner Filter
- Types of GE Wall Air Conditioner Filters
- How Often Should You Change or Clean Your GE Wall Air Conditioner Filter?
- Step-by-Step Guide to Cleaning or Replacing Your Filter
- Tips for Maintaining Optimal Air Quality with Your GE Wall AC
- Conclusion
GE Wall Air Conditioner Filter: Essential Tips for Cleaner Air
There’s nothing quite like the relief of walking into a cool, refreshing room on a sweltering summer day. But what if that cool air is carrying dust, allergens, or even mold spores? That’s where your GE wall air conditioner filter comes in—quietly working behind the scenes to keep your indoor air clean and your system running efficiently. I remember the first time I opened up my GE wall AC unit and saw how dirty the filter had gotten in just a few weeks. It was eye-opening. That single moment made me realize how much I’d been neglecting a simple but crucial part of my home’s comfort system.
Your GE wall air conditioner isn’t just about cooling—it’s also about air quality. And the filter is the first line of defense. A clean filter traps dust, pollen, pet dander, and other airborne particles before they circulate through your home. But many people overlook regular maintenance, either because they forget or don’t realize how much of a difference it makes. Over time, a clogged filter can reduce airflow, strain the motor, and even lead to higher energy bills. Worse, it can push dirty air back into your living space, affecting your health and comfort. The good news? Keeping your GE wall air conditioner filter in top shape is easier than you think—and the benefits are immediate.
Why the GE Wall Air Conditioner Filter Matters
You might be thinking, “It’s just a filter—how important can it really be?” The truth is, it’s more important than you realize. Think of your GE wall air conditioner filter like the lungs of your cooling system. Just as your lungs filter the air you breathe, the AC filter cleans the air that circulates through your home. When it’s working properly, you get cleaner, healthier air. When it’s clogged or dirty, your system has to work harder, and your indoor air quality suffers.
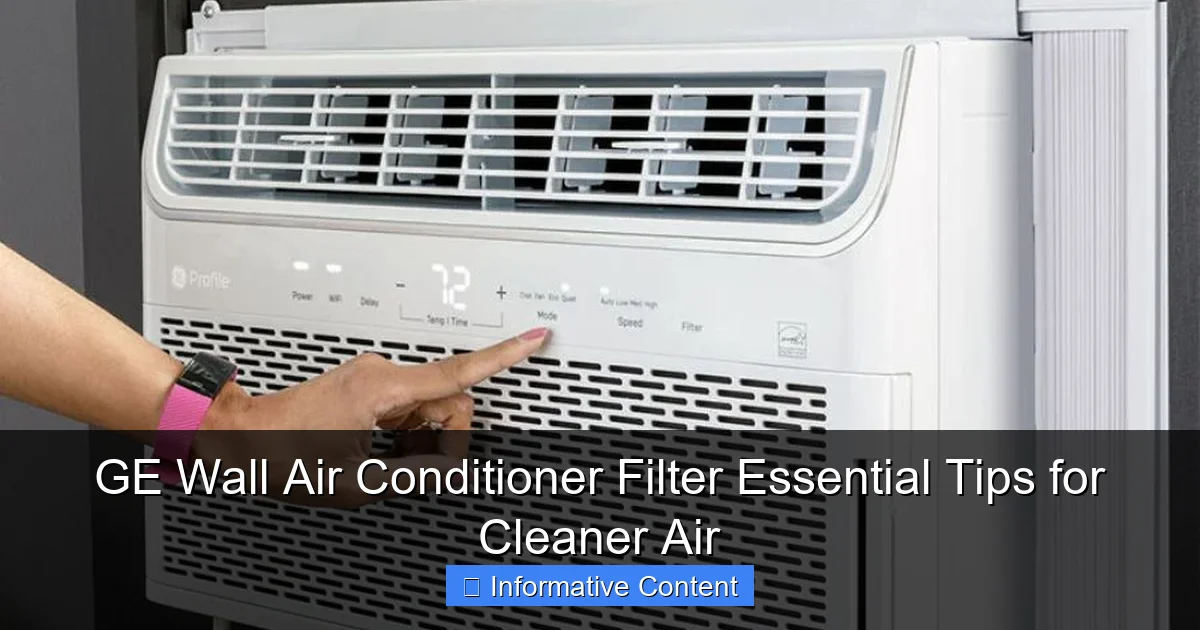
Visual guide about ge wall air conditioner filter
Image source: guideabouthvac.com
Impact on Indoor Air Quality
Indoor air can be up to five times more polluted than outdoor air, according to the Environmental Protection Agency (EPA). That’s because homes trap pollutants like dust, mold spores, pet dander, and volatile organic compounds (VOCs) from cleaning products and furniture. A clean GE wall air conditioner filter helps remove these contaminants, especially if you or your family members suffer from allergies, asthma, or other respiratory conditions. For example, a friend of mine noticed her daughter’s nighttime coughing improved dramatically after she started changing the filter monthly. It wasn’t a miracle—just a simple fix that made a big difference.
Energy Efficiency and System Longevity
A dirty filter restricts airflow, forcing your air conditioner to work harder to maintain the desired temperature. This not only increases your energy consumption but also puts extra stress on the compressor and fan motor. Over time, this can lead to premature wear and costly repairs. In fact, the U.S. Department of Energy estimates that replacing a dirty filter can lower your air conditioner’s energy consumption by 5% to 15%. That might not sound like much, but over a summer, it can add up to significant savings. Plus, a well-maintained system lasts longer—potentially saving you thousands in replacement costs down the road.
Preventing Odors and Mold Growth
Another often-overlooked benefit of a clean filter is odor control. When dust and debris accumulate on a dirty filter, they can start to smell musty—especially in humid climates. This odor then gets blown back into your room every time the AC runs. Worse, if moisture builds up on the filter (which can happen in high-humidity environments), it creates a breeding ground for mold and mildew. These not only produce unpleasant smells but can also release spores into the air, triggering allergies or respiratory issues. Regularly replacing or cleaning your GE wall air conditioner filter helps prevent these problems before they start.
How to Locate and Remove Your GE Wall Air Conditioner Filter
Finding and removing the filter in your GE wall air conditioner is simpler than you might think—but it’s not always obvious if you’ve never done it before. The location can vary slightly depending on your model, but the process is generally straightforward. Let’s walk through it step by step.
Step-by-Step Guide to Accessing the Filter
Most GE wall air conditioners have the filter located behind the front panel or grille. Here’s how to access it:
- Turn off the unit: Always start by turning off the air conditioner at the thermostat or control panel. For extra safety, unplug the unit from the wall.
- Open the front panel: Gently pull the front grille or panel forward. On some models, it may snap open; on others, you might need to lift it slightly or slide it upward. Look for small tabs or hinges.
- Locate the filter: Once the panel is open, you’ll see a rectangular or accordion-style filter. It’s usually white or light gray and may have a plastic frame.
- Remove the filter: Slide the filter out carefully. Some models have a handle or tab to make this easier. If it’s stuck, don’t force it—double-check for any clips or latches you might have missed.
For example, in my GE AHY08LZ model, the filter slides out from the bottom of the front panel. It took me a few tries to figure it out the first time, but now it takes less than 30 seconds. If you’re unsure about your specific model, check the user manual—most GE manuals are available online for free.
Tips for Safe Handling
When handling the filter, avoid touching the mesh or fibers directly, especially if you have sensitive skin. Dust and debris can irritate your hands or trigger allergies. Use a soft cloth or wear gloves if needed. Also, be gentle when removing and reinserting the filter—bending or tearing it can reduce its effectiveness and even damage the unit.
If your filter is reusable (more on that below), shake off loose dust outdoors before cleaning. For disposable filters, inspect them for damage—cracks, tears, or excessive dirt mean it’s time for a replacement.
Types of GE Wall Air Conditioner Filters
Not all filters are created equal. GE offers several types of filters for their wall air conditioners, each designed for different needs and environments. Understanding the differences can help you choose the right one for your home.
Standard Fiberglass Filters
These are the most basic and affordable option. Made from layered fiberglass fibers, they’re designed to capture large particles like dust and lint. While they’re effective for general use, they don’t trap smaller allergens like pollen or pet dander very well. They’re usually disposable and should be replaced every 30 days.
For example, if you live in a relatively clean environment with minimal pets or allergies, a standard filter might be sufficient. But if you’re looking for better air quality, you’ll want to consider an upgrade.
Pleated or High-Efficiency Filters
Pleated filters have a larger surface area due to their folded design, which allows them to capture more particles—including smaller allergens. They’re typically made from polyester or cotton paper and come in various MERV (Minimum Efficiency Reporting Value) ratings. A higher MERV rating means better filtration, but it can also restrict airflow if your unit isn’t designed for it.
Most GE wall air conditioners can handle filters with a MERV rating between 6 and 8. Going higher than that might reduce efficiency. I switched to a MERV 8 pleated filter last year and noticed a significant improvement in air quality—especially during allergy season.
Washable and Reusable Filters
These eco-friendly options are made from durable materials like aluminum mesh or electrostatic fabric. They can be washed and reused multiple times, making them cost-effective and sustainable. However, they require regular cleaning—usually every two to four weeks—and may not capture as many fine particles as high-efficiency disposable filters.
If you’re environmentally conscious or want to save money in the long run, a washable filter is a great choice. Just remember to let it dry completely before reinstalling to prevent mold growth.
Activated Carbon Filters
These filters include a layer of activated carbon, which helps absorb odors, smoke, and VOCs. They’re ideal for homes with pets, smokers, or strong cooking smells. While they don’t improve particle filtration much, they’re excellent for odor control.
I use a carbon filter in my kitchen-adjacent room during grilling season, and it makes a noticeable difference in keeping the air smelling fresh.
How Often Should You Change or Clean Your GE Wall Air Conditioner Filter?
One of the most common questions I get is, “How often should I change my filter?” The answer depends on several factors, including your environment, usage, and filter type. But here’s a general guideline to follow.
General Replacement Schedule
For most homes, the rule of thumb is to check the filter every 30 days and replace or clean it as needed. However, in high-use or high-pollution environments, you may need to do it more frequently. Here’s a quick reference:
| Filter Type | Recommended Replacement/Cleaning Frequency |
|---|---|
| Standard Fiberglass (Disposable) | Every 30 days |
| Pleated (Disposable) | Every 60–90 days |
| Washable (Reusable) | Every 30–60 days (clean when dirty) |
| Activated Carbon | Every 60–90 days (or when odors return) |
Keep in mind that these are averages. If you have pets, live in a dusty area, or use your AC heavily, you may need to change it more often.
Signs It’s Time to Replace or Clean
Don’t wait for a schedule—watch for these signs that your filter needs attention:
- Visible dirt or discoloration: If the filter looks gray or black, it’s time for a change.
- Reduced airflow: If air isn’t blowing as strongly as usual, a clogged filter could be the culprit.
- Increased energy bills: A dirty filter forces your system to work harder, which shows up on your utility bill.
- Allergy or respiratory symptoms: If you or your family members start sneezing, coughing, or experiencing congestion, poor air filtration might be to blame.
I once ignored a dirty filter for two months because I was busy. When I finally checked it, it was so clogged that air could barely pass through. My energy bill had jumped by 20%, and my allergies were worse than ever. Lesson learned: don’t skip the filter check!
Seasonal Considerations
Your filter needs may change with the seasons. During spring and summer, when pollen counts are high and the AC runs constantly, check the filter every 2–3 weeks. In fall and winter, when usage drops, you can extend the interval—but don’t forget to check it before turning the unit back on in spring.
Also, if you live in a humid climate, be extra vigilant. Moisture can cause mold to grow on the filter, especially if it’s not drying properly between uses.
Step-by-Step Guide to Cleaning or Replacing Your Filter
Now that you know why and when to maintain your filter, let’s talk about how to do it properly. Whether you’re cleaning a reusable filter or installing a new disposable one, the process is simple—but doing it right ensures maximum efficiency and longevity.
Cleaning a Washable Filter
If you have a reusable filter, follow these steps:
- Remove the filter: Follow the steps outlined earlier to safely take it out.
- Rinse with water: Use lukewarm water to gently rinse both sides. Avoid hot water, which can damage the material.
- Use mild soap (if needed): For stubborn dirt, add a drop of mild dish soap to the water. Scrub lightly with a soft brush or cloth.
- Rinse thoroughly: Make sure all soap residue is gone—soap can attract more dust.
- Air dry completely: Let the filter dry in a shaded, well-ventilated area. Never reinstall a damp filter.
- Reinstall: Slide it back into place, ensuring it fits snugly and the arrows (if present) point in the direction of airflow.
I usually clean my washable filter on a Sunday morning while doing laundry. It takes about 15 minutes total, and I feel good knowing I’m saving money and reducing waste.
Installing a New Disposable Filter
For disposable filters, the process is even simpler:
- Choose the right size: Check your old filter or the user manual for the correct dimensions. GE filters are often labeled with size codes like “16x20x1.”
- Remove the old filter: Dispose of it in a sealed bag to prevent dust from spreading.
- Insert the new filter: Make sure the arrows on the frame point toward the unit (indicating airflow direction).
- Close the panel: Snap or slide the front grille back into place.
- Turn the unit back on: Wait a few minutes before setting your desired temperature.
Pro tip: Write the installation date on the filter frame with a permanent marker. That way, you’ll always know when it was last changed.
Common Mistakes to Avoid
Even simple tasks can go wrong if you’re not careful. Here are a few pitfalls to watch out for:
- Using the wrong size: A filter that’s too small will let air bypass it; one that’s too big won’t fit properly.
- Installing it backward: Always check the airflow arrows. Installing it backward reduces efficiency.
- Skipping the inspection: Don’t assume a new filter is clean. Sometimes they come with dust or debris from packaging.
- Forgetting to turn the power back on: It sounds silly, but I’ve done it—don’t let it happen to you!
Tips for Maintaining Optimal Air Quality with Your GE Wall AC
While the filter is the star of the show, it’s not the only factor affecting your indoor air quality. A few extra habits can help you get the most out of your GE wall air conditioner and keep your home feeling fresh.
Keep the Area Around the Unit Clean
Dust and debris near the outdoor unit can be sucked into the system, reducing efficiency and clogging the filter faster. Trim any plants or shrubs within two feet of the unit, and clean the area regularly. Also, make sure the indoor vents are unobstructed by furniture or curtains.
Use a Programmable Thermostat
A programmable or smart thermostat helps you run your AC more efficiently. For example, you can set it to cool your home just before you return from work, rather than running it all day. This reduces wear on the system and gives the filter less air to clean.
Supplement with an Air Purifier
If you have severe allergies or live in a highly polluted area, consider using a standalone air purifier in addition to your AC filter. While the filter handles larger particles, a HEPA air purifier can capture ultrafine particles like smoke, bacteria, and viruses.
Schedule Annual Professional Maintenance
Even with regular filter changes, your GE wall air conditioner benefits from a yearly tune-up. A technician can clean the coils, check refrigerant levels, inspect electrical connections, and ensure everything is running smoothly. Think of it like a check-up for your car—it prevents small issues from becoming big problems.
Conclusion
Your GE wall air conditioner filter may seem like a small, insignificant part of your cooling system—but it plays a huge role in your comfort, health, and energy efficiency. From improving indoor air quality to extending the life of your unit, regular maintenance is one of the simplest and most effective things you can do for your home. Whether you’re using a basic fiberglass filter or a high-efficiency pleated model, taking the time to clean or replace it every few weeks makes a noticeable difference.
Don’t wait until your energy bill spikes or your allergies flare up. Make filter maintenance a habit—set a calendar reminder, mark it on your fridge, or pair it with another monthly task like changing smoke detector batteries. With just a few minutes of effort, you’ll enjoy cleaner air, lower bills, and peace of mind. After all, a cool home is great—but a cool, healthy home is even better.
Frequently Asked Questions
How often should I replace my GE wall air conditioner filter?
It’s recommended to replace your GE wall air conditioner filter every 1 to 3 months, depending on usage and air quality. Regular replacement ensures optimal airflow and cleaner indoor air.
Where can I find the right GE wall air conditioner filter for my unit?
You can find the correct GE wall air conditioner filter by checking your unit’s model number, usually located on the indoor air handler or in the owner’s manual. GE’s official website and authorized retailers also offer filter compatibility tools.
Can I clean and reuse a GE wall air conditioner filter?
Most GE wall air conditioner filters are designed for single use and should be replaced rather than cleaned. Reusable filters, if specified by your model, can be gently vacuumed or washed and must be completely dry before reinstallation.
What happens if I don’t change my GE wall air conditioner filter?
A dirty filter restricts airflow, reducing efficiency and potentially causing the unit to overheat. It also allows dust, allergens, and pollutants to circulate, leading to poorer indoor air quality and possible system damage over time.
How do I access the filter in my GE wall air conditioner?
To access the filter, turn off the unit and open the front panel or grille, usually by lifting or unlatching it. The filter is typically located just behind the panel and slides out for easy removal and replacement.
Are GE wall air conditioner filters compatible with other brands?
GE filters are specifically designed for GE units and may not fit or perform optimally in other brands. Always verify compatibility using your model number to ensure proper fit and function.