
Featured image for ge portable air conditioner instructions
Image source: mobileimages.lowes.com
GE portable air conditioner instructions make setup fast and hassle-free, even for first-time users. With clear, step-by-step guidance, you’ll have your unit installed and cooling in minutes—no tools or expertise required. Perfect for renters or quick seasonal use, these intuitive directions ensure optimal performance right out of the box.
Key Takeaways
- Read the manual first: Always check GE portable air conditioner instructions before setup.
- Proper venting is crucial: Use the included hose and window kit for efficient cooling.
- Level placement matters: Ensure the unit is on a flat, stable surface.
- Clean filters regularly: Maintain airflow by washing filters every two weeks.
- Use timer settings: Schedule on/off times to save energy and improve comfort.
- Check error codes: Refer to the guide for quick troubleshooting solutions.
📑 Table of Contents
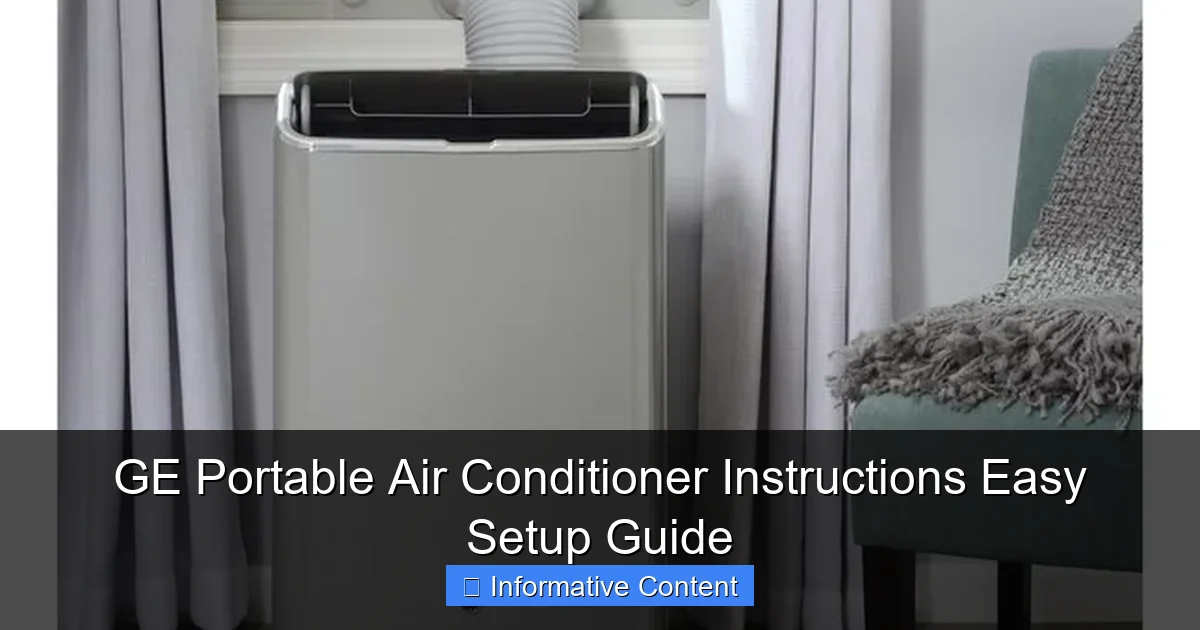
Getting Started with Your GE Portable Air Conditioner
There’s nothing worse than sweltering heat creeping into your home, turning what should be a cozy sanctuary into a sticky, uncomfortable mess. If you’ve recently bought a GE portable air conditioner, you’re likely eager to set it up and feel that cool, refreshing breeze. But let’s be honest—sometimes the instructions can feel like they’re written in another language, or worse, they’re missing entirely. I’ve been there, staring at a box of parts, wondering if I should’ve just bought a fan instead.
Here’s the good news: setting up your GE portable air conditioner is easier than you think, especially if you follow a clear, step-by-step guide. Whether you’re a first-time user or just need a refresher, this article will walk you through the entire process—from unboxing to troubleshooting common hiccups. We’ll cover everything you need to know to get your unit running smoothly, efficiently, and safely. By the end, you’ll not only have your GE portable air conditioner instructions mastered, but you’ll also feel confident using and maintaining it all summer (and beyond).
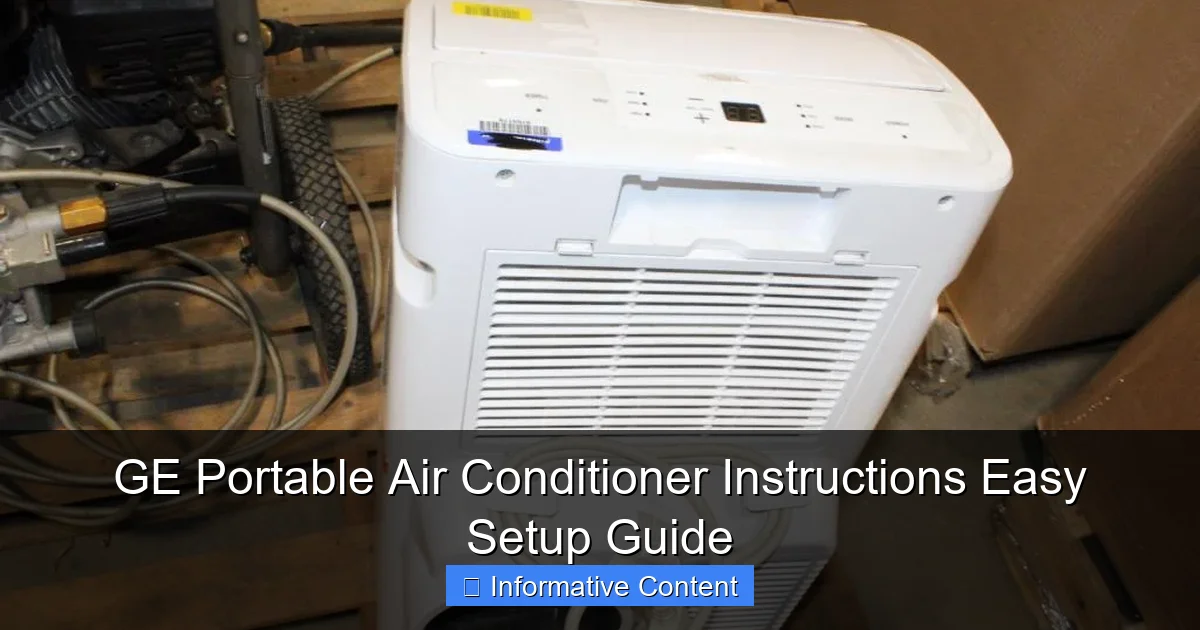
Unboxing and Initial Setup
What’s in the Box?
When you first open the box of your GE portable air conditioner, you’ll typically find the following items:
Visual guide about ge portable air conditioner instructions
Image source: content.propertyroom.com
- The main air conditioner unit
- Exhaust hose (usually 5–6 feet long)
- Window adapter kit (plastic panels or a universal kit)
- Drain hose (for models with a water tank or continuous drainage)
- Remote control and batteries
- User manual (the official GE portable air conditioner instructions guide)
- Screws, brackets, and mounting hardware
It’s a good idea to lay everything out on a clean, flat surface. Take a moment to check that all parts are present—especially the exhaust hose and window kit, which are essential for proper ventilation. If anything’s missing, contact GE customer support before proceeding. Trust me, it’s better to sort it out now than halfway through setup.
Choosing the Right Location
Not every spot in your room is ideal for your portable AC. To get the best performance, consider these tips:
- Near a window: The exhaust hose must vent hot air outside. Choose a window within 6–8 feet of the unit.
- On a flat, stable surface: Avoid carpets with thick pile or uneven floors. A hard surface like tile or wood is best.
- Near an electrical outlet: Use a grounded outlet and avoid extension cords. If you must, use a heavy-duty one rated for at least 15 amps.
- Clear of obstructions: Keep at least 18–24 inches of space around the unit for airflow.
I once placed my unit behind a tall bookshelf, thinking it would look neater. Big mistake. The airflow was restricted, and the unit struggled to cool the room. After moving it to a more open spot, the difference was night and day.
Assembling the Exhaust Hose and Window Kit
This is where many people get tripped up, but it’s actually straightforward once you know the steps.
- Attach the exhaust hose: Screw one end of the hose clockwise into the back of the unit. Make sure it’s tight—there should be no wiggle.
- Fit the window adapter: Most GE models come with a universal window kit made of interlocking plastic panels. Adjust the panels to fit your window width. For sliding windows, you’ll usually place the kit horizontally. For double-hung windows, vertically.
- Insert the hose into the adapter: Slide the other end of the exhaust hose into the hole on the window kit. Secure it with the included clamp or Velcro strap.
- Close the window: Gently lower or slide the window until it presses against the kit. The seal should be snug—no gaps.
Pro tip: If your window is too narrow or wide, you can use weather stripping or foam tape to seal gaps. A tight seal prevents hot air from leaking back into the room, which keeps your AC from working overtime.
Operating Your GE Portable Air Conditioner
Understanding the Control Panel and Remote
GE portable air conditioners usually have a simple, intuitive control panel on the top or front of the unit. Here’s what you’ll typically see:
- Power button: Turns the unit on/off.
- Mode button: Cycles through Cool, Fan, Dry, and sometimes Heat (on dual-function models).
- Temperature up/down: Adjusts the set temperature (usually 61–86°F).
- Fan speed: Low, Medium, High, or Auto.
- Timer: Sets the unit to turn on or off after a delay (great for energy savings).
- Sleep mode: Gradually adjusts temperature and fan speed for quieter nighttime operation.
The remote control mirrors most of these functions and is handy if you’re lounging on the couch. Make sure to insert the batteries—some remotes don’t include them. I learned this the hard way after pressing the power button 20 times before realizing the remote was dead.
Step-by-Step First-Time Operation
Once everything is set up, it’s time to fire up your AC. Here’s how to do it right the first time:
- Plug in the unit. Ensure the outlet is working and not shared with high-wattage appliances (like a microwave or space heater).
- Press the Power button. The unit will beep and the display will light up.
- Select “Cool” mode. This activates the compressor and starts cooling.
- Set your desired temperature. Start with 72–75°F—this is usually the sweet spot for comfort and efficiency.
- Choose fan speed. “Auto” is best for most situations—it adjusts based on how hard the unit needs to work.
- Wait 3–5 minutes. The AC needs a moment to circulate refrigerant and start cooling. You’ll hear the compressor kick in.
Within 10–15 minutes, you should feel a noticeable drop in room temperature. If not, double-check that the exhaust hose is properly sealed and that the unit isn’t set to “Fan” mode (which doesn’t cool).
Using Special Features: Dehumidifier, Fan, and Sleep Mode
Your GE portable AC isn’t just for cooling. It’s a multi-tool for indoor comfort.
- Dehumidifier (Dry mode): Great for humid climates. It removes moisture without overcooling. Use it when the air feels sticky but not hot.
- Fan-only: Circulates air without cooling. Ideal for mild days or when you want airflow without energy use.
- Sleep mode: Reduces fan speed and slightly raises the temperature over time (by about 2–4°F per hour). This keeps you comfortable at night without freezing you out. It also reduces noise—perfect for light sleepers.
I use Sleep mode every night. My AC starts at 72°F, then gradually warms to 76°F by morning. It’s subtle, but I wake up feeling refreshed, not sweaty or chilly.
Maintenance and Cleaning for Long-Term Performance
Why Regular Maintenance Matters
Just like your car, your portable AC needs regular care to run efficiently. Neglecting maintenance can lead to:
- Reduced cooling power
- Higher energy bills
- Unpleasant odors (mold and mildew)
- Shortened lifespan of the unit
I ignored cleaning my AC for two summers. The third year, it started making a weird gurgling noise and barely cooled. A quick inspection revealed a clogged filter and a water tank full of slime. After a deep clean, it ran like new—but I could’ve avoided the hassle.
Monthly Cleaning Routine
Here’s a simple monthly checklist to keep your GE portable air conditioner in top shape:
- Clean the air filter: Most GE models have a removable filter behind a front panel. Pull it out, vacuum loose dust, then rinse under lukewarm water. Let it air-dry completely before reinserting. Do this every 2–4 weeks in heavy use.
- Wipe down the exterior: Use a damp cloth with mild soap. Avoid harsh chemicals or abrasive sponges.
- Check the exhaust hose: Make sure it’s not kinked or blocked. A bent hose restricts airflow.
- Inspect the window seal: Look for gaps or wear in the window kit. Replace foam strips if they’re compressed.
Bonus tip: If you live in a dusty area (like near a construction site or in a dry climate), clean the filter every 2 weeks. You’ll save energy and breathe cleaner air.
Seasonal Deep Cleaning
At the end of each cooling season, give your unit a thorough cleaning:
- Empty the water tank: If your model has a bucket, drain it. Some units auto-evaporate water, but it’s still good to check.
- Clean the condensate drain pan: Use a mixture of 1 part white vinegar and 1 part water. Scrub with a soft brush to remove mold.
- Flush the drain hose (if applicable): Run vinegar through it to clear algae buildup.
- Cover or store properly: If not using year-round, store in a cool, dry place. Cover it with a breathable cloth to prevent dust.
For continuous-drain models, disconnect the drain hose and let any remaining water drip out. Leaving water in the system over winter can cause corrosion or leaks when you restart it.
Troubleshooting Common Issues
Unit Not Cooling
If your GE portable air conditioner is running but not cooling, here are the most common causes:
- Exhaust hose not sealed: Hot air leaks back in, making the room feel warmer. Recheck the window seal.
- Dirty air filter: A clogged filter restricts airflow. Clean or replace it.
- Set to Fan mode: Double-check the mode button. It should be on “Cool.”
- Room too large: Portable ACs have BTU ratings (e.g., 8,000 BTU for 300–350 sq ft). If your room is bigger, the unit may struggle.
Example: My neighbor bought a 6,000 BTU unit for a 400 sq ft living room. It ran constantly but never got below 78°F. Upgrading to an 8,000 BTU model solved the problem.
Water Leaking or Full Tank
Most portable ACs collect condensation in an internal tank. When full, the unit shuts off automatically. Here’s what to do:
- Empty the tank: Remove the plug or drawer (check your GE portable air conditioner instructions for the exact location). Pour out the water and reinsert.
- Enable continuous drainage: If your model supports it, attach the drain hose to a floor drain or bucket. This prevents frequent emptying.
- Check the drain pan: If water leaks from the back, the pan might be cracked or misaligned.
Note: In high-humidity areas, the tank may fill quickly—sometimes every 2–3 hours. Continuous drainage is a lifesaver here.
Unusual Noises or Odors
Hearing a rattling, buzzing, or gurgling sound? Smelling something musty?
- Rattling: Could be loose parts or a bent fan blade. Turn off the unit and inspect.
- Buzzing: Often electrical—check the power cord and outlet.
- Gurgling: Normal during operation, but excessive noise may indicate low refrigerant (a job for a technician).
- Moldy smell: Caused by bacteria in the filter or drain pan. Clean thoroughly with vinegar.
I once smelled something like wet socks after a rainstorm. It turned out the filter was soaked and hadn’t dried properly. A quick wash and 24-hour dry fixed it.
Energy Efficiency and Best Practices
How Portable ACs Compare to Central Systems
Portable air conditioners are less efficient than central AC but far better than window units or fans. Here’s a quick comparison of energy use (based on 8,000 BTU models):
| Unit Type | Avg. Energy Use (kWh/day) | Best For | Installation |
|---|---|---|---|
| Central AC | 1.5–2.5 | Whole-home cooling | Permanent ductwork |
| Window AC | 1.0–1.8 | Single rooms | Window-mounted |
| Portable AC | 1.2–2.0 | Rooms without window access, rentals | Temporary, vented via window |
| Ceiling Fan | 0.1–0.3 | Air circulation (no cooling) | Ceiling-mounted |
While portable ACs use more energy than window units, their flexibility (no permanent installation) makes them ideal for renters or homes without window space. Plus, newer GE models have improved energy efficiency ratings (EER) and smart features.
Tips to Save Energy and Money
You don’t have to blast your AC to stay cool. Try these tricks:
- Use a programmable timer: Turn the AC on 30 minutes before you get home. This avoids running it all day.
- Close curtains during the day: Blocking sunlight reduces heat gain.
- Run a ceiling fan: It circulates cool air, letting you raise the AC temperature by 4°F with no loss of comfort.
- Seal drafts: Use weather stripping on doors and windows.
- Keep the filter clean: A dirty filter can increase energy use by up to 15%.
My energy bill dropped 20% after I started using the timer and fan combo. The AC runs less, but the room stays cool thanks to better airflow.
When to Use vs. Other Cooling Methods
Portable ACs shine in specific situations:
- You rent and can’t install a window unit.
- Your home has no central AC or it’s broken.
- You need cooling in a room with no windows (but you can vent through a sliding door or wall).
- You want zone cooling—only cool the room you’re in.
But they’re not a perfect solution. Avoid using them in very large rooms, poorly insulated spaces, or as a long-term replacement for central AC in a whole house.
Final Thoughts: Enjoying Your GE Portable Air Conditioner
Setting up and using your GE portable air conditioner doesn’t have to be a headache. With the right preparation, a little maintenance, and smart usage, it can keep you cool and comfortable all season long. Remember, the key is in the details: a proper window seal, a clean filter, and thoughtful placement make all the difference.
Think of your portable AC not just as a machine, but as a partner in comfort. Treat it well, and it will return the favor with reliable, efficient cooling. Whether you’re battling summer heatwaves or just want a better night’s sleep, your GE unit is up to the task. And now, with these GE portable air conditioner instructions in hand, you’re ready to make the most of it—no guesswork, no frustration, just cool, refreshing air when you need it most.
So go ahead, plug it in, set the temperature, and enjoy. Summer doesn’t stand a chance.
Frequently Asked Questions
How do I set up my GE portable air conditioner for the first time?
To set up your GE portable air conditioner, unbox the unit, attach the exhaust hose to the back, and secure the window vent panel. Plug it in, press the power button, and follow the on-screen prompts to select your desired temperature and mode. Refer to the GE portable air conditioner instructions manual for detailed steps.
Why is my GE portable AC not cooling properly?
Ensure the exhaust hose is properly connected and the filter is clean. Check if the room size matches the unit’s BTU capacity, and verify the thermostat is set lower than the room temperature. Consult the GE portable air conditioner instructions for troubleshooting tips.
How often should I clean the filter on my GE portable air conditioner?
Clean the filter every 2–4 weeks, depending on usage, to maintain efficiency and airflow. Remove the filter, rinse it with warm water, and let it dry before reinserting it. Dirty filters can reduce cooling performance and strain the unit.
Can I use my GE portable air conditioner without a window vent?
No, the exhaust hose must vent hot air outside via a window or sliding door to cool effectively. If a window isn’t available, consider a dual-hose model or alternative cooling solutions. Always follow the venting guidelines in the manual.
How do I drain the water from my GE portable air conditioner?
Most GE models have a self-evaporative system, but excess water may need manual draining. Locate the drain plug at the bottom, place a container underneath, and open the plug. Refer to your model’s instructions for specific details.
What does the “E1” error code mean on my GE portable AC?
The “E1” error indicates a water tank overflow or sensor issue. Empty the water tank and ensure it’s seated correctly. If the error persists, consult the manual or contact GE customer support for assistance.