
Featured image for easy home portable air conditioner instructions
Image source: ar.fortune-te.net
Setting up your Easy Home portable air conditioner is a breeze with these straightforward, step-by-step instructions. From unboxing to first use, the process takes under 15 minutes—just attach the exhaust hose, plug it in, and select your desired cooling mode. No tools or professional help needed—just instant, efficient comfort.
Key Takeaways
- Unbox carefully: Remove all packaging and check for included accessories.
- Position near window: Ensure proper exhaust hose placement for efficient cooling.
- Secure window seal: Use the kit to block hot air from re-entering.
- Drain water regularly: Empty the tank to prevent auto-shutoff and overflow.
- Set thermostat wisely: Adjust for comfort while minimizing energy use.
- Clean filters weekly: Maintain airflow and efficiency with simple rinsing.
📑 Table of Contents
- Why a Portable Air Conditioner Might Be Your Best Summer Friend
- What to Expect When You Unbox Your Portable AC
- Step-by-Step Setup: From Box to Cool Breeze
- Optimizing Performance: Tips to Get the Most Out of Your AC
- Common Mistakes and How to Avoid Them
- Data Table: Portable AC Setup Checklist
- Final Thoughts: Enjoy Your Cool Oasis
Why a Portable Air Conditioner Might Be Your Best Summer Friend
Remember that one summer when your window AC gave up the ghost right before a heatwave? I do. I was sweating through my t-shirt at 3 a.m., desperately fanning myself with a pizza box. That’s when I discovered the magic of easy home portable air conditioner instructions—and how they could turn a sweaty nightmare into a cool, breezy dream in under an hour.
Portable air conditioners are like the Swiss Army knives of cooling: compact, versatile, and perfect for renters, small spaces, or anyone who doesn’t want to commit to a permanent installation. They’re not just for emergencies either. Whether you’re cooling a home office, a bedroom, or a sunroom, these units are designed for quick setup and immediate relief. But here’s the catch: if you’ve ever opened the box and stared at a pile of parts, hoses, and a 20-page manual, you know it can feel overwhelming. That’s why I’m here to walk you through exactly how to set up your portable AC—without the stress, the guesswork, or the midnight Google searches.
What to Expect When You Unbox Your Portable AC
Let’s start at the beginning. You’ve just brought home your new portable air conditioner, and the excitement is real. But before you dive into the setup, take a moment to appreciate what you’re holding. Most portable ACs come in a single box, but that box contains everything you need—and a few things you might not expect.
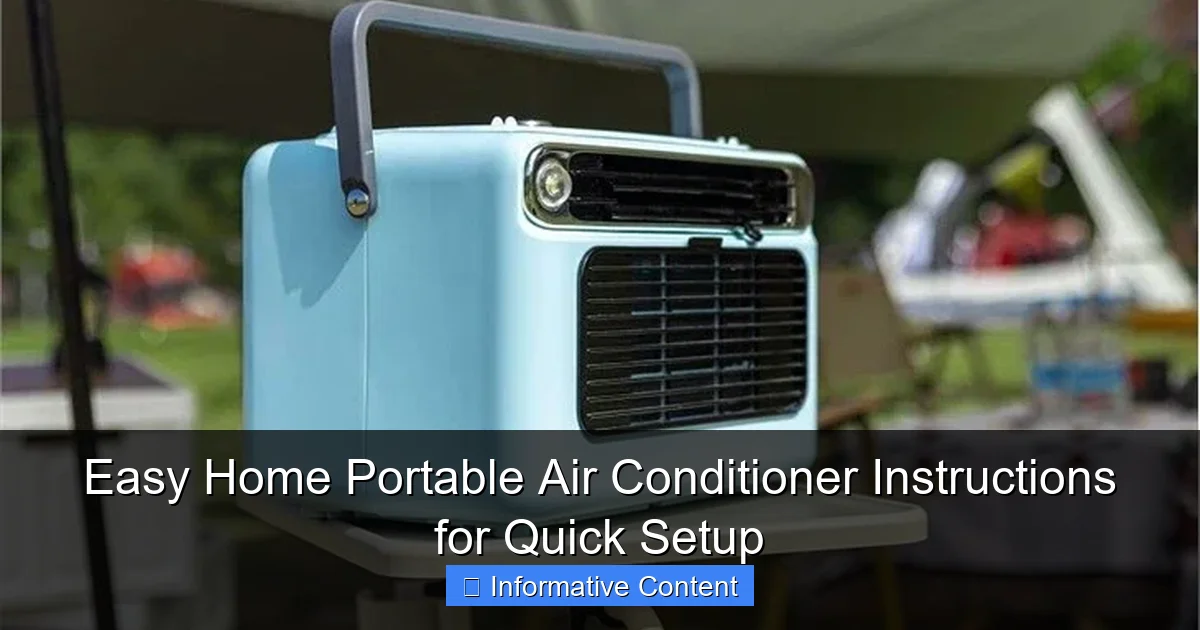
Visual guide about easy home portable air conditioner instructions
Image source: ar.fortune-te.net
What’s in the Box (Usually)
- The unit itself – This is the main body, usually on wheels for easy moving. It’s heavier than it looks, so ask for help if needed.
- Exhaust hose(s) – A flexible, insulated tube that vents hot air outside. Most units have one, but dual-hose models have two.
- Window adapter kit – This includes a plastic or metal panel that fits into your window frame, along with foam or rubber seals.
- Drain hose (optional) – Some units require manual draining, others have self-evaporating tech. Check your manual.
- Remote control and batteries – A small but mighty perk for lazy summer days.
- User manual – Keep it handy, but don’t panic if it’s confusing. That’s why we’re here.
Pro tip: Before you unbox, clear a space near a window and an electrical outlet. You’ll need at least 18–24 inches of clearance around the unit for airflow. Think of it like giving your AC room to breathe—literally.
Check for Damage and Compatibility
Inspect the unit for dents, cracks, or missing parts. If something looks off, contact the seller or manufacturer before you start setting up. Also, verify that your window type is compatible. Most kits work with sliding or double-hung windows, but casement or awning windows may need special adapters. I once tried to force a kit into a crank-style window—let’s just say the plastic panel didn’t survive.
Another thing: check the power requirements. Most portable ACs need a standard 115V outlet, but high-capacity models (like 14,000 BTU units) may need a dedicated 20-amp circuit. If your outlet is shared with a microwave or space heater, you might trip a breaker. I learned that the hard way during a work-from-home meeting. Not a great look.
Step-by-Step Setup: From Box to Cool Breeze
Now for the fun part: turning your portable AC from a box of parts into a cool, quiet companion. Follow these steps, and you’ll be sipping iced tea in a chilled room in no time.
Step 1: Position the Unit
Place your portable AC on a flat, stable surface near a window and outlet. Avoid carpets or rugs—they can block the intake vents. I once placed mine on a shag rug, and it kept overheating. The manual said “keep vents clear,” but I didn’t realize the rug was the culprit until I moved it. Lesson learned.
Keep the unit upright. Never lay it on its side—this can damage the compressor and void the warranty. If you had to transport it sideways (like in a car), let it sit upright for at least 2 hours before turning it on.
Step 2: Install the Window Kit
This is the trickiest part for many people, but it’s simpler than it seems. Here’s how to do it:
- Open your window and clean the track or sill. Remove any debris or old sealant.
- Attach the window adapter panel to the exhaust hose. Most hoses have a connector that snaps or screws into place.
- Insert the panel into the window. For sliding windows, you’ll usually lower the top sash onto the panel. For double-hung windows, raise the lower sash.
- Use the included foam or rubber seals to fill gaps. You want a snug fit—no hot air sneaking in, and no cool air escaping.
- Tighten the screws or clamps (if your kit has them) to secure the panel.
Tip: If your window is too wide, most kits come with extension panels. If it’s too narrow, use foam tape or a custom-cut piece of wood. I once used a cereal box (folded thick) to fill a gap—worked like a charm.
Step 3: Connect the Exhaust Hose
Attach the other end of the hose to the back of the portable AC. Again, it should snap or screw on securely. Make sure the hose isn’t kinked or bent sharply. A tight bend can reduce airflow and make the unit work harder.
For dual-hose models, you’ll need a second hose and window panel. These are more efficient because they draw fresh air in through one hose and expel hot air through the other. They’re pricier, but worth it if you’re cooling a large or hot room.
Step 4: Power It Up
Plug the unit into a grounded outlet. Don’t use an extension cord unless it’s heavy-duty (14-gauge or thicker). I tried using a regular lamp cord once—it got warm and tripped the breaker. Not safe.
Turn on the unit and set your desired temperature. Most portable ACs start cooling within 5–10 minutes. You’ll hear the fan and compressor kick in, and feel cool air from the front vents.
Bonus tip: Run the unit on a timer or smart plug if you want to cool the room before you get home. Just avoid running it 24/7—it’s not energy-efficient and can shorten the unit’s lifespan.
Optimizing Performance: Tips to Get the Most Out of Your AC
You’ve got your portable AC running—congrats! But to keep it efficient, quiet, and effective, a few tweaks can make a big difference.
Use the Right Fan Speed and Mode
Most units have multiple fan speeds (low, medium, high) and modes (cool, fan, dehumidify, sleep). Here’s how to choose:
- Cool mode – Use this when you want to lower the temperature. The compressor runs, and the fan circulates air.
- Fan mode – No cooling, just airflow. Great for mild days or circulating air from a central AC.
- Dehumidify mode – Removes moisture without cooling much. Ideal for humid climates or basements.
- Sleep mode – Reduces noise and gradually adjusts the temperature. Perfect for nighttime.
I use “cool + low fan” during the day and “sleep mode” at night. It’s quieter, and the room stays comfortable without getting too cold.
Seal Gaps and Insulate
Even with a tight window kit, heat can sneak in through cracks. Use weatherstripping, foam tape, or even a rolled-up towel to seal gaps around the window. I also close curtains or blinds during the day to block solar heat. A blackout curtain can reduce heat gain by up to 25%—a game-changer in a south-facing bedroom.
Clean the Air Filter Regularly
Most portable ACs have a washable air filter. Check it every 2 weeks (more often if you have pets or allergies). A clogged filter reduces airflow and efficiency. To clean it:
- Turn off and unplug the unit.
- Remove the filter (usually behind a front panel).
- Rinse it under cool water. No soap needed.
- Let it air dry completely before reinstalling.
I set a phone reminder every other Sunday. It takes 5 minutes and keeps my AC running smoothly.
Manage Drainage (If Needed)
Some units collect water in an internal tank. When it’s full, the unit will shut off or beep. To empty it:
- Place a towel under the drain plug.
- Remove the plug and let the water drain into a bucket.
- Reinsert the plug and restart the unit.
Units with self-evaporating tech (most modern models) exhaust most of the water through the hose. But in high humidity, you might still need to drain occasionally. I once ignored a “full tank” alert—my floor was soaked by morning. Lesson learned.
Common Mistakes and How to Avoid Them
Even with the best intentions, things can go wrong. Here are the most common setup errors—and how to dodge them.
Using the Wrong Window Kit
Not all window kits fit all windows. If your kit is too loose, hot air leaks in. If it’s too tight, you can’t close the window. Always measure your window opening before buying. Most kits support widths from 24” to 48”, but check the specs.
If your window is an odd size, consider a universal kit or a custom solution. I once used a piece of plexiglass cut to size with a foam seal. It worked better than the flimsy plastic panel that came with the unit.
Ignoring Ventilation
The exhaust hose must vent outside. Never vent it into an attic, garage, or another room. That just moves the heat around and reduces efficiency. I once thought I could vent mine into a closet—big mistake. The room got hotter, and the AC overheated.
Also, keep the hose as short and straight as possible. Every bend reduces airflow. If you must go around a corner, use a gentle curve—no sharp 90-degree turns.
Overloading the Circuit
Portable ACs draw a lot of power. If you plug one into a circuit with other appliances (like a fridge, TV, or microwave), you might trip the breaker. Look for a dedicated outlet or use a circuit tester to check the load.
When in doubt, plug the AC into a different room’s outlet. I run mine from the kitchen outlet—it’s on a separate circuit and works perfectly.
Neglecting Maintenance
Just like a car, your AC needs regular care. A dirty filter, clogged hose, or blocked vent can reduce performance and cause breakdowns. I check my unit every month: clean the filter, inspect the hose, and wipe down the vents.
Also, store the unit properly in winter. Clean it, remove the hose, and cover it to keep dust out. I use a large storage bin—it keeps everything together and protects the unit.
Data Table: Portable AC Setup Checklist
| Task | Frequency | Notes |
|---|---|---|
| Inspect unit and parts | Before setup | Check for damage, missing components |
| Clean window track/sill | Before setup | Ensure a tight seal |
| Install window kit | One-time | Use foam/tape to seal gaps |
| Connect exhaust hose | One-time | Keep hose short and straight |
| Clean air filter | Every 2–4 weeks | More often with pets/allergies |
| Check for condensation | Weekly | Empty tank if needed |
| Inspect hose for kinks | Monthly | Replace if cracked or leaking |
| Store properly (off-season) | Annually | Clean, dry, cover |
Final Thoughts: Enjoy Your Cool Oasis
Setting up a portable air conditioner doesn’t have to be a chore. With the right easy home portable air conditioner instructions, you can go from sweltering to serene in under an hour. The key is patience, attention to detail, and a willingness to learn from the occasional mistake (we’ve all had them).
Remember: your portable AC is a tool, not a miracle worker. It won’t turn a 100°F attic into a freezer, but it can make a bedroom, office, or sunroom livable—even on the hottest days. And with proper care, it’ll serve you well for years.
So take a deep breath, grab your tools, and get started. Before you know it, you’ll be kicking back with a cold drink, listening to the gentle hum of your AC, and wondering why you didn’t do this sooner. Summer doesn’t stand a chance.
Frequently Asked Questions
How do I set up my Easy Home portable air conditioner for the first time?
To set up your Easy Home portable air conditioner, place it near a window and power outlet, attach the exhaust hose to the unit and window kit, and plug it in. Ensure the hose is vented outside for proper airflow and cooling efficiency.
Where should I position my portable air conditioner for optimal cooling?
Position your Easy Home portable air conditioner in a central location with at least 12 inches of clearance on all sides, near a window for venting and an electrical outlet. Avoid direct sunlight or heat sources to maximize cooling performance.
How do I use the Easy Home portable air conditioner instructions to troubleshoot common issues?
Refer to the troubleshooting section in the Easy Home portable air conditioner instructions for issues like insufficient cooling or water leaks. Most problems can be resolved by checking the air filter, exhaust hose alignment, or water tank level.
Can I use my portable air conditioner without a window vent?
No, venting through a window or sliding door is essential for expelling hot air. If a window isn’t available, consider a portable AC with a single-hose design or use a sliding glass door with a venting kit.
How often should I clean the air filter on my Easy Home portable air conditioner?
Clean the air filter every two weeks during heavy use to maintain efficiency and air quality. Simply remove the filter, rinse it with water, and let it dry before reinserting it into the unit.
Does the Easy Home portable air conditioner require a dedicated circuit?
While not always mandatory, using a dedicated 15-amp circuit is recommended to prevent overloading. Check the Easy Home portable air conditioner instructions for specific electrical requirements based on your model.