
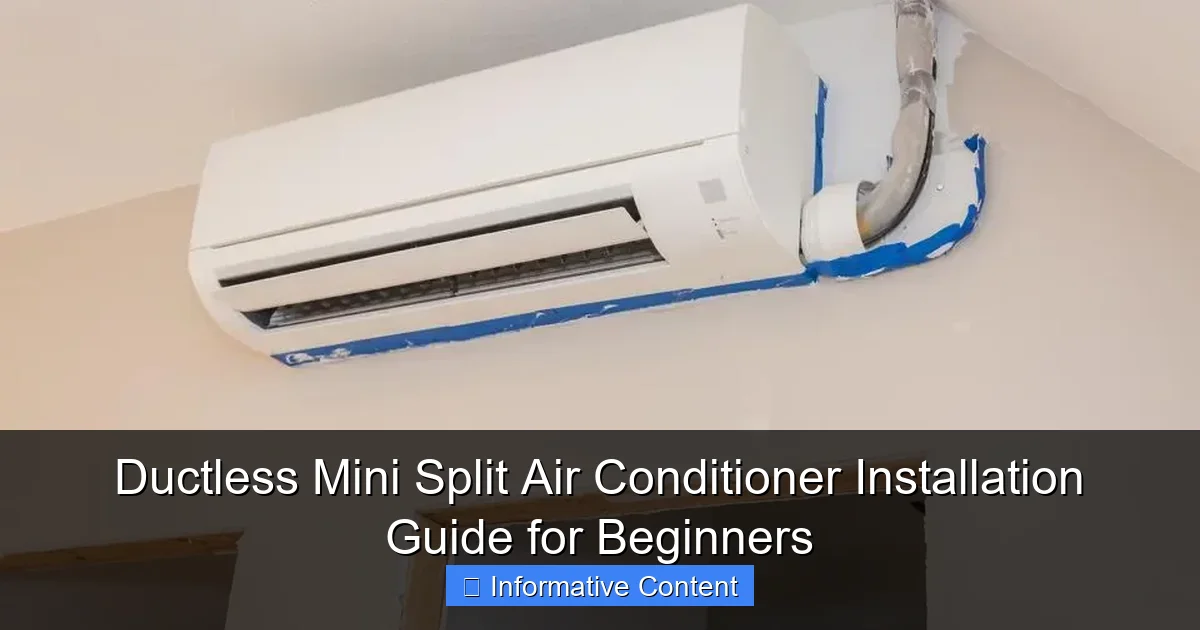
Featured image for ductless mini split air conditioner installation
Image source: thumbor.forbes.com
Installing a ductless mini split air conditioner is a cost-effective, energy-efficient way to cool your space without the complexity of ductwork. This beginner-friendly guide walks you through essential steps—from selecting the right unit and mounting the indoor and outdoor components to connecting refrigerant lines and wiring—ensuring a safe, professional-grade setup. With the right tools and careful planning, you can enjoy reliable climate control in just a few hours.
Key Takeaways
- Plan carefully: Choose the right unit size and optimal indoor/outdoor locations before starting.
- Follow codes: Always comply with local electrical and building regulations for safe installation.
- Drill precisely: Make a 3-inch hole for lineset, wiring, and drainage at a slight downward angle.
- Seal properly: Use foam and caulk to weatherproof the wall penetration and prevent air leaks.
- Vacuum lineset: Evacuate air and moisture with a vacuum pump to ensure system efficiency.
- Test thoroughly: Run system checks and refrigerant leak tests before finalizing the install.
📑 Table of Contents
- The Cool Truth About Going Ductless
- Why Go Ductless? The Big Picture Before You Start
- Choosing Your System: Size, Brand, and Features Matter
- Tools and Materials: What You’ll Need (and Why)
- Step-by-Step Installation: From Wall to Warranty
- Common Pitfalls and How to Dodge Them
- When to Call a Pro (and What It Costs)
- The Bottom Line: Is DIY Right for You?
The Cool Truth About Going Ductless
Remember that summer when your old AC unit gave up the ghost just as a heatwave rolled in? You were sweating buckets, calling every HVAC company in town, and getting quotes that made your eyes water almost as much as the humidity. That was the moment I realized my home needed a better solution—one that wouldn’t break the bank or require tearing down walls to install ducts. Enter the ductless mini split air conditioner.
Ductless mini splits are the unsung heroes of home cooling (and heating, but more on that later). Unlike traditional central air systems, these sleek units deliver targeted comfort without the energy losses associated with leaky ducts. But here’s the thing: installing one isn’t as simple as plugging in a window unit. It requires planning, precision, and a bit of know-how. Whether you’re a DIY enthusiast or just curious about what’s involved before calling in the pros, this ductless mini split air conditioner installation guide is for you. I’ll walk you through the entire process—from choosing the right system to making that final refrigerant connection—with real-world tips and lessons learned from my own journey.
Why Go Ductless? The Big Picture Before You Start
Energy Efficiency That Pays Off
Let’s face it: ductwork is like a leaky faucet. According to the U.S. Department of Energy, up to 30% of conditioned air can be lost through poorly sealed or insulated ducts in attics and crawl spaces. That means you’re paying to cool the outdoors. Ductless mini splits eliminate this problem entirely by delivering air directly where it’s needed—room by room.
Visual guide about ductless mini split air conditioner installation
Image source: albemarleheating.net
For example, my 1,200-square-foot bungalow had a single 3-ton central AC unit that struggled to keep the sun-drenched living room comfortable while leaving the shaded bedroom too cold. With a dual-zone mini split, I now have one indoor head for the living room and another for the bedroom. Each runs independently, so I only cool what’s being used. My energy bills dropped by nearly 25% in the first year.
Flexibility Without Renovation Headaches
If you live in an older home or a rental, installing ductwork can mean major structural changes. Not only is it expensive, but it also disrupts your daily life. Ductless systems, on the other hand, require just a small hole (about 3 inches) for the refrigerant lines, power cable, and condensate drain. This makes them perfect for:
- Room additions without existing HVAC
- Historic homes where preserving walls is essential
- Rental units where landlords won’t invest in full renovations
- Homes with limited attic or crawl space access
My neighbor, Sarah, added a sunroom to her 1950s ranch. Instead of extending the ducts (which would have cost over $5,000), she installed a single-zone mini split for under $2,000. Now she enjoys year-round comfort without sacrificing her home’s original charm.
Heating and Cooling in One Package
Here’s a little-known fact: most mini splits are heat pumps. That means they don’t just cool—they also heat efficiently, even in colder climates. Modern inverter-driven models can extract heat from outdoor air at temperatures as low as -15°F (-26°C). In my case, I replaced both my aging AC and a space heater with a single system. During winter, the mini split maintains a cozy 70°F in my living room while using less electricity than my old baseboard heaters.
Choosing Your System: Size, Brand, and Features Matter
Sizing It Right: The Goldilocks Principle
One of the biggest mistakes beginners make is picking the wrong size unit. Too small, and it won’t keep up with demand. Too large, and it cycles on and off too frequently, wasting energy and reducing lifespan. The key is calculating your BTU (British Thermal Unit) needs based on room size, insulation, sun exposure, and occupancy.
As a rule of thumb:
- 100–200 sq. ft. = 6,000–8,000 BTUs
- 200–300 sq. ft. = 9,000–12,000 BTUs
- 300–400 sq. ft. = 14,000–18,000 BTUs
But don’t rely on rules alone. I learned this the hard way when I initially sized my bedroom for 9,000 BTUs based on its 250-square-foot area. However, the room has three large windows facing west, so it gets hit by afternoon sun. After consulting an HVAC pro, we upgraded to a 12,000-BTU unit—and the difference was night and day.
Pro tip: Use an online load calculation tool or consult a professional. Many manufacturers offer free sizing guides, but remember to account for:
- Number of windows and their orientation
- Insulation quality (R-value)
- Ceiling height (rooms over 8 feet need more BTUs)
- Number of occupants (each person adds ~600 BTUs)
Brands That Deliver (and a Few to Avoid)
The market is flooded with options, but not all brands are created equal. Based on my research and personal experience, here’s what I found:
- Top Tier (Reliability & Performance): Mitsubishi, Daikin, Fujitsu. These brands dominate the commercial market and offer exceptional efficiency (up to 30 SEER) and quiet operation (as low as 19 dB). Yes, they’re pricier, but they last 15–20 years with proper maintenance.
- Mid-Range (Good Value): LG, Panasonic, Senville. These offer solid performance at a more affordable price point. I went with a Senille 18,000-BTU dual-zone system. After two summers, it’s still running smoothly.
- Budget (Risky but Possible): Pioneer, Klimaire. These are tempting for tight budgets, but I’ve heard mixed reviews. Some users report compressor issues within 5 years. If you go this route, buy from a reputable dealer with a solid warranty.
One thing to watch: SEER rating. This measures efficiency (Seasonal Energy Efficiency Ratio). The higher, the better. Look for at least 18 SEER for long-term savings. Also, check for ENERGY STAR certification—it guarantees performance and qualifies for rebates in many areas.
Features That Make Life Easier
Not all mini splits are basic. Modern models come packed with smart features:
- Inverter Technology: Adjusts compressor speed to maintain temperature without constant on/off cycling. My unit runs almost silently at 60% capacity most of the time.
- Wi-Fi Control: Adjust settings from your phone. I use mine to pre-cool the house before I get home from work.
- Air Quality Add-Ons: Some units include ionizers, UV-C lights, or HEPA filters. My neighbor’s Fujitsu has an allergy mode that reduces dust and pollen.
- Multi-Zone Options: Connect up to 8 indoor heads to one outdoor unit. Ideal for whole-home solutions.
Consider your needs. If you just want basic cooling, a single-zone system with a remote control might suffice. But if you’re tech-savvy or have specific comfort goals, invest in the extras.
Tools and Materials: What You’ll Need (and Why)
The Essential Toolbox
Before you start, gather these tools. Trust me, you don’t want to run to the hardware store mid-installation.
- Power drill with masonry bit: For drilling the hole through the wall. I used a 1/2-inch bit, but most kits include a 3-inch hole saw.
- Stud finder: To avoid framing when mounting the indoor unit. Nothing’s worse than hitting a stud and having to reposition.
- Level: Critical for proper drainage. A tilted indoor unit can cause water leaks.
- Vacuum pump: For evacuating refrigerant lines. This is non-negotiable. Skipping this step can ruin your compressor.
- Torque wrench: Ensures refrigerant line connections are tight without damaging the fittings.
- Manifold gauge set: To monitor pressure during refrigerant charging.
- Insulation tape and foam: For sealing the hole and preventing condensation.
- Condensate pump (optional): Needed if the indoor unit is below the drain line exit.
I borrowed a vacuum pump from a friend who’s an HVAC tech. It cost $200 to rent for a weekend, but it was worth it. You can also hire a pro just for the refrigerant charge, which saves you from buying expensive tools.
Materials Checklist
Your kit should include:
- Indoor and outdoor units
- Mounting hardware (brackets, screws)
- Refrigerant lines (usually 1/4-inch and 3/8-inch copper tubing)
- Drain hose
- Power cable (check voltage—most are 208/230V)
- Wall sleeve (to protect the hole)
- Remote control and wall mount
Buy extra insulation for the lines. I used 3/8-inch foam insulation, which came with my kit, but I added an extra layer to prevent condensation in humid climates.
One thing I wish I’d known: the refrigerant lines are flared, not compression fittings. This means you need to use a torque wrench—not just hand-tighten. Over-tightening can crack the flare, leading to leaks.
Permits and Codes: Don’t Skip This Step
Many areas require permits for electrical and refrigerant work. I live in a town that mandates HVAC permits, so I had to submit plans and schedule an inspection. It cost $150, but it was worth the peace of mind.
Check with your local building department. Some key code requirements:
- Electrical disconnect within 6 feet of the outdoor unit
- Proper grounding of all components
- Refrigerant lines must be labeled
- Condensate drain must terminate outdoors (not into a sewer)
If you’re unsure, hire a licensed electrician for the wiring. I did this for the outdoor unit’s disconnect box. It cost $200, but it passed inspection on the first try.
Step-by-Step Installation: From Wall to Warranty
Step 1: Mount the Indoor Unit
Start with the indoor head. Here’s how:
- Use the mounting template (included in the kit) to mark the wall. Ensure it’s at least 6 feet high and 12 inches from the ceiling.
- Drill a 3-inch hole at a slight downward angle (to allow condensate drainage). I used a 15-degree angle, as recommended by my manual.
- Secure the mounting bracket with screws. Make sure it’s level—I used a laser level for precision.
- Hang the indoor unit. It should click into place. Double-check that it’s snug.
Pro tip: If you’re installing multiple units, do the indoor heads first. This helps you plan the refrigerant line routing.
Step 2: Position the Outdoor Unit
The condenser needs:
- At least 12 inches of clearance on all sides
- Direct sunlight avoided (shade improves efficiency)
- A solid, level surface (concrete pad or wall-mounted bracket)
I placed mine on a concrete pad in my backyard, 15 feet from the house. The manual said to keep it within 50 feet of the indoor unit, but I went slightly longer (60 feet) with a line set extension. This required a refrigerant charge adjustment, which I’ll cover later.
Step 3: Run the Lines
This is the trickiest part. Here’s what worked for me:
- Feed the refrigerant lines, drain hose, and power cable through the wall hole. Use a fish tape to guide them.
- Connect the lines to the indoor unit’s valves. Use the torque wrench to tighten to spec (usually 10–15 ft-lbs for 1/4-inch lines).
- Insulate the lines with foam tubing. Seal gaps with insulation tape.
- Route the lines to the outdoor unit, securing them every 3 feet with clips.
Critical: Keep the lines as straight as possible. Bends should have a radius of at least 6 inches to avoid kinks.
Step 4: Electrical and Refrigerant Work
Turn off the power first! Then:
- Run 12/2 or 10/2 electrical cable (depending on unit amperage) from your panel to the outdoor unit. I installed a 20-amp double-pole breaker.
- Connect the power cable to the outdoor unit’s terminal block. Follow the wiring diagram—colors vary by brand.
- Evacuate the refrigerant lines with the vacuum pump. Run it for at least 30 minutes, then check for leaks with the manifold gauges.
- Open the service valves on the outdoor unit to release the factory charge. If your lines are longer than 25 feet, add refrigerant (measured by weight).
I hired a tech for the refrigerant charge. He added 12 ounces to compensate for my 60-foot line set. It cost $150, but it saved me from buying a refrigerant scale.
Step 5: Test and Troubleshoot
Turn the power back on and:
- Check for error codes on the indoor unit’s display.
- Listen for unusual noises (buzzing, hissing).
- Verify the condensate drain is flowing. Pour water into the indoor unit’s drain pan to test.
- Use a thermometer to confirm the air temperature drop (should be 15–20°F).
My unit had a “low refrigerant” alarm at first. Turns out, I didn’t evacuate the lines long enough. After re-pumping, it worked perfectly.
Common Pitfalls and How to Dodge Them
The Drainage Disaster
Condensate leaks are the #1 complaint. To avoid this:
- Ensure the indoor unit is perfectly level. Even a 1-degree tilt can cause leaks.
- Use a condensate pump if the drain line can’t slope downward. I installed one for my basement bedroom unit.
- Clean the drain hose annually. Algae can clog it over time.
My first summer, I had a puddle under the indoor unit. A quick check revealed a kinked drain hose. A simple fix, but it could have damaged the wall.
Refrigerant Leaks: The Silent Killer
Low refrigerant causes poor performance and compressor damage. Signs include:
- Ice on the refrigerant lines
- Hissing sounds from the valves
- Higher energy bills
Prevention: Always evacuate the lines properly. Use a micron gauge to confirm the vacuum is below 500 microns. If you smell a faint, sweet odor, call a pro immediately.
Noise Complaints
Most mini splits are quiet, but issues arise when:
- The outdoor unit vibrates on an uneven surface. Use rubber pads to isolate it.
- Refrigerant lines rub against walls. Secure them with foam insulation.
- The indoor unit’s fan is dirty. Clean the filter monthly.
My neighbor’s unit was loud because the installer didn’t use vibration pads. A $20 fix solved it.
Warranty Woes
Many manufacturers require professional installation for full warranty coverage. I registered my unit online and kept receipts for all work. When my remote control failed after 18 months, Senville sent a free replacement—no questions asked.
When to Call a Pro (and What It Costs)
The DIY Sweet Spot
You can handle the mounting, wiring, and basic setup yourself. But for:
- Refrigerant charging
- Electrical permits
- Complex multi-zone systems
…hire a pro. I paid $500 for a technician to handle the refrigerant and electrical inspection. It was worth it to ensure safety and compliance.
Cost Breakdown
| Item | DIY Cost | Professional Cost |
|---|---|---|
| 18,000-BTU dual-zone unit | $1,500–$2,500 | Included in labor |
| Tools (drill, level, etc.) | $200 (if you don’t own them) | — |
| Vacuum pump rental | $150 | — |
| Electrical work | $0 (DIY) | $300–$800 |
| Refrigerant charge | $0 (DIY) | $150–$300 |
| Permits | $100–$200 | $100–$200 |
| Total | $1,950–$3,550 | $2,500–$4,500 |
DIY saved me about $1,500. But if you’re uncomfortable with electrical or refrigerant work, the peace of mind is worth the extra cost.
The Bottom Line: Is DIY Right for You?
Installing a ductless mini split air conditioner is like assembling a complex puzzle. It’s challenging, but incredibly rewarding when you see that first burst of cool air. You’ll save money, gain valuable skills, and enjoy a system tailored to your home’s needs.
But let’s be real: it’s not for everyone. If you’re short on time, lack tools, or feel uneasy about electrical or refrigerant work, hire a pro. The average installation takes 1–2 days for a pro but could stretch to a weekend for a beginner.
My biggest takeaway? Plan meticulously. Measure twice, drill once. Read the manual cover to cover. And don’t rush the refrigerant evacuation—it’s the make-or-break step.
Now, as I sit here typing with a gentle breeze from my mini split, I can’t help but smile. No more noisy window units. No more high bills. Just pure, quiet comfort. Whether you DIY or hire help, going ductless is one of the best decisions you’ll make for your home. Stay cool, my friend.
Frequently Asked Questions
What is a ductless mini split air conditioner installation?
A ductless mini split air conditioner installation involves mounting an indoor air handler and an outdoor compressor unit, connected by a refrigerant line, without requiring ductwork. This setup is ideal for homes or rooms where traditional HVAC ducts aren’t feasible or cost-effective.
Can I install a ductless mini split air conditioner myself?
While DIY installation is possible for those with electrical and HVAC experience, hiring a professional is recommended for proper refrigerant handling, electrical connections, and warranty compliance. Incorrect installation can lead to inefficiency or system damage.
How long does a ductless mini split installation take?
Most installations take 4–8 hours, depending on the system’s complexity, number of indoor units, and accessibility of the installation site. Professional installers can complete the job faster with minimal disruption.
What are the key steps in ductless mini split air conditioner installation?
The process includes mounting the indoor and outdoor units, drilling a hole for the refrigerant line, connecting electrical wiring, and charging the refrigerant. Proper placement of units ensures optimal airflow and efficiency.
Do I need a permit to install a ductless mini split system?
Yes, many local building codes require a permit for HVAC installations, especially for electrical and refrigerant work. Check with your local authorities or hire a licensed contractor to ensure compliance.
What factors affect the cost of ductless mini split installation?
Costs depend on the system’s size, brand, number of zones, labor rates, and any structural modifications needed. Additional expenses may include permits or upgraded electrical panels.