
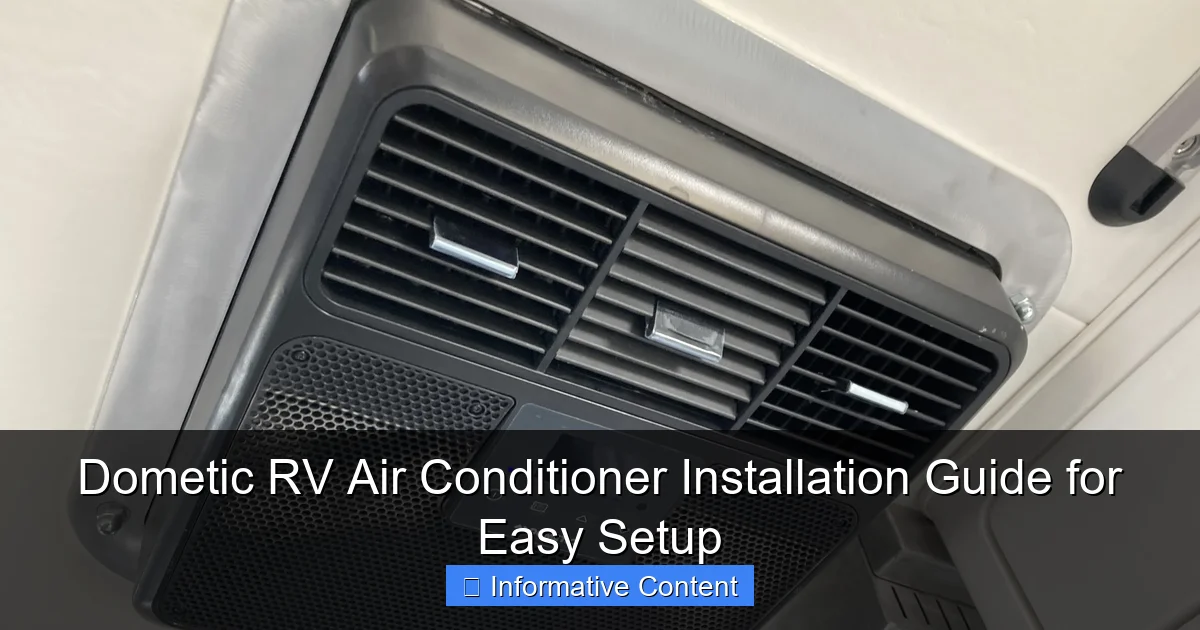
Featured image for dometic rv air conditioner installation
Image source: truckcamperadventure.com
Installing a Dometic RV air conditioner is a straightforward DIY project when you follow the right steps and safety precautions. This guide walks you through essential installation tips, from proper roof measurements and electrical requirements to secure mounting and leak testing, ensuring optimal performance and longevity. Get your RV cooling system up and running quickly—without costly professional help—by trusting Dometic’s reliable design and clear instructions.
Key Takeaways
- Verify compatibility: Ensure your RV roof opening matches Dometic’s 14″ x 14″ standard.
- Turn off power: Always disconnect shore power before starting electrical connections.
- Use sealant: Apply butyl tape for a weatherproof seal around the AC unit.
- Check ducting: Align air conditioner ducts with RV ceiling vents for optimal airflow.
- Test operation: Run a 15-minute test cycle before finalizing the installation.
- Secure wiring: Use cable ties to prevent loose wires from damaging components.
📑 Table of Contents
- Why Installing Your Dometic RV Air Conditioner Matters
- Understanding Your Dometic RV Air Conditioner Options
- Tools, Materials, and Safety: What You’ll Need
- Step-by-Step Installation Process
- Testing, Troubleshooting, and Common Pitfalls
- Maintenance Tips to Keep Your AC Running Smoothly
- When to Call a Professional (And When to DIY)
- Final Thoughts: Enjoy the Cool Ride
Why Installing Your Dometic RV Air Conditioner Matters
Let’s be honest—there’s nothing quite like the freedom of the open road in your RV. But when summer hits and the heat turns your cozy camper into a mobile sauna, that freedom can start to feel a little less glamorous. That’s where a reliable air conditioner comes in. And if you’re considering a Dometic RV air conditioner installation, you’re already on the right track. Dometic has been a trusted name in RV climate control for years, known for durability, quiet operation, and efficient cooling.
I remember my first real RV trip—three days into the desert, temperatures pushing 105°F, and my old AC unit wheezing like it had run a marathon. I ended up pulling over at a campground, sweating through a manual install of a replacement unit with shaky hands and YouTube tutorials. That experience taught me one thing: proper installation isn’t just about comfort—it’s about confidence. When you know your AC is installed correctly, you can focus on stargazing, hiking, or just enjoying a cold drink under the awning.
Understanding Your Dometic RV Air Conditioner Options
Before you even think about picking up a screwdriver, it’s important to know what kind of Dometic unit you’re working with. Not all models are created equal, and choosing the right one—or understanding your current one—can make the difference between a smooth install and a frustrating weekend.
Visual guide about dometic rv air conditioner installation
Image source: i1.wp.com
Popular Dometic Models for RVs
Dometic offers several RV-specific air conditioners, each with unique features. Here are the most common types:
- Dometic Brisk Air II (B57915.XX1C0): One of the most popular models, this 13,500 BTU unit fits standard 14” x 14” roof openings. It’s lightweight, energy-efficient, and works great for mid-sized travel trailers and Class B/C motorhomes.
- Dometic Penguin II (B57515.XX1J0): A low-profile model ideal for taller RVs or those with roof-mounted solar panels. At 15,000 BTU, it’s slightly more powerful and quieter than the Brisk Air.
- Dometic FreshJet 3 (FJ3000): A newer model with a sleek design, 15,000 BTU output, and improved airflow. It’s often used in fifth wheels and larger motorhomes.
- Dometic CoolCat (C135): A compact, high-efficiency unit designed for smaller RVs or as a secondary AC. It’s great if you want to cool just the bedroom at night.
Pro tip: Check your RV’s roof opening size before ordering. Most standard openings are 14” x 14”, but some older or custom models may differ. Measure twice, order once!
Roof vs. Under-Bench Units
Most Dometic RV air conditioners are roof-mounted, meaning they sit on top of your RV and blow cool air down through a ceiling vent. But there are also under-bench or under-bed units (like the Dometic CoolCat) that install inside your RV and vent outside through a side or rear panel.
- Roof units are easier to install (if you’re comfortable on a ladder) and provide more even cooling.
- Interior units save roof space and are quieter, but require ducting and more complex electrical work.
I once helped a friend install an under-bench unit. We spent two hours routing ducts behind cabinets and sealing gaps with foil tape. It worked great—but it wasn’t a “weekend project.” If you’re a DIY newbie, stick with a roof-mounted model for your first Dometic RV air conditioner installation.
Tools, Materials, and Safety: What You’ll Need
You don’t need to be a licensed HVAC technician to install a Dometic AC, but you do need the right tools and a healthy respect for safety. I’ve seen too many people rush through this step and end up with leaks, electrical issues, or even roof damage.
Essential Tools and Supplies
Here’s a checklist of what you’ll need:
- Ladder (extendable, stable, and long enough to safely reach your roof)
- Drill with bits (including a 1/4” bit for pilot holes)
- Socket wrench or ratchet set (for securing the mounting plate)
- Screwdrivers (Phillips and flathead)
- Caulking gun and RV roof sealant (Dicor or similar—don’t use silicone!)
- Measuring tape and level
- Wire strippers and electrical tape
- Butyl tape (for sealing the base plate—this is a must!)
- Roof vent cover (if replacing an old unit, make sure you have the correct one)
- Work gloves and safety glasses
- Assistant (optional but highly recommended)
Safety First: Don’t Skip This
RV roofs aren’t designed to support full human weight. Always use a sturdy ladder, wear slip-resistant shoes, and never walk on the roof without checking for soft spots. If your roof feels spongy, stop—there could be water damage or rot underneath.
Also, turn off power at the main breaker before touching any electrical connections. Even if you think the AC circuit is off, double-check with a non-contact voltage tester. I learned this the hard way when I accidentally brushed a live wire and got a jolt that made me drop my wrench—luckily, it didn’t hit anyone.
One more thing: never work in wet or windy conditions. A sudden gust can knock you off balance, and water + electricity = disaster.
Step-by-Step Installation Process
Now for the main event: the actual Dometic RV air conditioner installation. This is where preparation pays off. If you’ve got your tools, your model, and your safety gear ready, the process should take 3–5 hours—depending on your experience and whether you’re replacing an old unit.
Step 1: Remove the Old AC Unit (If Applicable)
If you’re replacing an existing air conditioner, start here:
- Disconnect power at the main breaker.
- Remove the interior ceiling shroud (the plastic cover inside your RV).
- Unplug the wiring harness from the old unit (usually a simple plug-and-play connector).
- Go outside and remove the mounting screws or bolts from the base plate.
- Carefully lift the old unit off the roof. Have a friend help—these units weigh 60–80 lbs.
- Inspect the roof opening for damage or debris. Clean it thoroughly.
Tip: Take photos at each step. It’ll help you remember how things were connected if you get stuck later.
Step 2: Prepare the Roof Opening
Even if the opening looks fine, it’s worth checking:
- Look for cracks, soft spots, or water stains around the perimeter.
- Remove old sealant with a plastic scraper (don’t use metal—it can damage the roof).
- Apply a fresh bead of butyl tape around the outer edge of the opening. This creates a flexible, waterproof seal.
- Make sure the mounting plate (included with your Dometic unit) fits snugly over the opening.
I once skipped the butyl tape because I thought the old sealant was “good enough.” Big mistake. Two weeks later, I had a leak during a storm. Don’t be like me.
Step 3: Mount the Base Plate and Install the AC
This is the trickiest part—getting the unit on the roof without dropping it.
- With help, carefully lift the new Dometic unit onto the roof. Align the base plate with the opening.
- Lower it slowly, making sure the drain holes and electrical conduit are positioned correctly.
- Secure the base plate with the provided bolts or screws. Use a crisscross pattern to avoid warping the plate.
- Apply a generous bead of RV roof sealant (like Dicor) around the entire base plate. Overlap the sealant at the corners.
Important: Don’t overtighten the bolts. You want the plate secure, but not so tight that it cracks the plastic housing.
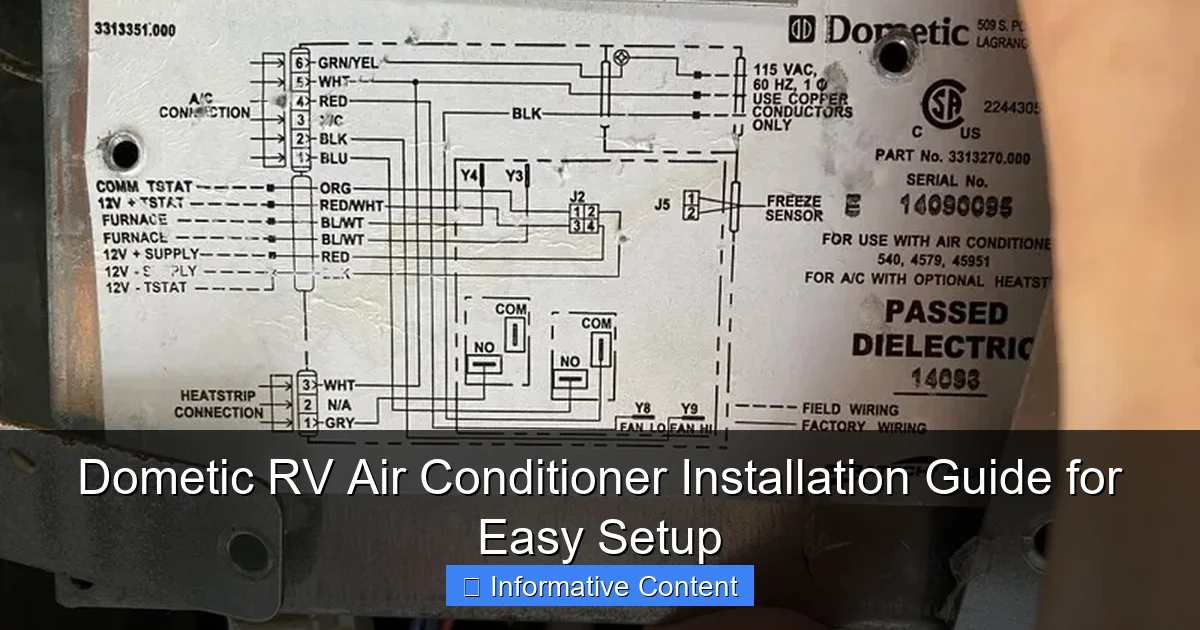
Step 4: Connect the Electrical Wiring
Back inside the RV, it’s time to wire things up:
- Locate the wiring harness from the AC unit. It should run down through the ceiling opening.
- Plug it into the matching connector on your RV’s AC control board (usually labeled “AC” or “Roof AC”).
- Secure any loose wires with zip ties. Keep them away from sharp edges.
- If your unit has a thermostat or control panel, follow the manual to connect it.
Most Dometic units are 120V AC, so they’ll plug into your RV’s main electrical system. If you’re unsure, consult the wiring diagram in your manual—or better yet, have an electrician verify it.
Step 5: Install the Interior Ceiling Shroud
The shroud (also called a ceiling assembly) covers the mechanical parts and directs airflow. Here’s how to install it:
- Align the shroud with the ceiling opening.
- Secure it with screws (usually 4–6).
- Connect the ducting if your model has adjustable vents.
- Test the louvers to make sure they open and close smoothly.
Some shrouds come with built-in lights or USB ports. If yours does, connect those wires too. I love the ones with night lights—perfect for midnight snack runs.
Testing, Troubleshooting, and Common Pitfalls
You’ve done the hard part—now it’s time to see if it works. But don’t just flip the switch and hope for the best. A proper test ensures everything is safe and efficient.
How to Test Your New AC Unit
Follow these steps after installation:
- Turn the power back on at the main breaker.
- Set your thermostat or control panel to “Cool” and a low temperature (e.g., 68°F).
- Wait 2–3 minutes. You should hear the compressor kick in.
- Check for cold air at the vents. Use your hand to feel airflow—don’t rely on the temperature alone.
- Listen for unusual noises (grinding, squealing, or loud bangs).
- Inspect the roof for leaks after 15 minutes of operation.
If everything’s working, great! If not, don’t panic. Let’s look at common issues.
Common Problems and Fixes
- No power or unit won’t turn on: Check the breaker, thermostat connection, and wiring harness. Use a multimeter to test voltage at the AC plug.
- Weak or no airflow: Make sure the ceiling shroud is properly aligned. Check for blocked ducts or a dirty filter (if your model has one).
- Water dripping inside: This usually means the drain pan isn’t level or the drain tubes are blocked. Adjust the unit slightly or clear the drains.
- Loud noises: Could be loose mounting bolts, a damaged fan blade, or a failing compressor. Tighten bolts first, then call a technician if it persists.
- Unit cycles on and off too often: This is often due to low refrigerant or a dirty condenser coil. Not a DIY fix—call a pro.
I once had an AC that kept tripping the breaker. Turns out, the wiring harness was pinched under the base plate. A small mistake, but a big headache. Always double-check connections before sealing everything up.
Maintenance Tips to Keep Your AC Running Smoothly
Installing your Dometic RV air conditioner is just the beginning. To get the most out of it, you need to maintain it. Think of it like changing the oil in your car—skip it, and you’ll pay later.
Seasonal Maintenance Checklist
Here’s what to do at the start and end of each camping season:
- Inspect the roof seal: Look for cracks or gaps in the sealant. Reapply Dicor if needed.
- Clean the exterior: Wipe down the unit with a damp cloth. Remove leaves, dirt, or bird nests from the condenser fins.
- Check the filter (if applicable): Some models have removable filters. Rinse them with water and let them dry.
- Test the thermostat: Make sure it’s reading the correct temperature.
- Lubricate moving parts: If your unit has a fan motor with oil ports, add a few drops of lightweight oil.
- Cover the unit when not in use: Use a breathable AC cover to protect it from UV rays and debris.
Winterizing Your RV AC
If you store your RV in cold climates, winterizing is crucial:
- Run the AC for 10 minutes to dry out the evaporator coil (prevents mold).
- Turn off power and remove the interior shroud.
- Cover the roof unit with a breathable cover. Never use plastic—it traps moisture.
- Check for rodent nests in the spring. Mice love nesting in warm, quiet AC units.
One winter, I forgot to cover my AC. By spring, the condenser fins were full of leaves and spiderwebs. It took me an hour with a soft brush and compressed air to clean it out. Learn from my laziness!
When to Call a Professional (And When to DIY)
I’m all for DIY, but there are times when calling a pro makes more sense. Here’s how to decide:
DIY-Friendly Scenarios
- Replacing a roof-mounted unit with the same model or a direct-fit upgrade.
- You have basic electrical and carpentry skills.
- Your RV is on level ground, and the roof is in good condition.
- You’re replacing the unit during warm, dry weather.
When to Call a Technician
- You’re installing an under-bench or ducted unit for the first time.
- You suspect roof damage or water intrusion.
- You’re not comfortable working with 120V electrical systems.
- Your RV has a complex climate control system (e.g., dual ACs with a thermostat).
- You’re installing in extreme weather (heat, rain, wind).
One of my buddies tried to install a dual-AC system himself. He got the units in place but couldn’t get them to run simultaneously. The issue? A shared circuit that needed a dedicated breaker. He ended up paying a tech $200 to fix it. Sometimes, it’s smarter to spend the money upfront.
Final Thoughts: Enjoy the Cool Ride
Installing a Dometic RV air conditioner isn’t just about beating the heat—it’s about peace of mind. When you know your AC is installed correctly, you can relax on your next adventure without worrying about breakdowns, leaks, or sky-high repair bills.
Take your time, follow the steps, and don’t skip the safety checks. Use quality sealants, double-check your wiring, and test everything before hitting the road. And if you run into a snag? Don’t get frustrated. Every installer—even the pros—has had a “what the heck?” moment.
Remember: a well-installed AC isn’t just a comfort upgrade. It’s an investment in your RV lifestyle. Whether you’re boondocking in the desert or parked at a lakeside campground, you’ll appreciate that cool, quiet breeze. So go ahead—crank it up, open the windows, and enjoy the ride. The open road is even better when it’s not 95 degrees inside your RV.
| Dometic Model | BTU Output | Roof Opening Size | Weight (lbs) | Best For |
|---|---|---|---|---|
| Brisk Air II (B57915.XX1C0) | 13,500 | 14” x 14” | 72 | Travel trailers, Class B/C |
| Penguin II (B57515.XX1J0) | 15,000 | 14” x 14” | 76 | Fifth wheels, tall RVs |
| FreshJet 3 (FJ3000) | 15,000 | 14” x 14” | 78 | Larger motorhomes |
| CoolCat (C135) | 13,500 | 14” x 14” (interior install) | 60 | Small RVs, secondary cooling |
Frequently Asked Questions
How do I install a Dometic RV air conditioner for the first time?
Begin by turning off all power sources and removing the old unit (if applicable). Follow the manufacturer’s manual to mount the new Dometic AC unit on the roof, secure it with brackets, and connect the wiring and ductwork carefully. Always double-check seals and electrical connections before powering on.
What tools are needed for a Dometic RV air conditioner installation?
You’ll typically need a drill, screwdrivers, sealant, wire stripper, level, and a socket wrench set. Having a helper for lifting the unit and a multimeter to verify electrical connections ensures a safer and smoother setup.
Can I install a Dometic RV air conditioner without professional help?
Yes, if you’re experienced with basic RV systems and follow the Dometic RV air conditioner installation guide closely. However, if you’re unsure about wiring or roof modifications, hiring a certified technician is recommended for safety and warranty compliance.
Where should the Dometic AC unit be placed on my RV roof?
Position the unit over the existing roof vent or cutout, ensuring it’s centered and level. Avoid placing it near roof seams, obstacles, or areas prone to debris buildup to maximize airflow and performance.
Do I need to replace the air filter during installation?
Yes, installing a new air filter during setup ensures optimal airflow and efficiency. Dometic recommends using their compatible filter to maintain warranty coverage and extend the unit’s lifespan.
How do I troubleshoot a Dometic RV air conditioner after installation?
If the unit doesn’t power on, check circuit breakers, thermostat settings, and wiring connections. For poor cooling, inspect the filter, condenser coils, and ductwork for obstructions or leaks. Refer to the manual for model-specific troubleshooting steps.