
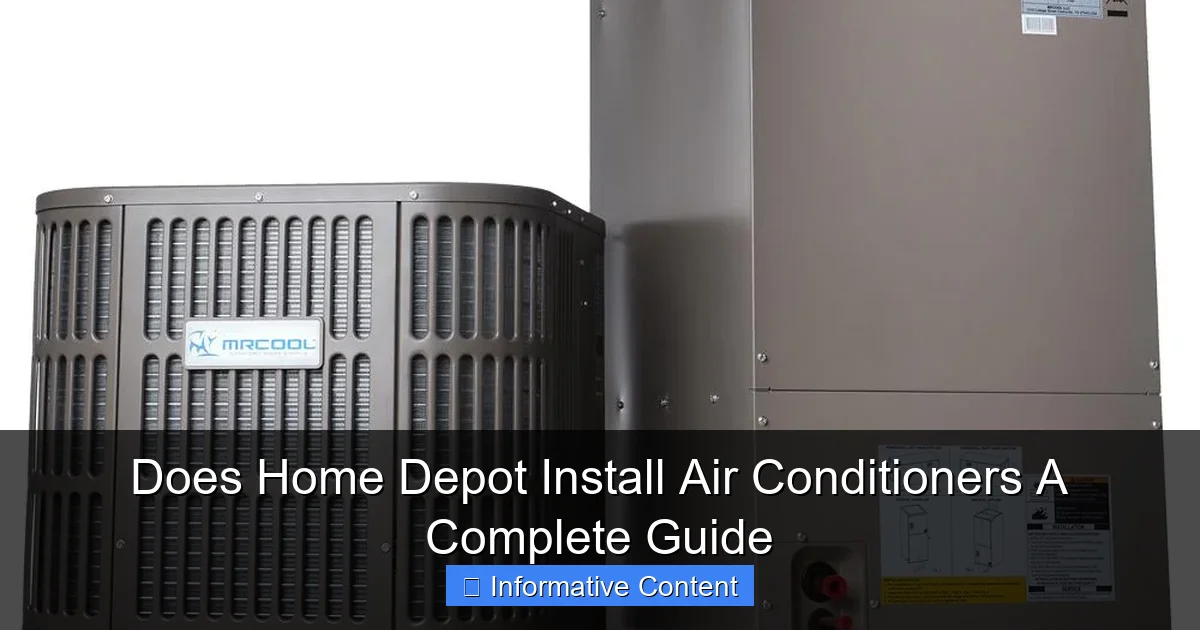
Featured image for does home depot install air conditioners
Image source: images.homedepot-static.com
Yes, Home Depot installs air conditioners through its network of licensed, local HVAC professionals, offering a seamless solution for both purchase and installation. Available for mini-split, window, and central AC units, the service includes expert assessment, haul-away of old systems, and flexible scheduling—making it a reliable one-stop shop for cooling upgrades.
Key Takeaways
- Yes, Home Depot installs ACs: Professional services available for all major brands.
- Free in-home consultation: Schedule online to assess your cooling needs.
- Get a custom quote: Upfront pricing with no hidden fees guaranteed.
- Flexible financing options: Apply for project loans or use credit plans.
- Certified technicians: Licensed, insured pros handle installation safely.
- Warranty protection: Workmanship and manufacturer warranties included.
📑 Table of Contents
- Does Home Depot Install Air Conditioners? A Complete Guide
- How Home Depot’s AC Installation Service Actually Works
- Types of Air Conditioners Home Depot Installs (and What You Need to Know)
- Cost Breakdown: What You’ll Actually Pay (and How to Save)
- Choosing the Right AC Unit: Sizing, Efficiency, and Features
- What to Expect on Installation Day (and How to Prepare)
- Alternatives to Home Depot Installation (and When to Consider Them)
Does Home Depot Install Air Conditioners? A Complete Guide
So, you’re sweating through another summer, and your old AC unit just isn’t cutting it anymore. You’ve been eyeing that shiny new air conditioner at Home Depot, but you’re wondering: Does Home Depot install air conditioners? You’re not alone. Thousands of homeowners face this exact dilemma every year. The good news? Yes, Home Depot does offer air conditioner installation services, but it’s not quite as simple as picking up a unit and having someone install it for you on the spot. It’s more like a well-organized team effort between you, the store, and their network of trusted local pros.
Let’s be real—installing an air conditioner isn’t a DIY job for most of us. It’s not just about lifting a heavy unit; it involves electrical work, refrigerant handling, ductwork (if you have central AC), and making sure everything is up to code. Mess it up, and you could be looking at sky-high energy bills, a broken system, or even safety hazards. That’s where Home Depot’s installation services come in. They partner with licensed, insured, and background-checked local HVAC contractors to handle the heavy lifting—literally and figuratively. In this guide, we’ll break down everything you need to know about Home Depot’s AC installation process, from choosing the right unit to what happens on install day and beyond. Think of it as your friendly, no-nonsense roadmap to staying cool without the stress.
How Home Depot’s AC Installation Service Actually Works
The Process: From Purchase to Installation
Home Depot doesn’t have in-house HVAC technicians. Instead, they use a third-party installation network. This means when you buy an AC unit (central, mini-split, or window), you can opt for professional installation. Here’s how it flows:
Visual guide about does home depot install air conditioners
Image source: contentgrid.homedepot-static.com
- Step 1: Choose Your AC Unit – You pick the right air conditioner for your home. This could be a central system, a ductless mini-split, or a portable/window unit. Home Depot’s website and in-store associates can help you with sizing and features (more on that later).
- Step 2: Add Installation at Checkout – During online checkout or at the store, you’ll see an option to “Add Installation.” This isn’t automatic. You have to select it. The cost is usually a flat fee or based on the unit type and complexity.
- Step 3: Home Depot Connects You with a Local Pro – After your purchase, Home Depot’s installation coordinator reaches out. They’ll schedule a free in-home assessment with a local HVAC contractor from their approved network. This is a crucial step—it’s not just about showing up. The pro will evaluate your home’s layout, existing ductwork (if any), electrical panel, and the unit’s placement to ensure it’s done right and safely.
- Step 4: The Installation Day – The contractor arrives with the necessary tools and equipment. They’ll install the unit, connect it to your power source and ductwork (if applicable), charge the refrigerant, and test the system. They’ll also show you how to use the thermostat and basic maintenance.
- Step 5: Final Walkthrough & Warranty – You’ll get a final walkthrough to make sure everything works. You’ll also receive documentation, including the warranty for the unit (usually from the manufacturer) and any labor warranty from the installing contractor.
For example, Sarah from Ohio bought a 3-ton central AC unit online and added installation. She got a call from a local HVAC company within 24 hours. They came to her home, assessed the attic space and existing ducts, and installed the unit in one day. The whole process took about a week from purchase to cool air.
What’s Included in the Installation Fee?
The installation fee isn’t a one-size-fits-all number. It covers the standard installation, but there are often extra costs if your home needs special work. Here’s what’s typically included:
- Unit Delivery – The AC unit is delivered to your home by the installer.
- Basic Installation Labor – Mounting the indoor and outdoor units, connecting refrigerant lines, wiring, and basic ductwork connections (if applicable).
- Refrigerant Charging – Filling the system with the correct amount of refrigerant.
- System Testing – Running the AC to ensure it cools properly and all components function.
- Basic Disposal – Removing your old AC unit (if you’re replacing one).
- Permits (Sometimes) – In some areas, the contractor will handle the building permit, but you may need to pay the permit fee yourself.
What’s *NOT* included (and can add to the cost):
- Extensive Ductwork Modifications – If your ducts are damaged, undersized, or need major rerouting, this is extra. Think of it like fixing a leaky pipe—it’s not part of the standard “install a new faucet” job.
- Electrical Panel Upgrades – If your current electrical panel can’t handle the AC’s power needs, you’ll need an electrician. This is a common extra cost, especially in older homes.
- Line Set Extensions – If the distance between the indoor and outdoor units is longer than standard, you’ll need longer refrigerant lines.
- Permit Fees – As mentioned, the cost of the permit itself is usually your responsibility, even if the contractor pulls it.
- Special Mounting Hardware – If your roof or wall is an unusual material (like tile or stucco), special brackets might be needed.
Pro tip: Always ask for a detailed written quote during the in-home assessment. This quote should break down the base installation cost and any potential extras. It’s your best defense against surprise bills.
Types of Air Conditioners Home Depot Installs (and What You Need to Know)
Central Air Conditioning Systems
This is the most common type for whole-house cooling. It uses an outdoor condenser unit and an indoor air handler (often connected to your furnace). Home Depot offers a wide range of brands (like Trane, Carrier, Goodman) and sizes.
- What You Need: Existing ductwork is a must. If you don’t have ducts (like in a newer home without forced air), this isn’t the right choice unless you’re willing to install ductwork (which is a major, expensive project).
- Installation Complexity: Moderate to high. It involves connecting to your furnace’s air handler, running refrigerant lines through walls/attic, and ensuring proper airflow through ducts.
- Cost Range (Installation Only): $1,500 – $4,000+ (depending on unit size, ductwork condition, and location). The unit itself is extra ($2,000 – $6,000+).
- Best For: Homes with existing forced-air heating systems.
Example: A family in Texas needed a new central AC. Their ducts were in good shape, but the outdoor unit was on a sloped roof. The installer used special brackets to secure it, adding about $300 to the base cost.
Ductless Mini-Split Systems
These are becoming super popular, especially for additions, older homes without ducts, or rooms that are always too hot/cold. They have an outdoor condenser and one or more indoor air handlers mounted on the wall or ceiling.
- What You Need: No ductwork required! You need a small hole (about 3 inches) in the wall for the refrigerant lines and wiring. Good for zoning—cooling specific rooms.
- Installation Complexity: Moderate. The installer needs to drill a hole, mount the indoor unit, run the lines, and connect the outdoor unit. It’s less invasive than central AC.
- Cost Range (Installation Only): $1,000 – $2,500+ (per zone). A single-zone system is cheaper; multi-zone systems cost more. The unit itself is extra ($1,500 – $4,000+ per zone).
- Best For: Homes without ducts, room additions, garages, or for creating “zones” within a home.
Tip: Mini-splits are great for energy efficiency because you only cool the rooms you’re using. No more wasting energy on an empty guest room!
Window and Portable Air Conditioners
These are smaller, self-contained units. Window units fit in a window opening, while portable units have a hose that vents out a window.
- What You Need: A standard window (for window units) or a way to vent the exhaust hose (for portables). Electrical outlet nearby.
- Installation Complexity: Low. Home Depot’s installation for these is often more about delivery and setup than complex work. The installer might help you lift it into the window, secure it, and show you how to use it.
- Cost Range (Installation Only): $100 – $300 (much lower than central or mini-split). The unit itself is extra ($200 – $800+).
- Best For: Renters, small apartments, or cooling a single room. Not ideal for whole-house cooling.
Important: Home Depot’s installation for window/portable units is not a full HVAC service. It’s more about helping you get it in place safely. You’ll still need to handle the electrical cord and window sealing yourself (or with a friend).
Cost Breakdown: What You’ll Actually Pay (and How to Save)
Base Installation Fees (Approximate)
These are general ranges. Your actual cost depends on your location, unit size, and home’s condition. Always get a quote.
| AC Type | Base Installation Fee Range | Unit Cost Range (Extra) | Potential Extra Costs |
|---|---|---|---|
| Central Air (3-ton) | $1,800 – $3,500 | $2,500 – $5,000 | Ductwork mods, electrical upgrade, permits, line set extensions |
| Ductless Mini-Split (Single Zone) | $1,200 – $2,000 | $1,800 – $3,000 | Additional zones, special mounting, longer line sets |
| Window Unit (24,000 BTU) | $150 – $250 | $400 – $700 | None (installation is basic setup) |
| Portable Unit (14,000 BTU) | $100 – $200 | $300 – $600 | None |
Hidden Costs & How to Avoid Them
- Permit Fees: These vary by city/county. Could be $50-$300. Ask the contractor if they pull the permit and who pays the fee.
- Electrical Work: If your panel is outdated (like a 100-amp fuse box), you might need a panel upgrade to a 200-amp breaker panel. This can add $1,000-$3,000+ and requires a separate electrician (not always the HVAC pro).
- Ductwork Repairs: Old, leaky, or undersized ducts can reduce efficiency by 30%. The installer might find this during the assessment. Repairs can add $500-$2,000+.
- Condensate Drain Line Issues: If the drain line is clogged or improperly sloped, it can cause water damage. Fixing it might be an extra charge.
- Extended Warranty on Labor: The standard labor warranty is usually 1-2 years. You might be offered an extended warranty (e.g., 5-10 years) for an extra fee. Read the fine print.
Saving Tips:
- Get Multiple Quotes: Even though Home Depot uses their network, you can sometimes ask for a different contractor if you’re not comfortable with the first one. Compare the quotes.
- Time It Right: Late fall and early spring are slower for HVAC companies. You might get a better deal then (less demand).
- Check for Rebates: Many states and utility companies offer rebates for energy-efficient AC units (look for ENERGY STAR). Home Depot’s website often lists these, or ask the contractor.
- Negotiate (Subtly): If the quote includes a lot of extras, ask if they can bundle them at a discount or if there’s a simpler (and cheaper) solution. For example, “Can we just patch the duct instead of replacing the whole section?”
- Buy the Unit During a Sale: Home Depot has sales (like Memorial Day, Labor Day, Black Friday). You can save 10-20% on the unit itself.
Real story: Mark in Florida got a quote for $3,200 for central AC installation. It included $800 for “duct sealing.” He asked for details and found out they wanted to replace a 10-foot section of duct. He negotiated—they agreed to just seal the joints with mastic for $200, saving him $600.
Choosing the Right AC Unit: Sizing, Efficiency, and Features
BTUs: The Key to Proper Sizing (Don’t Guess!)
Using the wrong size AC is a common mistake. A unit that’s too small won’t cool your home; one that’s too big will cycle on and off too quickly (called “short cycling”), wasting energy and not removing humidity well.
- Rule of Thumb (for rough estimates): You need about 20 BTUs per square foot of living space. So, a 1,500 sq ft home needs roughly 30,000 BTUs (3 tons).
- But It’s Not That Simple: Other factors matter: climate (hot/humid vs. dry), insulation, number of windows, ceiling height, and sun exposure. A south-facing room with big windows needs more cooling.
- Home Depot’s Help: Use their online AC sizing calculator (search “Home Depot AC size calculator”). It asks about your home’s details and gives a BTU recommendation. Or, ask an in-store associate for help.
- The Pro Assessment is Crucial: The local HVAC contractor will do a more detailed Manual J load calculation during the assessment. This is the gold standard for sizing and considers all the factors above. Never skip this step!
Example: A homeowner in Arizona bought a 3-ton unit based on square footage. The contractor’s Manual J showed they only needed a 2.5-ton unit because of good insulation and shaded windows. They saved money on the unit and energy bills!
SEER Rating: Energy Efficiency Matters
SEER (Seasonal Energy Efficiency Ratio) measures how efficiently an AC uses electricity. A higher SEER means lower energy bills.
- Minimum SEER: The U.S. minimum is 14 SEER (13 SEER in some northern states).
- High Efficiency: 16+ SEER (up to 26 SEER for top models).
- Cost vs. Savings: A 20 SEER unit costs more upfront but can save you 20-30% on cooling bills. Calculate the payback period (extra cost ÷ annual savings).
- Rebates: Many rebates require a minimum SEER (like 16 or 18). Check Home Depot’s rebate page or ask the contractor.
Tip: If you plan to stay in your home for 5+ years, a higher SEER unit is usually worth it. If you’re selling soon, a 14-16 SEER might be fine.
Features to Consider
- Two-Stage or Variable-Speed Compressor: These adjust cooling output based on need, saving energy and providing more consistent temperatures. More expensive but very efficient.
- Smart Thermostat Compatibility: Many new ACs work with smart thermostats (like Nest, Ecobee). This lets you control cooling remotely and set schedules.
- Air Filtration: Look for models with good air filters (like MERV 13) if you have allergies or pets.
- Sound Level (dB): Outdoor units can be noisy. Check the decibel rating. Lower dB = quieter. Look for “quiet” or “ultra-quiet” models.
Home Depot’s website has filters for these features. Use them to narrow down your choices.
What to Expect on Installation Day (and How to Prepare)
Before the Installers Arrive
- Clear the Area: Move furniture, plants, or anything blocking access to the indoor unit (furnace closet, attic) and the outdoor unit (backyard, side of house). Make a clear path for the installers to bring in tools and the new unit.
- Protect Your Floors: Lay down cardboard, old towels, or plastic sheeting in the work area. Refrigerant lines and tools can be messy.
- Secure Pets and Kids: The installers will be carrying heavy equipment. Keep pets and children away from the work area for safety.
- Have Payment Ready: You’ll usually pay the installer directly on the day (cash, check, or credit card). Confirm the payment method and total cost beforehand.
- Ask Questions: Have a list of questions ready: “How long will it take?” “Will you need to shut off my power?” “Can I watch?”
During the Installation
- They’ll Start with the Outdoor Unit: This is usually the first step. They’ll secure it to the concrete pad, connect the refrigerant lines, and wire it.
- Indoor Unit and Ductwork (Central AC): They’ll connect the indoor coil to your furnace, seal the ducts, and run the refrigerant lines through the wall/attic.
- Electrical Work: They’ll connect the AC to your electrical panel and add a disconnect box near the outdoor unit.
- Refrigerant Charging: This is a precise process. They’ll use gauges to add the correct amount of refrigerant.
- System Testing: They’ll turn on the AC, check the airflow, temperature drop, and refrigerant pressure. They’ll also program the thermostat.
- Cleanup: Good installers will clean up their mess, remove old packaging, and take your old AC unit (if applicable).
Typical time: 4-8 hours for central AC; 3-6 hours for mini-split; 1-2 hours for window/portable.
After the Installation
- Final Walkthrough: The installer will show you how to use the thermostat, explain the warranty, and answer any questions. Don’t skip this!
- Get Documentation: You should receive a copy of the installation receipt, warranty information (unit and labor), and any permits.
- Test It Thoroughly: Run the AC for a few hours to make sure it cools properly. Check for unusual noises, leaks, or weak airflow.
- Schedule Maintenance: AC units need annual maintenance (cleaning coils, checking refrigerant). Ask the installer if they offer a maintenance plan or if Home Depot has one.
Pro tip: Take photos of the installed unit and any work done (like new ductwork). This is helpful for future reference or if you sell your home.
Alternatives to Home Depot Installation (and When to Consider Them)
Home Depot’s service is convenient, but it’s not the only option. Here are alternatives and when they might be better:
- Local Independent HVAC Companies: These are often family-owned or smaller businesses. Pros: More personalized service, potentially lower prices (less overhead), and they might use the same brands Home Depot sells. Cons: Less brand recognition, you need to vet them yourself (check reviews, licenses, insurance). Best for: If you want more control over the contractor or if Home Depot’s quote seems high.
- Manufacturer-Recommended Installers: Some AC brands (like Trane, Carrier) have their own networks of certified installers. Pros: They’re specifically trained on that brand’s equipment. Cons: Limited to that brand, might be more expensive. Best for: If you’re set on a specific brand and want a “factory-certified” installer.
- DIY (Only for Window/Portable Units): If you’re handy and comfortable with basic tools, you can install a window or portable AC yourself. Pros: Save on installation cost. Cons: Risk of improper installation (leaks, electrical issues), voiding the warranty, and physical strain. Best for: Window units in standard windows; portable units. Never DIY central or mini-split AC.
- Other Retailers (Lowe’s, Menards): Lowe’s offers similar third-party installation services. Compare quotes from both Home Depot and Lowe’s. Best for: If you’re price-shopping or prefer Lowe’s customer service.
When to stick with Home Depot: You want the convenience of one-stop shopping (buy unit + install together), you trust their network of contractors, or you’re using a Home Depot credit card with financing options.
Ultimately, the goal is to get a reliable, efficient AC installed safely. Whether you choose Home Depot or another option, the key is doing your research, getting detailed quotes, and making sure the installer is licensed, insured, and reputable. A well-installed AC can last 15-20 years, so it’s worth getting it right the first time. Now go enjoy that cool air—you’ve earned it!
Frequently Asked Questions
Does Home Depot install air conditioners?
Yes, Home Depot offers professional air conditioner installation services through certified HVAC contractors. The service is available for both mini-split and central AC systems purchased through Home Depot.
What types of AC units does Home Depot install?
Home Depot installs ductless mini-splits, central air conditioners, and heat pumps from top brands like Carrier, Trane, and MRCOOL. Installation is only available for units bought directly from Home Depot.
How much does Home Depot charge for air conditioner installation?
Installation costs vary based on unit type, home size, and project complexity, but typically range from $500 to $2,500. Home Depot provides free in-home consultations to give accurate quotes for your specific needs.
Do I need to be home during the AC installation?
Yes, you or an authorized adult must be present during the entire installation process. This ensures the technicians can access your home and address any questions or concerns in real time.
How long does Home Depot take to install an air conditioner?
Most standard installations take 1-2 days, depending on system complexity and ductwork requirements. The Home Depot team will provide a timeline during your initial consultation.
Does Home Depot offer financing for AC installation?
Yes, Home Depot provides financing options through their credit card, including special promotions like 12-24 months no-interest plans for qualified buyers. This applies to both the AC unit and installation services.