

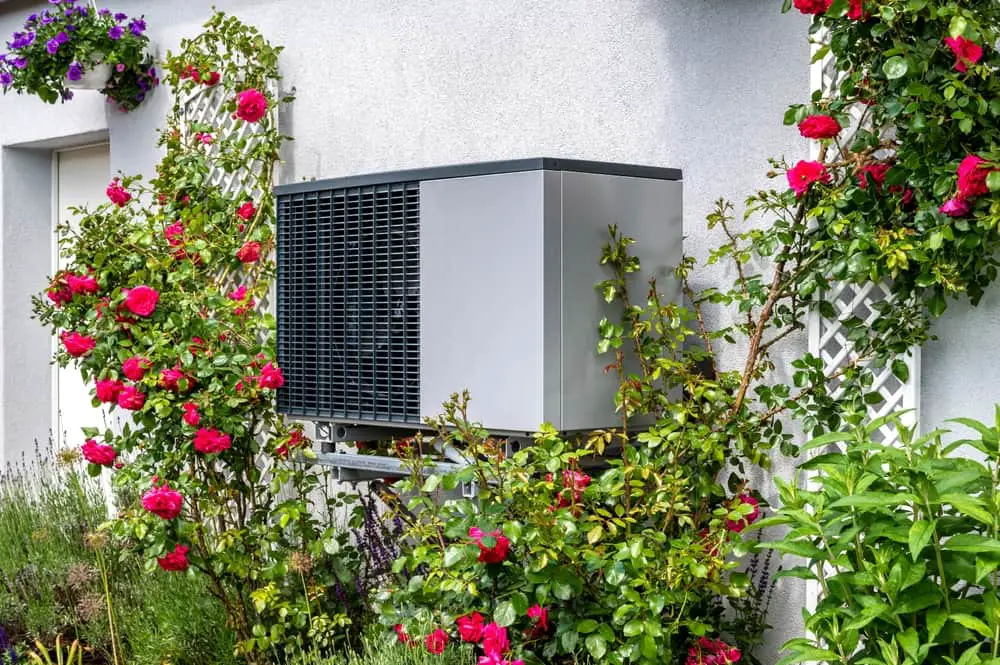
DIY solutions for common air conditioning issues include cleaning or replacing air filters and checking thermostat settings. Having a well-maintained air conditioning system is essential for a comfortable indoor environment, especially during hot summer days.
However, like any other appliance, air conditioners can encounter problems. Fortunately, many air conditioning issues can be resolved with simple do-it-yourself solutions, saving you time and money. We will explore some common air conditioning problems and provide step-by-step instructions on how to address them.
By following these diy solutions, you can prolong the lifespan of your air conditioner and ensure optimal performance. Read on to learn more about tackling common air conditioning issues on your own.
Unusual Noises
One of the most common signs of a malfunctioning air conditioning unit is the presence of unusual noises. While an air conditioner typically produces some noise during operation, certain sounds can indicate an underlying issue that requires attention. By recognizing these noises and understanding their potential causes, you can take DIY measures to address the problem and avoid costly repairs. In this section, we will explore the possible causes of these noises, how to diagnose the issue, and the DIY solutions you can employ.
Potential Causes Of Noises
When it comes to unusual noises from your air conditioner, there are a few potential causes to consider. It is essential to pinpoint the source of the noise accurately to address the issue effectively. The two most common culprits are loose or damaged fan blades and a worn-out compressor.
Loose or Damaged Fan Blades
One potential cause of unusual noises is loose or damaged fan blades. Over time, fan blades can become loose due to regular wear and tear or improper installation. When the blades are loose, they can hit other components inside the unit, resulting in rattling or clanging sounds. Additionally, if the fan blades are damaged, such as being bent or cracked, they can produce scraping or grinding noises. Inspecting the fan blades is a crucial first step in diagnosing the issue.
Worn Out Compressor
Another possible cause of unusual noises is a worn-out compressor. The compressor is a vital component of the air conditioning unit responsible for pressurizing the refrigerant. Over time, the compressor can experience wear and tear, leading to internal damage or malfunction. This can result in noises such as humming, buzzing, or squealing. Diagnosing the issue accurately is necessary to determine if the compressor needs replacement.
Diagnosing The Issue
Accurately diagnosing the cause of the unusual noises is crucial before attempting any DIY solutions. Listening for specific sounds and inspecting the fan blades are two simple yet effective methods of diagnosing the issue.
Listening for Specific Sounds
When your air conditioner is producing unusual noises, it is important to pay attention to the specific sounds. This can provide valuable clues about the underlying problem. Some common sounds and their potential causes include:
| Sound | Potential Cause |
|---|---|
| Rattling or clanging | Loose or damaged fan blades |
| Scraping or grinding | Cracked or bent fan blades |
| Humming or buzzing | Worn-out compressor |
| Squealing | Internal damage or malfunction of the compressor |
Inspecting the Fan Blades
Another step in diagnosing the issue is inspecting the fan blades. Ensure the power to the air conditioner is turned off, and then carefully examine the blades for any signs of damage or looseness. Look for cracks, bends, or excessive wobbling. If you notice any of these issues, it is likely that the fan blades are causing the unusual noises.
Diy Solutions
If you have identified loose or damaged fan blades or a worn-out compressor as the cause of the unusual noises, there are DIY solutions you can employ to address the issue.
Tightening Loose Fan Blades
If you find that the fan blades are loose, you can attempt to tighten them yourself. Ensure the power is off, and use a wrench or screwdriver to securely fasten the blades to the motor shaft. However, be cautious not to overtighten, as this can cause additional damage.
Replacing Worn Out Compressor
Replacing a worn-out compressor is a more complex task that may require professional assistance. If you have diagnosed a worn-out compressor as the cause of the unusual noises, it is best to consult an HVAC technician who can safely replace the compressor.
In conclusion, unusual noises from your air conditioning unit can indicate underlying issues that need attention. By accurately diagnosing the cause through listening for specific sounds and inspecting the fan blades, you can determine whether loose or damaged fan blades or a worn-out compressor are to blame. Depending on the issue, tightening the fan blades or seeking professional help for compressor replacement may be necessary. Remember, addressing these issues promptly can prevent costly repairs down the line.

Credit: www.searshomeservices.com
Weak Airflow
Weak airflow is a common problem faced by many homeowners when it comes to their air conditioning systems. If you notice that the air coming from your vents is not as strong as it used to be, it could be due to various reasons. In this section, we will discuss the common reasons for weak airflow and provide you with DIY solutions to rectify the issue.
Common Reasons For Weak Airflow
There can be several factors contributing to weak airflow in your air conditioning system. Understanding the root cause can help you troubleshoot the issue effectively. The two common reasons include:
- Dirty Air Filters
- Obstructed Air Vents
Dirty Air Filters
One of the primary culprits for weak airflow is dirty air filters. Over time, air filters tend to accumulate dust, dirt, and other particles, resulting in restricted airflow. This obstruction hinders the smooth passage of air through the system, causing weak airflow into your living spaces.
Troubleshooting Methods
To rectify weak airflow caused by dirty air filters, follow these simple DIY steps:
Checking and Replacing Air Filters
1. Locate the air filter on your air conditioning unit.
2. Carefully remove the filter from its housing.
3. Inspect the filter for dirt, debris, or discoloration.
4. If the filter appears dirty or clogged, it is time for a replacement.
5. Purchase a new filter that matches the size and specifications of your old filter.
6. Install the new filter by placing it back into the filter housing, following the arrows indicating the proper direction of airflow.
7. Ensure the filter is securely in place.
Obstructed Air Vents
Another common reason for weak airflow is obstructed air vents. When air vents are blocked or covered, it restricts the air’s flow, leading to reduced airflow into your home or specific rooms.
Troubleshooting Methods
You can improve the airflow by clearing any obstructions in the air vents. Follow these steps:
Clearing Obstructions in Air Vents
1. Inspect all the air vents in your home to identify any obstructions, such as furniture, curtains, or other objects.
2. Move any items blocking the vents to ensure they are not restricting airflow.
3. Ensure the vents are open and not obstructed by dust or debris.
4. If necessary, use a vacuum cleaner or a soft brush to clean the vents and remove any accumulated dirt or dust.
Additional Ways To Improve Airflow
If you have checked and cleared the air filters and vents but still experience weak airflow, consider these additional DIY methods:
- Regular Maintenance Tips
- Upgrading Air Ducts for Better Efficiency
Regular Maintenance Tips
Regular maintenance plays a vital role in maintaining proper airflow in your air conditioning system. Consider the following tips:
- Schedule professional maintenance once a year to ensure optimal system performance.
- Keep the outdoor unit free from debris, such as leaves or twigs, which can obstruct airflow.
- Regularly clean the evaporator coil and condenser coil to prevent dust buildup.
- Check for any leaks in the air ducts and seal them properly.
Upgrading Air Ducts for Better Efficiency
If weak airflow persists even after trying all the troubleshooting methods, you might consider upgrading your air ducts. Older or poorly insulated air ducts can cause airflow issues. Consult with a professional HVAC technician to assess your system and determine if upgrading the air ducts can improve airflow and energy efficiency.
Uneven Cooling
One common issue that homeowners may face with their air conditioning systems is uneven cooling. This occurs when certain areas of the house are cooler than others, making it uncomfortable to stay in certain rooms. Uneven cooling can be frustrating, but the good news is that there are several DIY solutions that can help address this problem. In this article, we will discuss the causes of uneven cooling and provide practical tips on how to fix it.
Causes Of Uneven Cooling
Insufficient Insulation
Inadequate insulation in your home can lead to uneven cooling. Insulation helps to regulate the temperature by preventing heat transfer between different areas. If certain parts of your home are not properly insulated, the cool air from your AC unit may escape, resulting in uneven cooling.
Imbalanced Air Distribution
An imbalanced air distribution system can also cause uneven cooling. This occurs when your AC unit does not distribute cool air evenly across all the rooms in your home. Certain areas may receive more air than others, leading to temperature variations.
Assessing Insulation
Before you can address the issue of uneven cooling, it’s essential to assess the insulation in your home. This will help you identify problematic areas that need improvement. Here are a few steps you can take to assess your insulation:
Identifying Problematic Areas
Start by conducting a thorough inspection of your home to identify areas with insufficient insulation. Common problem areas include attic spaces, crawlspaces, and walls. Look for signs of air leakage, such as drafts, cold spots, or temperature differences in different rooms.
To determine the extent of the insulation problem, you can also consult with a professional insulation contractor who can perform a comprehensive energy assessment of your home.
DIY Insulation Solutions
Once you have identified the problematic areas, you can implement some DIY insulation solutions to improve overall energy efficiency and address uneven cooling. Here are a few tips:
Balancing Air Distribution
To achieve balanced air distribution, make sure that your air vents are open and unobstructed. Sometimes, furniture or curtains may block the airflow, preventing the cool air from reaching certain areas. By ensuring proper air circulation, you can help eliminate temperature variations.
Adjusting Air Vents
If certain rooms are consistently warmer or colder, you can try adjusting the air vents. Closing the vents partially in cooler rooms and opening them wider in warmer rooms can help redirect the airflow and achieve more even cooling throughout your home.
Installing Zoning System
If you want a more advanced solution, consider installing a zoning system. This system allows you to control the temperature in different areas or zones of your home independently. By dividing your home into separate zones, you can regulate the airflow and temperature according to your specific needs, reducing uneven cooling.
In conclusion, uneven cooling can be a frustrating issue, but with the right DIY solutions, you can improve air distribution and achieve a more comfortable home environment. By addressing inadequate insulation and implementing practical tips such as balancing air distribution and adjusting air vents, you can enjoy consistent cooling throughout your home. If you prefer a more advanced solution, installing a zoning system may be worth considering. Remember to assess your insulation properly and consult with professionals if needed, to ensure optimal results.
Refrigerant Leaks
Welcome to the DIY solutions section of our blog, where we help you tackle common air conditioning issues. One such problem is refrigerant leaks. Refrigerant is a vital component in your AC system, responsible for cooling and dehumidifying the air. When a leak occurs, it not only affects the performance of your AC unit but can also harm the environment. In this section, we will discuss how to detect refrigerant leaks, the common signs and symptoms to look out for, the importance of prompt detection, and various DIY and professional repair options.
Detecting Refrigerant Leaks
In order to address a refrigerant leak, you first need to detect its presence. Identifying a leak can be challenging, but there are a few methods to help you locate the source.
Common Signs And Symptoms
There are several signs and symptoms that may indicate a refrigerant leak in your AC system. These include:
- Reduced cooling capacity
- Increased energy consumption
- Ice formation on the refrigerant lines
- Hissing or bubbling sounds near the unit
- Warm air blowing from the vents
Importance Of Prompt Detection
While it may be tempting to ignore a small refrigerant leak, prompt detection and repair are crucial. Here’s why:
- Refrigerant leaks can cause your AC system to work harder, resulting in higher energy bills.
- Continued operation with a low refrigerant level can lead to compressor damage, requiring costly repairs.
- Refrigerant leaks release harmful chemicals into the atmosphere, contributing to environmental pollution.
Fixing Small Leaks
If you’ve detected a small refrigerant leak early on, you may be able to fix it yourself. DIY leak repair kits are available that can help you seal minor leaks effectively.
Diy Leak Repair Kits
When using a DIY leak repair kit, carefully follow the instructions provided. These kits typically include a sealant that reacts with the refrigerant to form a solid seal at the leak point. It’s important to note that DIY kits are recommended only for small leaks and should not be used as a permanent solution.
Sealing Leaks With Epoxy
If you prefer a more robust solution for sealing leaks, you can use epoxy. Epoxy is a strong adhesive that can effectively seal refrigerant leaks. However, this method requires caution and precision, as incorrect application can lead to further damage to your AC system.
Professional Repair Options
For larger refrigerant leaks or if you’re unsure about DIY repairs, it’s best to consult a certified technician. They have the expertise and specialized equipment to accurately detect and repair leaks in your AC system.
Hiring A Certified Technician
When hiring a technician, ensure they are certified and experienced in handling refrigerant leaks. A certified technician will have the necessary knowledge to assess the extent of the leak and recommend the appropriate repair.
Evaluating The Cost-effectiveness
Before committing to a professional repair, it’s important to evaluate the cost-effectiveness in comparison to buying a new AC unit. Consider the age of your current system, the severity of the leak, and the cost of repairs. Sometimes, investing in a new unit may be more economical in the long run.
Ac Won’t Turn On
If you’re facing the frustrating situation of an air conditioner that won’t turn on, don’t worry – there are several troubleshooting steps you can take before calling in the professionals. By following these DIY solutions, you may be able to identify and resolve the issue preventing your AC from powering up.
Troubleshooting A Non-functioning Ac Unit
When your air conditioner refuses to turn on, the problem could lie in the power supply or the thermostat. By addressing these common issues, you might be able to get your AC back up and running without any major repairs.
Power Supply Issues
One of the first things to check when your AC won’t turn on is the power supply. Ensure that the unit is connected to a working power source and that any circuit breakers are in the proper position. Here are a couple of power supply solutions to consider:
Resetting Circuit Breaker
If the circuit breaker has tripped, it could be the reason behind your AC’s lack of power. Locate your home’s electrical panel and check for any flipped breakers. If you find a tripped breaker, simply turn it off and then back on to reset it.
Checking Electrical Connections
Inspect the electrical connections of your air conditioner, including the power cord and outlet. Make sure the cord is securely plugged in and not damaged. Also, examine the outlet for any loose connections or signs of damage. If necessary, try plugging the AC into a different outlet to rule out any issues with the original connection.
Faulty Thermostat
If the power supply checks out without any issues, the next area to investigate is the thermostat. A faulty thermostat may be preventing your AC from turning on. Here’s how you can diagnose and address thermostat problems:
Replacing Batteries
If your thermostat operates on batteries, it’s essential to check and replace them if necessary. Low batteries can cause the thermostat to lose power and prevent it from sending the signal to turn on the air conditioner. Remove the old batteries and replace them with fresh ones to see if this solves the problem.
Testing and Calibrating Thermostat
Perform a thorough test and calibration of your thermostat. Follow the manufacturer’s instructions to ensure your thermostat is accurately reading the temperature and sending the right signals to your AC unit. A malfunctioning thermostat can lead to a non-functioning air conditioner, so it’s crucial to address any issues with the thermostat’s operation.
By troubleshooting power supply issues and diagnosing thermostat problems, you can often resolve the common issue of an AC that won’t turn on. These DIY solutions can save you time and money, bringing back your cool and comfortable living space.
Frequently Asked Questions On Diy Solutions For Common Air Conditioning Issues.
Why Is My Air Conditioner Not Cooling My Room?
There could be several reasons why your air conditioner is not cooling your room. It could be due to a dirty air filter, a malfunctioning thermostat, low refrigerant levels, or even a faulty compressor. Make sure to check these components and consider calling a professional if needed.
How Often Should I Change My Air Filter?
It is recommended to change your air filter every 1 to 3 months, depending on factors such as the type of filter, the level of pollutants in your home, and the usage of your air conditioner. Regularly changing your air filter helps maintain optimum performance and efficiency of your AC unit.
What Should I Do If My Air Conditioner Is Leaking Water?
If your air conditioner is leaking water, it could be due to a clogged condensate drain line or a faulty condensate pump. Start by checking if the drain line is clear and unclog it if necessary. If the problem persists, it’s best to contact an HVAC technician to diagnose and fix the issue.
How Can I Improve The Air Quality In My Home?
To improve the air quality in your home, you can take several steps. Make sure to regularly clean and vacuum your home, keep windows and doors closed to prevent outdoor pollutants from entering, use air purifiers, and maintain good ventilation.
Additionally, regularly changing your air filter can also help improve air quality.
Conclusion
Tackling common air conditioning issues can be a DIY project with the right knowledge and solutions. By following these simple steps, you can maintain a comfortable and energy-efficient living space while avoiding costly repairs. Remember to regularly clean and replace filters, check for leaks, and perform routine maintenance.
With these DIY solutions, you can keep your air conditioner running smoothly and enjoy a cool and refreshing environment all summer long.