
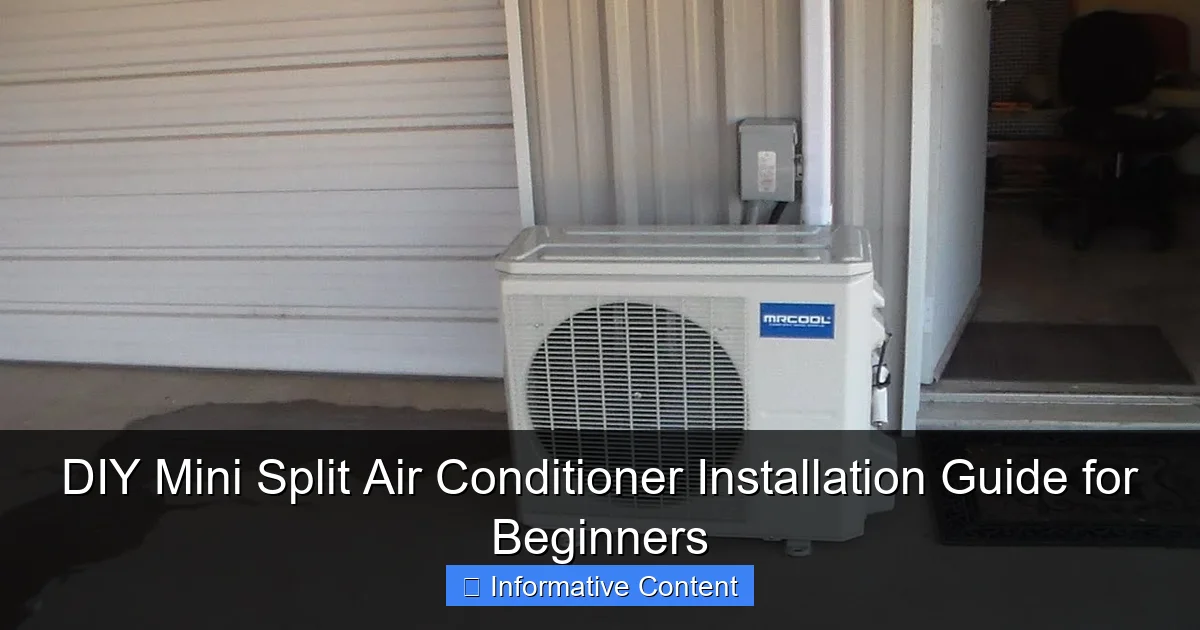
Featured image for diy mini split air conditioner installation
Image source: i.ytimg.com
Installing a DIY mini split air conditioner is a cost-effective way to cool your space without hiring a professional, and with the right tools and guidance, beginners can complete the job in just a few hours. Follow a detailed step-by-step plan—from mounting the indoor unit to connecting refrigerant lines and wiring—to ensure safe, efficient operation and avoid common mistakes that could void warranties or damage equipment.
Key Takeaways
- Plan carefully: Measure space and select the right unit size for efficiency.
- Follow manuals: Always adhere to manufacturer instructions for safety and performance.
- Prioritize safety: Turn off power before starting any electrical connections.
- Seal properly: Use foam and tape to prevent air leaks and moisture.
- Test thoroughly: Run system checks before finalizing installation to catch issues early.
- Get help if unsure: Consult a pro for complex steps like refrigerant line handling.
📑 Table of Contents
- Why DIY Mini Split Air Conditioner Installation Might Be Right for You
- What Is a Mini Split and Why Install It Yourself?
- Tools and Materials You’ll Need
- Step-by-Step Installation Process
- Common Mistakes and How to Avoid Them
- Cost Breakdown and Long-Term Savings
- Final Thoughts: Is DIY Mini Split Installation Worth It?
Why DIY Mini Split Air Conditioner Installation Might Be Right for You
Let’s face it—summer heat can be brutal, and relying on window units or central HVAC systems isn’t always ideal. Maybe your house lacks ductwork, or you’re just tired of high energy bills. That’s where a DIY mini split air conditioner installation comes in. These sleek, efficient systems cool (and often heat) individual rooms without the need for bulky ducts. And the best part? You can install one yourself—no HVAC pro required.
I remember the first time I considered installing a mini split. I was sweating through another muggy July night, frustrated with my inefficient window unit and sky-high electric bill. A friend recommended a mini split. “It’s easy,” he said. “You can do it yourself.” I was skeptical. I’m handy with tools, but refrigerant lines? Electrical wiring? That sounded like a disaster waiting to happen. But after doing some research, watching a few YouTube videos, and taking it step by step, I had a fully functional, whisper-quiet system cooling my bedroom in under two days. And yes, I did it myself. That’s the magic of modern DIY mini splits: they’re designed with homeowners in mind.
What Is a Mini Split and Why Install It Yourself?
Understanding the Mini Split System
A mini split air conditioner (also called a ductless mini split) is made up of two main parts: an outdoor condenser unit and one or more indoor air handlers. These are connected by a small conduit that houses the refrigerant lines, electrical wiring, and a drain line. Unlike central air, mini splits don’t use ductwork, so they’re perfect for homes without existing ducts, room additions, garages, or even tiny homes.
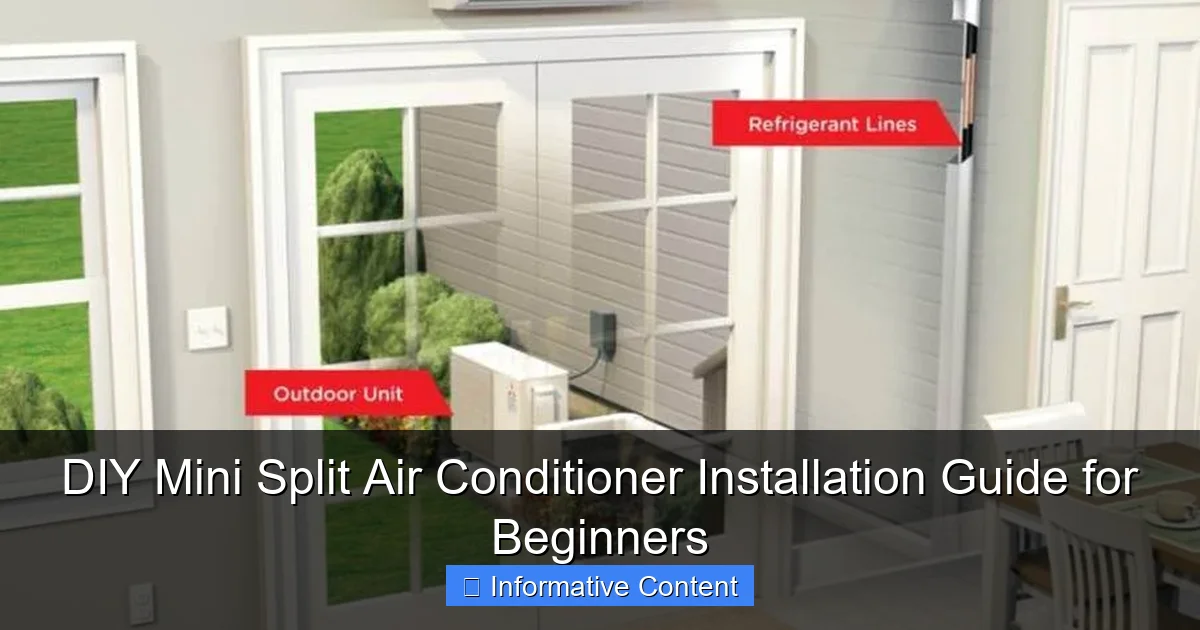
Visual guide about diy mini split air conditioner installation
Image source: fire-and-ice-cdn.s3.us-east-2.amazonaws.com
Mini splits come in single-zone (one indoor unit) or multi-zone (two or more indoor units) setups. The single-zone is ideal for beginners—it’s simpler, cheaper, and easier to install. Most DIY kits include everything you need: the indoor and outdoor units, mounting hardware, a line set cover, and even a wireless remote.
The Case for DIY Installation
Professional installation can cost anywhere from $1,500 to $3,000 for a single-zone system. But the equipment itself—depending on brand and BTU capacity—runs between $700 and $1,800. That means you can save up to $1,500 by doing it yourself. And honestly? The process isn’t as intimidating as it seems.
Modern mini splits are engineered for DIY. They come with pre-charged refrigerant lines (so you don’t need to vacuum or charge the system), quick-connect fittings, and detailed manuals. Brands like Senville, MRCOOL, and Cooper & Hunter even offer 24/7 support for DIYers. Plus, many units are “self-install” certified, meaning they meet standards for safe homeowner installation.
When DIY Might Not Be the Best Idea
That said, DIY isn’t for everyone. If you’re uncomfortable with:
- Working with electrical wiring (even low-voltage)
- Drilling through exterior walls (especially brick or stucco)
- Handling refrigerant (though most DIY kits are pre-charged)
- Working on ladders or uneven surfaces
…then consider hiring a pro. Safety first. But if you’re confident with basic tools and can follow instructions, you’re already halfway there. And if you’re unsure, start with a simple single-zone unit in a room you can access easily—like a bedroom or home office.
Tools and Materials You’ll Need
Essential Tools for the Job
You don’t need a full HVAC toolkit. Most of what you’ll use are basic household tools. Here’s what I used during my own installation:
- Drill and drill bits (including a 2.5–3 inch hole saw for the wall penetration)
- Stud finder (to locate framing and avoid electrical wires)
- Level (a must for mounting the indoor unit)
- Measuring tape
- Adjustable wrench and crescent wrench (for tightening connections)
- Pipe cutter (if you need to trim the refrigerant lines—rare, but good to have)
- Vacuum pump (only if your system isn’t pre-charged—check the manual)
- Electrical tester (non-contact voltage tester) (safety check for power lines)
- Ladder (for accessing the outdoor unit location)
- Safety goggles and work gloves
Materials Included in Most DIY Kits
Most DIY mini split kits include:
- Indoor air handler with mounting bracket
- Outdoor condenser unit
- Refrigerant line set (pre-charged, 15–25 ft depending on model)
- Drain hose (for condensate removal)
- Power cable (from indoor to outdoor unit)
- Remote control and wall mount
- Wall penetration cover (to hide the conduit)
- Insulation for refrigerant lines
- Mounting hardware (screws, anchors, etc.)
Pro tip: Before you buy, double-check the included line set length. If your indoor and outdoor units are more than 25 feet apart, you may need to buy an extension kit. Also, make sure the kit includes a wall penetration cover—it keeps the hole neat and weatherproof.
Optional (But Helpful) Add-Ons
- Line set cover kit (for a cleaner look and protection from sun/weather)
- Condensate pump (if the indoor unit is above the outdoor unit and gravity won’t drain the water)
- Condenser pad (to level the outdoor unit and protect it from ground moisture)
- Smart thermostat adapter (some brands allow integration with Alexa or Google Home)
I used a condensate pump because my outdoor unit was slightly higher than the indoor one. It cost an extra $40, but it saved me from dealing with a soggy wall. Worth every penny.
Step-by-Step Installation Process
Step 1: Choose the Right Location
Location is everything. For the indoor unit, pick a spot:
- At least 6 inches from the ceiling (for proper airflow)
- Near an exterior wall (to minimize drilling)
- Away from direct sunlight, heat sources, or electronics
- With access to a nearby electrical outlet (or where you can run a new circuit)
For the outdoor unit, choose a spot:
- At least 12 inches from walls, fences, or bushes (for airflow)
- On a flat, stable surface (use a concrete pad or plastic condenser stand)
- With shade if possible (but not under trees that drop leaves or sap)
- Within the line set’s maximum length (usually 25–50 ft depending on model)
I picked the back wall of my bedroom for the indoor unit and the side of my house for the outdoor unit. It gave me a 12-foot run—well within the 25-foot limit.
Step 2: Mount the Indoor Unit
Start by using the included template to mark the mounting bracket position. Use a level to ensure it’s perfectly horizontal. Then:
- Drill pilot holes for the screws.
- Attach the bracket securely to the wall (use anchors if not hitting studs).
- Hang the indoor unit on the bracket—most snap in easily.
Tip: Don’t fully tighten the screws until after you’ve drilled the wall penetration. It’s easier to adjust the unit’s position before the hole is made.
Step 3: Drill the Wall Penetration
This is the scariest part for many DIYers—but it’s just a hole. Use a 2.5–3 inch hole saw (check your manual for exact size). Drill at a slight downward angle (about 5 degrees) so rainwater drains out, not in.
Before drilling, use a stud finder to avoid hitting electrical wires or plumbing. I once drilled into a wall and hit a power line—thankfully, I used a non-contact tester first and caught it. Always double-check!
Step 4: Run the Line Set, Drain, and Power Cable
Feed the refrigerant lines, drain hose, and power cable through the hole from the inside. Then, from the outside, pull them through and connect them to the outdoor unit.
- Refrigerant lines: Use the included insulation and secure with zip ties. Don’t kink them.
- Drain hose: Route it so it slopes downward. Use a condensate pump if needed.
- Power cable: Connect to the outdoor unit’s terminal block (follow the manual’s wiring diagram).
Wrap the entire bundle with the line set cover or foam insulation to protect it from UV and weather.
Step 5: Mount and Connect the Outdoor Unit
Place the condenser on a level pad. Connect the refrigerant lines using the quick-connect fittings (they usually just snap or twist into place). Tighten the flare nuts with a wrench—don’t over-tighten, or you’ll damage the seal.
Connect the power cable to the outdoor unit’s terminals. Double-check the wiring diagram. Then, connect the drain hose to the outdoor unit’s drain port (if applicable).
Step 6: Power Up and Test
Turn off the breaker. Connect the indoor unit to power (either plug-in or hardwired). Turn the breaker back on. Power up the indoor unit with the remote.
The system should start automatically. Listen for the outdoor unit to kick in (you’ll hear the compressor). Use an infrared thermometer to check that cold air is blowing from the indoor unit (should be 15–20°F cooler than room temp).
If it doesn’t start, check:
- Breaker is on
- Remote batteries
- Wiring connections
- Error codes (displayed on indoor unit)
Common Mistakes and How to Avoid Them
Drilling the Wrong Hole Size or Angle
Too big, and you’ll have gaps. Too small, and the conduit won’t fit. Always use the hole saw size recommended in the manual. And remember: downward angle prevents water intrusion. I used a small level taped to the drill to keep it at 5 degrees.
Forgetting to Insulate the Refrigerant Lines
This is a big one. Uninsulated lines lose efficiency and can cause condensation on the indoor unit. Wrap the entire length with the included foam insulation and seal the ends with tape or silicone.
Over-Tightening Flare Connections
Refrigerant line connections use flare nuts. Tighten them just enough to seal—usually 1/4 to 1/2 turn past finger-tight. Over-tightening can crack the flare or strip the threads. Use a torque wrench if your kit includes one.
Ignoring the Drain Line Slope
If the drain line doesn’t slope downward, water will pool and leak into your wall. I learned this the hard way. Now I use a small level on the drain hose to ensure it’s at least a 1/4 inch drop per foot.
Skipping the Condensate Pump (When Needed)
If your outdoor unit is higher than the indoor unit, gravity won’t drain the water. A $40 condensate pump solves this. It’s a small investment that prevents water damage.
Not Testing Before Finalizing
Run the system for at least 30 minutes before mounting the wall cover or sealing the hole. This lets you catch leaks, electrical issues, or airflow problems early.
Cost Breakdown and Long-Term Savings
Let’s talk numbers. Here’s a real-world example based on my own installation:
| Item | Cost | Notes |
|---|---|---|
| 12,000 BTU DIY Mini Split Kit | $950 | Senville SENL-12CD, includes 25 ft line set |
| Condensate Pump | $40 | Needed due to elevation difference |
| Concrete Pad (DIY) | $20 | Used paver base and concrete mix |
| Line Set Cover | $35 | For aesthetics and protection |
| Tools (already owned) | $0 | Drill, hole saw, level, etc. |
| Total DIY Cost | $1,045 | |
| Professional Installation (avg.) | $2,200 | Based on local quotes |
| Savings | $1,155 |
But the savings don’t stop there. Mini splits are 30–50% more efficient than window units or central AC. I cut my cooling bill by 40% in the first summer. Plus, I only cool the room I’m in—no more wasting energy on empty rooms.
Over a 10-year lifespan, that’s thousands in savings. And if you install multiple units, the efficiency adds up. A multi-zone system lets you heat or cool only the rooms you use—perfect for a home office, guest room, or garage.
Maintenance is minimal: clean the air filters every 3 months, check the outdoor unit for debris, and inspect the drain line annually. No duct cleaning, no refrigerant top-offs (unless there’s a leak).
Final Thoughts: Is DIY Mini Split Installation Worth It?
After installing my first mini split, I was hooked. The process was challenging at times—especially drilling through the stucco wall—but it was doable. And the results? A quiet, efficient, and reliable cooling system that I built myself.
DIY mini split air conditioner installation isn’t just about saving money. It’s about empowerment. You’re taking control of your home’s comfort and energy use. You’re learning a valuable skill. And you’re doing it on your own terms.
That said, be honest with yourself. If you’re not comfortable with basic electrical or plumbing work, or if your home has unique challenges (like thick stone walls or no exterior access), don’t hesitate to call a pro. There’s no shame in that. But if you’re ready to take the plunge, the rewards are real.
Start small. Choose a single-zone unit. Read the manual. Watch a few installation videos. Gather your tools. And take your time. Every step matters. And when you finally press that power button and feel that first burst of cool air? You’ll know it was worth it.
So go ahead—beat the heat, lower your bills, and say hello to your new DIY mini split. You’ve got this.
Frequently Asked Questions
Can I install a DIY mini split air conditioner myself?
Yes, you can install a DIY mini split air conditioner if you have basic handyman skills and follow the manufacturer’s instructions carefully. However, you’ll still need a licensed HVAC technician to handle the refrigerant line evacuation and charging for safety and warranty compliance.
What tools do I need for a DIY mini split air conditioner installation?
Essential tools include a drill, hole saw, level, wrenches, vacuum pump, torque wrench, and a stud finder. You may also need a refrigerant manifold gauge set if performing partial refrigerant handling (though final charging should be done by a pro).
How long does a DIY mini split air conditioner installation take?
Most DIY mini split air conditioner installations take 6–10 hours, depending on complexity, wall type, and line set length. Allocate extra time for troubleshooting, especially when routing refrigerant lines and electrical wiring.
Do I need a permit to install a mini split AC unit myself?
In many areas, you need a permit for electrical and HVAC modifications, even for DIY mini split installations. Check local building codes—some regions require a licensed technician to sign off on refrigerant work, regardless of who installs the unit.
How do I choose the right location for my indoor and outdoor units?
Place the indoor unit high on an exterior wall, away from direct sunlight or heat sources, for optimal airflow. The outdoor unit should sit on a stable, level surface with at least 12 inches of clearance on all sides for airflow and maintenance.
What are common mistakes to avoid in a DIY mini split air conditioner installation?
Skipping the vacuum pump process on refrigerant lines or over-tightening flare connections are frequent errors. Always double-check line set slope for proper drainage and avoid kinking refrigerant lines during routing to ensure system efficiency.