
Featured image for delonghi pinguino air conditioner instructions
Image source: dygtyjqp7pi0m.cloudfront.net
Master your Delonghi Pinguino air conditioner in minutes with this straightforward, step-by-step instructions guide designed for hassle-free setup and daily use. From unboxing to optimal cooling, follow clear directions on installation, control panel navigation, and maintenance to ensure peak performance and energy efficiency all season long.
Key Takeaways
- Read the manual first: Always start with the user manual for safety and setup guidance.
- Position properly: Place the unit near a window for optimal exhaust and airflow.
- Secure drainage: Attach the hose correctly to prevent leaks during operation.
- Use timer settings: Schedule on/off times to save energy and enhance convenience.
- Clean filters monthly: Maintain efficiency by washing reusable filters regularly.
- Check error codes: Refer to the manual for quick troubleshooting of common issues.
📑 Table of Contents
- Getting Started: What Makes the DeLonghi Pinguino Air Conditioner Stand Out?
- Unboxing and Initial Setup: What to Expect
- Understanding the Control Panel and Remote
- Daily Use and Maintenance: Keeping Your Pinguino Running Smoothly
- Troubleshooting Common Issues
- Energy Efficiency and Long-Term Care
- Final Thoughts: Making the Most of Your DeLonghi Pinguino
Getting Started: What Makes the DeLonghi Pinguino Air Conditioner Stand Out?
If you’ve ever tried to survive a sweltering summer without a reliable air conditioner, you know how quickly discomfort turns into desperation. I remember one particularly brutal heatwave when my old AC gave up halfway through the week. The air felt thick, sticky, and impossible to escape—until I finally invested in the DeLonghi Pinguino air conditioner. It was like flipping a switch: suddenly, cool air flowed, humidity dropped, and my sanity returned.
The DeLonghi Pinguino isn’t just another portable AC. It’s designed with real-life use in mind—easy setup, intuitive controls, and energy-efficient cooling that actually works in rooms up to 450 sq. ft. Whether you’re using it in a bedroom, home office, or small apartment, its compact design and quiet operation make it a solid choice. But like any appliance, knowing how to use it properly makes all the difference. That’s why I put together this DeLonghi Pinguino air conditioner instructions guide—to help you get the most out of your unit without the frustration or guesswork.
Unboxing and Initial Setup: What to Expect
What’s in the Box?
When your DeLonghi Pinguino arrives, the first thing you’ll notice is how neatly everything is packed. Here’s what you’ll typically find inside the box:
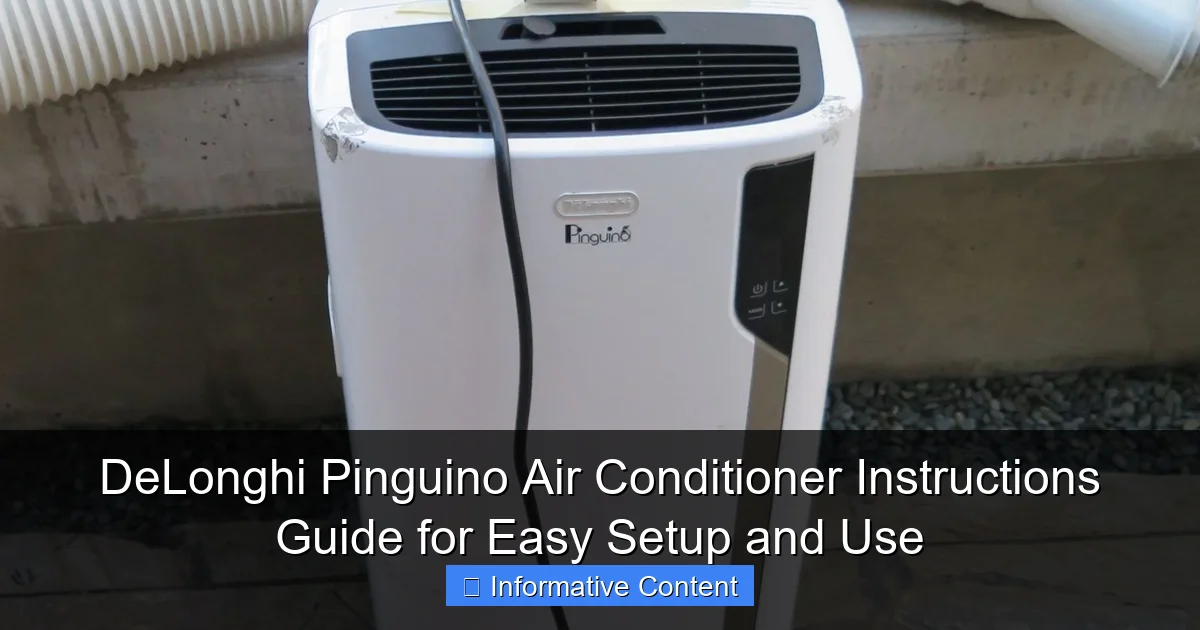
Visual guide about delonghi pinguino air conditioner instructions
Image source: dygtyjqp7pi0m.cloudfront.net
- The main air conditioning unit
- A window ventilation kit (including a window panel, hose, and adapter)
- A remote control (batteries included)
- Drain hose (for dehumidifying mode)
- User manual (with safety and setup instructions)
- Exhaust hose (already connected to the unit in some models)
One thing I appreciated right away? The exhaust hose is pre-attached on most models. That means less fumbling with clamps and connections during setup—a small detail, but one that saves time and frustration.
Choosing the Right Spot
Where you place your Pinguino matters. Here are a few tips based on my own trial and error:
- Keep it near a window—you’ll need to vent the hot air outside using the exhaust hose. The ideal spot is within 4–5 feet of the window.
- Leave at least 12–18 inches of space around the unit for proper airflow. Don’t push it against a wall or behind furniture.
- Avoid direct sunlight—placing it in a shaded area helps it cool more efficiently.
- Use a level surface—tilting the unit can cause water leakage during dehumidifying mode.
For example, I initially placed mine behind a bookshelf in my living room. It looked tidy, but the unit struggled to draw in air and overheated after an hour. Once I moved it to a clear corner near the window, it cooled the room down in half the time.
Installing the Window Ventilation Kit
This is the trickiest part for most people, but it’s actually straightforward once you know the steps. Here’s how I did it:
- Open your window and measure the height between the sill and the top of the opening. Most kits are adjustable, but you want to make sure it fits.
- Slide the window panel into the opening and extend or compress it to fit snugly. It should be tight enough that it doesn’t rattle but not so tight that it damages the window frame.
- Attach the exhaust hose to the back of the Pinguino unit. Most models use a simple click-in system—no tools needed.
- Connect the other end of the hose to the adapter on the window panel. Again, it should snap into place.
- Seal any gaps with foam tape (included) or weather stripping to prevent hot air from sneaking in.
Pro tip: If you have sliding windows, use the horizontal panel. For double-hung windows, the vertical setup works better. I once tried to force a vertical kit into a sliding window—it leaked air like a sieve. Lesson learned: match the kit to your window type.
Understanding the Control Panel and Remote
Control Panel Layout (Model-Specific)
The DeLonghi Pinguino comes in several models—like the PACEX120, PACN75, and PACAN125—each with slightly different controls. But the basics are the same. Here’s what you’ll typically see on the control panel:
- Power Button—turns the unit on/off.
- Mode Button—cycles through Cool, Fan, Dehumidify, and Auto modes.
- Temperature Up/Down—adjusts your desired temp (usually 61°F to 86°F).
- Fan Speed—Low, Medium, High, or Auto.
- Timer—set on/off times up to 24 hours in advance.
- Sleep Mode—reduces fan noise and slightly adjusts temperature for comfort while sleeping.
- Swing—activates oscillating louvers (on models that have them).
On my PACEX120, the buttons are backlit, which is super helpful at night. No more fumbling in the dark to turn it off.
Using the Remote Control
The remote is a lifesaver. It lets you adjust settings from across the room—perfect for when you’re in bed or on the couch. Here’s how to use it effectively:
- Point it at the front of the unit—the IR sensor is on the right side of the control panel.
- Use the “+” and “-” buttons to change temperature or timer settings.
- Press and hold mode buttons to cycle quickly (e.g., hold “Mode” to jump from Cool to Dehumidify).
- Store it in a designated spot—I keep mine on my nightstand so I don’t lose it.
One thing to note: the remote works best within 15–20 feet. If you’re in a larger room, you might need to get a bit closer. Also, avoid pointing it at bright lights or windows—sunlight can interfere with the signal.
Quick Mode Guide: When to Use Each Setting
Not sure which mode to pick? Here’s a real-world breakdown:
- Cool Mode—your go-to for hot days. Set your desired temp (I usually go for 72°F), and the unit will cool until it hits that point.
- Fan Only—great for mild days when you just want airflow. No cooling, but it helps circulate air.
- Dehumidify—perfect for muggy days or damp basements. It removes moisture without overcooling. I use this in my home office during rainy season.
- Auto Mode—the unit decides the best balance of cooling and fan speed based on room temperature. Handy when you’re not sure what you need.
- Sleep Mode—quieter operation and a gradual temp increase (to prevent chills). I use this every night—it’s like the unit tucks you in.
For example, during a humid 80°F evening, I switched to Dehumidify mode. The air still felt warm, but the stickiness was gone—and my clothes dried faster on the rack.
Daily Use and Maintenance: Keeping Your Pinguino Running Smoothly
Turning It On and Setting Your Preferences
Starting your Pinguino is simple, but there are a few best practices:
- Let it sit upright for 2–3 hours after moving it—this allows the refrigerant to settle. I once turned it on right after carrying it from the garage, and it made a weird gurgling noise for an hour. Not harmful, but unsettling.
- Start with Cool Mode and set a comfortable temp—I recommend 72–74°F for most rooms. Lower isn’t always better; too cold can waste energy and cause condensation issues.
- Use Auto Fan Speed—the unit adjusts based on how hard it needs to work. It’s more efficient than leaving it on High all the time.
Also, give it about 15–20 minutes to start cooling. Portable ACs take longer than window units because they’re venting heat through a smaller hose.
Cleaning and Filter Maintenance
This is where many people drop the ball—and it leads to reduced efficiency and musty smells. Here’s how to stay on top of it:
- Clean the air filter every 2 weeks (more often if you have pets or allergies). Just pop it out, rinse with water, and let it dry completely before reinserting.
- Wipe down the exterior with a damp cloth monthly. Avoid harsh cleaners—they can damage the plastic.
- Check the condensate tray (if your model has one). If it’s full, drain it using the provided hose or manually remove the plug.
I keep a reminder on my phone to clean the filter every other Sunday. It takes 5 minutes, and I’ve noticed a huge difference in airflow and odor control.
Handling Condensation and Water Buildup
Dehumidifying produces water—sometimes a lot of it. Here’s how to manage it:
- Use the continuous drain hose if you’re running it in Dehumidify mode all day. Attach it to a floor drain or bucket. I ran a hose from my Pinguino to the bathroom sink during a rainy week—no more emptying the tray every 4 hours.
- Empty the internal tank when the “Tank Full” light comes on. Most models shut off automatically, but it’s annoying if you’re not home.
- Check for leaks—if water’s pooling under the unit, make sure the drain plug is secure and the unit is level.
One summer, I ignored the tank for a day while on vacation. Came back to a soaked carpet. Lesson: set a timer or use the continuous drain if you’re gone.
Troubleshooting Common Issues
“My Pinguino Isn’t Cooling Properly”
This is the #1 complaint—and it’s usually fixable. Here are the most common causes:
- Blocked exhaust hose—make sure it’s not kinked or clogged with debris. I once found a sock caught in mine (long story).
- Dirty filter—a clogged filter restricts airflow. Clean it if it looks gray or dusty.
- Room too large—the Pinguino works best in rooms up to 450 sq. ft. If you’re trying to cool a 600 sq. ft. space, it’ll struggle.
- Hot air leaking in—check the window seal. Even a small gap can let in warm air and reduce efficiency.
I once thought my unit was broken because it wasn’t cooling well. Turns out, the window panel was loose, and hot air was blowing back into the room. A quick reseal fixed it.
Unusual Noises or Smells
Most Pinguinos run quietly (around 50–55 dB), but you might hear:
- Hissing or gurgling—normal during startup or shutdown as the refrigerant moves.
- Loud fan or rattling—could mean a loose panel or something touching the fan. Turn it off and inspect.
- Musty odor—a sign of mold or mildew in the unit. Run it in Fan mode for an hour to dry it out, then clean the filter and tray.
I once smelled something like wet socks. Turns out, a spider had built a web inside the air intake. A quick vacuum and filter clean solved it.
Remote Not Working
If the remote seems dead, try these steps:
- Replace the batteries (CR2032, usually).
- Make sure there’s no object blocking the IR sensor on the unit.
- Reset the remote by removing the batteries for 1 minute.
Pro tip: keep spare batteries in a drawer. I learned this after getting stuck in 90°F heat with a dead remote.
Energy Efficiency and Long-Term Care
How to Save Energy (and Money)
Portable ACs use more power than window units, but you can still be efficient:
- Use a programmable timer—turn it off when you’re not home or at night when temps drop. I set mine to turn off at 7 AM and back on at 4 PM.
- Keep doors closed—don’t try to cool an entire house. Close off unused rooms to focus cooling where you need it.
- Use curtains or blinds—blocking sunlight reduces heat gain. I close my blinds by 10 AM and open them at sunset.
- Set a higher temperature—every degree above 72°F saves about 3–5% on energy use.
My electric bill went down 15% after I started using the timer and keeping the temp at 74°F instead of 68°F.
Seasonal Storage Tips
If you’re not using your Pinguino in winter, store it properly:
- Drain all water—run it in Fan mode for 10 minutes to dry the internal components.
- Clean the filter and exterior—this prevents mold and dust buildup.
- Remove the exhaust hose and store it separately to avoid kinks.
- Cover the unit with a breathable cloth or the original box to protect it from dust.
I store mine in a closet with a dehumidifier nearby. No issues after 3 winters.
When to Call a Technician
Most issues are DIY-friendly, but some need pro help:
- Refrigerant leak (unit runs but doesn’t cool).
- Electrical issues (flickering lights, burning smell).
- Compressor failure (loud buzzing, unit shuts off repeatedly).
I once called a technician for a refrigerant issue. Cost me $150, but it was worth it—trying to fix it myself could’ve made it worse.
Final Thoughts: Making the Most of Your DeLonghi Pinguino
The DeLonghi Pinguino air conditioner is more than just a cooling appliance—it’s a comfort tool. When used correctly, it can transform a hot, stuffy room into a peaceful retreat. But like any tool, it needs care, attention, and a bit of know-how.
From the first unboxing to daily use and seasonal storage, this DeLonghi Pinguino air conditioner instructions guide is designed to help you avoid the pitfalls I’ve experienced and make the most of your investment. Remember: clean the filter, seal the window, manage condensation, and use the right mode for the situation. Small habits make a big difference.
And if you ever feel frustrated—take a breath. I’ve been there. Once, I spent an hour trying to figure out why the remote wasn’t working (it was the batteries). Another time, I thought the unit was broken because it wouldn’t cool (it was the window seal). These things happen. But with a little patience and the right guidance, your Pinguino will keep you cool for years.
So go ahead—plug it in, set your ideal temperature, and enjoy that crisp, refreshing air. Summer doesn’t stand a chance.
| Feature | PACEX120 | PACN75 | PACAN125 |
|---|---|---|---|
| Cooling Capacity (BTU) | 12,000 | 10,000 | 12,500 |
| Room Size (sq. ft.) | Up to 450 | Up to 350 | Up to 500 |
| Noise Level (dB) | 52 | 50 | 54 |
| Drain Options | Manual + Continuous | Manual | Manual + Continuous |
| Remote Control | Yes | Yes | Yes |
| Energy Efficiency Ratio (EER) | 9.5 | 9.0 | 9.8 |
Frequently Asked Questions
How do I set up my DeLonghi Pinguino air conditioner for the first time?
To set up your DeLonghi Pinguino air conditioner, place it near a window or vent for exhaust hose installation, ensure the unit is on a flat surface, and plug it into a grounded outlet. Follow the DeLonghi Pinguino air conditioner instructions manual for detailed steps on attaching the exhaust hose and window kit.
Why is my DeLonghi Pinguino not cooling effectively?
If your unit isn’t cooling, check that the exhaust hose is properly installed and free of kinks, and ensure the air filter is clean. Also, verify the temperature settings and that doors/windows are sealed to prevent hot air from entering the room.
How often should I clean the air filter on my DeLonghi Pinguino?
Clean the air filter every 2–4 weeks for optimal performance, especially during heavy use. Refer to your DeLonghi Pinguino air conditioner instructions for filter removal and washing guidance to maintain airflow and efficiency.
Can I use my DeLonghi Pinguino air conditioner as a dehumidifier?
Yes, most DeLonghi Pinguino models have a dehumidifying mode. Activate it via the control panel, and the unit will extract moisture from the air without cooling. Empty the water tank or use continuous drainage if needed.
What do the error codes on my DeLonghi Pinguino mean?
Error codes (e.g., E1, E2) indicate issues like sensor faults or tank full alerts. Consult your DeLonghi Pinguino air conditioner instructions manual for code-specific troubleshooting steps or contact customer support.
How do I drain the water tank on my DeLonghi Pinguino?
When the tank is full, the unit will stop and alert you. Remove the tank, empty it, and reinsert it securely. For continuous drainage, connect a hose to the outlet and direct it to a floor drain or container.