
Featured image for danby window air conditioner remote control instructions
Image source: shunspirit.com
Master your Danby window air conditioner with ease using the intuitive remote control—this guide walks you through every button, mode, and troubleshooting step for optimal comfort. From setting precise temperatures to activating sleep mode and timers, unlock full functionality to keep your space cool and energy-efficient all season long.
Key Takeaways
- Power On/Off: Press the power button to toggle the AC on or off.
- Adjust Temperature: Use up/down arrows to set your desired temperature.
- Select Modes: Press the mode button to switch between cool, fan, or dry.
- Fan Speed: Tap fan button to cycle low, medium, or high speeds.
- Timer Setup: Program on/off times using the timer function for efficiency.
- Battery Check: Replace remote batteries if buttons respond slowly or inconsistently.
📑 Table of Contents
Understanding Your Danby Window Air Conditioner Remote Control
Picture this: it’s a sweltering summer afternoon, and you’ve just walked in from the heat. You drop your bag, kick off your shoes, and head straight for the remote to crank up the cool. But wait—why isn’t the Danby window air conditioner responding? The fan isn’t kicking in, the temperature isn’t dropping, and you’re left wondering: *Did I press the right button? Is the remote even working?* If this sounds familiar, you’re not alone. Many Danby air conditioner owners face the same frustration when the remote seems like a mystery box of buttons.
The good news? Most Danby window air conditioners come with intuitive, user-friendly remotes. Once you understand how they work, you’ll wonder how you ever lived without them. Whether you’re a first-time AC owner or just need a refresher, this guide will walk you through everything you need to know about your Danby window air conditioner remote control instructions. From basic functions to advanced features, troubleshooting tips, and even a few pro tricks, we’ve got you covered. Let’s dive in and turn that remote from a source of stress into your summer sidekick.
Getting Started: Remote Basics and Setup
Unboxing and Initial Setup
When you first get your Danby window air conditioner, the remote control is usually tucked in a small compartment on the unit or included in the box. Before you start using it, take a moment to inspect the remote. Look for the battery compartment (usually on the back), and make sure the included AAA batteries are properly installed. Pro tip: if your remote feels sluggish or unresponsive right away, it’s often a sign of weak batteries—swap them out for fresh ones.
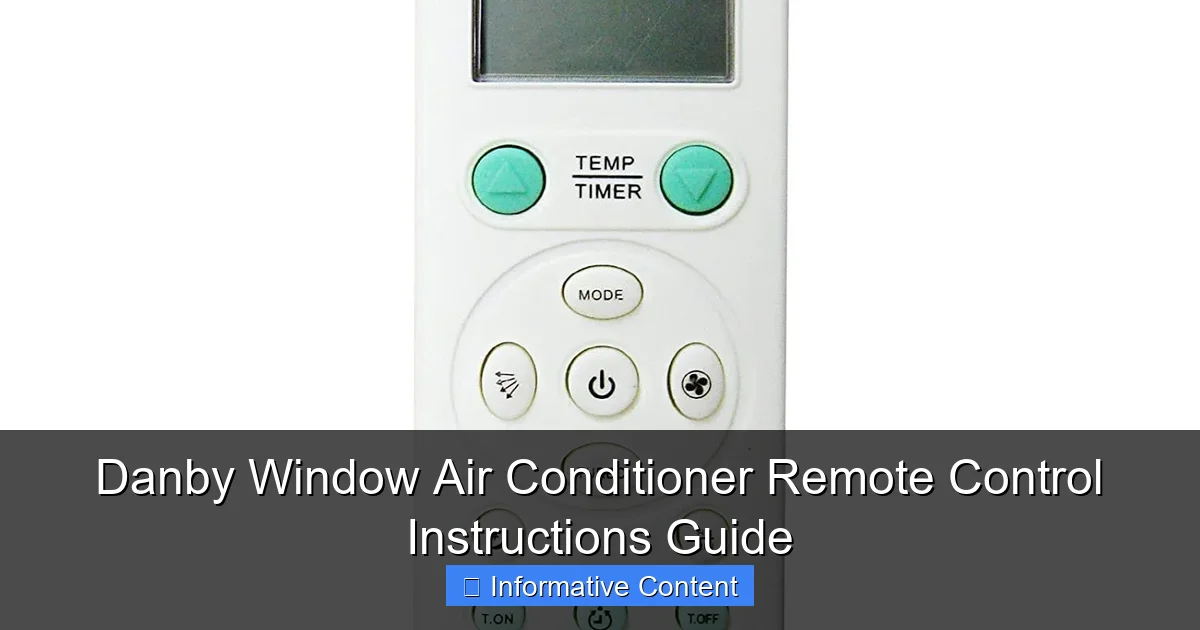
Visual guide about danby window air conditioner remote control instructions
Image source: m.media-amazon.com
Once the batteries are in, point the remote at the front of the AC unit (the infrared sensor is typically near the control panel) and press the Power button. You should hear a beep or see a light flash on the AC, confirming it received the signal. If nothing happens, don’t panic—we’ll cover troubleshooting later.
Key Buttons and Their Functions
Danby remotes are designed to be simple, but each button has a purpose. Here’s a quick rundown of the most common controls:
- Power: Turns the unit on or off. A long press might trigger an energy-saving mode on some models.
- Mode: Cycles between cooling, dehumidifying, fan-only, and sometimes heating (on select models). Press repeatedly until you reach your desired setting.
- Temperature (+/-): Adjusts the target temperature in 1°F or 0.5°C increments. Most units range from 61°F to 86°F (16°C to 30°C).
- Fan Speed: Toggles between low, medium, high, and auto. “Auto” adjusts fan speed based on how far the room is from the set temperature.
- Timer: Sets the unit to turn on or off after a specified number of hours. Great for saving energy or pre-cooling a room before bedtime.
- Swing: Activates the louvers to oscillate vertically (and sometimes horizontally), distributing air more evenly. Some models have a “Stop” function to lock the louvers in place.
- Sleep: Gradually adjusts the temperature over time to save energy while maintaining comfort. Ideal for overnight use.
For example, if you’re setting up your AC for a movie night, you might press Power, then Mode until “Cool” appears, set the temperature to 72°F, choose Medium fan speed, and enable Swing to keep the air moving. Simple, right?
Remote Display and Indicators
The remote’s LCD screen is your command center. It shows the current mode, set temperature, fan speed, timer status, and sometimes error codes. A few things to watch for:
- “E” or “F” codes: These indicate a malfunction (e.g., “E1” might mean a sensor issue). Refer to your user manual for specifics.
- Low battery icon: A small battery symbol that flashes when power is low.
- “Timer On” or “Timer Off”: Confirms your timer settings.
One user shared: “I thought my remote was broken because the screen was blank. Turns out I’d accidentally hit the ‘Light’ button, which dims the display. A quick press fixed it!” Always check for these small quirks—they’re often the culprit behind “malfunctions.”
Mastering Temperature and Fan Settings
Optimizing Temperature for Comfort and Efficiency
Setting the right temperature isn’t just about comfort—it’s also about energy savings. The Department of Energy recommends keeping your AC at 78°F (25.5°C) when you’re home and slightly higher when you’re away. But Danby remotes make it easy to customize this:
- Start high, then adjust: If it’s 90°F outside, don’t set your AC to 65°F and expect instant relief. Set it to 78°F first, then lower it gradually if needed. This prevents overworking the unit.
- Use the “Sleep” mode: Many Danby models have a Sleep function that gradually raises the temperature by 1-2°F per hour after you fall asleep. This saves energy while keeping you comfortable. For instance, if you set it to 70°F, it might rise to 72°F by morning.
- Consider humidity: In humid climates, a slightly higher temperature (like 76°F) with the AC in “Dehumidify” mode can feel just as cool as 72°F with regular cooling.
Example: During a heatwave, one Danby owner set their remote to 76°F with Auto fan speed. The unit ran efficiently, and the room stayed comfortable without the “icy blast” effect of lower temperatures.
Fan Speed: When to Use Low, Medium, High, or Auto
The fan speed isn’t just about noise level—it affects cooling efficiency and air distribution:
- Low: Quietest option. Best for nighttime or when you’re relaxing. It cools slowly but steadily.
- Medium: A good balance for everyday use. Cools faster than low without being too loud.
- High: Maximum airflow. Use this when the room is very hot (e.g., after cooking) or for quick cooling. It’s noisier but effective.
- Auto: The smartest choice for most scenarios. The AC adjusts fan speed based on the difference between the current room temperature and your set point. If it’s 85°F and you set 78°F, it’ll start on high, then switch to medium/low as the room cools.
Pro tip: If you notice cold air pooling at the floor, try setting the fan to High for 15 minutes to mix the air, then switch back to Medium. This prevents “cold feet” and improves comfort.
Using the “Swing” Function for Even Cooling
Danby’s Swing feature (sometimes labeled “Auto Swing” or “Oscillation”) moves the louvers to distribute air more evenly. Here’s how to use it:
- Press the Swing button. The louvers will start moving up and down (and sometimes side to side).
- To stop the swing at a specific angle (e.g., to avoid blowing air directly at your bed), press the button again when the louvers reach the desired position.
- On some models, you can also adjust the swing range using the + or – buttons while the swing is active.
One user noted: “I used to wake up with a stiff neck because the AC was blowing on my face. Once I figured out how to stop the swing at a 45-degree angle, it was a game-changer!”
Advanced Features: Timer, Sleep Mode, and Eco Settings
Programming the Timer for Energy Savings
The Timer function is a powerhouse for saving energy and convenience. Here’s how it works:
- Timer On: Sets the AC to turn on after a specified time (e.g., 2 hours). Great for pre-cooling a room before you get home.
- Timer Off: Sets the AC to turn off after a specified time. Perfect for falling asleep with the AC on but not running all night.
To set the timer:
- Press the Timer button. The display will show “Timer On” or “Timer Off.”
- Use the + and – buttons to adjust the time (in 0.5-hour increments).
- Press Timer again to confirm.
Example: You want the AC to turn off at 6 AM. Set the Timer Off to 7 hours, then go to bed. The AC will run for 7 hours and shut off automatically.
Note: Some Danby models have a “24-hour” timer, allowing you to set on/off times for specific hours (e.g., “On at 3 PM, Off at 11 PM”). Check your manual for this feature.
Sleep Mode: Comfort Meets Efficiency
Sleep Mode is designed for nighttime use. It works by:
- Gradually increasing the temperature by 1-2°F per hour (to save energy).
- Reducing fan speed after a few minutes (for quieter operation).
- Maintaining a comfortable humidity level.
To activate Sleep Mode:
- Press the Sleep button. A moon or bed icon will appear on the display.
- The AC will start cooling, then slowly adjust the temperature over 3-4 hours.
- To exit Sleep Mode, press the Sleep button again or change the mode/temperature.
One user shared: “I used to wake up freezing at 3 AM because I set the AC to 70°F. With Sleep Mode, it rises to 74°F by morning, and I sleep like a baby.”
Eco and Energy-Saving Modes
Many Danby models include an Eco or Energy Saver mode. This feature:
- Cycles the compressor on and off to maintain the set temperature without constant running.
- Reduces power consumption by up to 20% (according to Danby’s estimates).
- Activates automatically on some models when the room is within 1-2°F of the set temperature.
To enable Eco Mode (if available):
- Press the Eco or Energy Saver button. An “E” or leaf icon will appear.
- The AC will run in a more energy-efficient cycle.
Tip: Eco Mode is great for mild days or when you’re away but want to keep the room at a stable temperature.
Troubleshooting Common Remote Issues
Remote Not Responding: Quick Fixes
If your Danby remote isn’t working, try these steps before calling customer service:
- Check the batteries: Weak or dead batteries are the #1 cause of remote issues. Replace them with fresh AAA batteries.
- Point the remote correctly: The infrared signal must reach the AC’s sensor. Aim it directly at the front of the unit, within 20-30 feet.
- Remove obstructions: Curtains, furniture, or other objects can block the signal. Clear a path between the remote and AC.
- Check for interference: Fluorescent lights, TV remotes, or other IR devices can interfere. Turn off other remotes or move the AC slightly.
- Reset the remote: Remove the batteries, wait 10 seconds, then reinsert them. This can clear glitches.
One user joked: “I spent 20 minutes troubleshooting my remote until I realized my cat was sitting in front of the AC, blocking the signal. Lesson learned!”
AC Not Responding to Remote: When the Unit Itself Is the Problem
If the remote works but the AC doesn’t respond, the issue might be with the unit:
- Check the power cord: Ensure it’s securely plugged in. Try a different outlet if needed.
- Look for error codes: If the display shows “E” or “F” codes, refer to your manual. Common issues include dirty filters or refrigerant leaks.
- Test the control panel: If the buttons on the AC work, but the remote doesn’t, the IR receiver might be faulty.
- Reset the unit: Unplug the AC for 5 minutes, then plug it back in. This can resolve electronic glitches.
Note: If the AC’s control panel is also unresponsive, there might be a more serious electrical issue. Contact Danby support.
Replacing a Lost or Damaged Remote
If your remote is lost, broken, or stolen, don’t worry—replacements are available:
- Official Danby remotes: Purchase a model-specific remote from Danby’s website or authorized dealers. These are guaranteed to work.
- Universal remotes: Brands like One For All or GE offer programmable remotes that can mimic Danby’s signals. Check compatibility before buying.
- Mobile apps: Some newer Danby models are compatible with Wi-Fi adapters and smartphone apps (e.g., Danby Connect). This allows remote control from your phone.
Tip: When buying a replacement, note your AC’s model number (usually on a label on the side or back of the unit). This ensures compatibility.
Pro Tips for Getting the Most Out of Your Danby Remote
Remote Care and Maintenance
Your remote is more than a gadget—it’s your AC’s brain. Keep it in top shape:
- Clean it regularly: Wipe the screen and buttons with a slightly damp cloth. Avoid harsh chemicals.
- Store it safely: Keep it in a designated spot (e.g., a drawer or remote holder) to prevent loss.
- Protect it from moisture: Don’t leave it near sinks or windows where it could get wet.
- Replace batteries annually: Even if they seem fine, old batteries can leak and damage the remote.
Customizing Settings for Different Seasons
Your Danby remote can adapt to changing needs:
- Summer: Use Cool mode with Auto fan speed and Swing for even cooling.
- Spring/Fall: Try Fan-Only mode to circulate air without cooling. Great for mild days.
- Winter: If your model has a heat pump, use Heat mode to supplement your furnace. Set it to 68-70°F for comfort.
Data Table: Danby Remote Features by Model
| Model | Timer | Sleep Mode | Swing | Eco Mode | Wi-Fi/App |
|---|---|---|---|---|---|
| Danby DWC040A1BDB | Yes (24-hour) | Yes | Vertical | No | No |
| Danby DWC060B1WDB | Yes (On/Off) | Yes | Vertical + Horizontal | Yes | Yes (with adapter) |
| Danby DWC080A1BDB | Yes (On/Off) | Yes | Vertical | Yes | No |
| Danby DWC100B1WDB | Yes (24-hour) | Yes | Vertical + Horizontal | Yes | Yes (with adapter) |
Note: Features may vary slightly by region. Check your model’s manual for specifics.
Mastering your Danby window air conditioner remote control instructions transforms your AC from a basic appliance into a personalized comfort system. From setting the perfect temperature to using advanced features like timers and Sleep Mode, your remote is the key to staying cool—efficiently and effortlessly. Remember, small adjustments can make a big difference: a well-placed remote, fresh batteries, and a quick glance at the display can prevent headaches and save energy.
As one Danby owner put it: “I used to dread summer because my old AC was so noisy and expensive to run. Now, with the remote, I can set it and forget it. It’s like having a personal climate butler!” Whether you’re cooling a single room or managing multiple units, your Danby remote puts control in your hands. So go ahead—press that Power button, adjust the settings, and enjoy a summer of comfort, one degree at a time.
Frequently Asked Questions
How do I pair the remote control with my Danby window air conditioner?
To pair the remote, ensure the AC unit is powered on, then press and hold the “Mode” or “Power” button on the remote for 3–5 seconds until the unit beeps or the display flashes. Refer to your model’s manual for specific pairing steps, as some Danby models may require additional steps.
Why is my Danby window air conditioner remote not working?
First, check if the remote’s batteries are inserted correctly or need replacement. If the issue persists, ensure there’s no obstruction between the remote and the AC’s infrared sensor, and try resetting the remote by removing the batteries for 1 minute.
Where can I find the Danby window air conditioner remote control instructions manual?
You can download a digital copy of the Danby window air conditioner remote control instructions from the official Danby website under the “Support” or “Manuals” section. Alternatively, search for your model number online for third-party PDFs.
What do the symbols on my Danby AC remote mean?
Common symbols include a snowflake (cooling mode), a sun (heating, if applicable), a fan (fan-only mode), and a clock (timer). Consult your model’s manual for a full breakdown of icons, as layouts vary by Danby remote design.
How do I set the timer using the Danby AC remote?
Press the “Timer” button on the remote, then use the up/down arrows to adjust the hours. Confirm by pressing “Timer” again. This feature lets you schedule automatic on/off times for energy efficiency.
Can I replace a lost Danby window air conditioner remote?
Yes, you can purchase an OEM replacement remote by searching your AC model number on Danby’s website or retailers like Amazon. Ensure the remote is compatible with your specific Danby model before buying.