
Featured image for danby portable air conditioner remote control instructions
Image source: techno-tek.com
Unlock full control of your Danby portable air conditioner with simple, step-by-step remote instructions designed for effortless operation. Learn how to power on/off, adjust temperature, switch modes, and activate sleep settings quickly using your remote’s intuitive interface. Master every function in minutes and enjoy optimal comfort without confusion or frustration.
Key Takeaways
- Power on/off easily: Use the remote’s main button to control AC operation instantly.
- Adjust temperature precisely: Tap up/down arrows to set your ideal room temperature.
- Switch modes seamlessly: Cycle through cooling, dehumidifying, and fan modes effortlessly.
- Set timers for efficiency: Schedule auto on/off to save energy and enhance comfort.
- Use sleep mode wisely: Activate for quieter, energy-saving nighttime operation automatically.
- Replace batteries promptly: Ensure uninterrupted control by swapping weak batteries immediately.
📑 Table of Contents
- Why Your Danby Portable AC Remote Matters More Than You Think
- Getting to Know Your Danby Portable Air Conditioner Remote
- How to Use the Remote: Step-by-Step Instructions for Everyday Tasks
- Troubleshooting Common Remote Control Issues
- Advanced Tips and Hidden Features
- Maintenance and Long-Term Care for Your Remote
- Final Thoughts: Make Every Button Count
Why Your Danby Portable AC Remote Matters More Than You Think
It’s a sweltering summer afternoon. You’re back from work, drenched in sweat, and all you want is to collapse in front of your Danby portable air conditioner. You press the power button on the unit… nothing. You walk over, press it again… still nothing. Frustrated, you grab the remote, press the same button—*beep*—and suddenly, cool air starts flowing. That tiny remote control? It’s your secret weapon.
Most people treat their Danby portable air conditioner remote like an afterthought—something that lives behind the TV or gets lost under couch cushions. But here’s the truth: mastering your remote isn’t just about convenience. It’s about efficiency, comfort, and even energy savings. Whether you’re using a Danby DAC080BBUWDB, DAC120EB1WDB, or any model from their popular portable line, understanding how to use the remote properly can make a huge difference in your daily experience. And let’s be real—no one wants to get up every 20 minutes to adjust the temperature or switch modes.
Getting to Know Your Danby Portable Air Conditioner Remote
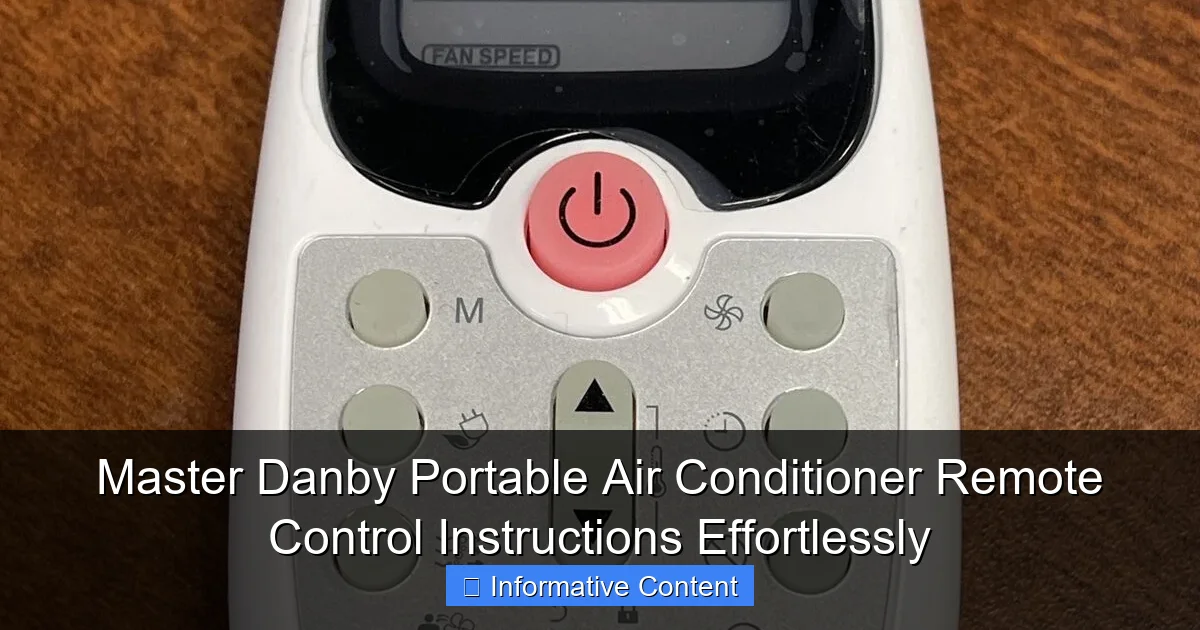
Anatomy of the Remote: What Each Button Does
Let’s start with the basics. Your Danby portable AC remote might look simple, but it’s packed with features designed to give you precise control. Here’s a quick breakdown of the most common buttons you’ll find:
Visual guide about danby portable air conditioner remote control instructions
Image source: replacementremotes.com
- Power Button (⏻): Turns the unit on or off. Simple, right? But did you know holding it for 3 seconds can reset some models?
- Mode Button (M): Cycles through cooling, dehumidifying, fan-only, and sometimes heating (on select models).
- Fan Speed (FAN): Lets you choose between low, medium, high, or auto fan settings.
- Temperature Up/Down (▲/▼): Adjusts your desired room temperature. Most Danby units go from 16°C to 30°C (61°F to 86°F).
- Timer (⏲): Sets on/off schedules—great for saving energy while you sleep or are away.
- Sleep Mode (🌙): Automatically adjusts temperature and fan speed for comfort during the night.
- Swing (↔): Activates vertical or horizontal airflow oscillation (on models with swing function).
- LED Display (🔆): Toggles the brightness of the control panel lights—handy if you’re sensitive to light at night.
One thing I love about Danby remotes is that they’re consistent across models. If you’ve used one Danby portable AC, the next one feels familiar. That’s a big win for usability.
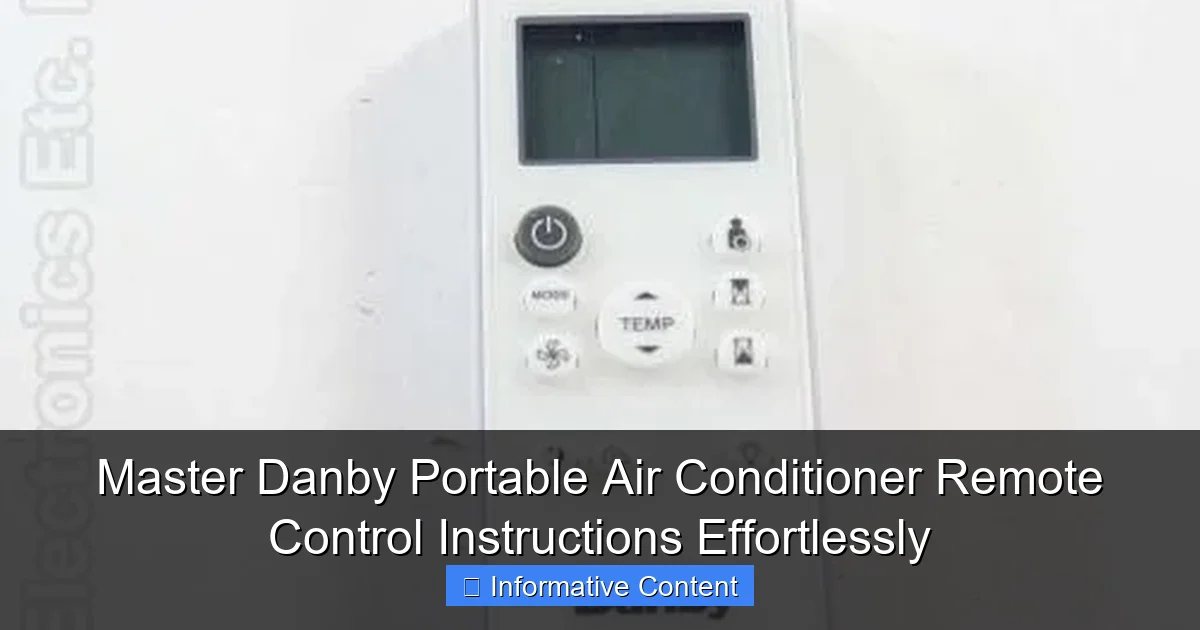
Understanding the LCD Screen and Indicators
The small LCD screen on your remote isn’t just for show. It gives you real-time feedback. Here’s what to watch for:
- Temperature Display: Shows your set temperature. If it flashes, the unit might be in standby or error mode.
- Mode Icons: A snowflake for cooling, a water drop for dehumidifying, a fan for fan-only, and a sun (on heat-capable models) for heating.
- Timer Indicator: A clock icon appears when a timer is active. This is super helpful if you forget whether you set a schedule.
- Fan Speed Arrows: Shows which level you’re on—low (1 arrow), medium (2), high (3).
- Sleep Mode Star: A small star appears when sleep mode is on.
Pro tip: If the screen is blank, first check if the batteries are dead. I once spent 10 minutes troubleshooting a “broken” remote before realizing the AA batteries were just low. A quick swap fixed everything.
How to Use the Remote: Step-by-Step Instructions for Everyday Tasks
Powering On and Selecting Modes
Let’s walk through the most basic—but essential—function: turning on your AC and picking the right mode.
- Insert fresh batteries into the remote (usually 2x AA). Make sure they’re inserted correctly—positive and negative aligned.
- Point the remote toward the front of your Danby unit. The infrared sensor is usually in the lower right or left corner.
- Press the Power button. You should hear a beep and see the unit’s display light up.
- Press the Mode button until you see the desired icon:
- Cool (❄️): For lowering room temperature. Use this on hot days.
- Dehumidify (💧): For reducing humidity without cooling much. Ideal for muggy climates or basements.
- Fan Only (🌀): For air circulation without cooling. Great for mild days or if you just want a breeze.
- Heat (☀️): Only on select models (like the Danby DPA080B6WDB). For warming up chilly rooms.
Real-life example: Last summer, my basement was damp and stuffy. Instead of cranking the AC, I switched to dehumidify mode and ran it for 2 hours. The air felt lighter, and I saved on cooling costs. Win-win.
Adjusting Temperature, Fan Speed, and Airflow
Now that your AC is on, let’s fine-tune it for maximum comfort.
- Set Temperature: Use the ▲/▼ buttons. For cooling, most experts recommend 24–26°C (75–78°F) for balance between comfort and energy use. Going below 22°C (72°F) can overwork the unit and increase humidity.
- Fan Speed: Press the FAN button to cycle through speeds. Use:
- High when the room is hot and you want fast cooling.
- Low at night for quiet operation.
- Auto (if available) for the unit to adjust based on room temperature.
- Swing Function: If your model has a swing button (look for ↔ or a fan with arrows), press it to enable oscillating airflow. This spreads cool air evenly and avoids “cold spots.”
Tip: If your remote doesn’t have a swing button, check the manual—some models activate swing via a long press on the fan button. I discovered this by accident when I held the FAN button for 5 seconds. The louvers started moving, and I felt like I’d unlocked a secret feature!
Using the Timer and Sleep Mode for Efficiency
Here’s where the remote really shines: automation. No more forgetting to turn off the AC or waking up too cold.
Setting the Timer
- With the unit on, press the Timer button. The display will show “0.0” or “00:00.”
- Use the ▲/▼ buttons to set how many hours you want the AC to run (up to 24 hours).
- Wait 5 seconds. The timer activates. The clock icon will appear on the remote and unit.
- To cancel, press the Timer button again.
Use case: I set a 2-hour timer every night before bed. The AC runs long enough to cool the room, then turns off automatically. I save energy and sleep better without waking up shivering.
Activating Sleep Mode
- Press the Sleep button. A star icon will appear.
- The unit will gradually increase the temperature by 1–2°C (2–4°F) over 2 hours to match your body’s natural drop in temperature at night.
- Fan speed automatically adjusts to low or medium for quiet operation.
- Press Sleep again to turn it off.
Note: Sleep mode works best in cooling or heating mode. It’s not available in fan-only or dehumidify.
Troubleshooting Common Remote Control Issues
Remote Not Working? Try These Fixes
Nothing’s more frustrating than a non-responsive remote. Before you panic, try these steps:
- Check Batteries: Replace them with fresh ones. Weak batteries are the #1 culprit.
- Remove Obstructions: Make sure nothing is blocking the infrared signal—curtains, plants, or even your hand.
- Clean the Sensor: Wipe the front of the remote and the unit’s receiver with a dry cloth. Dust or grime can block signals.
- Check Distance and Angle: Danby remotes work best within 6–8 meters (20–25 feet). Point directly at the unit, not the wall.
- Reset the Remote: Remove batteries, hold the Power button for 10 seconds, then reinsert batteries. This clears temporary glitches.
- Test with a Phone Camera: Turn on your phone’s camera and point the remote at it. Press any button. If you see a faint purple light, the remote is sending signals. If not, it’s likely faulty.
Personal story: My cat once knocked my remote into a puddle of water. I dried it with a hair dryer, replaced the batteries, and it worked perfectly. Water-resistant? Not officially. But it survived—just don’t test it.
Pairing and Re-Syncing the Remote (If Needed)
Most Danby remotes don’t require pairing—they work out of the box. But if your unit doesn’t respond:
- Turn off the AC at the power outlet.
- Remove remote batteries.
- Wait 30 seconds.
- Reinsert batteries.
- Turn AC back on.
- Press and hold the Power button on the remote for 5–10 seconds.
This forces a “handshake” between remote and unit. It worked for my friend who moved her AC to a new room and suddenly had connection issues.
Advanced Tips and Hidden Features
Energy-Saving Hacks Using the Remote
Want to cut your electricity bill? Your remote is a tool for efficiency.
- Use Auto Mode: If your model has an auto setting (often labeled “Auto” or “A”), use it. The unit will balance cooling and fan speed based on room temperature.
- Set a 26°C Baseline: Every degree lower increases energy use by 6–8%. 26°C (78°F) is ideal for most people.
- Combine Timer + Sleep Mode: Set a 1-hour timer to turn off after sleep mode adjusts. No cold wake-ups, no wasted power.
- Use Dehumidify at Night: In humid climates, run dehumidify mode for 2–3 hours before bed. The air feels cooler without overcooling the room.
Data point: A study by the U.S. Department of Energy found that using timers and sleep modes can reduce AC energy use by up to 20%. That’s real savings.
Customizing Settings for Different Rooms and Seasons
Your AC needs change based on where you are and what season it is. Here’s how to adapt:
- Bedroom: Use sleep mode, set fan to low, and enable swing. Keep temperature at 24–25°C (75–77°F).
- Living Room: Set fan to high during the day for quick cooling. Use auto mode in the evening.
- Basement: Run dehumidify mode for 2–3 hours daily, even in winter. Prevents mold and musty smells.
- Winter (Heat Mode): If your model supports heating, use sleep mode and set temperature to 18–20°C (65–68°F). It’s cozy, not overheated.
Bonus tip: In spring and fall, use fan-only mode to circulate fresh air without cooling. It’s quieter and uses less power.
Maintenance and Long-Term Care for Your Remote
Cleaning and Storing the Remote
A clean remote lasts longer and works better. Here’s how to care for it:
- Wipe Weekly: Use a soft, dry cloth. For sticky spots, lightly dampen the cloth with water. Avoid chemicals.
- Remove Batteries if Unused: If you’re not using the AC for weeks (e.g., winter), take out the batteries. Prevents corrosion.
- Store in a Dry Place: Keep it away from moisture, extreme heat, or direct sunlight. A drawer or shelf works best.
- Use a Remote Holder: Attach a magnetic clip or small hook to the wall near your AC. No more lost remotes!
I keep mine in a little basket on my nightstand. It’s always there when I need it—no more frantic searches at 3 a.m.
When to Replace the Remote or Batteries
Even the best remotes don’t last forever. Here’s when to take action:
- Battery Life: Replace every 6–12 months, or when the display dims or buttons become sluggish.
- Physical Damage: If the remote is cracked, buttons are unresponsive, or the screen is broken, it’s time for a replacement.
- Signal Issues: If you’ve tried all troubleshooting steps and it still doesn’t work, order a new one.
Danby sells replacement remotes on their website. Search your model number (e.g., DAC080BBUWDB) and “remote.” Prices range from $15–$30.
Data Table: Danby Remote Features by Model
| Model | Cooling (BTU) | Modes | Timer | Sleep Mode | Swing | Remote Type |
|---|---|---|---|---|---|---|
| DAC080BBUWDB | 8,000 | Cool, Dehumidify, Fan | Yes (24h) | Yes | Yes | Infrared |
| DAC120EB1WDB | 12,000 | Cool, Dehumidify, Fan, Heat | Yes (24h) | Yes | Yes | Infrared |
| DPA080B6WDB | 8,000 | Cool, Dehumidify, Fan, Heat | Yes (24h) | Yes | No | Infrared |
| DAC100EB1WDB | 10,000 | Cool, Dehumidify, Fan | Yes (24h) | Yes | Yes | Infrared |
Note: All models use infrared remotes. No Wi-Fi or app control—just simple, reliable operation.
Final Thoughts: Make Every Button Count
Your Danby portable air conditioner remote isn’t just a gadget. It’s a gateway to comfort, efficiency, and peace of mind. By mastering its buttons—from power and mode selection to sleep mode and timers—you’re not just cooling a room. You’re creating a better living environment.
Remember, small actions make a big difference. Setting a timer once a night. Using dehumidify in a damp basement. Switching to fan-only on a mild evening. These choices add up—for your comfort, your wallet, and the planet.
So the next time you grab your remote, take a second to appreciate what it can do. Point it with purpose. Press with confidence. And enjoy that cool, refreshing air—exactly when and how you want it. Because with the right knowledge, your Danby portable AC remote isn’t just a tool. It’s your cool companion.
Frequently Asked Questions
How do I pair my Danby portable air conditioner remote control?
To pair the remote, ensure the unit is powered on and press the “Reset” or “Pair” button (if available) on the remote. Point the remote toward the AC unit and wait for the signal confirmation light to flash, indicating successful pairing.
Why is my Danby portable air conditioner remote control not working?
First, check if the batteries need replacing or are inserted incorrectly. Ensure there’s no obstruction between the remote and the AC unit, and verify the remote is within 20 feet of the unit for optimal signal range.
Where can I find the Danby portable air conditioner remote control instructions manual?
You can download the official Danby portable air conditioner remote control instructions manual from Danby’s website under the “Support” or “Manuals” section. Enter your model number to locate the correct PDF guide.
How do I adjust the temperature using the Danby remote?
Press the “Temp+” or “Temp-” buttons on the remote to set your desired temperature. The display on the AC unit will update to reflect the new setting within a few seconds.
Can I use the Danby remote to switch between cooling modes?
Yes, press the “Mode” button on the remote to cycle between Cool, Fan, Dry, or Auto modes. The selected mode will appear on the AC’s display, and the unit will adjust accordingly.
How do I activate the timer function on my Danby portable air conditioner remote?
Press the “Timer” button, then use the “+” or “-” buttons to set the desired on/off time. The timer icon will light up on the AC unit, confirming the setting is active.