

Featured image for costway air conditioner instructions
Image source: costway.com
Setting up your Costway air conditioner is quick and hassle-free with the clear, step-by-step instructions provided in the user manual and setup guide. From unboxing to optimal performance, this guide ensures efficient installation and operation—perfect for beating the heat in minutes. No technical expertise needed!
Key Takeaways
- Read the manual first: Always review Costway air conditioner instructions before setup to avoid errors.
- Ensure proper ventilation: Keep vents unobstructed for optimal cooling and efficiency.
- Use the remote wisely: Master the remote settings to control temperature and modes easily.
- Check power requirements: Verify voltage compatibility to prevent damage or malfunctions.
- Clean filters monthly: Maintain airflow and performance with regular filter cleaning.
- Position unit correctly: Install on a stable, level surface for safe operation.
📑 Table of Contents
- Getting Started with Your Costway Air Conditioner
- Unboxing and Initial Setup: What’s in the Box?
- Step-by-Step Installation Guide
- Understanding the Control Panel and Remote
- Daily Operation and Maintenance Tips
- Troubleshooting Common Issues
- Data Table: Costway AC Models Compared
- Final Thoughts: Making the Most of Your Costway AC
Getting Started with Your Costway Air Conditioner
So, you’ve just brought home a shiny new Costway air conditioner. Whether you’re escaping a sweltering summer or just trying to keep your apartment cool during heatwaves, this little unit could be your new best friend. But before you plug it in and expect instant relief, let’s talk about setup. I remember my first Costway AC—I was so excited I almost skipped the manual. Spoiler alert: that was a mistake. After a few missteps (like trying to install it in a window that was too narrow), I learned the hard way that reading the Costway air conditioner instructions actually saves time, energy, and maybe even your sanity.
Setting up a portable or window air conditioner isn’t rocket science, but it *is* a process that requires attention to detail. From choosing the right spot to ensuring proper ventilation, every step matters. And while Costway units are known for being user-friendly, skipping instructions can lead to poor performance, noise issues, or even damage. In this guide, I’ll walk you through every step—based on my own experience, common user feedback, and what the manual *should* tell you (but sometimes doesn’t). Think of this as the ultimate cheat sheet for getting your Costway AC up and running with minimal fuss.
Unboxing and Initial Setup: What’s in the Box?
Checking Your Components
The first thing you’ll notice when unboxing your Costway air conditioner is how neatly everything is packed. Most models come with the AC unit itself, a window installation kit (for window units), exhaust hose, adapter, and a remote control. Portable models may include caster wheels, a drain hose, and a user manual. Before you even think about plugging it in, take a moment to lay everything out and check against the parts list in the manual.
Visual guide about costway air conditioner instructions
Image source: remotesremade.com
- Air conditioner unit – The main body with controls and vents.
- Exhaust hose – Usually 5–6 feet long, connects to the back of the unit and vents hot air outside.
- Window kit – For window units, this includes adjustable panels and a sealing foam strip.
- Hose adapter – Fits the exhaust hose to the window panel or wall opening.
- Remote control and batteries – For convenient temperature and mode adjustments.
- Drain hose (portable models) – For manual or continuous drainage if the tank fills.
Pro tip: I once skipped this step and realized I was missing the foam seal for the window panel. That led to a drafty, inefficient setup. So, yes—take five minutes to verify everything’s there.
Choosing the Right Location
Location matters more than you think. For window Costway air conditioners, you need a double-hung or sliding window with enough width and height to fit the unit and the installation kit. Measure the window opening *before* you buy, or at least before you start installing. The manual usually lists minimum and maximum window sizes.
For portable Costway air conditioners, you need:
- At least 18–24 inches of clearance on all sides (especially the back where the exhaust hose connects).
- Proximity to a window for venting the exhaust hose.
- A flat, stable surface—no rugs or uneven floors.
- Access to a grounded electrical outlet (110–120V).
Real-world example: I once placed my portable AC in a corner with only 10 inches of space behind it. The unit overheated after an hour, triggering the safety shutoff. Moving it to a spot with better airflow fixed the problem immediately.
Step-by-Step Installation Guide
Installing a Window Costway Air Conditioner
Let’s tackle window units first. These are great for permanent or semi-permanent cooling in rooms like bedrooms or home offices.
- Prepare the window: Open the window and clean the track. Remove any screens or obstructions.
- Assemble the window kit: Slide the adjustable panels together to match your window width. Most kits have notches or locking tabs—make sure they’re secure.
- Attach the foam seal: Stick the foam strip along the top edge of the lower window panel. This prevents hot air from sneaking back in.
- Place the unit: Carefully lift the AC and slide it into the window. The side panels should fit snugly. For heavier models, get a friend to help—Costway units can weigh 50+ pounds.
- Secure the window: Lower the window sash onto the top of the unit. Use the included brackets or screws to lock it in place. Never leave the window unsecured—this is a safety hazard.
- Connect the exhaust hose: If your model has a rear exhaust (some do), attach the hose to the back and route it outside through the window gap or a wall vent.
Tip: I use a small piece of cardboard or foam to fill any gaps around the unit. It’s not in the manual, but it makes a huge difference in efficiency.
Setting Up a Portable Costway Air Conditioner
Portable ACs are more flexible but require careful setup to avoid performance issues.
- Roll it into place: Use the caster wheels to move the unit. Avoid dragging it—this can damage the internal compressor.
- Attach the exhaust hose: Connect one end to the back of the unit and the other to the window adapter. Make sure it’s straight—no sharp bends or kinks.
- Install the window kit: Similar to window units, adjust the panels to fit your window and secure them. Insert the hose adapter into the panel.
- Seal the gaps: Use the foam strip or a custom-cut piece of insulation to block airflow around the adapter.
- Drain setup (if needed): In humid climates, the internal tank fills fast. You can either:
- Manually drain it when the “Tank Full” light appears.
- Attach the drain hose for continuous drainage (requires a floor-level outlet or gravity-fed setup).
Personal note: I live in Florida, where humidity is relentless. I set up continuous drainage by running the hose into a floor drain. It’s a game-changer—no more mid-summer tank alerts.
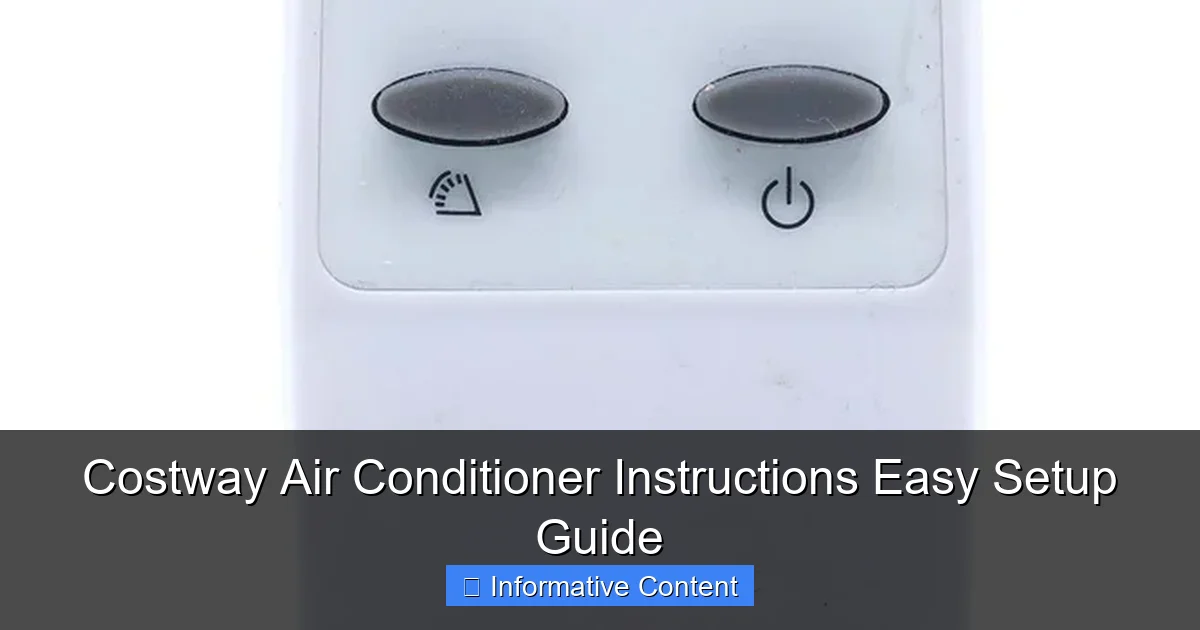
Understanding the Control Panel and Remote
Buttons and Settings Explained
Costway air conditioners have intuitive controls, but the symbols can be confusing at first glance. Here’s a breakdown of what each button does:
- Power: Turns the unit on/off.
- Mode: Cycles through Cool, Fan, Dry (dehumidify), and Auto (if supported). In Cool mode, the compressor kicks in. Fan mode circulates air without cooling. Dry mode reduces humidity but doesn’t cool as much.
- Temperature: Adjusts the set temp (usually 60–86°F). Lower temps mean more cooling, but also more energy use.
- Fan Speed: Options are Low, Medium, and High. High speed is great for quick cooling, but louder. I use Medium for nighttime.
- Timer: Set the unit to turn on or off after 1–24 hours. Handy for pre-cooling a room before bedtime.
- Sleep Mode: Gradually adjusts the temperature over time to reduce energy use. It’s quieter and ideal for overnight use.
- Swing (if available): Oscillates the louvers to spread air evenly. I love this feature—it prevents hot spots.
Using the Remote Control Effectively
The remote is a lifesaver, especially if your AC is in a hard-to-reach spot (like behind a couch). Here are a few tips:
- Point it directly at the unit: Most remotes use infrared, so obstacles like furniture can block the signal.
- Replace batteries early: Weak batteries cause unresponsive remotes. I keep spares in the remote’s battery compartment.
- Use the “Turbo” or “Quick Cool” button (if available): This temporarily boosts fan speed and compressor power for rapid cooling. Just don’t leave it on for hours—it’s not energy efficient.
- Check the display: Some models show room temp on the remote. Use it to fine-tune your settings.
Anecdote: I once thought my remote was broken because it wouldn’t turn on the AC. Turns out, I was pointing it at the ceiling fan instead of the unit. Lesson learned!
Daily Operation and Maintenance Tips
Optimizing Performance and Efficiency
To get the most out of your Costway air conditioner, follow these daily habits:
- Close doors and windows: Even a small crack can let in hot air. I seal mine with draft stoppers.
- Use curtains or blinds: Blocking direct sunlight reduces the workload on the AC. I keep my blinds closed from 11 AM to 4 PM.
- Set a reasonable temperature: Every degree below 72°F increases energy use by 6–8%. I set mine to 74°F during the day and 70°F at night.
- Clean the air filter weekly: A dirty filter reduces airflow and efficiency. Most Costway units have a washable filter—just rinse it under water and dry it completely before reinstalling.
- Keep the exhaust hose straight: Bends or dips can trap condensation, leading to leaks or mold.
Seasonal Maintenance and Storage
When the cooling season ends, don’t just pack it away. Proper storage prevents mold, dust buildup, and damage.
- Drain the water tank: Even if it’s empty, residual moisture can cause mold. I use a turkey baster to remove every drop.
- Clean the unit: Wipe the exterior with a damp cloth. Use a vacuum with a brush attachment to remove dust from the vents and filter area.
- Coil and store the hose: Wrap it loosely to avoid kinks. I hang mine on a hook in my garage.
- Cover the unit: Use the original box or a breathable fabric cover. Avoid plastic—it traps moisture.
- Store indoors: Keep it in a dry, temperature-stable place (not a damp basement).
Bonus tip: I label my storage box with the model number and date. It helps when I need to find it next summer.
Troubleshooting Common Issues
AC Not Cooling or Blowing Warm Air
This is the #1 complaint I hear. Here’s how to diagnose it:
- Check the mode: Is it set to Cool? If it’s on Fan or Dry, it won’t cool.
- Inspect the exhaust hose: Is it connected and venting outside? If the hose is loose or blocked, hot air recirculates.
- Clean the filter: A clogged filter restricts airflow. I clean mine every 7–10 days in peak summer.
- Check for ice buildup: If the coils freeze, the unit can’t cool. Turn it off for 24 hours to thaw, then restart. This often happens if the filter is dirty or airflow is restricted.
- Verify the temperature setting: If the set temp is higher than the room temp, the compressor won’t kick in.
Real fix: My unit once stopped cooling after a thunderstorm. Turns out, the surge protector tripped. I reset it, and the AC worked fine.
Excessive Noise or Vibration
Some noise is normal, but loud banging or rattling isn’t.
- Check for loose parts: Tighten any screws on the unit or window kit.
- Ensure the unit is level: Use a spirit level. If it’s tilted, the internal fan can vibrate.
- Inspect the exhaust hose: A loose or flapping hose can make noise. Secure it with tape or clamps.
- Place on a soft surface (portable models): A rubber mat reduces vibration transfer to the floor.
Water Leaks or Tank Full Alerts
Portable ACs collect condensation. If it’s leaking:
- Check the drain plug: Is it closed? I once forgot to reinsert it after cleaning.
- Inspect the hose connection: For continuous drainage, ensure the hose isn’t kinked or blocked.
- Empty the tank: If the “Tank Full” light is on, unplug the unit, drain the water, and restart.
- Use a dehumidifier: In very humid areas, a separate dehumidifier reduces the load on the AC.
Data Table: Costway AC Models Compared
| Model | Type | BTU | Cooling Area | Key Features | Noise Level (dB) |
|---|---|---|---|---|---|
| Costway 8000 BTU | Portable | 8,000 | Up to 300 sq. ft. | Remote, timer, 3 fan speeds, washable filter | 52–56 |
| Costway 10000 BTU | Window | 10,000 | Up to 450 sq. ft. | Energy Star, sleep mode, slide-out chassis | 54–58 |
| Costway 12000 BTU | Portable | 12,000 | Up to 550 sq. ft. | Dual hose, dehumidify, 24-hour timer | 55–59 |
| Costway 14000 BTU | Window | 14,000 | Up to 700 sq. ft. | Remote, auto restart, corrosion-resistant | 56–60 |
Note: BTU (British Thermal Unit) measures cooling power. Higher BTU = more cooling, but also higher energy use. Choose based on room size and insulation.
Final Thoughts: Making the Most of Your Costway AC
Setting up a Costway air conditioner isn’t just about following the Costway air conditioner instructions—it’s about understanding how the unit works and adapting it to your space. I’ve learned that a little patience during setup pays off in better performance, lower noise, and longer lifespan. Whether you’re using a window or portable model, the key is consistency: clean the filter, check the hose, and keep the area around the unit clear.
And remember, every AC has quirks. My first Costway unit took a few tries to get the window kit just right. But once it was set up properly, it kept my 350 sq. ft. apartment cool all summer. The remote became my favorite gadget, and I barely noticed the noise after the first week.
If you’re still on the fence about buying a Costway AC, know this: they’re not perfect (no budget-friendly unit is), but they deliver solid value for the price. Just treat the setup process like a mini-project—read the manual, take your time, and don’t skip the small steps. Your future cool, comfortable self will thank you.
Frequently Asked Questions
How do I set up my Costway air conditioner for the first time?
To set up your Costway air conditioner, unbox the unit, place it near a window or vent, and secure the exhaust hose. Follow the Costway air conditioner instructions for plugging it in and selecting your preferred mode (cool, dehumidify, or fan).
Why is my Costway air conditioner not cooling properly?
Ensure the exhaust hose is properly vented and the air filter is clean. Check the thermostat settings and make sure doors/windows are closed to prevent cool air from escaping.
Can I use my Costway air conditioner without a window kit?
No, the exhaust hose must be vented outside to release hot air. Using it without a window kit or alternative venting (like a sliding door adapter) will reduce efficiency and damage the unit.
How often should I clean the filter in my Costway air conditioner?
Clean the filter every 2–4 weeks, depending on usage. Refer to the Costway air conditioner instructions for removal steps and rinse it gently with water to maintain airflow.
Is there a sleep mode on my Costway portable air conditioner?
Yes, most models include a sleep mode that reduces noise and adjusts temperature gradually. Press the “Sleep” button on the remote or control panel to activate it.
What should I do if my Costway air conditioner shows an error code?
Error codes (like “E1” or “FL”) indicate issues like water tank full or sensor problems. Turn off the unit, check the manual’s troubleshooting section, and contact Costway support if needed.