
Featured image for coleman rv air conditioner installation instructions
Image source: d3847if7zi41q5.cloudfront.net
Installing a Coleman RV air conditioner is a straightforward DIY project with the right tools and guidance. This step-by-step guide simplifies the process, from mounting the unit to wiring and sealing, ensuring optimal performance and leak-free operation for your RV’s cooling system. Perfect for beginners and seasoned RVers alike!
Key Takeaways
- Verify compatibility: Ensure your RV roof and electrical system match the unit specs.
- Turn off power: Always disconnect power before starting installation to prevent accidents.
- Follow the manual: Adhere strictly to Coleman’s step-by-step instructions for safety.
- Seal properly: Use included gasket or sealant to prevent leaks and drafts.
- Test before use: Run the unit after installation to check cooling and airflow.
- Secure all screws: Double-check tightness to avoid vibrations and noise during operation.
📑 Table of Contents
- Why Installing a Coleman RV Air Conditioner Is a Game-Changer
- Choosing the Right Coleman RV Air Conditioner for Your Needs
- Tools, Materials, and Safety: Preparing for Installation
- Step-by-Step Installation Process
- Common Installation Mistakes and How to Avoid Them
- Maintenance Tips for Long-Term Performance
- Data Table: Coleman RV Air Conditioner Models Comparison
- Final Thoughts: Your Journey to Cool Comfort Starts Here
Why Installing a Coleman RV Air Conditioner Is a Game-Changer
Let’s be real: nothing ruins a summer camping trip faster than a sweltering RV with no working AC. I remember one July weekend in the Arizona desert, where the temperature hit 110°F, and our old AC unit gave up halfway through. We spent the next two days sweating through every meal and sleepless night, vowing to never let it happen again. That’s when we decided to upgrade to a Coleman RV air conditioner—a reliable, widely trusted brand among full-time RVers and weekend warriors alike.
Installing a Coleman RV air conditioner isn’t just about comfort—it’s about peace of mind. Whether you’re replacing a worn-out unit or adding AC to a camper for the first time, the process can feel overwhelming. But here’s the good news: with the right tools, a little patience, and this step-by-step Coleman RV air conditioner installation instructions guide, you can do it yourself and save hundreds of dollars on professional labor. No need to be a mechanic or electrician. Just follow along, and I’ll walk you through everything you need to know—from choosing the right model to securing the final bolt.
Choosing the Right Coleman RV Air Conditioner for Your Needs
Before you even think about installation, it’s crucial to pick the right model. Not all Coleman RV air conditioners are created equal, and choosing the wrong one can lead to poor cooling, excessive noise, or even electrical issues. Let’s break it down so you make the best decision for your setup.
Visual guide about coleman rv air conditioner installation instructions
Image source: tankbig.com
Understanding BTU Requirements
The first thing to consider is the cooling capacity, measured in BTUs (British Thermal Units). A general rule of thumb: you need about 1,000 BTUs per 10 square feet of RV space. Here’s a quick reference:
- 13,500 BTU: Ideal for small to mid-size RVs (18–25 feet). Great for couples or small families.
- 15,000 BTU: Best for larger trailers, fifth wheels, or motorhomes (26–40 feet). Handles higher heat loads and longer run times.
- Dual-zone units (e.g., 15,000 + 13,500 BTU): Perfect for RVs with separate living and bedroom zones. Offers independent temperature control.
Pro tip: If you camp in hot climates (think Texas, Arizona, or Florida), lean toward the higher BTU models. The extra power ensures consistent cooling even during peak heat.
Roof vs. Ducted vs. Non-Ducted Systems
Coleman offers several installation styles, and your RV’s existing setup plays a big role.
- Roof-mounted (standard): Most common. Installed on top of the RV, with air distributed through ceiling vents. Easy to install and service.
- Ducted systems: Air travels through built-in ducts to multiple vents. Offers even cooling but requires ductwork in the ceiling. Check if your RV has ducts—older models may not.
- Non-ducted (ceiling cassette): Air blows directly from the unit into the cabin. Simpler install but less consistent airflow in larger RVs.
For example, if your RV already has ceiling ducts (common in motorhomes), a Coleman Mach 8 Plus 15,000 BTU ducted model is a solid upgrade. But if you’re starting from scratch, a non-ducted unit like the Coleman Mach 10 ND might be easier.
Power Requirements and Compatibility
Most Coleman RV ACs run on 120V AC power, but check your RV’s electrical system. A 13,500–15,000 BTU unit typically needs a 20-amp circuit. Older RVs might only have 15-amp outlets, which could trip breakers under heavy load.
Example: We installed a 15,000 BTU unit on our 30-foot travel trailer, which had a 20-amp circuit. It worked perfectly. But when we tried running it alongside a microwave on a 15-amp circuit, the breaker blew. Lesson learned: always check your electrical capacity!
Tools, Materials, and Safety: Preparing for Installation
You don’t need a full garage of tools, but having the right gear makes all the difference. Here’s what you’ll need—and how to use it safely.
Essential Tools and Supplies
- Socket wrench set (especially 3/8″ and 1/2″ sockets)
- Drill with 1/8″ and 1/4″ bits (for pilot holes)
- Jigsaw or oscillating tool (if cutting a new roof hole)
- Silicone sealant (100% RV-grade) – critical for waterproofing
- Butyl tape (for sealing the base plate)
- Torque wrench (to avoid over-tightening bolts)
- Voltage tester (to confirm power is off)
- Ladder (extension or step) – make sure it’s stable!
- Work gloves and safety glasses – non-negotiable
We once skipped the torque wrench and over-tightened a bolt, cracking the plastic base plate. A $10 tool saved us a $150 repair. Lesson: never skip the basics.
Safety First: Working on the Roof
RV roofs are slippery, especially when wet. Here’s how to stay safe:
- Work on a dry, clear day – no wind, rain, or dew.
- Use a roof ladder or platform – don’t rely on a step ladder alone.
- Secure your ladder with tie-downs or a spotter.
- Wear non-slip shoes – flip-flops are a no-go.
- Turn off all power to the RV before disconnecting wires.
When we installed our first AC, my buddy tried to rush it after dinner. The ladder wobbled, and he nearly fell. We paused, waited until morning, and did it right. Safety isn’t optional—it’s the foundation of a good install.
Pre-Installation Checklist
Before you start, run through this quick checklist:
- ✅ Confirm the AC unit matches your RV’s roof opening (usually 14″ x 14″).
- ✅ Verify your RV’s roof can support the weight (most can handle 150+ lbs).
- ✅ Check for roof damage or leaks—repair any issues first.
- ✅ Ensure you have a clear path for the wiring from the roof to the thermostat.
- ✅ Have a helper—lifting a 70-lb unit alone is risky.
Step-by-Step Installation Process
Now the fun part: installing your Coleman RV air conditioner. Follow these steps carefully, and you’ll have cool air in no time.
Step 1: Remove the Old AC Unit (If Applicable)
If you’re replacing an old unit, start here:
- Turn off power at the breaker and disconnect shore power.
- Remove the interior ceiling panel (usually held by 4–6 screws).
- Disconnect wiring (thermostat, power, ground). Take a photo before disconnecting for reference.
- Unscrew the mounting bolts from the roof (usually 4–8 bolts).
- Lift the old unit off—get help! These are heavy.
- Scrape off old sealant from the roof opening. Clean with alcohol.
Tip: If the old sealant is stuck, use a plastic scraper—never metal, which can scratch the roof.
Step 2: Prepare the Roof Opening
For new installations, you may need to cut a hole. Most RVs already have a 14″ x 14″ opening, but double-check.
- Measure the opening with a tape measure. If it’s too small, use a jigsaw to expand it.
- Sand the edges to remove sharp metal burrs.
- Apply a thin layer of silicone around the opening to prevent leaks.
Real-world example: Our RV had a slightly warped opening. We used a rubber gasket (included with the Coleman unit) to create a perfect seal.
Step 3: Install the Base Plate and Gasket
The base plate (or mounting frame) is key to a secure, leak-proof install.
- Apply butyl tape to the bottom of the base plate (follow the unit’s instructions for tape placement).
- Lower the base plate into the roof opening. Align it so the screw holes match.
- Secure with mounting screws (usually 4–8). Use a torque wrench to tighten to 18–20 ft-lbs—don’t overdo it!
Pro tip: If your RV has a rubber roof, use EPDM-compatible sealant. For fiberglass or aluminum, standard RV silicone works.
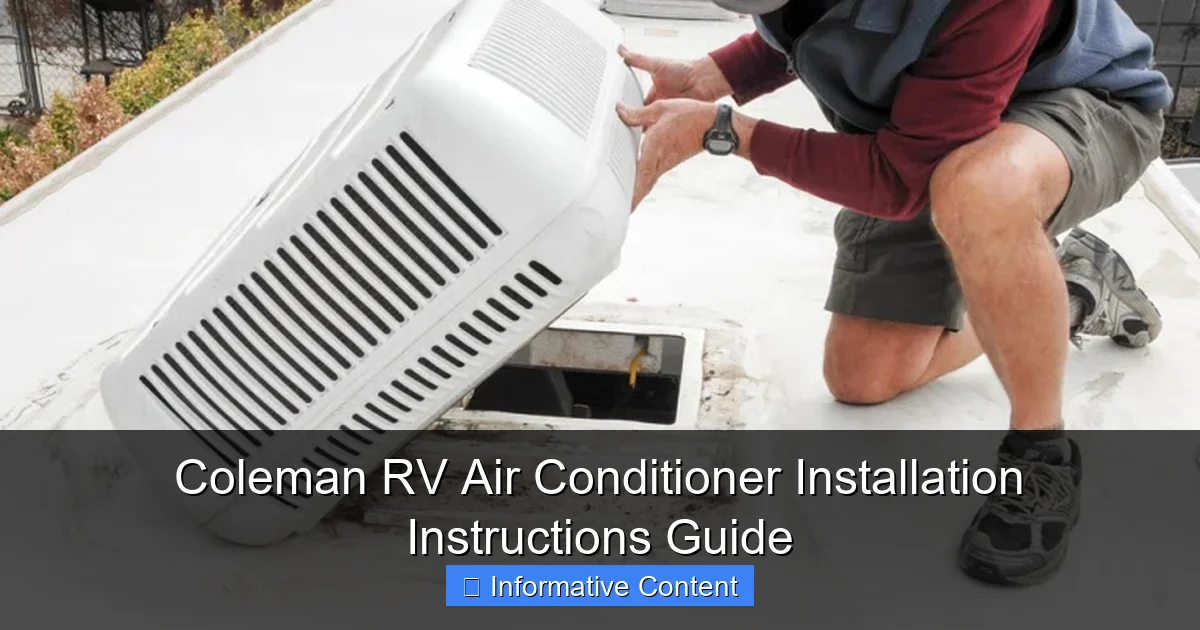
Step 4: Lift and Secure the AC Unit
This is the heaviest part—don’t rush it.
- Have a helper on the roof and one on the ground.
- Use a lifting strap (or a sturdy rope) to raise the unit. Avoid lifting by the fins—they bend easily.
- Lower the AC onto the base plate, aligning the mounting holes.
- Insert bolts and hand-tighten. Then, use a torque wrench to secure to 20 ft-lbs.
- Seal the edges with silicone. Apply a bead around the entire perimeter.
Warning: If the unit wobbles after tightening, check the base plate. A loose base = leaks and damage.
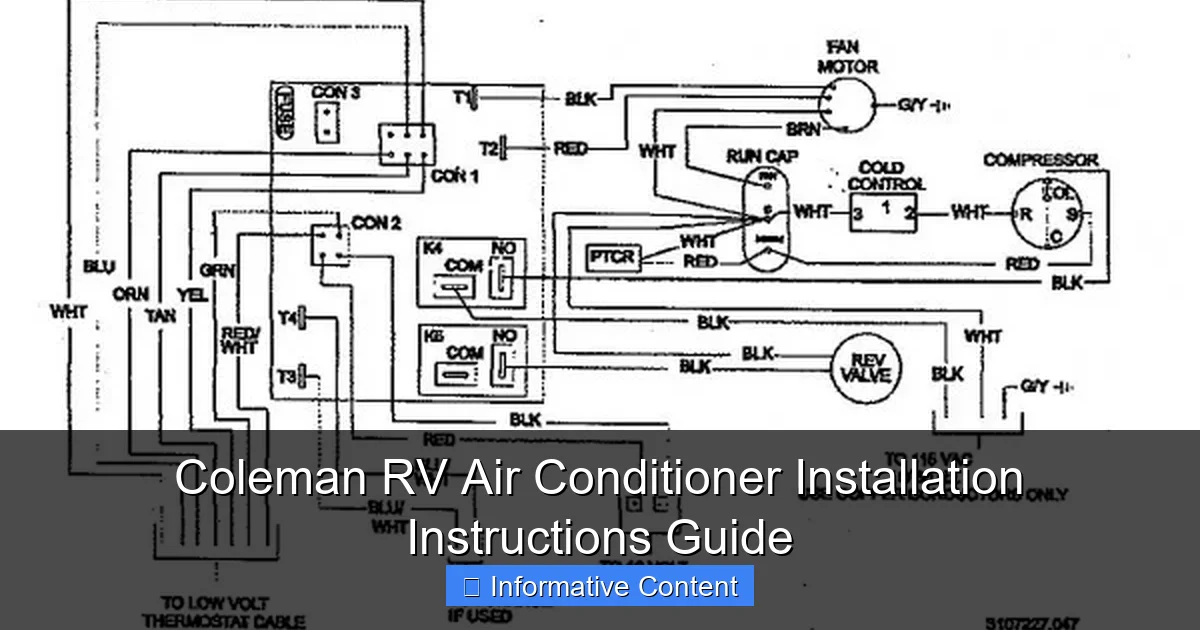
Step 5: Wire the AC Unit
Wiring can be tricky, but Coleman units usually have color-coded wires.
- Run the wiring from the roof to the thermostat area (use existing conduits if possible).
- Connect wires per the manual:
- Black (L1) → Power
- White (N) → Neutral
- Green (G) → Ground
- Thermostat wires (usually red, white, green, yellow) → Match to thermostat terminals
- Use wire nuts and wrap connections with electrical tape.
- Secure wires with zip ties to prevent vibration damage.
Example: Our Coleman Mach 10 had a 6-wire thermostat connection. We labeled each wire before disconnecting to avoid confusion.
Step 6: Install the Ceiling Panel and Test
The final touches make all the difference.
- Attach the ceiling panel to the base plate with screws.
- Turn on power and set the thermostat to “cool.”
- Listen for the compressor—you should hear it kick on within 1–2 minutes.
- Check for airflow and temperature. Aim for a 15–20°F drop within 10 minutes.
- Inspect for leaks around the roof seal after 24 hours.
Common Installation Mistakes and How to Avoid Them
Even experienced DIYers make mistakes. Here’s what to watch for—and how to fix it.
Over-Tightening Bolts
Too much torque cracks the plastic base or roof. Always use a torque wrench and follow the manual (usually 18–20 ft-lbs).
Poor Sealing = Leaks
Water intrusion is the #1 cause of AC failure. Use butyl tape and silicone. Apply sealant in a continuous bead—no gaps!
Incorrect Wiring
Reversed polarity or loose connections can damage the unit. Double-check wire colors and use a voltage tester.
Ignoring the Roof’s Condition
Never install on a damaged roof. Repair soft spots or delamination first. A weak roof can’t support the unit’s weight.
Skipping the Test Run
Always test before you leave the driveway. We once installed an AC and didn’t test it until we reached the campground—only to find a wiring issue. Now we run a 1-hour test at home.
Maintenance Tips for Long-Term Performance
Your Coleman RV air conditioner can last 10+ years with proper care. Here’s how to keep it running smoothly.
Monthly: Clean the Filters
Dirty filters reduce airflow and strain the compressor. Remove and wash them with mild soap and water. Let them dry completely before reinstalling.
Seasonal: Inspect the Roof Seal
Check for cracks, gaps, or lifted sealant. Reapply silicone as needed. Also, clear debris (leaves, pine needles) from the condenser fins.
Yearly: Check Wiring and Connections
Inspect for frayed wires, loose terminals, or corrosion. Tighten any loose connections.
Before Storage: Run the Unit
Turn it on for 30 minutes to prevent moisture buildup in the compressor. Also, cover the unit with a breathable RV AC cover (not plastic).
Data Table: Coleman RV Air Conditioner Models Comparison
| Model | BTU | Type | Weight (lbs) | Power Draw (Amps) | Best For |
|---|---|---|---|---|---|
| Coleman Mach 8 Plus | 13,500 | Ducted | 72 | 13.5 | Mid-size RVs with ducts |
| Coleman Mach 10 ND | 15,000 | Non-Ducted | 75 | 15.2 | Large trailers, no ducts |
| Coleman Mach 15 | 15,000 | Ducted | 78 | 15.5 | Motorhomes, high heat |
| Coleman Zephyr 135 | 13,500 | Non-Ducted | 68 | 12.8 | Small RVs, budget-friendly |
| Coleman Dual-Zone | 15,000 + 13,500 | Ducted | 140 (total) | 15.2 + 13.5 | Large RVs with separate zones |
Final Thoughts: Your Journey to Cool Comfort Starts Here
Installing a Coleman RV air conditioner isn’t just a weekend project—it’s an investment in your camping comfort. I’ll never forget the first night we tested our new unit. We set the thermostat to 72°F, cracked open a cold drink, and actually enjoyed the summer heat outside. That’s the magic of a well-installed AC.
Remember, the key to success is patience. Follow the Coleman RV air conditioner installation instructions carefully, don’t skip safety steps, and take your time. If you hit a snag, pause and reassess. There’s no shame in calling a pro for help—better safe than sorry.
Now, with your AC running smoothly, you can focus on what really matters: exploring the open road, making memories, and staying cool no matter where the journey takes you. Happy camping!
Frequently Asked Questions
How do I install a Coleman RV air conditioner unit?
To install a Coleman RV air conditioner, first ensure the roof opening matches the unit’s dimensions. Secure the mounting brackets, connect the wiring to the thermostat, and seal the edges with weatherproof caulk for a secure fit.
What tools are needed for Coleman RV air conditioner installation instructions?
You’ll need a screwdriver, drill, wrench, wire strippers, and a caulking gun. Always refer to the official Coleman RV air conditioner installation instructions for model-specific tool requirements and safety tips.
Can I install a Coleman RV AC unit myself, or do I need a professional?
DIY installation is possible if you’re comfortable working on your RV’s roof and electrical systems. However, hiring a professional is recommended for complex wiring or if you’re unsure about roof modifications.
Where should the thermostat be placed during installation?
The thermostat should be mounted inside the RV on an interior wall, away from direct airflow or heat sources. This ensures accurate temperature readings and optimal performance of your Coleman air conditioner.
Are there weight limits for the RV roof when installing a Coleman AC unit?
Yes, most RV roofs can support 100–150 lbs, but check your RV’s manual and the Coleman RV air conditioner installation instructions for exact weight limits. Overloading can damage the roof structure.
How do I seal the AC unit to prevent leaks?
Apply a high-quality butyl or silicone sealant around the base of the unit before securing it to the roof. Re-check the seal annually to maintain a watertight installation and prevent water damage.