

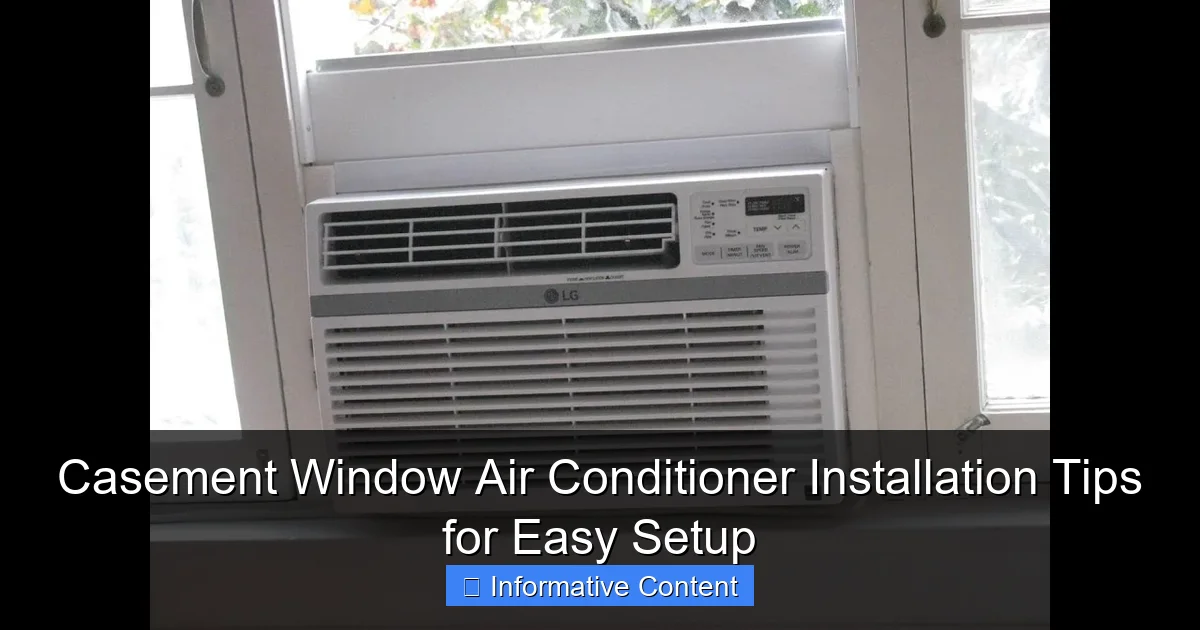
Featured image for casement window air conditioner installation
Image source: pickhvac.com
Proper measurement and a secure fit are crucial when installing a casement window air conditioner to ensure efficiency and safety. Use adjustable side panels or custom brackets to stabilize the unit in non-standard window frames, preventing air leaks and potential damage. This simple setup approach minimizes hassle and maximizes cooling performance all season long.
Key Takeaways
- Measure carefully: Ensure unit fits your casement window dimensions before purchase.
- Secure support brackets: Install brackets first to prevent unit slippage or damage.
- Seal gaps completely: Use foam strips to block hot air leaks and improve efficiency.
- Check window swing: Confirm AC doesn’t obstruct inward or outward window operation.
- Level the unit: Slight tilt (¼”) outward ensures proper drainage and performance.
- Inspect electrical needs: Match voltage requirements and use dedicated outlets only.
📑 Table of Contents
- Why Casement Window Air Conditioners Are a Smart Choice
- Understanding Casement Windows and AC Compatibility
- Essential Tools and Materials for Installation
- Step-by-Step Installation Process
- Common Challenges and How to Solve Them
- Maintenance and Long-Term Care Tips
- Data Table: Popular Casement Window AC Models (2024)
- Final Thoughts: Cool, Confident, and in Control
Why Casement Window Air Conditioners Are a Smart Choice
Let’s face it—summer heat can sneak up on you faster than you can say “I need an AC.” If you’ve got a casement window (you know, those crank-out, side-hinged windows that open like a door), you’ve probably wondered: Can I even install a window air conditioner here? The answer is yes—but it’s not as simple as plopping a standard unit in the sash and calling it a day.
I learned this the hard way during my first summer in a mid-century home with casement windows. I bought a regular window AC, only to realize it wouldn’t fit. After some trial, error, and a few YouTube tutorials, I discovered the secret: with the right tools and a little patience, casement window air conditioner installation is totally doable. And once it’s in? Pure, cool, life-saving relief.
Casement window AC units are specifically designed for these unique windows. They’re typically slimmer, more compact, and built to sit vertically, using the window’s frame and support brackets for stability. But the key to a smooth setup lies in planning, the right equipment, and following a few smart installation tips. Whether you’re a DIY newbie or a seasoned home improver, this guide will walk you through everything you need to know to install your casement window air conditioner safely, efficiently, and without breaking a sweat—literally.
Understanding Casement Windows and AC Compatibility
What Makes Casement Windows Different?
Casement windows are hinged on one side and open outward using a hand crank. They’re common in older homes, modern designs, and rooms where you want maximum ventilation. Unlike double-hung or sliding windows, they don’t have a sash that moves up and down. Instead, the entire window swings out—which means a traditional horizontal window AC won’t work.
Visual guide about casement window air conditioner installation
Image source: i.ytimg.com
Imagine trying to balance a toaster on a swinging door. That’s what happens when you try to fit a standard AC into a casement window. The unit needs to be vertical, secured, and sealed to prevent leaks, drafts, and (worst-case) it crashing to the ground.
Choosing the Right Casement Window Air Conditioner
Not all ACs are created equal. When shopping for a casement window air conditioner, look for models specifically labeled “casement” or “narrow window” compatible. These units are:
- Vertically oriented—they’re taller and narrower than standard models
- Lightweight—typically under 60 pounds to reduce strain on brackets
- Equipped with side supports—to brace against the window frame
- Designed with adjustable mounting brackets—for different window widths
For example, the Frigidaire FFRS0822S1 is a popular 8,000 BTU casement AC that’s 14.5 inches wide—perfect for most casement openings. Meanwhile, the LG LW8017ERSM offers smart features and a slim 15.5-inch width. Always measure your window opening (height and width) before buying. Most casement ACs fit windows between 13.5 and 16 inches wide.
Pro tip: If your window is wider than 16 inches, consider using a custom support bracket or even a through-the-wall unit (more on that later). But for most standard casements, a purpose-built AC is your best bet.
Essential Tools and Materials for Installation
What You’ll Need (And Why)
Before you start, gather your gear. Trust me—having everything ready saves you from running to the hardware store mid-installation. Here’s what you’ll need:
- Casement window AC unit (obviously!)
- Support brackets (usually included with the AC, but double-check)
- Adjustable L-brackets or side support rails (to prevent tipping)
- Weather stripping or foam insulation (to seal gaps)
- Silicone caulk or exterior-grade sealant (for waterproofing)
- Drill and drill bits (for securing brackets)
- Screwdriver (Phillips and flathead)
- Level (to ensure the AC isn’t tilted)
- Measuring tape
- Utility knife (for trimming insulation)
- Gloves and safety glasses (safety first!)
I once tried installing an AC without a level—big mistake. The unit leaned forward, the drain pan overflowed, and I ended up with a mini indoor waterfall. A $5 level saved me from a $200 repair.
Optional but Helpful Add-Ons
While not required, these extras can make your life easier and improve performance:
- AC window installation kit (sold separately, includes extra seals and brackets)
- Foam board or plexiglass panel (to fill the open space above the AC)
- Exterior window cover (for winter protection)
- Smart plug or timer (to control cooling remotely)
For example, I use a Foam N’ Seal insulation kit with a removable plexiglass panel. It keeps the heat out, looks clean, and I can pop it off when I want to open the window in spring.
Step-by-Step Installation Process
Step 1: Measure and Prepare the Window
Start by measuring the exact width and height of your casement window opening. Open the window fully and measure from one side of the frame to the other. Note the depth of the window frame—this helps determine bracket placement.
Clean the window track and frame. Remove any old sealant, dirt, or debris. A clean surface ensures a tight seal and prevents leaks.
Step 2: Assemble and Position the Support Brackets
Most casement ACs come with a support bar that attaches to the window sill. This bar has adjustable arms that extend to the sides of the frame. Here’s how to set it up:
- Place the support bar on the sill, centered under the window.
- Extend the arms to fit snugly against the sides of the frame.
- Use the level to make sure the bar is perfectly horizontal.
- Mark the bracket screw holes with a pencil.
- Drill pilot holes and secure the brackets with screws (don’t overtighten).
Real-world tip: If your sill is sloped, use a wooden shim to level the bracket. I once skipped this step and the AC tilted forward, causing water to leak inside. A $1 shim fixed it in minutes.
Step 3: Install Side Support Rails (Critical!)
This is the most important step. Casement ACs rely on side supports to prevent them from falling out when the window is closed. These rails attach to the window frame and press against the sides of the AC unit.
- Attach the side rails to the frame using the included screws or brackets.
- Position them so they’ll press firmly against the AC’s sides when the window is closed.
- Use the level to ensure the rails are vertical.
Some models (like the Midea U-Shaped Inverter) use a unique “U” bracket that wraps around the AC. Others use simple L-brackets. Follow the manufacturer’s instructions closely—each design is slightly different.
Step 4: Lift and Place the AC Unit
This is a two-person job if the unit is over 50 pounds. Lift the AC carefully and slide it onto the support bar. Make sure it sits flat and doesn’t rock.
Once in place, close the window slowly. The side rails should press against the AC’s sides, creating a snug fit. If there’s too much gap, adjust the rails or add foam padding.
Step 5: Seal the Gaps
Air leaks are the enemy of efficiency. Use foam weather stripping or a foam insulation kit to seal around the top and sides of the AC. Cut the foam to size with a utility knife and press it into place.
For the top gap (between the window and the AC), I use a removable plexiglass panel cut to fit. It’s clear, looks neat, and I can remove it when I want to open the window. Seal the edges with silicone caulk to keep bugs and rain out.
Step 6: Test and Adjust
Turn on the AC and let it run for 10–15 minutes. Check for:
- Vibrations or rattling (tighten brackets if needed)
- Air leaks (add more foam if you feel drafts)
- Water pooling inside (ensure the unit is level and draining properly)
If the AC makes a loud noise when the compressor kicks in, it might be touching the frame. Adjust the side rails slightly to create a 1/4-inch gap.
Common Challenges and How to Solve Them
Challenge 1: The Window Won’t Close Fully
This happens when the AC is too wide or the side rails aren’t positioned correctly. Solutions:
- Double-check your measurements—some casement windows have a “stop” that limits how far they can close.
- Use thinner side rails or foam padding to reduce the AC’s width.
- If all else fails, install a custom plexiglass panel that extends beyond the AC to fill the gap.
I once had a 1/2-inch gap that caused a draft. I cut a piece of foam board to size, painted it white, and secured it with Velcro. Problem solved, and it looked almost invisible from the outside.
Challenge 2: Water Leaks Inside
Leaks usually mean the unit isn’t level or the drain pan is clogged. Fix it by:
- Rechecking the level and adjusting the support bar.
- Ensuring the AC tilts slightly outward (about 1/4 inch lower on the outside) so water drains away from the room.
- Cleaning the drain pan and checking for clogs in the drain holes.
One summer, I ignored a small leak—only to find a puddle under the AC a week later. A quick level check and tilt adjustment fixed it. Lesson learned: always tilt slightly outward!
Challenge 3: Poor Cooling or High Energy Bills
If your room isn’t cooling well, the problem might be:
- Gaps in the seal—reapply foam or caulk.
- Dirty air filter—clean or replace it monthly.
- Undersized unit—check the BTU rating. For a 150 sq ft room, you need at least 6,000 BTUs; for 300 sq ft, 8,000–10,000 BTUs.
I once used a 6,000 BTU AC in a 400 sq ft living room. It ran nonstop and barely cooled the space. Upgrading to a 12,000 BTU unit cut my energy bill by 30% and made a huge difference in comfort.
Challenge 4: Noise or Vibration
Loud humming or rattling can be annoying. Try:
- Adding rubber pads under the AC to absorb vibrations.
- Ensuring the unit isn’t touching the window frame.
- Using a quieter model (look for “inverter” or “ultra-quiet” in the specs).
The LG LW8017ERSM, for example, runs at just 44 dB—quieter than a library. Worth the extra cost if you’re sensitive to noise.
Maintenance and Long-Term Care Tips
Monthly Cleaning Routine
Keep your AC running efficiently with simple monthly tasks:
- Clean the air filter—rinse it under water or vacuum it.
- Wipe down the exterior—use a damp cloth and mild soap.
- Check for mold or mildew—especially in humid climates. Wipe the inside with a 1:1 vinegar-water solution.
I clean mine every month during summer. It takes 10 minutes and keeps the airflow strong.
Seasonal Shutdown and Storage
Before winter, follow these steps:
- Turn off and unplug the AC.
- Remove the unit carefully (two people recommended).
- Clean the filter, drain pan, and exterior.
- Let it dry completely.
- Store it in a dry, covered area (like a closet or basement).
- Cover the window opening with a plastic sheet or insulation panel.
I leave mine in place but cover the top with a custom plexiglass panel and seal the edges with tape. It keeps the cold out and the AC safe until summer.
When to Call a Pro
Most casement window air conditioner installation can be DIY, but consider hiring a pro if:
- Your window frame is damaged or rotting.
- You need custom brackets or a through-the-wall unit.
- You’re not comfortable working at heights or handling heavy units.
One friend tried to install a 70-pound AC alone—and dropped it on his foot. Not worth the risk!
Data Table: Popular Casement Window AC Models (2024)
| Model | BTU | Width (in) | Weight (lbs) | Noise Level (dB) | Special Features |
|---|---|---|---|---|---|
| Frigidaire FFRS0822S1 | 8,000 | 14.5 | 57 | 52 | Dehumidifier, remote control |
| LG LW8017ERSM | 8,000 | 15.5 | 58 | 44 | Wi-Fi, inverter, ultra-quiet |
| Midea U-Shape 8,000 | 8,000 | 15.2 | 55 | 42 | U-bracket design, energy star |
| GE AHY08LZ | 8,000 | 14.8 | 56 | 50 | Easy-clean filter, 3 fan speeds |
| Honeywell MN10CESWW | 10,000 | 16.0 | 62 | 54 | Dehumidifier, sleep mode |
This table helps you compare top models based on size, noise, and features. Remember: the right AC depends on your window size, room square footage, and personal preferences (like noise tolerance).
Final Thoughts: Cool, Confident, and in Control
Installing a casement window air conditioner might seem tricky at first, but with the right approach, it’s a manageable DIY project. The key is preparation—measure twice, gather your tools, and follow the steps carefully. Don’t rush it. Take your time, use the level, and seal those gaps tight.
I’ll never forget the first time I cranked my casement AC to full power and felt that cool air blast through the room. It was a small victory, but a big relief. And now, every summer, I know I’ve got a reliable system that keeps me comfortable without the stress of leaks, noise, or sky-high bills.
Whether you’re cooling a bedroom, home office, or sunroom, a properly installed casement AC makes a huge difference. You don’t need to be a handyman—just patient, careful, and willing to learn from a few mistakes (trust me, we’ve all made them).
So go ahead: measure your window, pick a quality unit, and get to work. With these tips, your casement window air conditioner installation will be smooth, safe, and successful. And when that first wave of cool air hits? You’ll know it was worth every minute.
Frequently Asked Questions
What is the best way to install a casement window air conditioner?
The best way to install a casement window air conditioner is to ensure the unit fits snugly in the window frame using support brackets or mounting kits designed for horizontal sliding or crank-style windows. Always follow the manufacturer’s instructions and use weatherstripping to seal gaps for optimal efficiency.
Can I install a casement window air conditioner by myself?
Yes, you can install a casement window air conditioner yourself if you have basic tools and follow safety precautions. However, for heavier units or complex setups, professional help is recommended to ensure proper support and prevent damage to the window or AC unit.
Do I need special tools for casement window air conditioner installation?
Most casement window air conditioner installations require only basic tools like a screwdriver, level, and measuring tape. Some models may include a mounting kit with specialized brackets or support arms, which simplify the process.
How do I seal gaps during casement window air conditioner installation?
Use foam weatherstripping or foam insulation panels to seal gaps around the unit, ensuring no air leaks. Proper sealing improves cooling efficiency and prevents dust, insects, or moisture from entering through the sides of the air conditioner.
Are there weight limits for casement window air conditioners?
Yes, casement windows typically support lighter units (30–50 lbs), so check your window’s weight capacity before installing a casement window air conditioner. Heavier units may require additional support brackets or an alternative window style.
How do I remove a casement window air conditioner safely?
To remove a casement window air conditioner, turn it off, unplug it, and carefully unscrew any mounting brackets. Have someone assist you to support the unit’s weight, especially if it’s large, to avoid dropping it or damaging the window frame.