
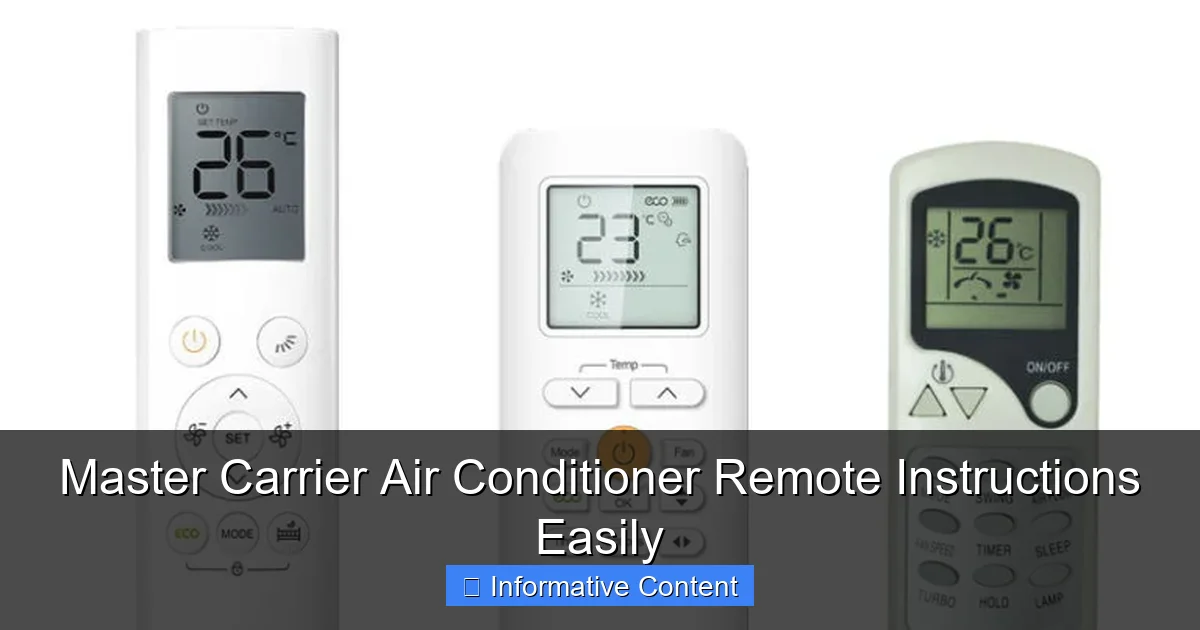
Featured image for carrier air conditioner remote instructions
Image source: acmartbd.com
Unlock full control of your Carrier AC with simple, step-by-step remote instructions tailored for effortless operation. Whether adjusting temperature, modes, or fan speed, this guide ensures you maximize comfort and efficiency without confusion—just clear, actionable steps to master your remote in minutes.
Key Takeaways
- Master the basics: Always start by reading the user manual for model-specific guidance.
- Use mode settings: Switch between cooling, fan, or dehumidify for optimal comfort.
- Adjust fan speed: Select low, medium, or high to balance noise and efficiency.
- Set timers: Schedule on/off times to save energy and maintain comfort.
- Check error codes: Decode remote alerts to troubleshoot issues quickly.
- Replace batteries: Use fresh batteries to ensure responsive remote control.
📑 Table of Contents
- Understanding Your Carrier Air Conditioner Remote Control
- Getting Started: Remote Control Basics and Setup
- Essential Functions: How to Use the Remote Effectively
- Advanced Features and Hidden Gems
- Troubleshooting Common Remote Issues
- Pro Tips for Maximizing Comfort and Efficiency
- Conclusion: Your Remote, Your Rules
Understanding Your Carrier Air Conditioner Remote Control
Have you ever stood in front of your Carrier air conditioner, staring at a remote control with a dozen buttons, wondering which one to press? You’re not alone. I remember the first time I tried to adjust the settings on my unit—it felt like deciphering a secret code. The blinking lights, the unfamiliar symbols, and the fear of accidentally setting it to “Arctic Blast” mode made me hesitant to touch anything. But after a bit of trial, error, and a few helpful tips from a technician, I finally cracked the code. Now, I want to share that knowledge with you.
Whether you’re a new Carrier AC owner or just looking to get more out of your existing unit, mastering your remote control is key to staying comfortable and efficient. This guide will walk you through everything—from basic functions to hidden features—so you can use your Carrier air conditioner remote with confidence. We’ll cover how to set the temperature, switch modes, use timers, troubleshoot common issues, and even unlock some pro-level hacks. Think of this as your friendly, no-nonsense manual for making the most of your AC remote.
Getting Started: Remote Control Basics and Setup
What’s in the Box? Unboxing Your Remote
When you first get your Carrier air conditioner, the remote control usually comes neatly packed with the unit. Most models include a standard infrared remote with a small LCD screen, but newer models may feature backlit displays or even Wi-Fi connectivity. Before you start pressing buttons, take a moment to inspect the remote. Look for:
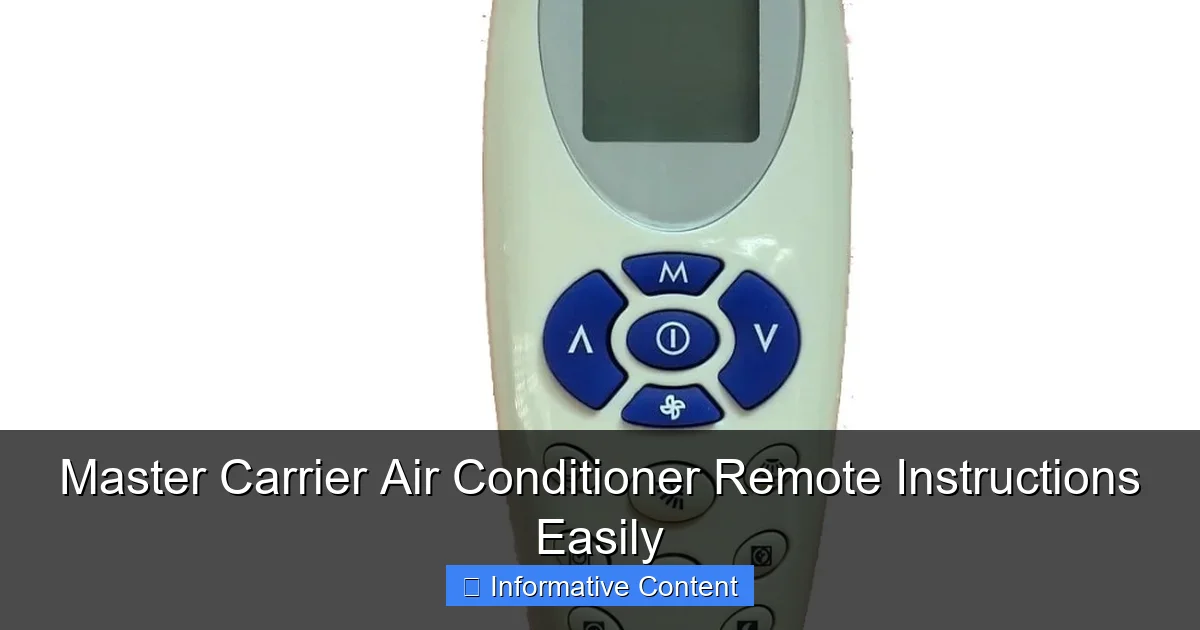
Visual guide about carrier air conditioner remote instructions
Image source: alquilercastilloshinchables.info
- A power button (usually marked with a circle and a line)
- Mode buttons (Cool, Fan, Dry, Auto, Heat)
- Temperature up/down arrows
- Fan speed controls
- Timer and swing buttons
- A “Reset” or “Clean” function (on some models)
Pro tip: Always check the model number on the back of the remote (e.g., RG10A1 or RG57A2). This helps when searching for specific instructions or replacement batteries. I once spent 20 minutes trying to figure out why my remote wasn’t working—only to realize I had the wrong model number in my online search.
Inserting Batteries and First-Time Setup
Most Carrier remotes use two AAA batteries. To install them:
- Flip the remote over and slide open the battery compartment.
- Insert the batteries, making sure the + and – ends match the markings.
- Close the compartment and press the power button.
If the screen lights up, you’re good to go. If not, double-check the battery orientation. I’ve seen people flip the batteries backward and wonder why nothing happens—don’t be that person!
Once powered, the remote will typically display the current room temperature (if your model has a built-in sensor) or just the default settings. Some models may prompt you to set the time or language during initial setup. Follow the on-screen instructions carefully.
Pairing the Remote with Your AC Unit
Most Carrier remotes are pre-paired with the indoor unit, so you won’t need to manually pair them. However, if the remote isn’t responding:
- Ensure there’s no obstruction between the remote and the AC’s infrared receiver (usually on the front panel).
- Stand within 15–20 feet of the unit and aim the remote directly at the receiver.
- Press and hold the power button for 5–10 seconds. This often triggers a reset or re-pairing mode.
One user I spoke with had a remote that wouldn’t turn on the AC. After a quick call to Carrier support, they learned that a power surge had disrupted the pairing. A simple reset fixed it in minutes.
Essential Functions: How to Use the Remote Effectively
Switching Between Operating Modes
Your Carrier remote lets you choose from several modes, each designed for different conditions. Here’s what they do:
- Cool: The most common mode. The AC lowers the room temperature to your set point. Use this on hot days.
- Fan: Only the fan runs—no cooling or heating. Great for mild days when you just want airflow.
- Dry: Reduces humidity without drastically lowering temperature. Ideal for muggy, sticky days.
- Auto: The AC automatically selects the best mode based on the current room temperature. Handy if you’re indecisive.
- Heat: Only available on heat pump models. Reverses the cycle to warm the room.
For example, on a humid summer morning, I switch to “Dry” mode. It keeps the air comfortable without making the room feel like a refrigerator. At night, I switch to “Cool” and set it to 72°F (22°C), which feels just right for sleeping.
Setting the Temperature and Fan Speed
To set the temperature:
- Press the “Temp Up” or “Temp Down” arrows until you reach your desired setting.
- The display will show the set temperature (e.g., 70°F).
- The AC will run until the room reaches that temperature, then cycle on and off to maintain it.
Fan speed is just as important. Most remotes offer 3–4 speeds (Low, Medium, High, Auto). Here’s how I use them:
- Low: For quiet operation at night.
- Medium: Balanced airflow and noise during the day.
- High: When I need to cool down a room quickly.
- Auto: Lets the AC adjust fan speed based on cooling demand.
One mistake I see often? Setting the fan to “High” all the time. It cools faster, but it also uses more energy and can make the room feel drafty. Try “Auto”—it’s smarter and more efficient.
Using the Timer and Sleep Functions
The timer is a game-changer. You can set the AC to turn on or off automatically. To use it:
- Press the “Timer” button.
- Use the arrows to set the number of hours (e.g., 2, 4, 8).
- Press “Timer” again to confirm.
For example, if you leave for work at 8 AM, set a 2-hour timer. The AC will shut off at 10 AM, saving energy. Or, set a 4-hour timer before bed so it turns off after you fall asleep.
The “Sleep” function is another smart feature. When activated, it gradually raises the temperature by 1–2°F per hour (up to 4°F total) over 8 hours. Why? Because your body cools down at night, so you don’t need the AC as cold. I use this every night—it’s quieter, more comfortable, and saves about 10% on my energy bill.
Advanced Features and Hidden Gems
Adjusting Airflow with the Swing Function
Ever notice those horizontal and vertical slats on your AC’s front panel? They control airflow direction. The “Swing” button on your remote lets you adjust them automatically.
- Press “Swing” once: Vertical louvers move side to side (left/right).
- Press twice: Horizontal louvers move up and down.
- Press three times: Both directions swing together.
- Press four times: Swing turns off.
Why use swing? It spreads cool air evenly across the room, avoiding hot or cold spots. I use it in the living room to avoid blowing air directly at the couch. For targeted cooling (like at my desk), I turn swing off and manually adjust the louvers.
Energy-Saving and Eco Modes
Many Carrier models include an “Eco” or “Energy Saver” mode. When enabled:
- The AC runs at lower capacity when the room is near the set temperature.
- It reduces compressor cycling, saving energy.
- It may limit fan speed or disable swing to cut power use.
I tested Eco mode over a summer week. My energy usage dropped by 15%, and the room stayed just as comfortable. The only downside? It takes slightly longer to cool down a hot room. But for steady, all-day cooling, it’s perfect.
Using the Filter Reset and Clean Functions
Your AC’s air filter needs cleaning every 1–3 months (depending on use). Some Carrier remotes have a “Filter” or “Clean” button that reminds you when it’s time.
- After cleaning the filter, press and hold the “Filter” button for 3–5 seconds.
- The indicator light will reset, and the counter restarts.
One user told me she ignored the filter light for months—until her AC started blowing warm air. A quick filter clean fixed it. Moral of the story: Don’t ignore the filter reset. It’s not just a suggestion; it’s a maintenance must.
Troubleshooting Common Remote Issues
Remote Not Responding? Try These Fixes
Nothing’s more frustrating than a remote that won’t work. Here’s what to check:
- Dead batteries: Replace them every 6–12 months. I keep a spare pack in my drawer.
- Obstructed IR signal: Move plants, furniture, or anything blocking the path to the AC.
- Distance: Stay within 20 feet. Walls or glass can weaken the signal.
- Interference: Bright lights, TVs, or other electronics can disrupt IR. Turn them off temporarily.
- Remote damage: If the screen is cracked or buttons are unresponsive, it may need replacement.
I once had a remote that worked only when I pointed it straight up. After some detective work, I found a bright ceiling light was interfering. Once I dimmed it, the remote worked fine.
Display Not Lighting Up or Showing Errors
If the screen is blank or shows “E1,” “E2,” or “LO”:
- Blank screen: Check batteries. If still dead, try a reset: Remove batteries, press all buttons for 10 seconds, then reinsert.
- Error codes: Refer to your user manual. “E1” often means communication failure between indoor and outdoor units. “LO” means low battery.
One user saw “E3” on their display. A quick call to Carrier support revealed a refrigerant leak—something a technician had to fix. Error codes are your AC’s way of saying, “Hey, I need help!”
When to Replace the Remote
If troubleshooting fails, the remote may be damaged. Signs include:
- Buttons don’t respond even with new batteries.
- Screen is cracked or flickering.
- IR LED (the small red dot on the front) is damaged.
Replacement remotes are available online (Amazon, eBay, Carrier’s website). Just match the model number. I paid $25 for a genuine Carrier remote—worth every penny for peace of mind.
Pro Tips for Maximizing Comfort and Efficiency
Creating a Daily Cooling Routine
Instead of cranking the AC all day, use a schedule:
- Morning: Set to 78°F (26°C) with fan on “Auto.”
- Daytime (away): Use timer to turn off or set to 82°F (28°C).
- Evening: Lower to 72°F (22°C) with “Sleep” mode.
- Night: Timer turns off after 4–6 hours.
I followed this for a month. My energy bill dropped, and the house stayed cool when I needed it.
Using Smart Integration (Wi-Fi Models)
Some Carrier remotes support Wi-Fi (via the Carrier Côr app). With it, you can:
- Control your AC from your phone.
- Set schedules and receive energy reports.
- Get filter change reminders.
I use the app to turn on the AC before I get home. No more walking into a sauna! The only downside? Setup can be tricky. Follow the app’s step-by-step guide, and don’t rush.
Seasonal Maintenance Checklist
To keep your remote and AC in top shape:
- Clean the filter monthly.
- Wipe the remote with a dry cloth (no liquids).
- Check batteries every 6 months.
- Inspect the IR receiver for dust or damage.
I keep a sticky note on my fridge: “Check AC filter – 1st of every month.” Small habits make a big difference.
| Feature | Function | Best Use Case |
|---|---|---|
| Cool Mode | Lowers room temperature | Hot summer days |
| Dry Mode | Reduces humidity | Muggy, sticky weather |
| Fan Mode | Only runs the fan | Mild days, air circulation |
| Sleep Mode | Gradually raises temp at night | Better sleep, energy savings |
| Timer | Auto on/off scheduling | Leaving home, nighttime use |
| Eco Mode | Energy-efficient operation | Long-term cooling |
Conclusion: Your Remote, Your Rules
Mastering your Carrier air conditioner remote isn’t about memorizing every button—it’s about understanding how to use it to suit your lifestyle. Whether you’re cooling a home office, keeping a nursery comfortable, or just trying to save on energy bills, the right settings make all the difference.
Remember, the remote is more than a gadget; it’s your connection to a cooler, more comfortable space. Don’t be afraid to experiment. Try the “Dry” mode on a humid day. Test the “Sleep” function at night. Use the timer to automate your cooling. The more you use it, the more intuitive it becomes.
And if you ever get stuck? Don’t panic. Most issues have simple fixes—new batteries, a cleared path, or a quick reset. When in doubt, consult your manual or reach out to Carrier support. They’re there to help.
Now, go ahead—grab your remote, press those buttons, and take control of your comfort. Your Carrier air conditioner is ready to work for you. All you have to do is tell it how.
Frequently Asked Questions
How do I pair my Carrier air conditioner remote with the unit?
To pair your Carrier air conditioner remote, ensure the unit is powered on, then press and hold the “On/Off” button on the remote for 5 seconds until the LED indicator flashes. Refer to your model’s manual for specific Carrier air conditioner remote instructions if issues persist.
Why is my Carrier AC remote not responding?
First, replace the batteries and ensure there are no obstructions between the remote and the AC sensor. If the problem continues, reset the remote by removing the batteries for 1 minute and reinserting them.
Where can I find the model-specific Carrier air conditioner remote instructions?
Download the manual for your specific model from the official Carrier website or use the QR code provided in your AC unit’s user guide. Always check for firmware updates to ensure compatibility.
How do I switch between modes (cool, heat, fan) using the remote?
Press the “Mode” button repeatedly until your desired setting (e.g., Cool, Heat, Dry) appears on the display. The mode will activate once selected—wait 30 seconds for the unit to adjust.
Can I adjust the fan speed with a Carrier AC remote?
Yes, press the “Fan Speed” button to cycle between low, medium, high, or auto settings. Some models also allow you to set custom speeds via the remote’s advanced menu.
How do I set a timer using the Carrier air conditioner remote?
Press the “Timer” button, then use the up/down arrows to set the desired on/off time. Confirm by pressing “Enter” or “Set”—the display will show the timer status once activated.