
Featured image for carrier air conditioner remote control instructions
Image source: cdn.shopify.com
Master your Carrier air conditioner remote control in minutes with our simplified, step-by-step instructions designed for effortless setup and daily use. From adjusting temperature settings to activating sleep mode and fan speeds, this guide ensures you unlock every feature with confidence—no manual confusion required.
Key Takeaways
- Master basic functions: Learn power, mode, and temperature controls first.
- Use timer settings: Schedule on/off times to save energy effortlessly.
- Clean the sensor: Keep the remote’s IR sensor dust-free for reliability.
- Check batteries often: Replace weak batteries to avoid signal issues.
- Sync with AC unit: Ensure remote and AC are on the same frequency.
- Reset if unresponsive: Hold power button 5 seconds to reboot remote.
📑 Table of Contents
Getting to Know Your Carrier Air Conditioner Remote
Let’s be honest—few things are more frustrating than standing in front of your Carrier air conditioner, remote in hand, and realizing you have no idea how to make it do what you want. Maybe you just moved into a new place, or your old remote finally gave up the ghost. Or perhaps you’ve had the same unit for years, but the manual has long since vanished into the abyss of “where did I put that?” Whatever your situation, you’re not alone. The good news? Mastering your Carrier air conditioner remote control instructions doesn’t have to be a headache.
I remember the first time I tried to use a Carrier remote. I pressed every button, hoping for a miracle. The fan turned on, then the temperature dropped too low, and before I knew it, I was shivering in July. It felt like I was fighting the remote instead of working with it. But after a few trial runs (and a lot of trial and error), I realized that once you understand the basics, it’s actually quite intuitive. The key is knowing what each button does and how to navigate the settings without feeling overwhelmed. And that’s exactly what this guide is for—to help you go from confused to confident in no time.
Understanding the Remote Control Layout
Identifying the Key Buttons
Before you start adjusting temperatures or switching modes, take a moment to familiarize yourself with the remote’s layout. Most Carrier remotes follow a similar design, with a central display and a row of labeled buttons. Here’s a quick rundown of the essentials:
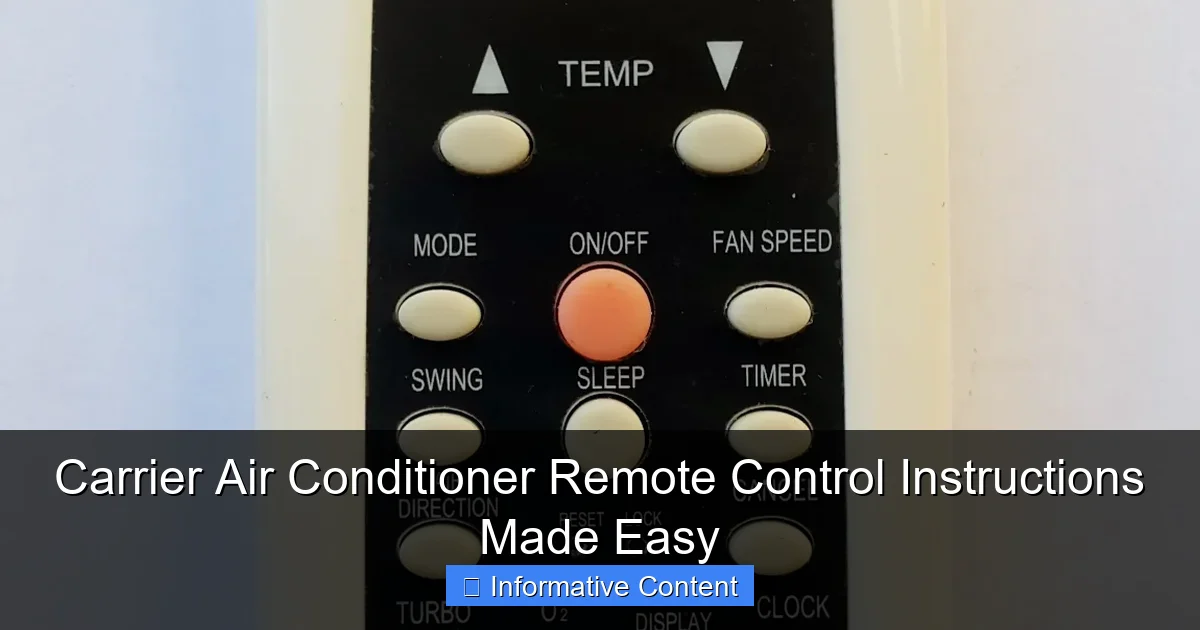
Visual guide about carrier air conditioner remote control instructions
Image source: cdn.shopify.com
- Power Button: This one’s easy—it turns the unit on or off. A small light or icon usually confirms the status.
- Mode Button: Cycles through different operating modes: Cool, Heat, Dry, Fan, and sometimes Auto. Each mode is tailored to a specific need.
- Temperature Up/Down: These arrows adjust your desired temperature. Press and hold for faster changes.
- Fan Speed: Lets you choose between Low, Medium, High, or Auto. Some models also have a “Turbo” or “Eco” setting.
- Timer: Allows you to schedule when the unit turns on or off. Great for saving energy while you sleep or are away.
- Swing or Louver: Controls the direction of airflow. You can set it to sweep or lock in a fixed position.
- Sleep Mode: Gradually adjusts the temperature to keep you comfortable through the night without overcooling or overheating.
One thing I love about Carrier remotes is that they’re usually well-labeled. But if yours has symbols instead of words (common in international models), don’t panic. Look for a small icon that resembles a sun (heat), a snowflake (cool), or a fan (fan mode). A quick glance at the manual—or a Google search—can decode these quickly.
Reading the Display Screen
The display is your best friend. It shows the current room temperature, your set temperature, fan speed, mode, and any active features like timer or sleep mode. Some newer models even show humidity levels or energy usage indicators.
For example, if the display shows “24°C” and a snowflake icon, that means your unit is in Cool mode with a target temperature of 24°C. If you see “T1,” it might mean the timer is set to turn on in one hour. Understanding these little cues makes a big difference in how effectively you use your air conditioner.
Pro tip: If the display is dim or hard to read, try changing the angle or turning on a nearby light. Some remotes have a backlight—press the “Light” or “Display” button to brighten it temporarily.
Step-by-Step Guide to Basic Operations
Turning On and Setting the Mode
Let’s walk through the most common scenario: turning on your Carrier AC and setting it to cool your room on a hot afternoon.
- Press the Power button. You should hear a beep and see the display light up.
- Press the Mode button repeatedly until the “Cool” icon (usually a snowflake) appears on the screen.
- Use the Up/Down arrows to set your desired temperature. For most people, 22–25°C (72–77°F) is a sweet spot—cool but not freezing.
- Press the Fan Speed button to choose your airflow level. “Auto” is often the best choice since it adjusts based on room temperature.
- Press Swing to activate the louvers, so air circulates evenly. Or, lock them in place if you prefer airflow directed at you.
I once had a friend who always set her AC to 16°C, thinking it would cool the room faster. It didn’t. In fact, it just made the unit run nonstop and froze the coils. The truth? Air conditioners cool at a constant rate. Setting it to 16°C doesn’t speed things up—it just makes your room colder than needed. Stick to a reasonable temperature, and let the unit do its job.
Using the Timer Function
The timer is a game-changer for energy efficiency and comfort. You can set your AC to turn on 30 minutes before you wake up or shut off after you fall asleep.
- Press the Timer button. The display will show “T” and a number (usually 0.0).
- Use the Up/Down arrows to set the number of hours until the unit turns on or off. For example, set “T8” to turn on in 8 hours.
- Press Timer again to switch between “On” and “Off” timer modes. A small “On” or “Off” indicator will appear.
- Press Power to confirm. The timer is now active.
Let’s say you leave work at 5:30 PM and want your apartment cool by 6:00 PM. Set the “On” timer for 30 minutes. Your AC will power on at 5:30 and cool the room just in time for your arrival. No more walking into a sauna!
Activating Sleep Mode
Sleep mode is perfect for nighttime use. It gradually increases the temperature by 1–2°C (2–4°F) after you fall asleep, so you don’t wake up shivering. It also reduces fan noise and energy use.
- Press the Sleep button. A moon or bed icon will appear.
- Set your starting temperature (e.g., 23°C).
- Go to sleep. After 2–4 hours, the unit will automatically adjust the temperature and fan speed for optimal comfort.
One thing to note: Sleep mode works best when you’re in Cool or Heat mode. It won’t activate in Fan or Dry mode. Also, if you wake up and adjust the temperature manually, Sleep mode will cancel.
Advanced Features and Hidden Functions
Turbo Mode and Eco Mode
Some Carrier remotes have special buttons for Turbo and Eco modes. These aren’t always obvious, so let’s break them down.
- Turbo Mode: This kicks the fan into high gear for rapid cooling or heating. It’s great when you first turn on the unit and want to feel relief fast. However, it uses more energy, so use it sparingly—maybe the first 10–15 minutes after turning on the AC.
- Eco Mode: This optimizes energy use by adjusting temperature and fan speed based on room conditions. It might not feel as powerful, but it can save you 10–20% on your energy bill over time.
I use Turbo mode when I come home after a long day in the sun. It cools the living room in about 10 minutes. Then I switch to Eco mode to maintain comfort without the energy drain. It’s the best of both worlds.
Auto Restart and Filter Reset
Two features that often go unnoticed but are incredibly useful:
- Auto Restart: If there’s a power outage, your AC will automatically turn back on with the same settings when power returns. This is usually enabled by default, but you can check in your model’s manual.
- Filter Reset: After cleaning or replacing the air filter, press and hold the Filter or Check button for 3–5 seconds. This resets the filter timer, so your unit doesn’t keep reminding you to clean it.
My neighbor didn’t know about the filter reset function. Her AC kept beeping every week, driving her crazy. Once she reset it, the beeping stopped—and her indoor air quality improved because she started cleaning the filter regularly.
Child Lock and Remote Pairing
If you have kids or pets, the Child Lock feature is a lifesaver. It disables the buttons so no one can accidentally change the settings.
- Press and hold the Power and Mode buttons together for 3 seconds.
- The display will show “LC” (Locked). All buttons are now disabled except Power.
- To unlock, repeat the same step.
For newer Carrier models with smart features, you might need to pair the remote with the indoor unit. This usually involves pressing a “Pair” or “Link” button on both the remote and the unit. Check your model’s manual for exact steps.
Troubleshooting Common Remote Issues
Remote Not Working? Try These Fixes
Nothing’s more frustrating than pressing the power button and getting nothing. Here are the most common reasons—and how to fix them.
- Dead batteries: The #1 culprit. Replace the batteries with fresh ones (usually AAA or AA). Make sure they’re inserted correctly.
- Signal blocked: Point the remote directly at the indoor unit. Remove any obstructions (curtains, furniture, etc.).
- Low signal range: Most remotes work up to 8 meters (26 feet). If you’re too far, move closer.
- IR sensor blocked: The small lens on the front of the indoor unit receives the remote signal. Wipe it with a clean, dry cloth.
- Remote malfunction: Try resetting the remote. Remove batteries, press all buttons for 10 seconds, then reinsert batteries.
I once had a remote that stopped working after a thunderstorm. I assumed it was fried, but replacing the batteries fixed it. Sometimes the simplest solution is the right one.
Display Not Showing Correct Temperature
If your remote shows 30°C when it feels like 22°C, the sensor might be faulty. Most Carrier remotes have a built-in temperature sensor near the battery compartment. If it’s in direct sunlight or near a heat source (like a lamp), it can give false readings.
Try moving the remote to a shaded area or placing it on a table away from heat sources. For more accurate readings, some models allow you to use the indoor unit’s sensor instead. Check your manual for “Sensor Priority” or “Remote Sensor” settings.
Buttons Not Responding
If some buttons work but others don’t, the remote’s circuit board might be dirty. Here’s a gentle fix:
- Remove the batteries.
- Use a cotton swab and a tiny amount of isopropyl alcohol to clean around the buttons.
- Let it dry completely before reinserting batteries.
Be careful not to soak the remote. A little goes a long way. If cleaning doesn’t help, the remote might need replacement.
Maintenance Tips for Long-Term Performance
Cleaning and Storing the Remote
Your remote is a small but important part of your AC system. Treat it well, and it’ll last for years.
- Wipe the surface with a soft, dry cloth weekly. Avoid harsh cleaners.
- Store it in a cool, dry place—not on a windowsill or near a heater.
- Use a remote holder or hook to prevent drops and damage.
- Replace batteries every 6–12 months, even if they seem to work. Leaking batteries can damage the remote.
I keep my remote in a small basket on my nightstand. It’s out of the way but easy to find. Plus, no more frantic searches when I wake up hot at night.
When to Replace the Remote
Even the best remotes don’t last forever. Here are signs it’s time for a new one:
- Buttons are unresponsive after cleaning.
- Display is dim or flickering.
- Signal range has decreased significantly.
- You’ve lost the original remote and need a compatible replacement.
You can buy genuine Carrier remotes from authorized dealers or online retailers. Make sure the model number matches your AC unit. Universal remotes are an option, but they might not support all features.
Data Table: Common Carrier Remote Models and Features
| Model | Compatible AC Series | Key Features | Battery Type |
|---|---|---|---|
| Carrier CR-100 | Infinity, Performance | Turbo, Sleep, Timer, Swing, Eco | 2x AAA |
| Carrier CR-200 | Comfort, EcoFlow | Child Lock, Filter Reset, Auto Restart | 2x AAA |
| Carrier CR-300 | Smart Series, Wi-Fi Models | Backlit Display, App Sync, Voice Control | 2x AA |
| Universal URC-500 | Most Carrier Units | Programmable Codes, Basic Functions | 2x AAA |
This table covers the most common models. Always check your AC’s model number before purchasing a replacement remote.
Final Thoughts: Making the Most of Your Remote
Using your Carrier air conditioner remote control instructions doesn’t have to be complicated. With a little practice, you’ll find yourself adjusting settings, setting timers, and activating sleep mode without a second thought. The key is to start simple—master the basics first, then explore the advanced features as you get comfortable.
Think of your remote as a tool, not a puzzle. It’s designed to make your life easier, not harder. Whether you’re cooling down on a sweltering summer day, warming up in the winter, or just enjoying a quiet night with the perfect airflow, your Carrier remote puts control right in your hands.
And remember—if something doesn’t work, don’t panic. Most issues have simple fixes. Replace the batteries, clean the sensor, or reset the remote. If all else fails, reach out to Carrier support or a local HVAC technician. You’ve got options.
So next time you pick up your remote, take a deep breath. Press that power button with confidence. You’ve got this. Your comfort is just a few clicks away.
Frequently Asked Questions
How do I pair my Carrier air conditioner remote control?
To pair your Carrier air conditioner remote, ensure the unit is powered on, then press and hold the “Reset” or “Pair” button on the remote for 3–5 seconds until the display flashes. Refer to your model’s manual for specific Carrier air conditioner remote control instructions if pairing fails.
Why is my Carrier remote not responding to the AC unit?
Check the batteries first and replace them if needed. Ensure there’s no obstruction between the remote and the AC sensor, and try resetting the remote using the steps in your Carrier air conditioner remote control instructions.
How do I set the timer on my Carrier AC remote?
Press the “Timer” button on your remote, then use the up/down arrows to adjust the desired on/off time. Confirm by pressing “Enter” or “Set,” depending on your remote model.
Can I use a universal remote with my Carrier air conditioner?
Yes, but ensure the universal remote is compatible with Carrier models and supports the same frequency (usually 38–40 kHz). Follow the universal remote’s setup guide to sync it with your AC unit.
How do I switch between cooling, fan, and dehumidify modes?
Press the “Mode” button on your remote repeatedly until the desired mode appears on the display (e.g., “Cool,” “Fan,” or “Dry”). Each press cycles through the available options.
What do the error codes on my Carrier remote mean?
Error codes (e.g., E1, E5) indicate specific issues like sensor faults or communication errors. Consult your Carrier air conditioner remote control instructions or the user manual for a full list of codes and troubleshooting steps.