
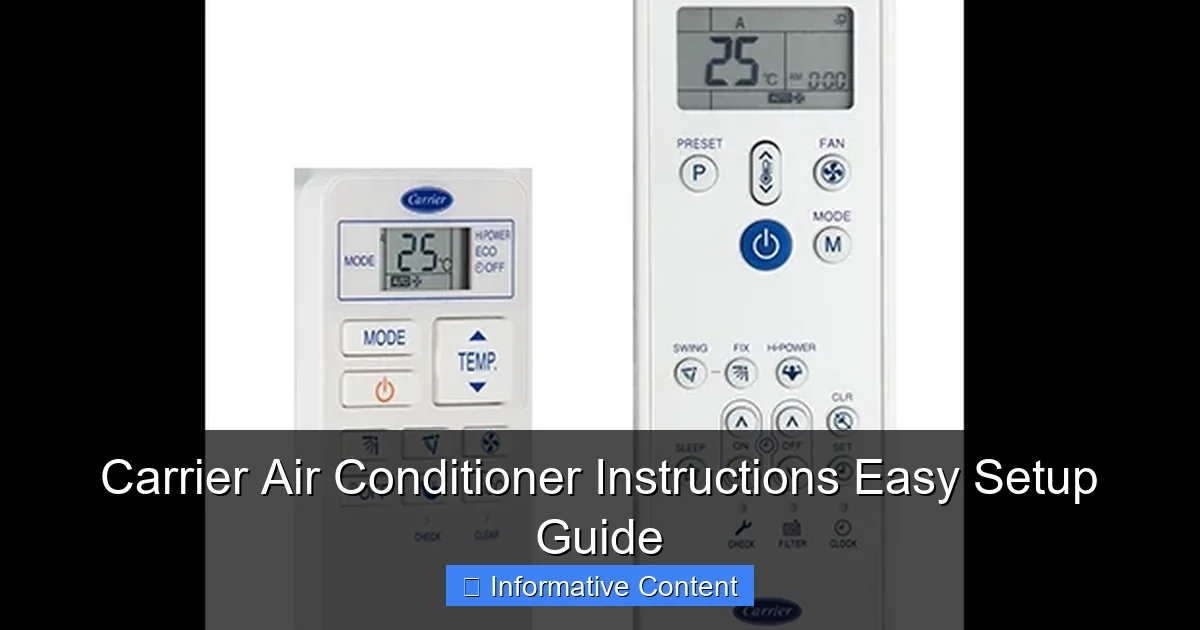
Featured image for carrier air conditioner instructions
Image source: alquilercastilloshinchables.info
Master your Carrier air conditioner setup quickly and safely with our clear, step-by-step instructions designed to get your unit running in minutes. From unpacking to programming the remote, this guide simplifies every stage—ensuring optimal performance without the guesswork. Say goodbye to confusing manuals and hello to cool, effortless comfort.
Key Takeaways
- Read the manual first: Always start with Carrier’s official guide for model-specific details.
- Verify power requirements: Ensure correct voltage and circuit before installation.
- Use proper tools: Follow instructions for refrigerant lines, wiring, and mounting.
- Check thermostat settings: Configure correctly for efficient cooling and performance.
- Schedule routine maintenance: Clean filters and coils to maximize unit lifespan.
- Contact support if unsure: Reach out to Carrier for technical or safety concerns.
📑 Table of Contents
- Why Carrier Air Conditioners Are a Smart Choice for Your Home
- Unboxing and Initial Setup: What to Expect
- Step-by-Step Installation Guide (Following Carrier Air Conditioner Instructions)
- First-Time Startup and System Testing
- Daily Operation and Maintenance Tips
- Troubleshooting Common Issues (Based on Carrier Air Conditioner Instructions)
- Final Thoughts: Making the Most of Your Carrier AC
Why Carrier Air Conditioners Are a Smart Choice for Your Home
Let’s face it—no one enjoys sweating through summer or shivering during a heatwave. I remember the first time I installed a Carrier air conditioner in my home. I was skeptical at first. Would it really cool the entire living room? Would the setup be a nightmare? But after following the Carrier air conditioner instructions step by step, I was pleasantly surprised at how smooth the process turned out to be. The unit not only cooled my space efficiently but also blended seamlessly into my home’s design.
Carrier is one of the most trusted names in HVAC (heating, ventilation, and air conditioning). Founded in 1915, they’ve spent over a century perfecting climate control solutions. Whether you’re replacing an old unit or installing a new one, understanding the Carrier air conditioner instructions is essential for getting the best performance, energy efficiency, and longevity out of your system. In this guide, I’ll walk you through everything from unpacking to daily operation—no technical jargon, just real, practical advice based on experience.
Unboxing and Initial Setup: What to Expect
What Comes in the Box
When your Carrier air conditioner arrives, the first thing you’ll notice is the packaging—sturdy, well-labeled, and designed to protect the unit during transit. Inside, you’ll typically find:
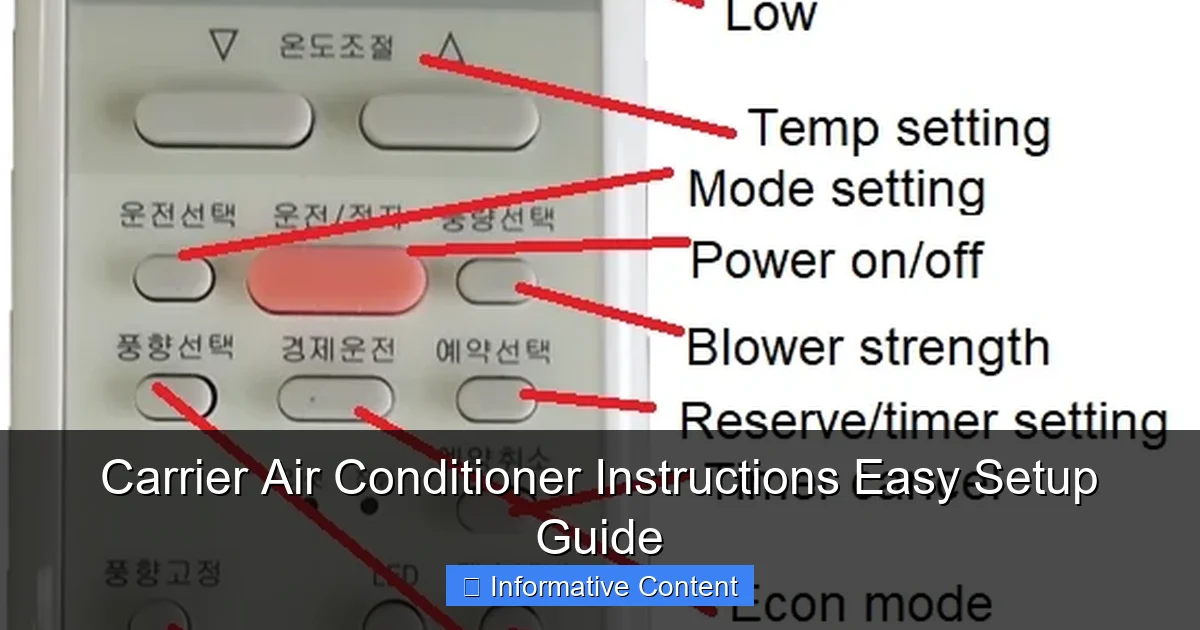
Visual guide about carrier air conditioner instructions
Image source: alquilercastilloshinchables.info
- The main indoor unit (air handler or evaporator)
- The outdoor unit (condenser)
- Mounting brackets and hardware
- Remote control with batteries
- Drain hose and insulation foam
- A detailed user manual (this is your Carrier air conditioner instructions bible!)
- Optional: Wi-Fi module (for smart models)
Pro tip: Before you start, lay everything out on a clean surface. Check for any visible damage—especially dents or cracks on the condenser. If you spot anything, contact the retailer or Carrier support immediately. Don’t wait until installation day to discover a problem.
Tools You’ll Need (and a Few You Won’t)
You don’t need to be a licensed HVAC technician to get started, but having the right tools makes life easier. Here’s what I recommend:
- Drill and drill bits (for wall mounting)
- Level (to ensure the indoor unit is perfectly horizontal)
- Wrench set (for tightening connections)
- Vacuum pump and gauge manifold (only if you’re handling refrigerant lines—more on this later)
- Silicone sealant (to waterproof the wall penetration)
- Measuring tape
Now, here’s a personal story: I once tried installing a mini-split without a level. The unit looked fine to the naked eye, but after a week, it started dripping water. Turns out, a slight tilt was preventing proper drainage. A $10 level saved me $200 in repairs. Moral of the story? Use the tools—even the simple ones.
Choosing the Right Location
Where you place your Carrier AC matters more than you think. For the indoor unit:
- Mount it high on the wall (at least 7 feet from the floor) to maximize airflow.
- Ensure it’s at least 12 inches from the ceiling.
- Keep it away from direct sunlight, heat sources (like radiators), and electronics.
- Make sure the wall can support the unit’s weight—especially for larger models.
For the outdoor condenser:
- Place it on a flat, level surface (concrete pad or wall bracket).
- Ensure at least 24 inches of clearance on all sides for airflow.
- Avoid areas with heavy debris, leaves, or snow buildup.
- If possible, position it in a shaded area to improve efficiency.
One reader shared that they installed their condenser next to a garden hose—bad idea. Over time, water exposure corroded the fins. Now they use a simple roof overhang. A small change, huge difference.
Step-by-Step Installation Guide (Following Carrier Air Conditioner Instructions)
Mounting the Indoor Unit
Start with the indoor unit. Follow these steps closely:
- Use the template provided in the Carrier air conditioner instructions to mark drill points on the wall.
- Drill holes and insert wall anchors (if needed).
- Secure the mounting plate with screws. Double-check with a level.
- Hang the indoor unit on the plate. It should click into place.
Important: The unit must be perfectly level. If it’s even slightly tilted, condensate won’t drain properly, leading to leaks or water damage. I learned this the hard way when my first unit started dripping onto the carpet. A quick re-level fixed it—but it was a mess.
Drilling the Wall Hole and Running Lines
Next, drill a 3-inch hole (usually at a slight downward angle) from the indoor to outdoor side. This is where you’ll run:
- Refrigerant lines (copper tubing)
- Drain hose
- Power and communication cables
Tip: Use a drill bit slightly larger than the lines to allow for foam insulation. After running the lines, seal the gap with silicone to prevent insects, drafts, and moisture.
For refrigerant lines, if you’re not certified to handle refrigerant, do not attempt to flare or connect them yourself. This is where you’ll need a licensed HVAC pro. The Carrier air conditioner instructions will specify the correct line size and pressure—don’t guess.
Installing the Outdoor Unit
Now for the condenser:
- Place it on a pre-leveled pad or secure it to a wall bracket.
- Connect the refrigerant lines, drain hose, and electrical wiring.
- Use flare nuts to secure refrigerant connections—tighten with two wrenches to avoid damaging the fittings.
- Attach the drain hose to the outdoor unit and route it to a safe drainage area.
Pro tip: If you live in a cold climate, consider a winter cover. But don’t wrap it tightly—moisture trapped inside can cause rust. A breathable cover works best.
Electrical Connections: Safety First
Electrical work can be intimidating, but it’s critical. Here’s what to do:
- Turn off the power at the main breaker before starting.
- Run a dedicated circuit to the outdoor unit (check your model’s amperage in the manual).
- Connect the wires (usually L1, L2, and ground) to the terminal block.
- Use wire nuts or connectors as specified.
Warning: If you’re not comfortable with electrical work, hire a licensed electrician. I once saw a friend skip this step and end up with a tripped breaker and a fried control board. Not worth the risk.
First-Time Startup and System Testing
Powering On and Initial Checks
After installation, it’s time to test. But don’t rush:
- Turn on the power at the breaker.
- Wait 3–5 minutes for the compressor to stabilize (some models have a built-in delay).
- Press the power button on the remote or unit.
- Set the mode to “Cool” and lower the temperature below room temperature.
Listen for any unusual noises—grinding, buzzing, or clicking. A soft hum is normal; anything else might indicate a loose part or electrical issue.
Checking Airflow and Cooling Performance
After 10 minutes, check:
- Is cold air blowing from the indoor unit?
- Are the louvers moving smoothly?
- Is the outdoor unit running and expelling hot air?
- Is the drain hose dripping water (condensate)?
One thing I always do: Place a thermometer in the air stream. A properly functioning Carrier AC should lower air temperature by 15–20°F compared to room temp. If it’s less than 10°F, there might be a refrigerant issue or airflow blockage.
Using the Remote Control and Smart Features
Most Carrier models come with a remote. Familiarize yourself with:
- Mode button: Cool, Heat (if heat pump), Fan, Dry, Auto
- Temperature adjustment: Set between 62°F and 86°F
- Fan speed: Low, Medium, High, Auto
- Timer: Schedule on/off times
- Sleep mode: Reduces fan speed and adjusts temp for comfort
For Wi-Fi models, download the Carrier app. Pair it via the instructions. Now you can control your AC from your phone, set schedules, and even get maintenance alerts. My favorite feature? “Away mode”—it adjusts the temperature when I’m not home to save energy.
Daily Operation and Maintenance Tips
Setting the Right Temperature and Modes
Here’s a common mistake: Setting the AC to 60°F and expecting instant Arctic cool. It won’t work—and it’ll overwork the system. Instead:
- Set the thermostat to 72–76°F for comfort and efficiency.
- Use “Auto” mode in summer—it adjusts fan speed based on demand.
- In humid climates, use “Dry” mode to reduce moisture without overcooling.
Personal tip: I use a smart thermostat (like Ecobee) with my Carrier unit. It learns my schedule and pre-cools the house before I get home. Saves about 20% on energy bills.
Cleaning and Replacing Filters
Dirty filters are the #1 cause of reduced airflow and higher energy use. The Carrier air conditioner instructions recommend cleaning every 2–4 weeks during peak season. Here’s how:
- Turn off the unit.
- Open the front panel and remove the filter.
- Rinse with lukewarm water (no soap).
- Let it dry completely (24 hours).
- Reinstall.
For HEPA or carbon filters, replace every 6–12 months. I keep a calendar reminder—set it and forget it.
Seasonal Maintenance Checklist
To keep your Carrier AC running smoothly:
| Task | Frequency | Notes |
|---|---|---|
| Clean indoor filters | Every 2–4 weeks | More often if you have pets or allergies |
| Inspect outdoor unit | Monthly | Remove leaves, debris, and check for damage |
| Check drain hose | Every 3 months | Ensure no clogs or algae buildup |
| Professional tune-up | Annually | Includes refrigerant check, coil cleaning, and electrical inspection |
| Inspect refrigerant lines | Annually | Look for oil stains (sign of leaks) |
I schedule my annual tune-up in early spring. It’s cheaper than an emergency repair in July when the unit breaks down in 95°F heat.
Troubleshooting Common Issues (Based on Carrier Air Conditioner Instructions)
AC Not Turning On
If the unit won’t power on, check:
- Is the breaker tripped?
- Is the remote control working? (Try replacing batteries)
- Is the thermostat set below room temperature?
- Is there a delay in startup (common in newer models)?
One time, my remote died mid-summer. I thought the AC was broken—until I found the spare batteries in the drawer. Crisis averted.
Insufficient Cooling or Warm Air
Possible causes:
- Dirty air filter (clean it!)
- Thermostat set to “Fan” instead of “Cool”
- Refrigerant leak (look for oil stains or hissing sounds)
- Outdoor unit blocked by debris
- Incorrect unit size for the room
Rule of thumb: A 1.5-ton unit cools about 600–700 sq. ft. If your room is larger, you might need a bigger model. The Carrier air conditioner instructions include a sizing chart—use it.
Water Leaks or Dripping
Leaks usually mean:
- Clogged drain hose (clean with a wet/dry vacuum or pipe cleaner)
- Unit not level (re-level it)
- Frozen evaporator coil (turn off and let it thaw)
I once had a frozen coil because I ran the AC 24/7 in 100°F weather. The manual says to give it a break every few hours. Lesson learned.
Unusual Noises or Vibrations
Normal sounds: soft hum, occasional clicking (thermostat or louvers). Warning signs:
- Banging: Loose parts or compressor issue
- Hissing: Refrigerant leak
- Grinding: Bearing failure in fan motor
Don’t ignore these. Turn off the unit and call a technician. Better safe than sorry.
Final Thoughts: Making the Most of Your Carrier AC
Installing and using a Carrier air conditioner doesn’t have to be overwhelming. With the right Carrier air conditioner instructions and a little patience, you can enjoy cool, clean air all summer—and even into winter if you have a heat pump model.
Remember, the key to success is preparation. Read the manual before you start. Use the right tools. Don’t skip the little things—like leveling the unit or sealing the wall hole. And when in doubt, call a pro. I’ve saved myself hundreds by doing simple maintenance, but I’ve also avoided disasters by knowing when to call in an expert.
Your Carrier AC is an investment. Treat it well, and it’ll serve you for 10–15 years or more. Whether you’re cooling a bedroom, living room, or entire home, follow these steps, stay consistent with maintenance, and you’ll stay comfortable year after year. And hey—next summer, when your neighbors are sweating, you’ll be sipping iced tea in perfect 72°F bliss. That’s what it’s all about.
Frequently Asked Questions
How do I set up my Carrier air conditioner for the first time?
To set up your Carrier air conditioner, follow the step-by-step instructions in the user manual, ensuring proper installation of the unit, thermostat, and electrical connections. Always verify that the power supply matches the specifications listed in your Carrier air conditioner instructions manual.
Why is my Carrier AC not cooling properly after installation?
This could be due to incorrect thermostat settings, blocked air filters, or refrigerant leaks. Refer to your Carrier air conditioner instructions to troubleshoot common issues like airflow obstructions or improper mode selection.
How often should I clean the air filters in my Carrier AC?
Clean the air filters every 2–4 weeks during peak usage to maintain efficiency and airflow. Your Carrier manual provides specific guidance on removing, cleaning, and reinstalling filters safely.
Can I install a Carrier air conditioner myself, or do I need a professional?
While basic setups (like window units) may be DIY-friendly, split systems or central ACs require professional installation to ensure safety, warranty compliance, and optimal performance.
What do the error codes on my Carrier AC display mean?
Error codes indicate specific issues (e.g., sensor faults or low refrigerant). Consult the “Troubleshooting” section of your Carrier manual for code definitions and recommended actions.
How do I program the thermostat for energy efficiency?
Use the programmable or smart thermostat settings to create schedules that match your routine. The manual outlines temperature presets and eco-modes to reduce energy consumption.