
Replacing your Carrier air conditioner filter is a simple yet essential task that boosts efficiency, improves indoor air quality, and extends your system’s lifespan. With the right tools and a little know-how, you can do it yourself in under 15 minutes—no technician required.
Key Takeaways
- Regular filter replacement improves airflow and system efficiency: A clean filter allows your AC to work less, reducing energy bills and preventing strain on components.
- Dirty filters reduce indoor air quality: Clogged filters can’t trap dust, pollen, or pet dander, leading to poor air circulation and potential health issues.
- Most Carrier filters should be replaced every 1–3 months: Frequency depends on usage, household size, pets, and air quality in your area.
- Using the correct filter size and type is crucial: Check your owner’s manual or existing filter for dimensions and MERV rating to ensure compatibility.
- DIY replacement is safe and easy: With basic tools and a few minutes, you can replace your filter without calling a professional.
- Signs you need a new filter include reduced cooling, higher bills, or visible dirt buildup: Don’t wait for system failure—stay proactive with maintenance.
- Proper disposal of old filters matters: Seal used filters in a plastic bag before throwing them away to prevent spreading contaminants.
📑 Table of Contents
- Why Replacing Your Carrier Air Conditioner Filter Matters
- How Often Should You Replace Your Carrier AC Filter?
- Signs It’s Time to Replace Your Filter
- How to Find the Right Filter for Your Carrier AC Unit
- Step-by-Step Guide to Replacing Your Carrier AC Filter
- Tips for Maintaining Your Carrier AC System
- Common Mistakes to Avoid
- Conclusion
Why Replacing Your Carrier Air Conditioner Filter Matters
Your Carrier air conditioner works hard to keep your home cool and comfortable, especially during the sweltering summer months. But behind the scenes, one small component plays a huge role in how well—and how efficiently—your system performs: the air filter. While it might seem like a minor detail, replacing your Carrier air conditioner filter regularly is one of the most impactful maintenance tasks you can do at home.
Think of the air filter as your AC’s first line of defense. As air circulates through your system, the filter traps dust, pollen, pet dander, mold spores, and other airborne particles. Over time, this buildup restricts airflow, forcing your system to work harder to push air through. The result? Higher energy bills, uneven cooling, and added stress on your compressor and blower motor. In extreme cases, a severely clogged filter can even cause your system to freeze up or shut down entirely.
But the benefits go beyond just efficiency. A clean filter also means cleaner air for you and your family to breathe. If you or anyone in your household suffers from allergies, asthma, or respiratory conditions, a fresh filter can make a noticeable difference in comfort and health. Plus, regular maintenance helps extend the life of your Carrier unit, saving you money on costly repairs or premature replacements down the road.
How Often Should You Replace Your Carrier AC Filter?
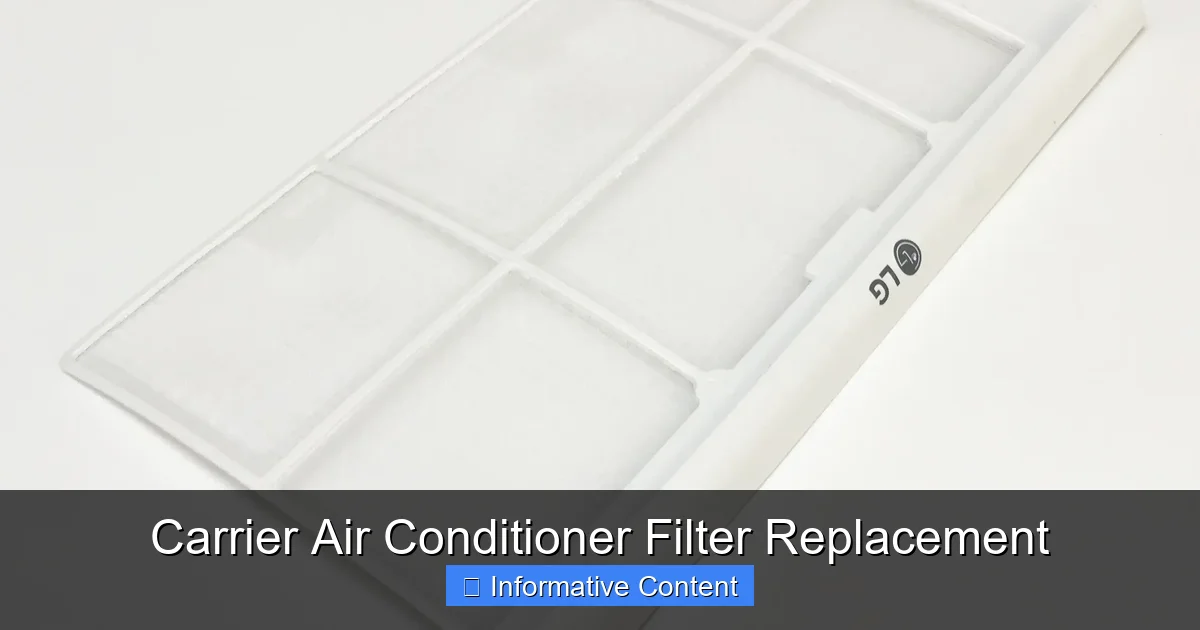
Visual guide about Carrier Air Conditioner Filter Replacement
Image source: learn.apolloheatpumps.com
One of the most common questions homeowners ask is: “How often do I really need to change my air filter?” The short answer is every 1 to 3 months, but the exact frequency depends on several factors unique to your home and lifestyle.
For most households with standard usage and no pets, replacing the filter every 90 days is a good rule of thumb. However, if you have pets that shed, live in a dusty area, or have family members with allergies, you may need to replace it every 30 to 60 days. High-efficiency filters (like those with a MERV rating of 11 or higher) may also need more frequent changes because they capture finer particles and can clog faster.
Another factor is how often you run your AC. If you keep your system running constantly during summer, the filter will accumulate debris more quickly than in a home where the AC is used sporadically. Similarly, homes with multiple occupants or frequent foot traffic tend to generate more indoor pollutants, requiring more frequent filter changes.
To stay on top of it, consider setting a calendar reminder or marking your filter replacement date on a physical calendar. Some smart thermostats even track filter usage and send alerts when it’s time for a change. Pro tip: Make it a habit to check your filter at the start of each season—spring, summer, fall, and winter—so you never fall behind.
Signs It’s Time to Replace Your Filter
Even if you’re following a regular schedule, it’s smart to visually inspect your filter every month. Sometimes, conditions change—like a new pet, a home renovation, or a spike in pollen—and your filter may need replacing sooner than expected. Here are some clear signs that it’s time for a new one:
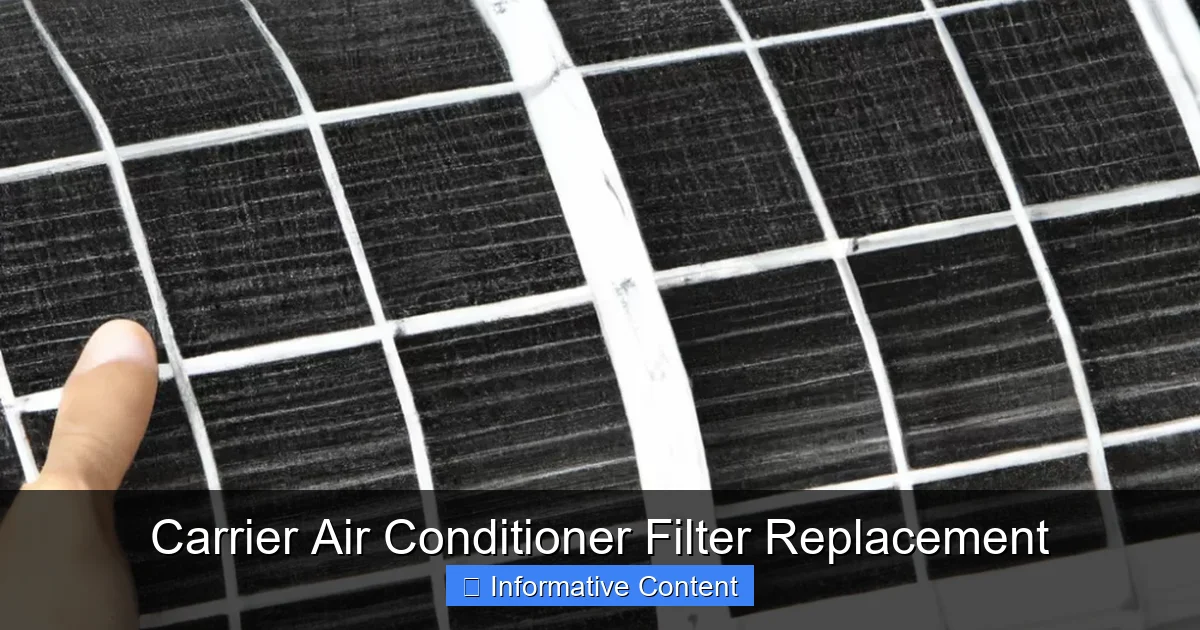
First, look at the filter itself. If it appears gray or black and feels heavy or stiff, it’s likely clogged. Hold it up to a light—if you can’t see through it, it’s definitely time for a replacement. Even if it’s not completely dark, a noticeable layer of dust or debris means it’s losing effectiveness.
You might also notice reduced airflow from your vents. If your rooms aren’t cooling as quickly as they used to, or if some areas feel warmer than others, a dirty filter could be the culprit. Your AC may also run longer cycles or struggle to reach the set temperature, which increases wear and tear on the system.
Another red flag is a spike in your energy bill. When your filter is clogged, your system has to work harder to move air, which uses more electricity. If you see an unexplained increase in your utility costs, check the filter before assuming there’s a bigger problem.
Finally, pay attention to indoor air quality. If you or your family members are sneezing more, experiencing itchy eyes, or noticing more dust on surfaces, a dirty filter might be letting contaminants circulate freely. In homes with pets, you may also notice more pet hair or dander in the air.
How to Find the Right Filter for Your Carrier AC Unit
Choosing the correct filter for your Carrier air conditioner is essential for optimal performance. Using the wrong size or type can lead to poor airflow, reduced efficiency, and even damage to your system. Here’s how to make sure you get the right one.
Start by checking your owner’s manual. Carrier provides detailed specifications for each model, including the recommended filter size and MERV (Minimum Efficiency Reporting Value) rating. The MERV rating tells you how effectively the filter captures particles—higher numbers mean better filtration, but also potentially more resistance to airflow.
If you don’t have the manual, look at your current filter. Most filters have the size printed on the frame, typically in a format like “16x20x1” (length x width x depth in inches). Write this down before removing the old filter so you don’t forget.
You can also find your model number on the outdoor unit or indoor air handler and use Carrier’s online filter finder tool. Simply enter your model number, and the site will recommend compatible filters. This is especially helpful if you’ve moved into a home with an existing Carrier system and aren’t sure of the original specs.
When shopping, you’ll find several filter types:
– Fiberglass filters: Inexpensive and disposable, but offer minimal filtration. Best for basic dust control.
– Pleated filters: Made from polyester or cotton, these capture more particles and last longer. Ideal for homes with allergies or pets.
– Electrostatic filters: Use static electricity to attract particles. Some are washable, making them eco-friendly and cost-effective over time.
– HEPA filters: Offer the highest level of filtration but may require system modifications due to high resistance.
For most Carrier systems, a pleated filter with a MERV rating between 8 and 11 strikes the best balance between air quality and system performance. Avoid going too high (like MERV 13 or above) unless your system is designed for it, as it can restrict airflow.
Step-by-Step Guide to Replacing Your Carrier AC Filter
Replacing your Carrier air conditioner filter is a quick and straightforward process that anyone can do. With just a few simple steps, you can keep your system running smoothly and your air clean. Here’s how to do it safely and correctly.
Step 1: Turn Off the System
Before you begin, turn off your air conditioner at the thermostat. This prevents the system from kicking on while you’re working and ensures safety. If your unit has a disconnect switch near the outdoor compressor, flip that off as well.
Step 2: Locate the Air Filter
Most Carrier systems have the filter located in one of two places: either in the return air duct near the furnace or air handler, or inside the indoor unit itself. Look for a large vent on your wall or ceiling—this is usually the return air grille. The filter is typically behind a removable panel or behind the grille itself.
In some models, especially newer ones, the filter may be inside the air handler cabinet. You’ll need to open the access panel (usually held by screws or latches) to reach it. Refer to your owner’s manual if you’re unsure.
Step 3: Remove the Old Filter
Carefully slide out the old filter. Note the direction of the airflow arrows printed on the frame—these should point toward the blower motor and away from the return duct. This orientation is important for proper airflow, so remember it when installing the new one.
If the filter is stuck or dirty, wear gloves to protect your hands. Some filters can be quite grimy, especially if they’ve been in place for a while.
Step 4: Inspect and Clean the Area
Before inserting the new filter, take a moment to inspect the filter slot and surrounding area. Use a vacuum with a brush attachment to remove any dust or debris that may have accumulated. This helps maintain airflow and prevents contaminants from entering the system.
If you notice mold, excessive dirt, or signs of water damage, it may be time to schedule a professional cleaning or inspection.
Step 5: Install the New Filter
Take your new filter and align it with the slot, making sure the airflow arrows point in the correct direction. Slide it in gently—don’t force it. If it doesn’t fit easily, double-check the size. A filter that’s too tight can damage the frame or restrict airflow.
Once in place, make sure it sits flat and secure. If your system has a filter access door or panel, close and latch it properly.
Step 6: Turn the System Back On
After the new filter is installed, turn your thermostat back to the desired setting. Your AC should start up normally. Listen for any unusual noises or reduced airflow, which could indicate an installation issue.
Step 7: Record the Replacement Date
Write the date on the edge of the new filter with a permanent marker, or note it in your phone or maintenance log. This helps you keep track of when to replace it next.
Tips for Maintaining Your Carrier AC System
While replacing the filter is a big part of AC maintenance, it’s not the only thing you should do to keep your Carrier system in top shape. A little extra care goes a long way in preventing breakdowns and extending the life of your unit.
First, keep the area around your outdoor unit clean. Remove leaves, grass clippings, and debris that could block airflow. Trim back shrubs or plants at least two feet on all sides to ensure proper ventilation.
Inside, vacuum your return air grilles regularly to prevent dust from building up before it even reaches the filter. If you have pets, consider using a vacuum with a HEPA filter to capture more dander and hair.
Also, check your thermostat settings. Avoid setting the temperature too low—every degree below 78°F can increase energy use by 6–8%. A programmable or smart thermostat can help you maintain consistent temperatures and reduce strain on your system.
Finally, schedule annual professional maintenance. A certified technician can inspect your coils, refrigerant levels, electrical connections, and overall system performance. They can also clean components that you can’t reach, like the evaporator and condenser coils, which improves efficiency and prevents costly repairs.
Common Mistakes to Avoid
Even simple tasks like filter replacement can go wrong if you’re not careful. Here are some common mistakes homeowners make—and how to avoid them.
One of the biggest errors is using the wrong filter size. A filter that’s too small can allow air to bypass the filter entirely, while one that’s too large won’t fit properly and can cause gaps. Always double-check the dimensions before purchasing.
Another mistake is installing the filter backward. The airflow arrows must point toward the blower motor. If installed incorrectly, the filter won’t work efficiently and may even damage the system over time.
Some people also forget to turn off the system before replacing the filter. This isn’t just a safety risk—it can also cause the AC to pull in unfiltered air while you’re working, defeating the purpose of the replacement.
Finally, don’t ignore the filter for too long. Even if your system seems to be working fine, a clogged filter can cause hidden damage. Set reminders and stick to a schedule.
Conclusion
Replacing your Carrier air conditioner filter is one of the simplest and most effective ways to maintain your system’s performance, improve indoor air quality, and save money on energy bills. With just a few minutes of effort every 1 to 3 months, you can prevent common issues, extend the life of your AC, and breathe easier at home.
Remember: a clean filter means a happy system. By staying proactive with maintenance, using the right filter, and following proper installation steps, you’ll keep your Carrier unit running smoothly for years to come. Don’t wait for problems to arise—make filter replacement a regular part of your home care routine.
Frequently Asked Questions
How often should I replace my Carrier air conditioner filter?
Most Carrier filters should be replaced every 1 to 3 months, depending on usage, pets, and air quality. Homes with allergies or pets may need monthly changes.
Can I reuse or wash my Carrier AC filter?
Only washable electrostatic filters can be cleaned and reused. Most standard pleated or fiberglass filters are disposable and should be replaced when dirty.
What happens if I don’t replace my AC filter?
A dirty filter restricts airflow, reduces efficiency, increases energy bills, and can cause your system to overheat or freeze up.
How do I know what size filter my Carrier unit needs?
Check the dimensions printed on your current filter (e.g., 16x20x1) or consult your owner’s manual. You can also use Carrier’s online filter finder tool.
Can I use a higher MERV filter for better air quality?
Higher MERV filters capture more particles but may restrict airflow if your system isn’t designed for them. Stick to MERV 8–11 unless specified otherwise.
Is it safe to replace the filter myself?
Yes, replacing your Carrier air conditioner filter is a safe DIY task. Just turn off the system first and follow the correct installation steps.