
Knowing the Carrier air conditioner filter location is essential for regular maintenance and optimal performance. This guide walks you through finding filters in furnaces, fan coils, and air handlers, plus tips for replacement and troubleshooting.
Key Takeaways
- Filter location varies by system type: Carrier AC units use furnaces, fan coils, or air handlers—each with different filter placements.
- Check the return air grille first: Many Carrier systems hide the filter behind a large vent on the wall or ceiling.
- Furnace filters are often inside the blower compartment: Look for a slot or panel near the bottom of the furnace.
- Fan coil units may have front or side access: Some models require removing a front panel to reach the filter.
- Replace filters every 1–3 months: Dirty filters reduce efficiency and strain your system.
- Use the correct filter size and MERV rating: Check your owner’s manual or existing filter for specs.
- Regular maintenance improves air quality and lowers energy bills: A clean filter helps your Carrier AC run smoother and last longer.
📑 Table of Contents
- Why Knowing Your Carrier Air Conditioner Filter Location Matters
- Understanding Carrier Air Conditioner System Types
- Where to Find the Filter in Common Carrier Setups
- Step-by-Step Guide to Replacing Your Carrier AC Filter
- Tips for Maintaining Your Carrier AC Filter
- Troubleshooting Common Filter Issues
- Conclusion
Why Knowing Your Carrier Air Conditioner Filter Location Matters
When your air conditioner isn’t cooling like it used to, or your energy bills are creeping up, the problem might be simpler than you think—your filter could be clogged. But before you can fix it, you need to know where to find it. For Carrier air conditioner owners, locating the filter isn’t always straightforward. Unlike some appliances with obvious access points, Carrier systems often tuck filters away in less visible spots, depending on the model and installation.
Understanding the Carrier air conditioner filter location isn’t just about convenience—it’s about maintaining your system’s health. A dirty filter restricts airflow, forcing your AC to work harder. This not only increases energy consumption but can also lead to frozen coils, reduced cooling, and even system breakdowns. In fact, the Department of Energy estimates that replacing a clogged filter can reduce your AC’s energy use by up to 15%. That’s a big deal for both your wallet and the environment.
But here’s the good news: once you know where to look, checking and replacing your filter becomes a quick, easy task. Whether you have a furnace, fan coil, or air handler, this guide will help you pinpoint the filter location in your Carrier system. We’ll walk you through common setups, give you step-by-step instructions, and share pro tips to keep your AC running efficiently all summer long.
Understanding Carrier Air Conditioner System Types
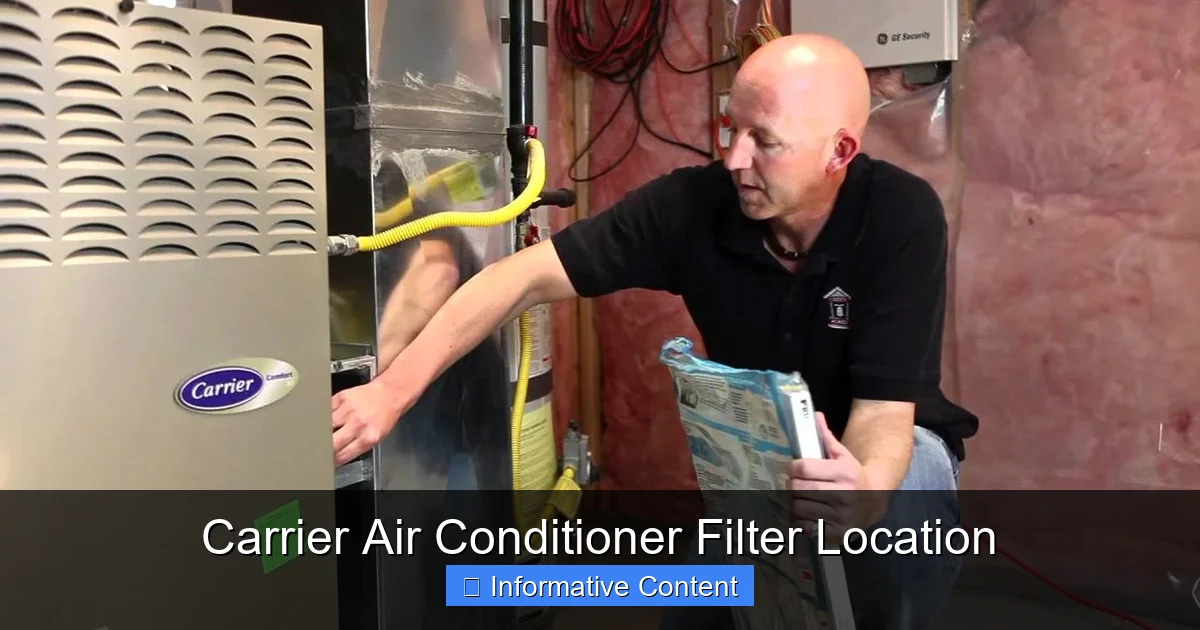
Visual guide about Carrier Air Conditioner Filter Location
Image source: storables.com
Before diving into filter locations, it’s important to understand the different types of Carrier air conditioning systems. Carrier offers a range of HVAC setups, and the filter location depends heavily on which type you have. Most residential Carrier systems fall into one of three categories: split systems with furnaces, fan coil units (FCUs), or air handlers. Each has its own design and filter access point.
Split Systems with Furnaces
The most common setup in homes is a split system paired with a gas or electric furnace. In this configuration, the outdoor unit (condenser) handles heat exchange, while the indoor furnace contains the blower motor and air filter. The furnace acts as the central hub for air distribution, pulling air through the return duct, filtering it, and pushing cooled air through the supply ducts.
In these systems, the Carrier air conditioner filter location is typically inside the furnace cabinet. You’ll usually find it near the bottom, where the return air enters. Some furnaces have a dedicated filter slot on the side or front, while others require you to open the blower compartment. This design keeps the filter protected and ensures consistent airflow through the system.
Fan Coil Units (FCUs)
Fan coil units are popular in homes without ductwork or in spaces like condos and additions. These compact units mount on walls or ceilings and combine a fan, coil, and filter in one enclosure. They’re often used with heat pumps or chilled water systems.
In a Carrier fan coil unit, the filter is usually located behind a front or side panel. Some models have a removable grille that swings open, while others require unscrewing a few screws. The filter sits just behind the intake, catching dust and debris before air passes over the cooling coil. Because FCUs are smaller and often wall-mounted, their filters can get dirty faster—especially in high-traffic areas.
Air Handlers
Air handlers are used in all-electric systems or when the furnace is replaced with a dedicated air-moving unit. These systems look similar to furnaces but don’t have a heating element. Instead, they rely on electric heat strips or a separate heat source.
The Carrier air conditioner filter location in an air handler is typically inside the unit’s return air compartment. Like furnaces, air handlers often have a filter rack or slot near the bottom. Some models feature a slide-out tray for easy access, while others require removing a front panel. Air handlers are common in modern, high-efficiency homes and are designed for quiet, consistent operation.
Where to Find the Filter in Common Carrier Setups
Now that you know the system types, let’s get practical. Here’s where to look for the filter in the most common Carrier air conditioner configurations. We’ll break it down by location and access method so you can find yours quickly.
Behind the Return Air Grille
One of the easiest places to check is the return air grille. This is the large vent—usually on a wall or ceiling—that pulls air from your home into the HVAC system. In many Carrier systems, especially those with furnaces or air handlers, the filter is mounted directly behind this grille.
To access it, simply remove the grille by lifting it off its clips or unscrewing the mounting screws. You’ll often see the filter frame right behind it. Some grilles are designed to swing open like a door, making filter changes a breeze. This setup is common in newer homes and is one of the most user-friendly filter locations.
Tip: If the grille feels stuck, check for hidden latches or magnetic seals. Don’t force it—gentle pressure usually does the trick.
Inside the Furnace Blower Compartment
If there’s no filter behind the return grille, the next place to check is inside the furnace. Most Carrier furnaces have a filter slot or compartment near the bottom, where the return air enters the blower motor.
To access it, turn off the power to the furnace at the breaker panel. Then, locate the front panel of the furnace—usually held in place by screws or latches. Remove the panel to reveal the blower motor and, in many cases, a filter rack or slot. The filter will slide in horizontally or vertically, depending on the model.
Some furnaces have a dedicated filter door on the side, eliminating the need to remove the entire front panel. Look for a small latch or handle. This design is common in high-efficiency Carrier models like the Infinity or Performance series.
In the Fan Coil Unit Access Panel
For homes with Carrier fan coil units, the filter is typically behind a front or side access panel. These panels are often held in place by screws or clips and may require a screwdriver to remove.
Once the panel is off, you’ll see the filter frame just behind the intake. Some FCUs have a slide-out tray, while others require lifting the filter out by hand. Because fan coils are often installed in tight spaces—like closets or utility rooms—be sure to leave enough room to work when accessing the filter.
Pro tip: Take a photo of the filter before removing it. This helps you remember the size and orientation when replacing it.
Under the Air Handler Cabinet
In systems with an air handler, the filter is usually located at the bottom of the unit, where return air enters. Look for a filter slot or removable panel on the side or front of the cabinet.
Some air handlers have a slide-out filter tray, similar to a furnace. Others require removing a small access panel. Always turn off the power before opening any electrical components.
If you’re unsure, check the owner’s manual or look for a label inside the cabinet. Carrier often includes a diagram showing the filter location.
Step-by-Step Guide to Replacing Your Carrier AC Filter
Once you’ve found the filter, replacing it is simple—but doing it correctly ensures your system runs efficiently. Follow these steps to replace your Carrier air conditioner filter safely and effectively.
Step 1: Turn Off the Power
Safety first. Before touching any part of your HVAC system, turn off the power at the main breaker panel. This prevents the blower motor from starting unexpectedly while you’re working.
Even if your system is off at the thermostat, the fan could still activate if there’s a delay or if another zone calls for air. Cutting power at the breaker eliminates this risk.
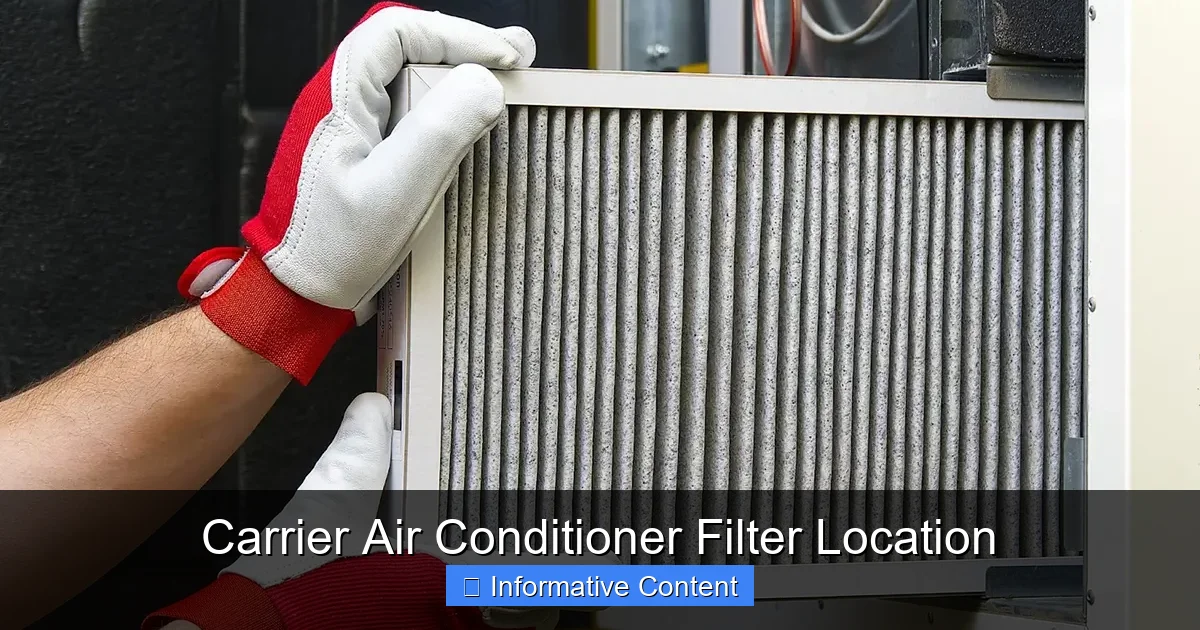
Step 2: Locate and Remove the Old Filter
Use the guidance above to find your filter. Once located, carefully remove it from its slot or tray. Note the direction of the airflow arrow on the filter frame—this tells you which way the filter should face when reinstalled.
If the filter is heavily clogged with dust and debris, consider wearing a mask to avoid inhaling particles. A dirty filter can release allergens and mold spores into the air when disturbed.
Step 3: Check the Filter Size and Type
Look at the dimensions printed on the filter frame—usually in inches (e.g., 16x20x1). This tells you the exact size you need for replacement. Also, note the MERV rating, which measures filtration efficiency. Common ratings for home use range from MERV 8 to MERV 13.
Avoid using filters with a MERV rating higher than recommended by Carrier. High-MERV filters can restrict airflow in systems not designed for them, reducing efficiency and potentially damaging the blower motor.
Step 4: Install the New Filter
Slide the new filter into the slot, making sure the airflow arrow points toward the blower motor (usually inward). The filter should fit snugly without forcing. If it’s too tight, double-check the size.
For filters in return grilles, ensure the grille clicks back into place securely. Loose grilles can allow unfiltered air to bypass the filter, reducing its effectiveness.
Step 5: Restore Power and Test
Once the new filter is installed, replace any panels or grilles and restore power at the breaker. Turn on the thermostat and let the system run for a few minutes. Listen for unusual noises and check that air is flowing properly through the vents.
If the system seems sluggish or makes a rattling sound, double-check that the filter is installed correctly and that all panels are secure.
Tips for Maintaining Your Carrier AC Filter
Replacing the filter is just one part of HVAC maintenance. To keep your Carrier system running smoothly, follow these best practices for filter care and system health.
Check the Filter Monthly
Even if you replace the filter every 1–3 months, it’s wise to check it monthly. In homes with pets, smokers, or high dust levels, filters can clog faster. A quick visual inspection takes just seconds and can prevent bigger problems.
If the filter looks dirty—gray or covered in dust—it’s time to replace it, even if it’s not yet been a full month.
Use High-Quality Filters
Not all filters are created equal. Cheap fiberglass filters catch only large particles and need frequent replacement. Pleated filters offer better filtration and last longer. Look for filters with a MERV rating between 8 and 13 for the best balance of airflow and air quality.
Carrier recommends using filters that meet their specifications. Check your owner’s manual or visit the Carrier website for approved models.
Keep the Area Around the Unit Clean
Dust and debris near your furnace, air handler, or fan coil can get sucked into the system, shortening the filter’s life. Vacuum around the unit regularly and keep the space free of clutter.
For outdoor units, trim back vegetation and remove leaves or debris that could block airflow.
Schedule Annual Professional Maintenance
While filter changes are a DIY task, your Carrier system needs professional care at least once a year. A technician can clean coils, check refrigerant levels, inspect electrical connections, and ensure everything is working efficiently.
During maintenance, ask the technician to confirm the correct filter size and type for your system. They can also show you the exact filter location if you’re still unsure.
Upgrade to a Smart Thermostat
Some Carrier-compatible smart thermostats, like the Carrier Infinity Touch, can remind you when it’s time to change the filter. They monitor system runtime and send alerts based on usage, helping you stay on top of maintenance.
This is especially helpful if you have a busy schedule or multiple HVAC zones.
Troubleshooting Common Filter Issues
Even with regular maintenance, you might run into problems. Here’s how to troubleshoot common filter-related issues in Carrier systems.
Filter Keeps Getting Dirty Too Fast
If your filter clogs within days or weeks, it could signal a larger issue. Possible causes include:
– Leaky ductwork allowing unfiltered air in
– A dirty blower wheel or evaporator coil
– High indoor pollution (pets, smoking, construction)
Have a technician inspect your ducts and clean the internal components. Sealing duct leaks can significantly reduce dust intake.
Airflow Is Weak After Filter Replacement
If your vents aren’t blowing as hard as usual after changing the filter, check these:
– Is the filter installed in the correct direction? (Airflow arrow should point inward)
– Is the filter too thick or high-MERV for your system?
– Are the return grilles or vents blocked by furniture or curtains?
Also, ensure the new filter isn’t damaged or bent, which can restrict airflow.
System Won’t Turn On After Filter Change
If your AC won’t start after replacing the filter, the issue might be electrical. Check that:
– The power is restored at the breaker
– All panels and grilles are securely closed
– The thermostat is set correctly
Some Carrier systems have safety switches that prevent operation if a panel is open. Make sure everything is reassembled properly.
Filter Doesn’t Fit or Is Hard to Remove
If the new filter is too tight or the old one is stuck, double-check the size. Measure the slot or tray and compare it to the filter dimensions. Filters should slide in smoothly—forcing them can damage the frame or housing.
If the old filter is stuck due to dust buildup, gently wiggle it loose or use a vacuum to clean the slot first.
Conclusion
Knowing the Carrier air conditioner filter location is a small but powerful step toward better home comfort and energy efficiency. Whether your filter is behind a return grille, inside a furnace, or tucked away in a fan coil, regular checks and replacements keep your system running smoothly.
By understanding your system type, following safe replacement steps, and staying proactive with maintenance, you’ll extend the life of your Carrier AC and enjoy cleaner, cooler air all season long. Don’t wait for a breakdown—make filter care a monthly habit. Your system, your wallet, and your indoor air quality will thank you.
Frequently Asked Questions
Where is the filter located on a Carrier air conditioner?
The filter is typically found behind the return air grille, inside the furnace blower compartment, or behind an access panel on a fan coil or air handler. The exact location depends on your system type and model.
How often should I change my Carrier AC filter?
Replace your filter every 1 to 3 months, depending on usage, pets, and indoor air quality. Check it monthly and change it if it looks dirty.
Can I use any filter in my Carrier system?
Use a filter with the correct size and MERV rating recommended by Carrier. High-MERV filters can restrict airflow if your system isn’t designed for them.
Why is my Carrier AC not cooling after changing the filter?
This could be due to incorrect filter installation, a clogged coil, or low refrigerant. Ensure the filter is facing the right way and the system has power.
How do I find the filter size for my Carrier unit?
Check the dimensions printed on the old filter frame (e.g., 16x20x1) or refer to your owner’s manual. You can also measure the filter slot.
Is it safe to change the filter while the AC is running?
No. Always turn off the power at the breaker before replacing the filter to prevent the blower from starting unexpectedly.