
Changing your Carrier air conditioner filter regularly is one of the simplest yet most impactful maintenance tasks you can do. It boosts cooling efficiency, improves indoor air quality, and helps prevent costly repairs. This guide walks you through everything you need to know—from identifying the right filter to installing it correctly.
This is a comprehensive guide about carrier air conditioner filter change.
Key Takeaways
- Replace filters every 1–3 months: Frequency depends on usage, pets, allergies, and home environment.
- Use the correct filter size and type: Check your Carrier model number and match MERV ratings for optimal performance.
- Turn off the system before changing: Safety first—always power down your AC unit to avoid electrical hazards.
- Inspect the filter housing for debris: Clean the area around the filter slot to prevent dust buildup and airflow blockage.
- Upgrade to high-efficiency filters if needed: Consider pleated or HEPA-style filters for better allergen and particle capture.
- Track filter changes with a calendar or app: Set reminders to stay consistent and avoid forgetting this important task.
- Proper installation matters: Ensure the filter is seated correctly with airflow arrows pointing toward the unit.
[FEATURED_IMAGE_PLACEHOLDER]
Why Changing Your Carrier Air Conditioner Filter Matters
When was the last time you changed your Carrier air conditioner filter? If you’re drawing a blank, you’re not alone. Many homeowners overlook this small but mighty component—until their AC starts acting up. But here’s the truth: a clean filter is the unsung hero of your cooling system. It doesn’t just keep your air fresh; it protects your entire HVAC unit from strain, inefficiency, and premature wear.
Think of your air filter like the lungs of your home. Just as we need clean air to breathe well, your AC needs clean airflow to function properly. Over time, dust, pet dander, pollen, and other airborne particles accumulate on the filter. When it gets clogged, your system has to work harder to push air through. That means higher energy bills, reduced cooling power, and a greater chance of breakdowns—especially during peak summer months.
But the benefits go beyond just performance. A clean filter also improves indoor air quality, which is crucial if you or your family members suffer from allergies, asthma, or respiratory sensitivities. In fact, the Environmental Protection Agency (EPA) identifies indoor air pollution as one of the top five environmental risks to public health. Regularly changing your Carrier air conditioner filter is a simple, affordable way to reduce that risk.
And let’s not forget longevity. HVAC systems are a significant investment—often costing thousands of dollars. By maintaining your filter, you’re helping extend the life of your unit. Carrier, a trusted name in home comfort since 1915, designs its systems for durability, but even the best equipment needs care. Routine filter changes are one of the easiest ways to honor that investment.
In short, changing your Carrier air conditioner filter isn’t just a chore—it’s a smart habit that pays off in comfort, savings, and peace of mind. Whether you’re a first-time homeowner or a seasoned DIYer, this guide will walk you through the process step by step, so you can keep your home cool and your system running smoothly all season long.
How Often Should You Change Your Carrier Air Conditioner Filter?
One of the most common questions homeowners ask is: “How often should I change my Carrier air conditioner filter?” The short answer? It depends. But the general rule of thumb is every 1 to 3 months. However, several factors can influence this timeline, so it’s important to assess your unique situation.
If you live in a home with pets, especially cats or dogs that shed, you’ll likely need to change the filter more frequently—possibly every 30 to 60 days. Pet hair and dander are major contributors to filter clogging, and they can quickly reduce airflow. Similarly, if someone in your household has allergies or asthma, more frequent changes (every 30 days) can help maintain cleaner air and reduce irritants.
Seasonal use also plays a role. During peak cooling months—typically late spring through early fall—your AC runs more often, which means the filter collects debris faster. In contrast, during milder months when the system isn’t in constant use, you might get away with changing it every 90 days. But don’t wait too long. Even if the filter doesn’t look dirty, microscopic particles can build up and affect performance.
Another factor is your home’s environment. If you live in a dusty area, near construction, or in a region with high pollen counts, your filter will clog faster. Similarly, homes with multiple occupants or frequent foot traffic tend to generate more indoor pollutants. In these cases, checking the filter monthly is a good practice.
It’s also worth noting that the type of filter you use affects how often it needs replacing. Basic fiberglass filters are cheaper but less effective and typically need changing every 30 days. Pleated filters, on the other hand, have a larger surface area and can last up to 90 days—though they may need earlier replacement in high-pollution environments.
To make it easier, consider setting a calendar reminder or using a smart home app to track your filter changes. Some modern Carrier systems even come with filter change indicators that alert you when it’s time for a replacement. These lights or notifications take the guesswork out of maintenance and help you stay on schedule.
Ultimately, the best approach is to check your filter monthly. Pull it out and hold it up to a light. If you can’t see through it, it’s time for a new one. This simple visual check can save you from reduced efficiency, higher bills, and potential system damage. Remember: a little attention now can prevent big problems later.
How to Identify the Right Filter for Your Carrier AC Unit
Picking the right filter for your Carrier air conditioner isn’t just about grabbing any old filter from the shelf. Using the wrong size or type can lead to poor performance, reduced efficiency, and even damage to your system. So how do you find the perfect match?
Start by locating your Carrier model number. This is usually found on a metal label inside the access panel of your indoor air handler or furnace. The model number often includes a series like “40MAQB” or “59TP6,” which helps identify your specific unit. Once you have it, check the manufacturer’s website or user manual for the recommended filter size and type.
Most Carrier systems use standard filter sizes, such as 16x20x1, 20x25x1, or 14x24x1 inches. The first two numbers represent the length and width, while the third is the thickness. It’s crucial to match all three dimensions exactly. A filter that’s too small can allow unfiltered air to bypass the system, while one that’s too large won’t fit properly and may restrict airflow.
Next, consider the MERV rating. MERV stands for Minimum Efficiency Reporting Value, and it measures how well a filter captures particles. Ratings range from 1 to 20, with higher numbers indicating better filtration. For most homes, a MERV 8 to MERV 11 filter offers a great balance between air quality and system efficiency. These filters capture common pollutants like dust, pollen, mold spores, and pet dander without putting too much strain on your AC.
However, if you have severe allergies or respiratory conditions, you might consider a MERV 13 filter, which can trap even smaller particles like smoke and bacteria. Just be cautious: high-MERV filters can restrict airflow in older or less powerful systems. Always check your Carrier unit’s specifications to ensure it can handle higher-efficiency filters.
Another option is a washable or reusable filter. These are eco-friendly and cost-effective over time, but they require regular cleaning—usually every 1–2 months. While convenient, they may not offer the same level of filtration as high-quality pleated filters, so they’re best for low-pollution environments.
When shopping, look for filters labeled as compatible with Carrier systems. Many third-party brands offer high-quality alternatives at a lower price, but make sure they meet the same standards as OEM (Original Equipment Manufacturer) filters. Reading customer reviews and checking for certifications like AHRI (Air Conditioning, Heating, and Refrigeration Institute) can help ensure you’re getting a reliable product.
Finally, don’t forget to note the airflow direction. Most filters have arrows printed on the frame indicating which way the air should flow. These arrows should point toward the air handler or furnace, not away from it. Installing the filter backward can reduce efficiency and cause the system to work harder.
By taking the time to choose the right filter, you’re setting your Carrier AC up for success. It’s a small step that makes a big difference in performance, air quality, and long-term reliability.
Step-by-Step Guide to Changing Your Carrier Air Conditioner Filter
Changing your Carrier air conditioner filter is a straightforward process that takes just a few minutes—but doing it correctly is key. Follow this step-by-step guide to ensure a smooth, safe, and effective filter change every time.
Step 1: Turn Off the Power
Before you do anything, safety comes first. Locate your HVAC system’s power switch or breaker and turn it off. This prevents the fan from accidentally turning on while you’re working, which could cause injury or damage. If you’re unsure where the breaker is, check your electrical panel for a switch labeled “HVAC,” “Furnace,” or “AC.” Some systems also have a disconnect switch near the indoor unit.
Step 2: Locate the Filter Slot
Next, find where your filter is housed. In most Carrier systems, the filter is located in the return air duct, typically near the air handler or furnace. Look for a large vent on your wall or ceiling, or a removable panel on the side or bottom of the unit. Some models have a dedicated filter access door with a latch or screws.
If you’re having trouble finding it, consult your owner’s manual or look for a label that says “Filter” or “Air Filter Access.” In newer Carrier systems, the filter may be behind a front panel that swings open.
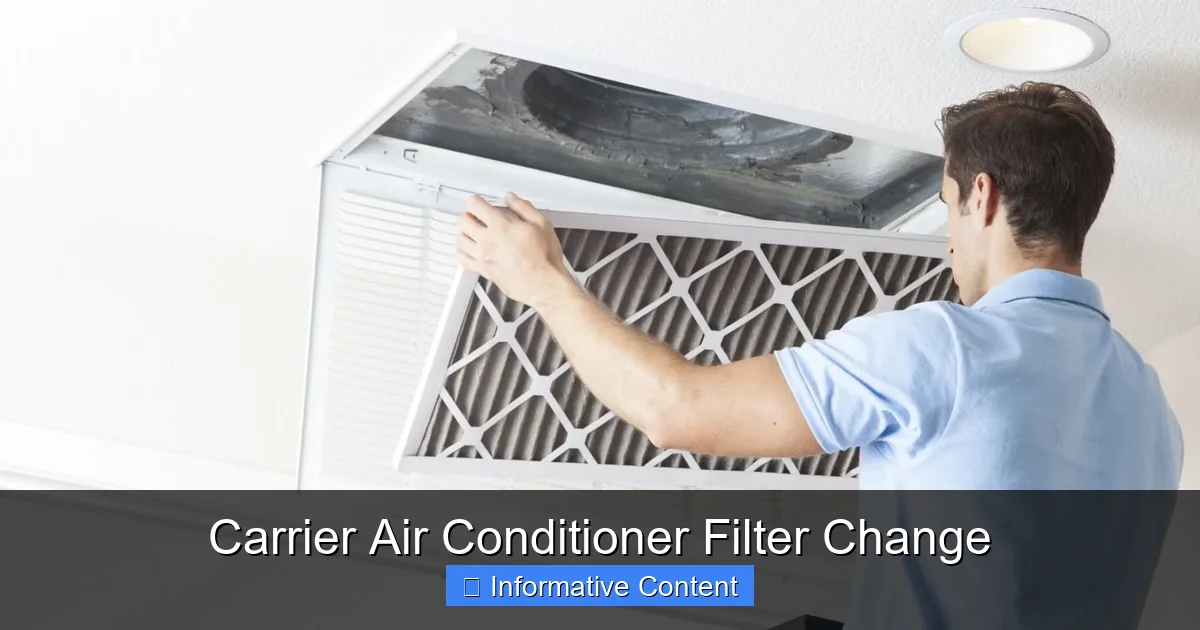
Step 3: Remove the Old Filter
Once you’ve located the filter, carefully slide it out of the slot. Note the direction of the airflow arrows on the frame—this will help you install the new one correctly. If the filter is stuck, gently wiggle it side to side while pulling. Avoid forcing it, as this could damage the housing.
Take a moment to inspect the old filter. If it’s caked with dust, pet hair, or debris, it’s definitely time for a replacement. Even if it looks only slightly dirty, remember that microscopic particles can still affect performance.
Step 4: Clean the Filter Area
Before inserting the new filter, take a quick look inside the filter slot. Use a vacuum with a brush attachment or a damp cloth to remove any dust or debris that may have accumulated. This ensures proper airflow and prevents contaminants from entering the system.
If you notice mold, excessive dirt, or signs of water damage, it may indicate a larger issue—like a clogged drain line or poor insulation. In that case, consider scheduling a professional inspection.
Step 5: Install the New Filter
Take your new filter and check the airflow arrows on the frame. These should point toward the air handler or furnace—never away from it. Slide the filter into the slot, making sure it fits snugly without bending or forcing.
If your system uses a filter with a gasket or seal, ensure it’s properly aligned to prevent air bypass. A poorly sealed filter can reduce efficiency by allowing unfiltered air to circulate.
Step 6: Secure the Access Panel and Restore Power
Once the new filter is in place, close and secure the access panel. Make sure all latches or screws are tightened to prevent air leaks. Then, turn the power back on at the breaker or switch.
Give your system a few minutes to restart. You should notice improved airflow and cooling within a short time. If the system doesn’t turn on or makes unusual noises, double-check the filter installation and power connections.
Pro Tips for Success
– Always handle filters by the frame to avoid tearing the media.
– Keep a spare filter on hand so you’re never caught off guard.
– Take a photo of the old filter with the model number before disposing of it—this makes reordering easier.
– If your system has multiple filters (e.g., in a return vent and the air handler), change them all at the same time.
By following these steps, you’ll keep your Carrier AC running efficiently and your home’s air clean. It’s a simple task that delivers big results.
Common Mistakes to Avoid When Changing Your Filter
Even though changing a Carrier air conditioner filter seems simple, it’s easy to make mistakes that can hurt your system’s performance. Avoid these common pitfalls to get the most out of your maintenance routine.
Using the Wrong Filter Size
One of the biggest errors is installing a filter that doesn’t fit properly. A filter that’s too small leaves gaps where unfiltered air can bypass the system, reducing air quality and efficiency. A filter that’s too large won’t fit at all or may get compressed, blocking airflow. Always double-check the dimensions and match them exactly to your Carrier model’s specifications.
Installing the Filter Backward
Airflow direction matters. Most filters have arrows indicating which way air should flow—toward the unit. Installing the filter backward restricts airflow and forces your system to work harder. This can lead to overheating, reduced cooling, and even system shutdowns. Always align the arrows with the direction of airflow.
Skipping the Power-Off Step
Never change the filter while the system is running. Not only is it unsafe, but it can also cause the fan to suck in debris or damage internal components. Always turn off the power at the breaker or disconnect switch before starting.
Ignoring the Filter Housing
A clean filter is only effective if the housing is clean too. Dust and debris in the slot can get pulled into the system, reducing efficiency and potentially damaging the blower motor. Take a moment to vacuum or wipe the area before installing the new filter.
Waiting Too Long to Change the Filter
Even if the filter doesn’t look dirty, it may still be clogged with microscopic particles. Waiting too long between changes reduces airflow, increases energy use, and can lead to frozen coils or system failure. Check your filter monthly and replace it every 1–3 months based on your home’s needs.
Using Low-Quality Filters
Cheap fiberglass filters may save money upfront, but they offer minimal filtration and need frequent replacement. Invest in a quality pleated filter with a MERV 8–11 rating for better performance and longer life. Your Carrier system deserves the best protection.
By avoiding these mistakes, you’ll keep your AC running smoothly and your home comfortable year-round.
Benefits of Regular Filter Maintenance
Regularly changing your Carrier air conditioner filter isn’t just about preventing breakdowns—it comes with a host of benefits that improve your home life and your wallet.
First and foremost, it boosts energy efficiency. A clean filter allows air to flow freely, reducing the workload on your system. According to the U.S. Department of Energy, replacing a clogged filter can lower your energy consumption by 5% to 15%. Over time, that adds up to significant savings on your utility bills.
It also extends the life of your HVAC system. When your AC doesn’t have to work as hard, components like the blower motor, evaporator coil, and compressor experience less wear and tear. This means fewer repairs and a longer lifespan for your unit—potentially adding years to its service life.
Improved indoor air quality is another major benefit. A clean filter traps dust, pollen, mold, and other allergens, creating a healthier living environment. This is especially important for children, seniors, and anyone with respiratory conditions.
Finally, regular maintenance helps maintain your warranty. Many Carrier warranties require proof of routine care, including filter changes. Skipping this step could void your coverage if a problem arises.
In short, changing your filter is a small effort with big rewards. Make it a habit, and your home—and your wallet—will thank you.
Conclusion
Changing your Carrier air conditioner filter is one of the simplest, most effective ways to maintain your home’s comfort and your system’s health. It takes just a few minutes, costs very little, and delivers outsized benefits—from lower energy bills to cleaner air and fewer repairs.
By following the steps in this guide, you can ensure your filter is changed correctly and on schedule. Remember to check your filter monthly, use the right size and type, and always turn off the power before starting. Avoid common mistakes like installing the filter backward or using low-quality replacements.
Your Carrier AC is designed to keep you cool and comfortable for years to come. With regular filter maintenance, you’re not just preserving that investment—you’re enhancing it. So grab a new filter, set a reminder, and give your system the care it deserves. Your home will be cooler, your air will be cleaner, and your peace of mind will be intact.
Frequently Asked Questions
How often should I change my Carrier air conditioner filter?
Most experts recommend changing your Carrier air conditioner filter every 1 to 3 months. However, if you have pets, allergies, or live in a dusty area, you may need to change it more frequently—every 30 to 60 days.
Can I reuse a washable filter in my Carrier AC?
Yes, you can use a washable filter if your Carrier system supports it. These filters need to be cleaned every 1–2 months and should be completely dry before reinstallation to prevent mold growth.
What happens if I don’t change my AC filter?
A dirty filter restricts airflow, forcing your system to work harder. This leads to higher energy bills, reduced cooling, frozen coils, and potentially costly repairs or premature system failure.
How do I find the right filter size for my Carrier unit?
Check the label on your indoor air handler or furnace for the model number, then refer to the owner’s manual or Carrier’s website. You can also measure the old filter’s length, width, and thickness.
Can I use a higher MERV filter in my Carrier AC?
You can, but only if your system is designed to handle it. High-MERV filters (13+) may restrict airflow in older units. Always check your manual or consult a professional before upgrading.
Do I need to turn off my AC to change the filter?
Yes, always turn off the power at the breaker or disconnect switch before changing the filter. This prevents the fan from turning on accidentally and protects you from electrical hazards.