
Replacing a Carrier air conditioner compressor is a complex but essential repair when your cooling system fails. This guide walks you through symptoms, costs, DIY considerations, and why professional help is often the safest choice.
Key Takeaways
- Recognize the signs early: Strange noises, warm air, or frequent cycling can signal compressor trouble.
- Compressor failure is serious: It’s the heart of your AC system—failure often means major repairs or full unit replacement.
- Costs vary widely: Expect $1,200 to $3,500+ depending on model, labor, and refrigerant type.
- DIY is risky: Handling refrigerants and high-voltage components requires EPA certification and specialized tools.
- Warranty matters: Check if your unit or compressor is still under warranty to save on replacement costs.
- Prevent future issues: Regular maintenance like coil cleaning and refrigerant checks can extend compressor life.
- Consider a full system upgrade: If your unit is over 10–15 years old, replacing the entire system may be more cost-effective.
📑 Table of Contents
- Understanding the Role of the Compressor in Your Carrier AC
- Signs Your Carrier Air Conditioner Compressor Needs Replacement
- Causes of Compressor Failure in Carrier Units
- Carrier Air Conditioner Compressor Replacement: Step-by-Step Process
- Cost of Replacing a Carrier Air Conditioner Compressor
- DIY vs. Professional Compressor Replacement: What You Need to Know
- Conclusion: Making the Right Decision for Your Home
Understanding the Role of the Compressor in Your Carrier AC
When your Carrier air conditioner kicks on, the compressor is the unsung hero working behind the scenes. Think of it as the heart of your cooling system—it pumps refrigerant through the coils, creating the cold air that keeps your home comfortable during hot summer months. Without a functioning compressor, your AC can’t cool your home, no matter how well the rest of the system works.
Carrier, one of the most trusted names in HVAC, designs compressors to last 10 to 15 years under normal conditions. But like any mechanical part, it can wear out over time due to age, poor maintenance, electrical issues, or environmental stress. When the compressor fails, your AC might still turn on, but you’ll notice it’s not cooling like it used to—or not at all.
Understanding how the compressor works helps you appreciate why its replacement is such a big deal. It’s not just a simple swap. The compressor is tightly integrated with the refrigerant lines, electrical connections, and the overall system design. That’s why diagnosing and replacing it correctly is critical to restoring your home’s comfort and efficiency.
How the Compressor Powers Your Cooling Cycle
The cooling process starts when the thermostat signals your Carrier AC to turn on. The compressor then draws in low-pressure, cool refrigerant gas from the evaporator coil. Using electrical energy, it compresses this gas, raising its temperature and pressure significantly. This hot, high-pressure gas then flows into the condenser coil, where it releases heat to the outside air and condenses into a liquid.
From there, the refrigerant moves through the expansion valve and back into the evaporator coil, where it absorbs heat from your indoor air, turning back into a gas. The cycle repeats, continuously removing heat from your home. The compressor is the engine driving this entire process—without it, the refrigerant just sits there, and no cooling happens.
Because the compressor operates under high pressure and temperature, it’s built with durable materials and precision engineering. However, even the best compressors can fail due to overheating, voltage fluctuations, or lack of lubrication. That’s why regular maintenance is so important—it helps catch small issues before they turn into costly compressor failures.
Signs Your Carrier Air Conditioner Compressor Needs Replacement
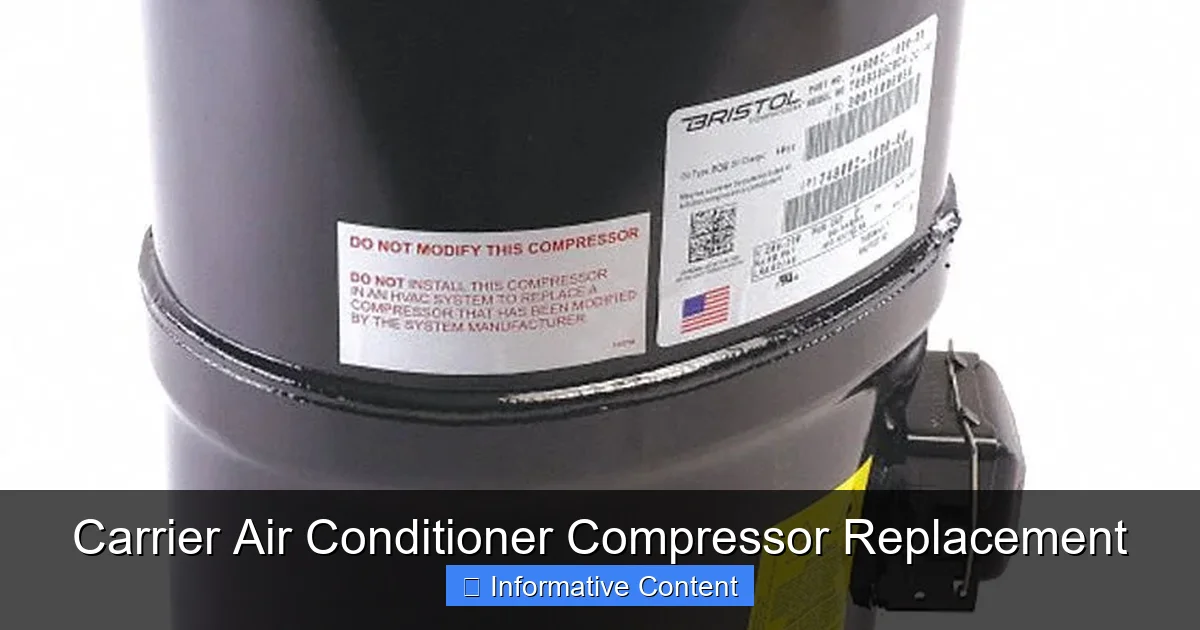
Visual guide about Carrier Air Conditioner Compressor Replacement
Image source: atlasacrepair.com
Spotting compressor problems early can save you from a sweltering home and a hefty repair bill. While some symptoms may seem minor at first, they often point to a deeper issue with the compressor. Here are the most common warning signs to watch for.
One of the first red flags is warm air blowing from your vents, even though the AC is running. If your thermostat is set to cool but the air coming out feels lukewarm or room temperature, the compressor may not be pumping refrigerant properly. This could be due to a seized compressor, electrical failure, or low refrigerant levels—all of which can stem from compressor issues.
Another telltale sign is unusual noises. If you hear loud clicking, grinding, or humming sounds when the AC turns on, it could mean the compressor is struggling to start or is already damaged. A healthy compressor runs smoothly and quietly. Any persistent noise is a reason to call a technician.
You might also notice your AC frequently cycling on and off—known as short cycling. This happens when the compressor can’t maintain proper pressure, causing the system to shut down prematurely. Short cycling not only reduces cooling efficiency but also puts extra strain on the compressor, accelerating wear and tear.
Electrical and Performance Clues
Electrical issues often accompany compressor failure. If your circuit breaker trips repeatedly when the AC kicks on, it could indicate the compressor is drawing too much current—a sign of internal damage or a locked rotor. Similarly, if you notice a burning smell near the outdoor unit, it might mean the compressor motor is overheating or the windings are failing.
Performance drops are another clue. Even if your AC is running, it may take much longer to cool your home than it used to. You might find yourself lowering the thermostat more and more, only to feel little relief. This reduced efficiency often means the compressor isn’t compressing refrigerant effectively, leading to poor heat transfer.
In some cases, you might see ice buildup on the outdoor unit or refrigerant lines. While this can be caused by low refrigerant or dirty coils, it’s also a symptom of compressor problems. When the compressor doesn’t maintain proper pressure, refrigerant can freeze in the evaporator coil, leading to ice formation and reduced airflow.
When to Call a Professional
If you notice any of these signs, it’s time to call a licensed HVAC technician. Diagnosing compressor issues requires specialized tools and knowledge. A professional can perform a series of tests—like checking voltage, amperage, and refrigerant pressure—to determine if the compressor is truly at fault.
Don’t wait until your AC completely stops working. Early diagnosis can sometimes allow for less invasive repairs, like replacing a faulty capacitor or contactor, which are cheaper than a full compressor replacement. But if the compressor itself is damaged, replacement is usually the only long-term solution.
Causes of Compressor Failure in Carrier Units
Understanding why your Carrier compressor failed can help prevent future problems. While compressors are built to last, several factors can shorten their lifespan. Most failures aren’t sudden—they result from gradual wear or neglect over time.
One of the most common causes is lack of maintenance. Skipping annual tune-ups means dirt builds up on coils, filters get clogged, and refrigerant levels drop. All of these issues force the compressor to work harder, increasing the risk of overheating and failure. For example, a dirty condenser coil restricts airflow, causing the compressor to run hotter than normal.
Electrical problems are another major culprit. Power surges, faulty wiring, or failing capacitors can damage the compressor motor. A weak start capacitor, for instance, may prevent the compressor from turning on properly, leading to repeated attempts that wear out the motor. Similarly, voltage fluctuations from unstable power sources can stress the compressor over time.
Refrigerant issues also play a big role. Overcharging or undercharging the system disrupts pressure levels, which the compressor must compensate for. Low refrigerant, often due to leaks, causes the compressor to run longer cycles, increasing wear. On the other hand, too much refrigerant can flood the compressor with liquid, leading to hydraulic shock and mechanical damage.
Environmental and Operational Stress
Environmental factors can’t be ignored. If your outdoor unit is exposed to extreme heat, direct sunlight, or debris like leaves and dirt, it can overheat. Carrier compressors are designed to handle outdoor conditions, but constant exposure to high temperatures or blocked airflow reduces efficiency and lifespan.
Improper installation is another hidden cause. If the AC was installed incorrectly—say, with kinked refrigerant lines or incorrect refrigerant type—the compressor may have been under stress from day one. Even small installation errors can lead to premature failure years later.
Age is, of course, a natural factor. After 10 to 15 years of service, even the best compressors begin to wear out. Bearings degrade, seals deteriorate, and electrical components weaken. At this point, replacement is often more practical than repair, especially if other parts of the system are also aging.
Preventing Compressor Failure
The good news? Many compressor failures are preventable. Regular maintenance is your best defense. Schedule annual inspections with a Carrier-certified technician to clean coils, check refrigerant levels, test electrical components, and ensure everything is running smoothly.
Keep the area around your outdoor unit clear. Trim back plants, remove debris, and ensure there’s at least two feet of clearance on all sides. This improves airflow and reduces the risk of overheating.
Consider installing a surge protector to guard against power spikes. These are especially important in areas with frequent thunderstorms or unstable electrical grids. A whole-house surge protector can protect not just your AC but all your major appliances.
Finally, change your air filters every 1–3 months. Clogged filters restrict airflow, making the compressor work harder. It’s a simple step that can significantly extend the life of your system.
Carrier Air Conditioner Compressor Replacement: Step-by-Step Process
Replacing a Carrier air conditioner compressor is a complex job that should only be done by a licensed HVAC technician. It involves handling refrigerants, working with high-voltage electricity, and reassembling critical system components. Here’s what the process typically looks like.
The first step is a thorough diagnosis. The technician will confirm that the compressor is indeed faulty and not just suffering from a related issue like a bad capacitor or low refrigerant. They’ll check electrical connections, measure voltage and amperage, and inspect the compressor for physical damage.
Once confirmed, the technician will shut off power to the unit at the breaker and disconnect the electrical wiring. Safety is paramount—working on live circuits can be deadly. They’ll also isolate the refrigerant lines to prevent leaks.
Removing the Old Compressor
Next, the technician will recover any remaining refrigerant using EPA-approved equipment. This is required by law—refrigerants like R-410A are harmful to the environment and must be captured, not released into the air. The recovery process can take 30 minutes to an hour, depending on the system size.
With the refrigerant safely removed, the technician will disconnect the suction and discharge lines from the compressor. These are typically brazed connections, so a torch is used to carefully melt the solder. The old compressor is then unbolted from its mounting bracket and removed from the unit.
Before installing the new compressor, the technician will inspect the surrounding components. They’ll check the condenser coil, fan motor, and electrical panel for damage. If the compressor failed due to a system-wide issue—like a refrigerant leak or electrical surge—those problems must be fixed first to avoid damaging the new compressor.
Installing the New Compressor
The new compressor is then mounted in place and secured with bolts. The refrigerant lines are reconnected using a torch to braze them securely. Proper alignment and clean joints are essential to prevent leaks.
Once the lines are connected, the system is pressurized with nitrogen to test for leaks. The technician will use a leak detector to ensure all connections are tight. If no leaks are found, the system is evacuated using a vacuum pump to remove any moisture and air. This step is critical—moisture in the system can cause acid formation and damage the new compressor.
After evacuation, the technician will recharge the system with the correct type and amount of refrigerant. For most modern Carrier units, this is R-410A. The charge must be precise—too little or too much can affect performance and efficiency.
Finally, power is restored, and the system is tested. The technician will monitor temperature drops, airflow, and electrical draw to ensure everything is working correctly. They’ll also check for proper cycling and listen for unusual noises.
Post-Installation Checks
A good technician won’t just leave after installation. They’ll explain what was done, provide documentation, and offer maintenance tips. They may also recommend a follow-up visit in a few weeks to ensure the system is running smoothly.
Keep in mind that replacing the compressor doesn’t always mean the job is done. If the failure was caused by a dirty coil or low refrigerant, those issues should be addressed to prevent future problems. Some technicians also recommend replacing the filter drier—a small component that removes moisture from the refrigerant—to protect the new compressor.
Cost of Replacing a Carrier Air Conditioner Compressor
The cost of replacing a Carrier air conditioner compressor can vary widely, but most homeowners can expect to pay between $1,200 and $3,500. Several factors influence the final price, including the model of your unit, labor rates in your area, and whether additional repairs are needed.
The compressor itself typically costs $600 to $1,500, depending on the size and type. Carrier offers different compressor models—like scroll, reciprocating, or rotary—each with different price points. Scroll compressors, which are common in newer Carrier units, tend to be more expensive but also more efficient and durable.
Labor is another major expense. HVAC technicians charge $100 to $200 per hour, and compressor replacement can take 4 to 8 hours. That means labor alone can add $400 to $1,600 to your bill. In areas with high demand or limited technicians, prices may be higher.
Additional Costs to Consider
Beyond the compressor and labor, there are other potential costs. Refrigerant recharge can add $100 to $300, depending on the type and amount needed. If the system has a leak, repairing it will cost extra—possibly $200 to $500 for locating and sealing the leak.
You might also need to replace related components. A new filter drier costs $50 to $100, and a hard start kit (which helps the compressor start more easily) runs $100 to $200. If the capacitor or contactor is damaged, those parts add another $50 to $150.
Warranty and Savings Opportunities
One way to reduce costs is through warranty coverage. Carrier offers extended warranties on compressors, often covering 5 to 10 years. If your unit is still under warranty, the compressor replacement may be free or heavily discounted—you’ll just pay for labor.
Check your original purchase paperwork or contact Carrier customer service to verify coverage. Even if the warranty has expired, some parts may still be covered if the failure is due to a manufacturing defect.
Another option is to finance the repair. Many HVAC companies offer payment plans or work with third-party lenders to spread the cost over several months. This can make a large expense more manageable.
When Replacement Isn’t the Best Option
In some cases, replacing the compressor isn’t the most cost-effective choice. If your Carrier unit is over 15 years old, the rest of the system may be nearing the end of its life. Replacing just the compressor could lead to more repairs down the road.
At that point, investing in a new, energy-efficient Carrier system might save you money in the long run. Newer models use less electricity, have better warranties, and come with advanced features like smart thermostats and variable-speed compressors. Plus, you’ll get a fresh start with a system designed to last another 15 to 20 years.
DIY vs. Professional Compressor Replacement: What You Need to Know
You might be tempted to replace the compressor yourself to save money, but this is one repair where DIY can backfire—literally and figuratively. Compressor replacement involves high-voltage electricity, pressurized refrigerants, and precise technical steps. One mistake can lead to injury, system damage, or even void your warranty.
Why DIY Is Risky
First, handling refrigerants requires EPA Section 608 certification. It’s illegal for uncertified individuals to buy or handle refrigerants like R-410A. Even if you could get the refrigerant, releasing it into the atmosphere is a federal offense with hefty fines.
Second, electrical work on HVAC systems is dangerous. Compressors run on 240 volts, and improper wiring can cause shocks, fires, or damage to the unit. Without proper training, it’s easy to miswire connections or overlook safety steps.
Third, the physical installation requires specialized tools—like a vacuum pump, torch, and manifold gauge set. These aren’t things you’d have in a typical home toolbox. Renting or buying them just for one job isn’t cost-effective.
When Professional Help Is Essential
A licensed HVAC technician has the training, tools, and experience to do the job safely and correctly. They know how to recover refrigerant, braze lines, evacuate the system, and charge it properly. They also understand Carrier’s specific designs and can ensure compatibility with your model.
Moreover, professionals offer warranties on their work. If something goes wrong after installation, they’ll come back and fix it at no extra cost. That peace of mind is worth the investment.
If you’re handy and want to help, there are still ways to assist. You can clean the outdoor unit, replace air filters, or keep the area clear. But leave the compressor replacement to the experts.
Conclusion: Making the Right Decision for Your Home
Replacing a Carrier air conditioner compressor is a significant but sometimes necessary step to restore your home’s cooling. While the process is complex and costly, understanding the signs, causes, and options can help you make an informed decision.
Early detection is key. If you notice warm air, strange noises, or frequent cycling, don’t ignore them. Call a professional to diagnose the issue before it worsens. Regular maintenance can prevent many compressor failures, so stay on top of tune-ups and filter changes.
When replacement is needed, work with a trusted Carrier-certified technician. They’ll ensure the job is done right, safely, and in compliance with environmental regulations. And always consider your unit’s age—sometimes, upgrading to a new system is the smarter long-term investment.
With the right care and attention, your Carrier AC can keep you cool for many summers to come.
Frequently Asked Questions
How long does a Carrier air conditioner compressor last?
Most Carrier compressors last 10 to 15 years with proper maintenance. Factors like climate, usage, and upkeep can affect lifespan. Regular tune-ups help extend its life.
Can I replace just the compressor, or do I need a new AC unit?
You can replace just the compressor, but if your unit is over 15 years old or has other issues, a full system replacement may be more cost-effective and efficient.
Is it legal for homeowners to replace their own AC compressor?
While you can physically replace the compressor, handling refrigerants requires EPA certification. It’s illegal and unsafe for uncertified individuals to do so.
How much does it cost to replace a Carrier compressor?
Expect to pay $1,200 to $3,500, including parts and labor. Costs vary by model, location, and whether additional repairs are needed.
What causes a Carrier compressor to fail?
Common causes include lack of maintenance, electrical issues, refrigerant leaks, overheating, and age. Preventive care can reduce the risk of failure.
Will my warranty cover compressor replacement?
Carrier often covers compressors under extended warranties for 5–10 years. Check your paperwork or contact Carrier to verify coverage and avoid unnecessary costs.