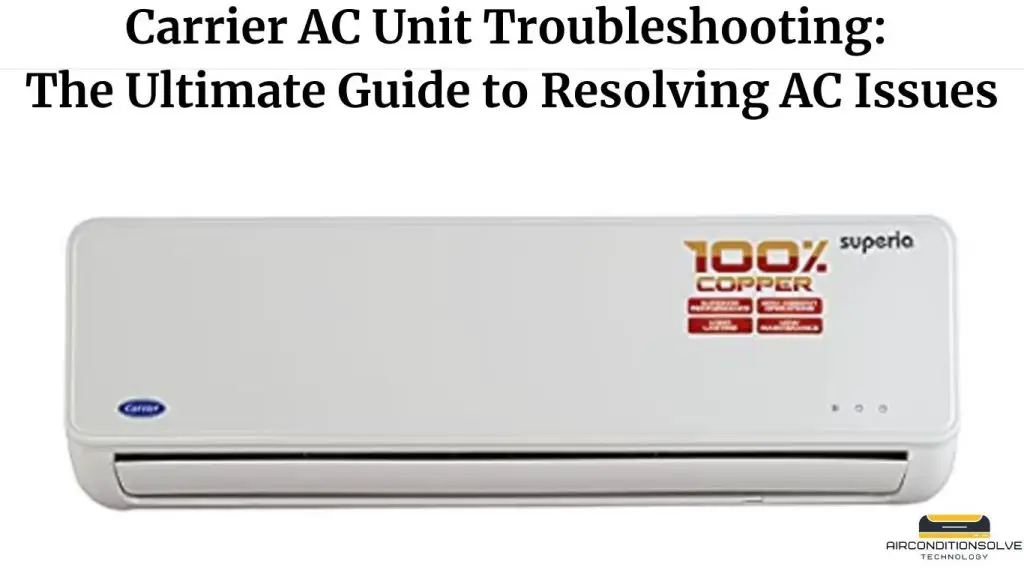
Carrier AC unit troubleshooting can be done by checking for power issues and ensuring proper airflow. In order to troubleshoot a Carrier AC unit, it is important to address any power problems and make sure that there is adequate airflow in the system.
Diagnosing Ac Issues
When your Carrier AC unit encounters problems, it can be frustrating and inconvenient, especially during hot summer months. However, understanding the signs and symptoms of a malfunctioning AC unit is the first step in diagnosing and resolving any issues. In this section, we will explore common AC problems and how to identify them.
Symptoms Of A Malfunctioning Ac Unit
Before diving into troubleshooting, it is essential to be aware of the signs that your Carrier AC unit may be experiencing difficulties. By recognizing these symptoms, you can quickly address the problem, preventing further damage and ensuring your AC unit operates efficiently.
Strange Noises
Unusual sounds coming from your AC unit can indicate various issues. If you notice vibrating, grinding, squealing, or banging noises, it is crucial to identify and address the underlying problem. These noises could stem from loose or damaged parts, a worn-out compressor, or a faulty motor. Ignoring such sounds can lead to more significant problems and potentially cause your AC unit to fail completely.
Insufficient Cooling
If your AC unit is running but not providing adequate cooling, it may indicate an underlying problem. This issue can result from a range of factors, such as a clogged air filter, low refrigerant levels, or a malfunctioning thermostat. It is important to address this problem promptly to maintain a comfortable indoor environment and prevent unnecessary energy consumption.
Frequent On/off Cycles
Does your AC unit constantly turn on and off? This frequent cycling, known as short cycling, can be a sign of an issue. It may be caused by a dirty or blocked air filter, an oversized unit, or a faulty thermostat. Short cycling not only reduces the efficiency of your AC system but also puts excessive strain on the components, potentially leading to premature wear and tear.
By paying attention to these signs and symptoms, you can detect potential issues with your Carrier AC unit before they become major problems. In the next section, we will delve into troubleshooting these problems and explore possible solutions.

Understanding Your Carrier Ac Unit
Get a better understanding of troubleshooting your Carrier AC unit with these helpful tips. Easily identify and fix common issues to keep your AC running smoothly.
Understanding Your Carrier AC Unit
When it comes to troubleshooting your Carrier AC unit, having a basic understanding of its components is essential. By familiarizing yourself with the key parts of your unit, you can identify potential issues and communicate more effectively with HVAC professionals. In this section, we will explore three crucial components of a Carrier AC unit: the condenser unit, evaporator coil, and air handler.
Components Of A Carrier Ac Unit
The Carrier AC unit is a complex system that consists of several vital components working together to keep your home cool and comfortable. Understanding the role of each component is crucial for troubleshooting potential problems. Let’s take a closer look at each of these components:
Condenser Unit
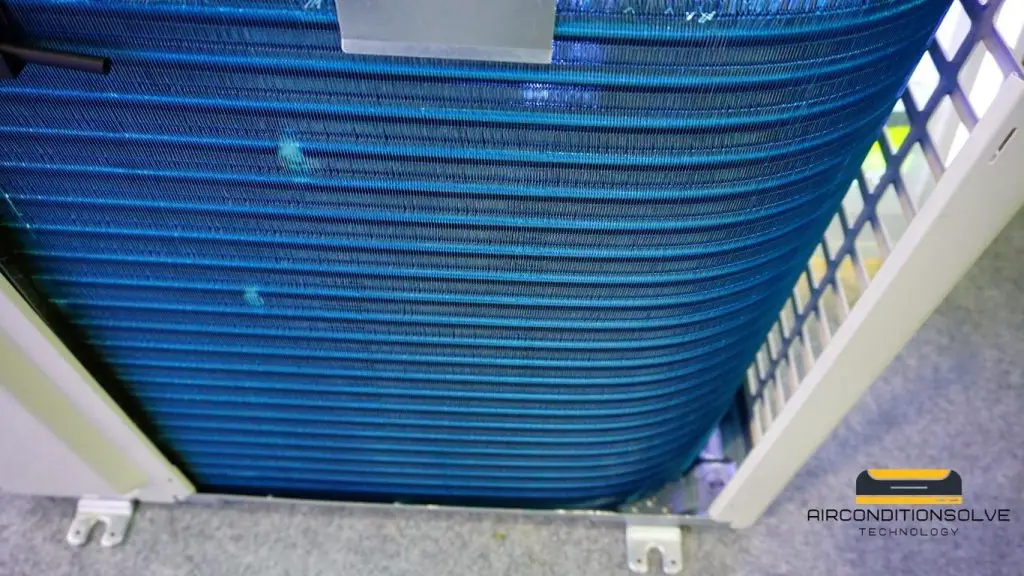
The condenser unit is an essential part of your Carrier AC system and is typically located outside your home. It plays a pivotal role in the refrigeration cycle by transferring heat from indoors to the outdoors. The condenser unit contains a compressor, condenser coil, and a fan. The compressor pressurizes the refrigerant, while the condenser coil removes heat from the refrigerant, converting it from a high-pressure gas to a high-pressure liquid. The fan facilitates heat dissipation by blowing air across the condenser coil. Any issues with the condenser unit can significantly impact the cooling efficiency of your AC system.
Evaporator Coil
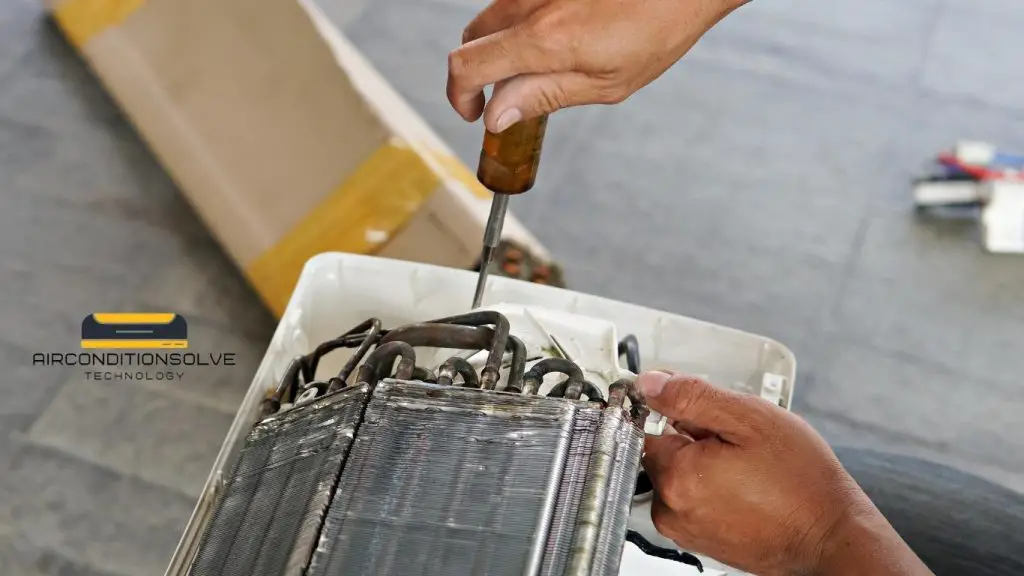
Inside your home, the evaporator coil works alongside the condenser unit to remove heat and humidity from the air. It is typically located in the air handler or furnace and is responsible for cooling and dehumidifying the air before it is circulated throughout your home. As the refrigerant flows through the evaporator coil, it absorbs heat from the indoor air, cooling it in the process. Any restrictions or malfunctions with the evaporator coil can affect the cooling capacity and efficiency of your AC unit.
Air Handler
The air handler is the central component of your Carrier AC system, responsible for distributing the cooled air throughout your home. It typically consists of a blower motor, evaporator coil, and filter. The blower motor circulates air through the ductwork, pushing it over the evaporator coil to be cooled. The filter ensures that the air circulated is clean and free from dust and allergens. If the blower motor or filter becomes clogged or damaged, it can affect the air quality and cooling performance of your AC unit.
Understanding the key components of your Carrier AC unit is crucial for effective troubleshooting. By familiarizing yourself with the condenser unit, evaporator coil, and air handler, you can diagnose potential problems and communicate effectively with HVAC professionals. Regular maintenance and care of these components can help prolong the lifespan of your AC unit and ensure optimal performance.
Resolving Airflow Issues
Having trouble with your Carrier AC unit? Resolve airflow issues quickly with our expert troubleshooting tips. Improve your unit’s performance and enjoy a comfortable living space.
Resolving Airflow Issues
If you’re experiencing poor airflow from your Carrier AC unit, it can make your home uncomfortable and affect your energy efficiency. Resolving airflow issues is crucial to ensure your system operates optimally. In this section, we will look at two common factors that can contribute to airflow problems and how to address them effectively.
Checking And Cleaning The Air Filter
A clogged or dirty air filter is one of the primary culprits when it comes to restricted airflow in your Carrier AC unit. Over time, dust, debris, and pet dander can accumulate on the filter, obstructing the airflow and reducing its efficiency. To resolve this issue, follow these steps:
- Locate the air filter in your Carrier AC unit.
- Carefully remove the filter from its housing using the designated tab or handle. Refer to your unit’s manual if you’re unsure of the exact location.
- Inspect the filter for any visible dirt, dust, or debris. If you notice a significant buildup, it’s time for a cleaning or replacement.
- If the filter is washable, gently rinse it with water until the water runs clear. Allow the filter to dry completely before placing it back into the unit. If the filter is disposable, replace it with a new one.
- Ensure the filter is properly seated in the unit, and the housing is securely closed.
Regularly checking and cleaning or replacing your air filter every one to three months (depending on usage) will help maintain optimal airflow and improve the overall efficiency of your Carrier AC unit.
Clearing Obstructions In The Air Vents
In addition to a dirty air filter, obstructions in the air vents can also restrict the airflow from your Carrier AC unit. Objects like furniture, curtains, or even debris in the vents can impede the air from circulating properly. Here are steps you can take to clear any obstructions:
- Inspect each vent in your home and ensure they are not blocked by any objects. Move furniture or any other items obstructing the vents to allow for unrestricted airflow.
- Check for any visible debris or dust accumulation in the vents. If you notice any, use a vacuum cleaner or a soft brush to gently remove the obstructions.
- Ensure that the vent covers are free from dust and fully open.
To optimize airflow and prevent future obstructions, it’s important to regularly clean both the interior and exterior vent covers.
By regularly checking and cleaning the air filter as well as clearing obstructions in the air vents, you can effectively resolve airflow issues in your Carrier AC unit. Maintaining proper airflow not only improves the comfort of your home but also helps your system operate efficiently, resulting in energy savings and increased longevity.
Fixing Cooling Problems
Are you experiencing issues with your Carrier AC unit not cooling your home effectively? Don’t worry, we’ve got you covered. In this section, we will guide you through some troubleshooting steps to help you identify and fix common cooling problems with your Carrier AC unit.
Inspecting And Cleaning The Condenser Coils
One of the main culprits behind poor cooling performance is dirty condenser coils. Over time, these coils can accumulate dirt, dust, and debris, hindering the heat exchange process and reducing the efficiency of your AC unit. To inspect and clean the condenser coils, follow these simple steps:
- Turn off the power supply to your AC unit.
- Locate the condenser unit, which is usually situated outside your home.
- Remove any leaves, grass, or debris from the surrounding area to ensure proper airflow.
- Carefully remove the outer cover of the condenser unit.
- Inspect the coils for any visible dirt or debris.
- Using a soft brush or a vacuum cleaner with a brush attachment, gently clean the coils, taking care not to damage them.
- Once the coils are clean, reattach the outer cover and restore power to your AC unit.
Checking And Adjusting Thermostat Settings
The thermostat settings play a crucial role in maintaining the desired temperature in your home. Incorrect settings can lead to inadequate cooling or excessive energy consumption. To check and adjust the thermostat settings:
- Ensure the thermostat is set to the cooling mode.
- Check the temperature setting and lower it by a few degrees to see if it improves the cooling performance.
- Make sure the thermostat is not exposed to direct sunlight or any heat sources that may affect its accuracy.
- If you have a programmable thermostat, double-check the programmed schedule and settings to ensure they align with your preferences.
- If your thermostat uses batteries, inspect and replace them if necessary.
By inspecting and cleaning the condenser coils and checking and adjusting the thermostat settings, you can address common cooling problems with your Carrier AC unit. However, if the issues persist, it’s recommended to seek professional help from a certified HVAC technician to avoid further damage or potential safety hazards.
Addressing Electrical And Wiring Problems
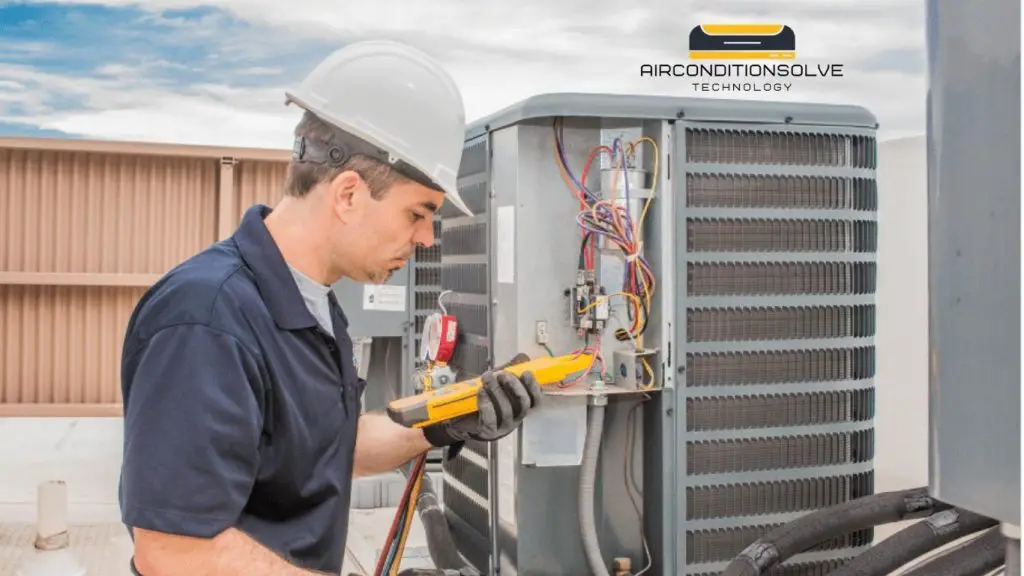
The electrical and wiring components of your Carrier AC unit are crucial for its proper functioning. However, over time, these components may develop faults that can disrupt the cooling performance of your unit. In this section, we will discuss how to troubleshoot faulty electrical connections and replace defective capacitors in order to maintain the efficiency of your air conditioning system.
Troubleshooting Faulty Electrical Connections
Faulty electrical connections can cause your Carrier AC unit to malfunction or even stop working completely. It is important to know how to identify and address these issues to prevent any further damage. Here are some steps you can take to troubleshoot faulty electrical connections:
- Start by turning off the power to your AC unit. This can be done by switching off the circuit breaker dedicated to the air conditioner.
- Inspect the electrical connections, including the wiring, terminals, and connectors. Look for any signs of loose or frayed wires, corrosion, or burned-out components.
- If you notice any loose connections, tighten them using a screwdriver or a wrench. Make sure the connections are secure but be careful not to overtighten.
- If you find any damaged wires or connectors, they may need to be replaced. Consult a professional HVAC technician for assistance.
- After addressing the faulty electrical connections, turn the power back on and test the AC unit to see if the problem has been resolved.
Replacing Defective Capacitors
A defective capacitor can cause your Carrier AC unit to have trouble starting or running efficiently. If you suspect that a capacitor is faulty, follow these steps to replace it:
- First, make sure the power to your AC unit is turned off.
- Locate the capacitor, which is usually a cylindrical or oval-shaped component with two or three terminals.
- Take note of the wiring connections before removing the faulty capacitor to ensure proper installation of the new one.
- Using a screwdriver or pliers, carefully disconnect the wires from the defective capacitor.
- Remove the old capacitor and replace it with a new one of the same specifications.
- Reconnect the wires to the corresponding terminals of the new capacitor, following the notes you took earlier.
- Double-check all connections to ensure they are secure.
- Turn the power back on and test the AC unit to see if the issue has been resolved.
By troubleshooting faulty electrical connections and replacing defective capacitors, you can address common electrical and wiring problems that may arise with your Carrier AC unit. However, if you are unsure about any aspect of the troubleshooting or replacement process, it is recommended to seek the assistance of a qualified HVAC technician to avoid further complications.
Identifying Refrigerant Leaks
Refrigerant leaks can cause a number of issues with your Carrier AC unit. If left unchecked, these leaks can lead to decreased cooling performance, increased energy consumption, and potential damage to the system. Identifying and repairing refrigerant leaks is crucial to maintaining the optimal functionality and efficiency of your AC unit. In this section, we will discuss the signs of a refrigerant leak and how to locate and repair it.
Signs Of A Refrigerant Leak
It is important to be aware of the signs that indicate a refrigerant leak in your Carrier AC unit. By recognizing these signs early on, you can prevent further damage and avoid costly repairs. Here are some common symptoms of a refrigerant leak:
- Decreased cooling performance: If you notice that your AC unit is not cooling your space as effectively as it used to, it may be a sign of a refrigerant leak. Low refrigerant levels can hinder the cooling process and result in warmer indoor temperatures.
- Ice on the evaporator coil: When refrigerant leaks, it can cause the evaporator coil to freeze. If you see ice buildup on the coil, it is a strong indication of a leak.
- Hissing or bubbling sounds: If you hear hissing or bubbling sounds coming from your AC unit, it may be due to a refrigerant leak. These sounds occur when the refrigerant escapes from the system.
- Frequent cycling: A refrigerant leak can cause your AC unit to cycle on and off more frequently. This can put additional strain on the system and lead to increased energy consumption.
- Higher utility bills: If you have noticed a sudden increase in your monthly energy bills without any apparent reason, it could be a result of a refrigerant leak. Leaks can cause your AC unit to work harder and consume more energy to maintain the desired temperature.
Locating And Repairing The Leak
Identifying the exact location of a refrigerant leak is crucial for effective repairs. Here are the steps to locate and repair a refrigerant leak in your Carrier AC unit:
- Inspect the refrigerant lines: Start by visually inspecting the refrigerant lines for any signs of oil stains or residue. These can indicate a leak.
- Check the fittings: Examine the fittings and connections of the refrigerant lines for any signs of damage, such as cracks or looseness. Tighten or replace any damaged fittings.
- Use a leak detector: To pinpoint the exact location of the leak, use an electronic leak detector or a bubble solution. Apply the solution or the detector near the suspected areas and observe for any bubble formation or the detector’s alarm.
- Repair the leak: Once you have identified the leak, it’s time to repair it. The method of repair will depend on the size and location of the leak. Small leaks can often be fixed by using an epoxy sealant or a refrigerant leak repair kit. For larger leaks, it is recommended to seek professional assistance.
- Recharge the refrigerant: After repairing the leak, it is essential to recharge the refrigerant to the appropriate level. This step should be performed by a certified HVAC technician who can ensure the correct amount of refrigerant is added.
By promptly addressing refrigerant leaks in your Carrier AC unit, you can enhance its performance, extend its lifespan, and prevent further damage. Regular maintenance and professional inspections can help detect and prevent leaks, ensuring the efficiency and longevity of your AC system.
Credit: www.ptacunits.com
Frequently Asked Questions For Carrier Ac Unit Troubleshooting
How Do I Troubleshoot My Carrier Ac Unit If It Won’t Turn On?
If your Carrier AC unit won’t turn on, check if the thermostat is set correctly and if the circuit breaker is tripped. Additionally, ensure that the air filter is clean and the condensate drain is not clogged. If the issue persists, it’s best to contact a professional HVAC technician for further troubleshooting.
What Should I Do If My Carrier Ac Unit Is Not Cooling Properly?
If your Carrier AC unit is not cooling properly, check if the air filter is dirty and clean or replace it if necessary. Ensure that the outdoor unit is clear of any debris, and make sure the thermostat is set to the desired temperature.
If the problem persists, contact a qualified technician to inspect and diagnose the issue.
Why Is My Carrier Ac Unit Making Unusual Noises?
Unusual noises from your Carrier AC unit can indicate various problems. Check if the unit’s fan blades are hitting anything, as this can cause a scraping or rattling noise. Additionally, a high-pitched whistling noise could indicate a refrigerant leak. If you’re unable to identify the cause, it’s recommended to consult with an HVAC professional for proper diagnosis and repair.
How Often Should I Clean The Air Filters In My Carrier Ac Unit?
It’s recommended to clean or replace the air filters in your Carrier AC unit every 1-2 months, or more frequently if you have pets or allergies. Regularly cleaning the air filters helps maintain proper airflow, improves indoor air quality, and ensures efficient cooling performance.
Conclusion
To troubleshoot your Carrier AC unit effectively, understanding common issues and their solutions is crucial. Remember to check the power supply, thermostat settings, and filters regularly. If your AC is still not functioning properly, contacting a professional technician is advisable.
By following these troubleshooting tips, you can maintain the longevity and efficiency of your Carrier AC unit, ensuring a cool and comfortable environment in your home or office.

