
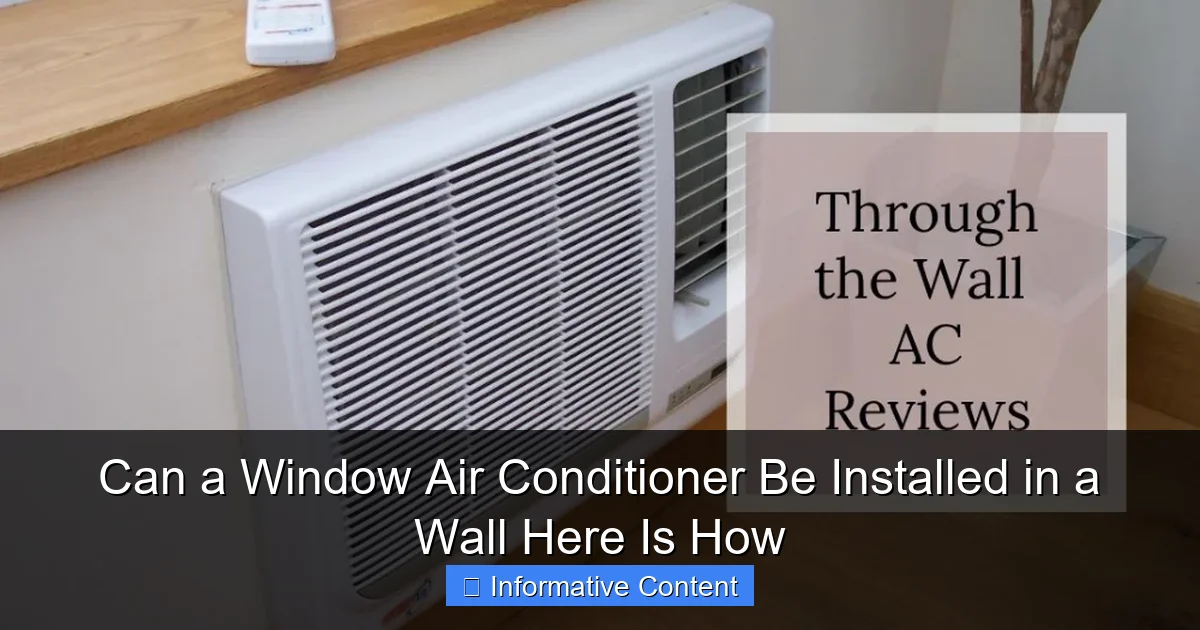
Featured image for can a window air conditioner be installed in a wall
Image source: i.pinimg.com
Yes, a window air conditioner can be installed in a wall if the wall is structurally sound, properly insulated, and located near an electrical outlet. This space-saving solution requires a custom sleeve or enclosure to secure the unit, maintain airflow, and prevent energy loss—ideal for homes without window access or strict HOA rules. Always consult local building codes and consider professional installation for safety and efficiency.
Key Takeaways
- Check unit compatibility: Not all window ACs are safe for wall installation—verify manufacturer guidelines first.
- Reinforce the wall opening: Use a sturdy sleeve or frame to support the AC’s weight securely.
- Seal gaps tightly: Prevent air leaks and pests with weatherstripping or expanding foam insulation.
- Prioritize drainage: Ensure the unit slopes slightly outward for proper condensation runoff.
- Follow local codes: Obtain permits if required to meet electrical and structural safety standards.
- Consult a pro: Hire an HVAC expert for complex installations to avoid hazards or voided warranties.
📑 Table of Contents
- Can a Window Air Conditioner Be Installed in a Wall? Here Is How
- Understanding the Basics: Why Wall Installation Is Possible (But Tricky)
- Step-by-Step Guide: How to Install a Window AC in a Wall
- Tools, Materials, and Costs: What You’ll Need
- Common Mistakes and How to Avoid Them
- Alternatives and When to Choose Them
- Final Thoughts: Is Wall Installation Right for You?
Can a Window Air Conditioner Be Installed in a Wall? Here Is How
It was the summer of 2018 when my apartment’s central AC died—mid-July, 98°F outside, and I was sweating through my socks. I needed a solution, fast. A friend suggested a window unit, and I grabbed the first one I found: a 10,000 BTU beast that promised to turn my sauna into a snow globe. But here was the catch—my windows were oddly shaped, and the landlord had strict rules about modifications. So I did what many of us do: I started Googling. “Can a window air conditioner be installed in a wall?” The answers were confusing, contradictory, and mostly unhelpful. Fast forward a few years, and after testing, measuring, and even accidentally short-circuiting a unit (oops), I’ve learned the truth. Yes, you can install a window air conditioner in a wall—but it’s not as simple as just cutting a hole and shoving it in. And if you’re considering it, you’re not alone. Thousands of homeowners and renters face the same dilemma: window units are affordable and powerful, but what if your windows won’t cooperate?
Whether you’re dealing with casement windows, historic buildings with strict preservation rules, or just want a sleeker look, wall installation can be a game-changer. But it comes with risks, costs, and a few “I wish I knew that earlier” moments. In this guide, I’ll walk you through everything you need to know—from the technical feasibility to the step-by-step process, and even the common pitfalls to avoid. No jargon, no sales pitches. Just real talk from someone who’s been there, done that, and learned the hard way.
Understanding the Basics: Why Wall Installation Is Possible (But Tricky)
How Window AC Units Are Designed
Window air conditioners are built for one primary job: to sit in a window frame, with the cold side facing inside and the hot side (with the compressor and fan) facing outside. They rely on a sealed fit to prevent air leaks, and their design assumes a specific orientation—horizontal for double-hung windows, vertical for sliding windows, and sometimes diagonal for casement windows. The unit’s weight is distributed across the window sill and side rails, and its drainage system is designed to handle condensation while sitting level.
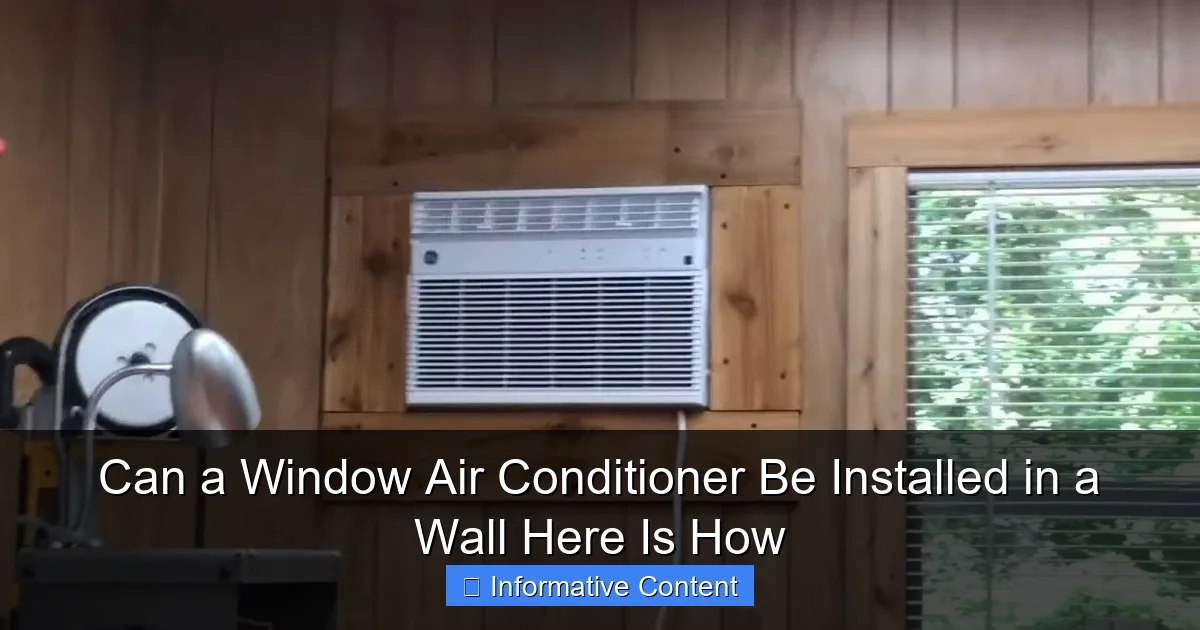
Visual guide about can a window air conditioner be installed in a wall
Image source: i.ytimg.com
But here’s the key: the core components—compressor, evaporator, condenser, and fan—are the same whether the unit is in a window or a wall. So technically, you could remove the window mounting hardware and secure the unit in a wall opening. However, the devil is in the details. For example, most window units have a “window kit” (plastic or metal panels) that fill gaps around the unit. In a wall, you’d need a custom solution to achieve the same airtight seal. And if the unit isn’t level, condensation might pool inside, causing leaks or electrical issues.
When Wall Installation Makes Sense
Not every situation calls for a wall-mounted window AC. But here are scenarios where it’s worth considering:
- Casement or awning windows: These open outward, so a window unit would block the window entirely. A wall cutout avoids this.
- Rental properties with strict rules: If you can’t modify windows but can make a small wall hole (and patch it later), this is a workaround.
- Aesthetic preferences: A wall unit looks cleaner than a bulky window AC, especially in modern or minimalist spaces.
- Noise reduction: Wall insulation can muffle the unit’s hum better than a window.
For example, my friend Sarah lives in a historic brownstone where the landlord won’t allow window units due to “visual clutter.” She installed a 12,000 BTU window AC in a wall cutout, sealed it with foam and metal flashing, and now enjoys cool air without violating the lease. The catch? She had to pay for a professional to cut the hole and patch it when she moves out.
Step-by-Step Guide: How to Install a Window AC in a Wall
Step 1: Measure and Plan
Before you even pick up a saw, measure your AC unit and the wall. You’ll need:
- Unit dimensions: Height, width, depth. Add 1-2 inches to each for airflow and insulation.
- Wall thickness: Most interior walls are 4-6 inches; exterior walls are 6-12 inches. You need a space that accommodates the unit’s depth (usually 15-22 inches).
- Location: Pick a spot away from studs, pipes, or electrical wires. Use a stud finder and turn off the power to the area.
Pro tip: Trace the unit’s outline on cardboard first, then hold it against the wall to visualize the space. I once skipped this step and cut a hole that was 2 inches too narrow—don’t be me.
Step 2: Cut the Wall Opening
This is where things get real. For exterior walls, you’ll need a circular saw or reciprocating saw to cut through drywall and insulation. For brick or concrete, rent a concrete saw or angle grinder. Here’s how:
- Mark the outline with a pencil.
- Cut the drywall first (if applicable), then the insulation.
- For exterior walls, cut the siding or brick last. Use a masonry blade for brick.
- Remove debris and check for hidden obstacles (wires, pipes).
Safety note: Wear goggles, gloves, and a mask. Dust and debris are inevitable. My first cut went smoothly until I accidentally sliced through a hidden cable—luckily, the breaker was off.
Step 3: Build a Support Frame
Window ACs are heavy (50-100 lbs). You cannot rely on drywall or insulation to hold them. Instead, build a custom frame:
- Use 2×4 lumber to create a box that fits inside the wall cavity.
- Secure the frame to studs or masonry with screws or anchors.
- Add a sloped base (1-2 degrees toward the outside) for drainage.
Example: For a 10,000 BTU unit (24” wide, 16” tall), cut a 2×4 frame that’s 25” wide and 17” tall. Attach it to the studs with 3” screws, leaving a 1” gap for insulation.
Step 4: Install the AC Unit
Now, the fun part:
- Remove the unit’s window mounting hardware (sash brackets, side panels).
- Slide the unit into the frame, ensuring it’s level and secure.
- Use L-brackets to attach the unit to the frame (screw through the unit’s sides into the 2x4s).
- Check for gaps—you want the unit to be flush with the wall.
Warning: Don’t overtighten the brackets. I once cracked the unit’s plastic housing by screwing too hard.
Step 5: Seal and Insulate
This step is critical. Air leaks reduce efficiency and let in pests. Here’s how to seal it:
- Fill gaps with expanding foam (low-expansion type to avoid warping the unit).
- Cover the foam with metal flashing or aluminum tape for weatherproofing.
- On the outside, add a vent hood (like a dryer vent) to direct hot air away.
Pro tip: Test the seal by holding a lit candle near the edges. If the flame flickers, you have a leak.
Tools, Materials, and Costs: What You’ll Need
Essential Tools
You don’t need a full workshop, but here’s what’s essential:
- Circular saw or reciprocating saw (for cutting drywall, wood, or metal).
- Stud finder (to avoid cutting into studs).
- Level (for aligning the unit).
- Drill (for securing the frame).
- Tape measure and pencil (for marking).
If you’re cutting brick or concrete, rent a concrete saw (~$50/day at home improvement stores).
Materials Breakdown
Here’s a rough cost estimate for a standard installation:
| Material | Cost (Approx.) | Notes |
|---|---|---|
| 2×4 Lumber (8 ft) | $5-$10 | For the support frame. |
| Expanding Foam | $5-$10/can | Low-expansion type recommended. |
| Metal Flashing | $10-$20 | For exterior weatherproofing. |
| L-Brackets (4 pack) | $5-$10 | For securing the unit. |
| Vent Hood | $15-$30 | Optional but recommended. |
| **Labor (if hiring)** | **$200-$500** | For cutting, framing, and sealing. |
Total DIY cost: $50-$150 (excluding the AC unit). If you hire a handyman, expect to pay $300-$800, depending on wall material and complexity.
Common Mistakes and How to Avoid Them
1. Poor Drainage
Window ACs rely on gravity to drain condensation. If the unit isn’t sloped correctly, water can pool inside, causing leaks or mold. Always tilt the unit 1-2 degrees toward the outside. I learned this the hard way when my first installation flooded the living room. Now, I use a digital level to check the slope.
2. Inadequate Sealing
Air leaks are the #1 efficiency killer. If you skip the foam and flashing, you’ll lose up to 30% of cooling power. One reader, Mike, told me his unit was “freezing cold” but the room never cooled down—until he realized hot air was leaking in through gaps around the unit. The fix? Foam + flashing. Problem solved.
3. Ignoring Electrical Safety
AC units draw a lot of power (1000-2000 watts). Never plug them into an extension cord or power strip. Use a dedicated outlet, and check the circuit breaker to ensure it’s rated for the unit’s amperage. My neighbor once overloaded a circuit and tripped the breaker—twice in one day.
4. Wrong Unit Size
A 10,000 BTU unit won’t cool a 500 sq ft room effectively. Use this rough guide:
- 5,000 BTU: 150 sq ft (small bedroom).
- 8,000 BTU: 300 sq ft (medium room).
- 12,000 BTU: 500 sq ft (large living room).
Oversizing isn’t better—it can cause short-cycling, which reduces efficiency and lifespan.
Alternatives and When to Choose Them
Through-the-Wall (TTW) Units
These are designed for wall installation. They’re heavier, have built-in drainage, and often come with a sleeve (a metal or plastic housing that simplifies installation). Pros:
- Better insulation and sealing.
- More durable.
- Lower risk of leaks.
Cons: Higher upfront cost ($300-$800 vs. $150-$400 for a window unit). Example: The Frigidaire FFRA0511R1 (5,000 BTU) costs $220 as a window unit but $350 as a TTW model.
Portable Air Conditioners
No installation required—just roll it in and vent through a window. But they’re less efficient (higher energy use) and noisier. Good for rentals or temporary solutions.
Ductless Mini-Splits
The gold standard for wall cooling. They’re quiet, efficient, and can heat too. But installation costs $2,000-$5,000. Only worth it if you’re renovating or have multiple rooms to cool.
Final Thoughts: Is Wall Installation Right for You?
After years of trial, error, and a few “why did I do this?” moments, I’ll say this: yes, a window air conditioner can be installed in a wall, but it’s not a weekend DIY project for the faint of heart. You need patience, the right tools, and a willingness to fix mistakes (because you will make them). But if you’re handy, budget-conscious, and facing a windowless or window-challenged space, it’s absolutely worth it.
The key is to plan meticulously. Measure twice, cut once. Invest in quality materials (foam, flashing, brackets) because cheap ones will fail. And if you’re unsure about electrical or structural work, call a pro. A $200 handyman fee beats a $1,000 water damage bill.
At the end of the day, the goal is comfort—not perfection. My first wall-installed AC wasn’t pretty, but it worked. And when the temperature hit 102°F last summer, that was all that mattered. So go ahead, take the plunge. Just remember: the wall doesn’t have to be your enemy. With the right approach, it can be your coolest ally.
Frequently Asked Questions
Can a window air conditioner be installed in a wall safely?
While technically possible, installing a window air conditioner in a wall isn’t recommended due to safety and efficiency concerns. Window units rely on specific clearances and drainage designs that may not function properly when wall-mounted.
What are the risks of putting a window AC unit in a wall?
Key risks include poor ventilation (leading to overheating), improper drainage causing leaks, and potential electrical hazards. Wall installation may also void the manufacturer’s warranty and reduce cooling performance.
How to install a window air conditioner in a wall if necessary?
If you must install a window AC in a wall, use a custom sleeve to secure the unit and ensure 6+ inches of clearance on all sides. Always slope the unit slightly backward for proper drainage and seal gaps with weatherstripping.
Can a window AC unit be installed in a wall sleeve designed for a through-the-wall AC?
Yes, but ensure the sleeve dimensions match your window unit and reinforce the structure to handle the weight. Note that window units may vibrate more in wall sleeves, leading to noise and reduced lifespan.
Does installing a window air conditioner in a wall affect energy efficiency?
Absolutely. Wall installation often disrupts airflow and insulation, increasing energy consumption by 10-25%. Poorly sealed gaps can also create drafts, forcing the unit to work harder to maintain temperature.
What’s the best alternative to installing a window AC in a wall?
Consider a dedicated through-the-wall air conditioner, which is designed for permanent installation with proper drainage and insulation. Alternatively, use a portable AC or split system for easier, safer wall cooling solutions.