
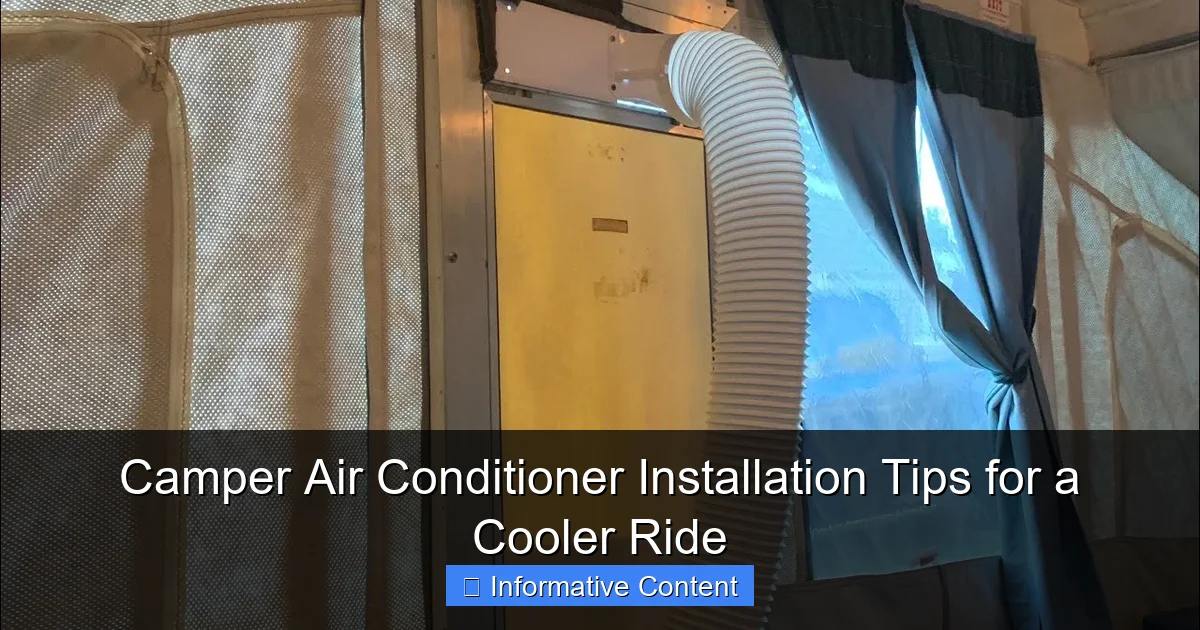
Featured image for camper air conditioner installation
Image source: i.ytimg.com
Proper camper air conditioner installation starts with choosing the right unit size and roof vent compatibility to ensure maximum cooling efficiency and energy savings. Always secure the AC unit with manufacturer-recommended mounting hardware and seal all gaps with high-quality butyl tape to prevent leaks and vibrations. Follow the wiring instructions carefully and consider professional help if unsure—safety and performance depend on precise setup.
Key Takeaways
- Choose the right AC unit: Match size and type to your camper’s needs.
- Inspect roof integrity first: Ensure it can support the AC’s weight securely.
- Seal all connections tightly: Prevent leaks and improve cooling efficiency.
- Follow wiring diagrams exactly: Avoid electrical hazards and system failures.
- Test before finalizing: Run the unit to check for issues early.
- Use professional help if unsure: Safety and performance depend on correct installation.
📑 Table of Contents
- Why Installing a Camper Air Conditioner Is Worth the Effort
- Choosing the Right Air Conditioner for Your Camper
- Preparing Your Camper for Installation
- Step-by-Step Installation Guide
- Common Installation Mistakes and How to Avoid Them
- Maximizing Cooling Efficiency After Installation
- Data Table: Popular Camper AC Units Compared
- Final Thoughts: Enjoy a Cooler, More Comfortable Adventure
Why Installing a Camper Air Conditioner Is Worth the Effort
Let’s face it—summer road trips are magical until the inside of your camper starts feeling like a sauna. You’re sweating before you even finish making your morning coffee. That’s when you realize: it’s time to install a camper air conditioner. I’ve been there—sitting in my pop-up camper at 8 a.m., already drenched, wondering why I thought a fan and a prayer would cut it.
But here’s the good news: installing an air conditioner in your camper isn’t just possible—it’s one of the best upgrades you can make for comfort, sleep quality, and overall enjoyment. Whether you’re a weekend warrior or a full-time RVer, a properly installed AC unit can transform your rig from a hot box into a cool oasis. The key? Doing it right the first time. I’ve made mistakes (hello, misaligned roof unit that leaked during a thunderstorm), and I’ve learned from them. In this guide, I’ll walk you through everything you need to know about camper air conditioner installation—from choosing the right unit to sealing it properly and keeping it running smoothly.
Choosing the Right Air Conditioner for Your Camper
Types of Camper Air Conditioners
Before you even think about drilling a hole in your roof, you need to pick the right type of AC unit. Not all air conditioners are created equal, and what works for a 40-foot motorhome might be overkill—or underpowered—for a 16-foot travel trailer.
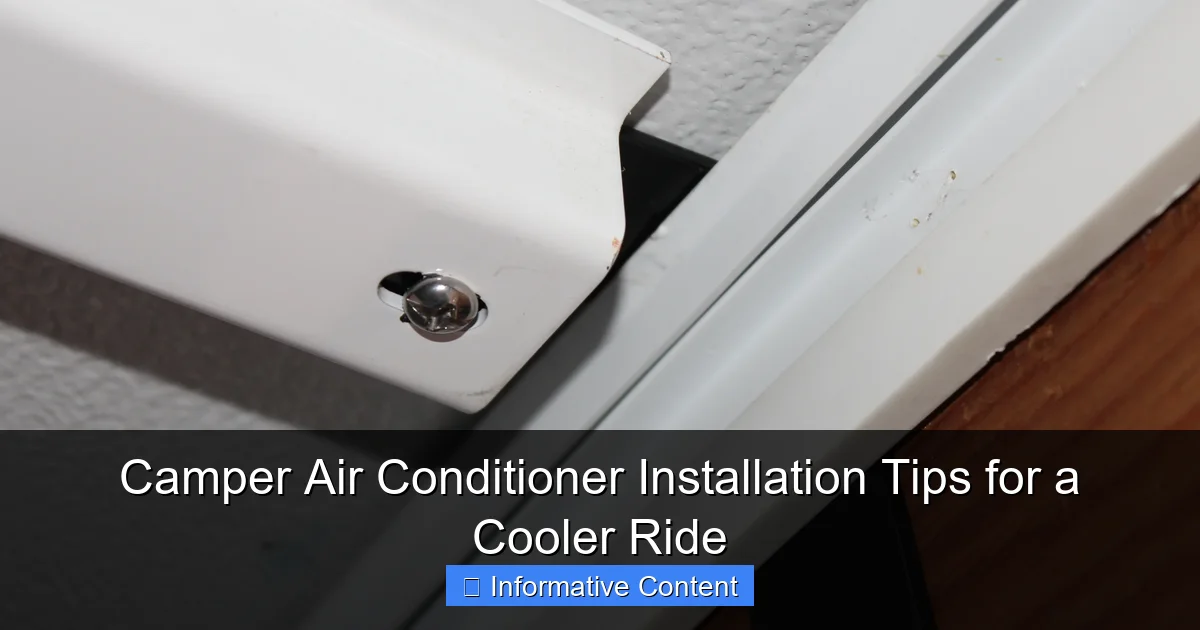
Visual guide about camper air conditioner installation
Image source: wikihow.com
Here are the main types you’ll come across:
- Roof-Mounted Units: The most common choice for RVs. They sit on top of your roof and connect to your existing ductwork (or a custom system). Brands like Dometic, Furrion, and Coleman dominate this space. These are great for larger campers with ducted systems.
- Portable AC Units: These sit inside your camper and vent hot air out a window or door. They’re ideal for pop-ups, teardrops, or older campers without roof space. They’re easier to install (no roof work!) but take up floor space and need a power source.
- Window or Wall Units: Rare in campers, but possible if you have a flat, sturdy wall and access to outside. They’re more common in converted vans or DIY builds. Less efficient than roof units but can be a budget-friendly option.
- Ducted vs. Non-Ducted: Ducted units push cool air through vents in multiple rooms. Non-ducted units blow air directly into one area. Most modern campers are designed for ducted systems, but if yours isn’t, you can still make it work with a non-ducted unit and some smart venting.
When I first upgraded my 24-foot travel trailer, I went with a 13,500 BTU roof-mounted Dometic Penguin II. Why? It fit the pre-cut roof opening, matched my existing ductwork, and had a low-profile design that didn’t catch wind on the highway. That was the right call. But I’ve also used a portable unit in my teardrop camper—worked great for short trips, but not ideal for week-long adventures in 95°F heat.
Matching BTU to Your Camper Size
BTU (British Thermal Unit) measures cooling power. Too low, and your AC will struggle. Too high, and you’ll waste power, create humidity issues, and possibly freeze the evaporator coils.
Here’s a rough guide:
- 10–15 ft camper: 5,000–8,000 BTU
- 16–25 ft camper: 10,000–13,500 BTU
- 26–35 ft camper: 13,500–15,000 BTU
- 36+ ft camper: 15,000+ BTU (or dual units)
But size isn’t the only factor. Sun exposure, insulation quality, and ceiling height matter too. My camper has large windows and poor insulation, so I went with 13,500 BTU instead of the 10,000 BTU that might “technically” fit. It makes a huge difference on sunny days.
Power Requirements and Compatibility
Most RV air conditioners run on 120V AC power and draw 10–15 amps. That means you’ll need:
- A dedicated circuit (don’t share with the fridge or microwave)
- At least a 30-amp shore power connection (or a 3,000-watt generator if boondocking)
- Proper wiring from your breaker panel to the AC location
Check your camper’s electrical panel. If you’re installing a new AC, you may need to upgrade your wiring or add a new breaker. I learned this the hard way when I tried running my AC and microwave at the same time—tripped the main breaker and lost power for an hour. Not fun in 90°F weather.
Preparing Your Camper for Installation
Assessing Your Roof and Structure
Before you buy or install anything, inspect your roof. Is it flat? Is it reinforced? Is there a pre-cut hole?
- Pre-Cut Openings: Many modern campers come with a 14” x 14” roof opening already cut. If you have this, installation is much easier. Just make sure it’s not blocked by a vent, antenna, or solar panel.
- No Pre-Cut: You’ll need to measure, mark, and cut a hole. This is doable, but you’ll need a jigsaw, a steady hand, and a good understanding of your roof structure. Cutting through a support beam? Big mistake. Always check your roof framing diagram (often in the owner’s manual).
- Roof Material: Most campers have aluminum or fiberglass roofs. Aluminum is easier to cut and seal. Fiberglass requires more care—use a fine-tooth blade and go slow to avoid cracking.
When I installed my second AC (a backup unit for my motorhome), I found the roof was slightly warped near the front. I had to add shims to level the base plate. Without that, the unit would’ve leaked every time it rained. Always check for flatness with a level before mounting.
Gathering the Right Tools and Materials
You don’t need a full garage, but you do need the right gear. Here’s what I keep in my RV AC toolkit:
- Drill with 1/8” and 3/8” bits
- Jigsaw with fine-tooth blade (for cutting roof)
- Socket wrench set
- Silicone sealant (non-hardening, UV-resistant—like Dicor Self-Leveling Lap Sealant)
- Butyl tape (for sealing between the AC base and roof)
- Measuring tape and marker
- Level
- Vacuum (to clean up metal shavings and debris)
- Safety gear: gloves, goggles, knee pads
Pro tip: Buy extra butyl tape. It’s cheap, and you’ll need it for resealing later. I always keep a roll in my toolbox.
Checking Electrical and Ventilation Access
You’ll need to run power to your AC unit. Most roof units connect to a 120V circuit inside the camper. If you’re replacing an old AC, the wiring is probably already there. If not, you may need to run a new cable from your electrical panel to the roof.
Also, check your ceiling for:
- Access to wiring (remove interior ceiling panels if needed)
- Existing ductwork (if installing a ducted unit)
- Clear path for condensation drain (most ACs have a small hose that drains outside)
I once tried installing an AC in a vintage camper with no ductwork. I ended up using flexible aluminum ducting and custom vents. It worked, but it wasn’t pretty. If you’re doing a retrofit, plan your vent layout carefully.
Step-by-Step Installation Guide
Step 1: Turn Off Power and Remove Old Unit (If Applicable)
Safety first. Turn off your main power supply at the breaker. If you’re replacing an old AC, disconnect the wiring and remove the old unit. Use a helper—roof units can weigh 70+ pounds.
Inspect the old sealant. If it’s cracked or brittle, scrape it off completely. Clean the roof surface with isopropyl alcohol to remove grease and dirt. This ensures a good bond for your new sealant.
Step 2: Position and Mark the New AC
Place the AC base plate on the roof. Use the manufacturer’s template (included in the box) to mark the hole. Double-check measurements—once you cut, there’s no going back.
Make sure the unit is centered and level. Use a level on the base plate. If your roof isn’t flat, shim it now. I use small pieces of rubber or wood under the corners to level the base.
Step 3: Cut the Roof Opening
Drill a starter hole inside your marked area. Use your jigsaw to cut along the lines. Go slowly—especially on fiberglass. Remove the cut-out piece and vacuum up debris.
Check the opening from inside the camper. Make sure you can access the wiring and duct connections. If you hit a support beam, stop and reposition. You may need to notch it slightly, but never cut it entirely.
Step 4: Install Butyl Tape and Mount the Base
Apply a 1/4” bead of butyl tape around the perimeter of the roof opening. This creates a flexible, waterproof seal between the base and roof. Don’t use silicone here—it can crack and leak over time.
Lower the AC base into place. Align it carefully. Secure it with the included screws (usually 6–8). Don’t overtighten—this can warp the base or crack the roof.
Step 5: Connect Electrical and Ductwork
Inside the camper, connect the AC’s power cable to your breaker panel. Use wire nuts and electrical tape. If you’re unsure, hire an electrician. Bad wiring can cause fires.
For ducted units, connect the AC’s air plenum to your existing ducts using foil tape or clamps. For non-ducted units, install the air distribution box and vents. Make sure all connections are tight—air leaks reduce efficiency.
Step 6: Seal and Test
Apply self-leveling sealant around the outside of the base plate. Smooth it with a putty knife. Let it cure for 24 hours.
Turn on the power. Test the AC at different fan speeds and cooling modes. Listen for unusual noises. Check for air leaks at vents. Feel the air—it should be cool and consistent.
If you notice condensation dripping inside, check the drain hose. It should slope downward and exit through the roof or side of the camper.
Common Installation Mistakes and How to Avoid Them
Leaking Roof Seals
Leaks are the #1 problem with camper AC installations. They usually happen because:
- Old sealant wasn’t removed
- Butyl tape was skipped or applied incorrectly
- Sealant was applied in cold or wet weather (it won’t cure)
- Unit wasn’t level, causing water to pool
To avoid this: always clean the roof, use butyl tape + sealant, and install on a dry, warm day. I learned this after my first AC leaked during a storm—water dripped right onto my bed. Not cool.
Incorrect BTU or Poor Airflow
An undersized AC will run constantly and never cool your camper. An oversized one will cool quickly but create humidity and freeze up.
Solution: size correctly, and ensure proper airflow. Keep vents unobstructed. Close windows and blinds during the day. Use reflective window covers. I use Reflectix on my windows—cuts heat gain by 40%.
Electrical Overload
Running your AC with other high-draw appliances (microwave, coffee maker, space heater) can trip breakers. This is especially common on 30-amp systems.
Tip: use an energy monitor (like a SmartPlug or EMS) to track usage. Avoid using multiple big appliances at once. I run my AC in the morning, then switch to battery power for coffee and toast.
Ignoring Maintenance Needs
Even a perfectly installed AC needs care. Filters get clogged. Coils get dirty. Seals degrade.
Maintenance checklist:
- Clean or replace filters every 2–4 weeks
- Wipe down coils annually (use a soft brush and coil cleaner)
- Check and reseal roof connections every 2 years
- Inspect drain hose for clogs
I clean my AC filters every time I camp. It takes 5 minutes and keeps airflow strong.
Maximizing Cooling Efficiency After Installation
Insulation and Heat Management
Your AC works harder if your camper is hot. Improve insulation:
- Add reflective window covers
- Use insulated curtains
- Install roof vent covers (like MaxxAir) to let hot air escape
- Park in the shade when possible
I park under trees whenever I can. Even an hour of shade makes a difference.
Smart Use of Thermostat and Settings
Don’t set your AC to 65°F and expect instant results. That’s inefficient and can freeze the coils. Instead:
- Set it to 72–75°F
- Use “auto” fan mode to save energy
- Pre-cool your camper before bed
- Turn it off when you leave for the day
I use a programmable thermostat. It cools to 72°F by bedtime, then turns off overnight. My camper stays cool, and I save power.
Ventilation and Airflow
Good airflow prevents hot spots. Use fans to circulate air. Open interior doors. Keep vents clear of furniture.
I have a small 12V fan in my bedroom that runs all night. It pushes cool air from the AC vent to the far corners. Works like a charm.
Data Table: Popular Camper AC Units Compared
| Model | Type | BTU | Voltage | Weight (lbs) | Noise Level (dB) | Best For |
|---|---|---|---|---|---|---|
| Dometic Penguin II | Roof-Mounted, Ducted | 13,500 | 120V | 85 | 60 | Mid-size to large campers |
| Furrion Chill | Roof-Mounted, Ducted | 15,000 | 120V | 92 | 58 | Large campers, hot climates |
| Coleman Mach 8 | Roof-Mounted, Ducted | 13,500 | 120V | 80 | 62 | Budget-friendly, easy install |
| Honeywell MN10CESWW | Portable | 10,000 | 120V | 70 | 65 | Pop-ups, small campers |
| Black+Decker BPACT14WT | Portable | 14,000 | 120V | 75 | 68 | Large pop-ups, vans |
This table shows key specs to compare. Noise level matters—especially if you’re camping near others. I prefer quieter units (under 62 dB) for peaceful nights.
Final Thoughts: Enjoy a Cooler, More Comfortable Adventure
Installing a camper air conditioner isn’t just about comfort—it’s about safety, health, and enjoyment. Hot, stuffy air can ruin sleep, make you irritable, and even lead to dehydration or heat exhaustion. A good AC changes all that.
Yes, camper air conditioner installation takes time, tools, and attention to detail. But it’s not rocket science. With the right prep, the right unit, and a careful hand, you can do it yourself—and save hundreds on labor. I’ve installed three units now, and each time I’ve learned something new. The key is patience. Don’t rush the sealant. Don’t skip the leveling. Test everything before you button it up.
And once it’s in? You’ll wonder how you ever camped without it. I remember my first night with the new AC—cool air flowing, windows closed, fans humming softly. I slept like a baby. The next morning, I made coffee in peace, without sweating through my shirt. That’s the dream.
So grab your tools, pick the right AC, and get to work. Your cooler, more comfortable camping days are just a few screws away. Happy travels—and stay cool out there.
Frequently Asked Questions
What’s the best way to prepare for camper air conditioner installation?
Start by measuring your camper’s roof space and checking the manufacturer’s specifications to ensure compatibility. Turn off all power sources and clear the area around the installation site for easy access.
Can I install a camper air conditioner myself, or should I hire a professional?
DIY camper air conditioner installation is possible if you’re comfortable with electrical wiring and roof work, but hiring a certified technician is safer for complex systems. Always follow local codes and the unit’s manual to avoid voiding warranties.
How long does a typical camper air conditioner installation take?
Most installations take 3–6 hours, depending on the unit type and your camper’s design. Rooftop models may require extra time for sealing and securing to prevent leaks.
What tools do I need for installing a camper air conditioner?
Essential tools include a drill, screwdrivers, wire strippers, a multimeter, and a caulking gun for sealing. A helper is also useful for lifting heavy rooftop units into place.
Are there weight restrictions for camper air conditioner units?
Yes, most campers have weight limits (usually 100–150 lbs per rooftop AC). Always check your RV’s manual to avoid overloading and damaging the roof structure.
How do I ensure proper airflow after camper air conditioner installation?
Seal all gaps around the unit to prevent air leaks and insulate ducts if applicable. Regularly clean filters and check vents to maintain optimal airflow and efficiency.