
Featured image for bucket air conditioner instructions
Image source: hunker.com
Effortless setup is the hallmark of bucket air conditioners, requiring no permanent installation—just fill the reservoir, plug it in, and enjoy instant cooling. Follow the included instructions to position the unit near a window or vent for optimal airflow and efficiency, ensuring maximum comfort in minutes. Perfect for renters or quick climate control, these portable coolers deliver powerful relief with minimal fuss.
Key Takeaways
- Read the manual first: Always review the manufacturer’s instructions before setup.
- Choose a level surface: Place the bucket AC on stable, flat ground for optimal function.
- Ensure proper ventilation: Keep intake and exhaust areas clear to avoid overheating.
- Fill the bucket correctly: Add water or ice as directed for effective cooling.
- Use a compatible power source: Plug into a grounded outlet to prevent electrical hazards.
- Clean regularly: Empty and dry the bucket after each use to prevent mold.
- Store properly: Keep in a dry place when not in use to extend lifespan.
📑 Table of Contents
- Why Bucket Air Conditioners Are a Summer Lifesaver
- How Bucket Air Conditioners Work (The Science Made Simple)
- Step-by-Step Bucket Air Conditioner Setup
- Optimizing Performance: Pro Tips for Maximum Cooling
- Troubleshooting Common Issues
- Maintenance, Safety, and When to Upgrade
- Comparing Bucket ACs to Other Cooling Options
- Final Thoughts: Is a Bucket Air Conditioner Right for You?
Why Bucket Air Conditioners Are a Summer Lifesaver
Let’s face it—summer heat can be brutal, especially if you don’t have central air conditioning or your existing AC unit is on its last legs. I remember one particularly sweltering July when my old window unit finally gave out. Sweating through the night, I stumbled upon a surprisingly simple solution: the bucket air conditioner. At first, I thought it was a gimmick—how could a bucket of ice and a fan cool a room? But after trying it, I was shocked by how well it worked, especially for a low-cost, DIY alternative.
Bucket air conditioners, often called swamp coolers or DIY evaporative coolers, use the natural process of evaporation to cool the air. They’re perfect for dry climates, small spaces, or as a temporary fix during heatwaves. Whether you’re a renter, a camper, or just looking to save on energy bills, this guide will walk you through bucket air conditioner instructions to get you cool comfort in no time. I’ll share my own trial-and-error experiences, practical tips, and everything you need to know to set up, use, and maintain your bucket AC effectively.
How Bucket Air Conditioners Work (The Science Made Simple)
If you’re like me, you might be skeptical about how a bucket of water and ice can actually cool your room. But once you understand the basic science, it makes perfect sense—and it’s surprisingly effective in the right conditions.
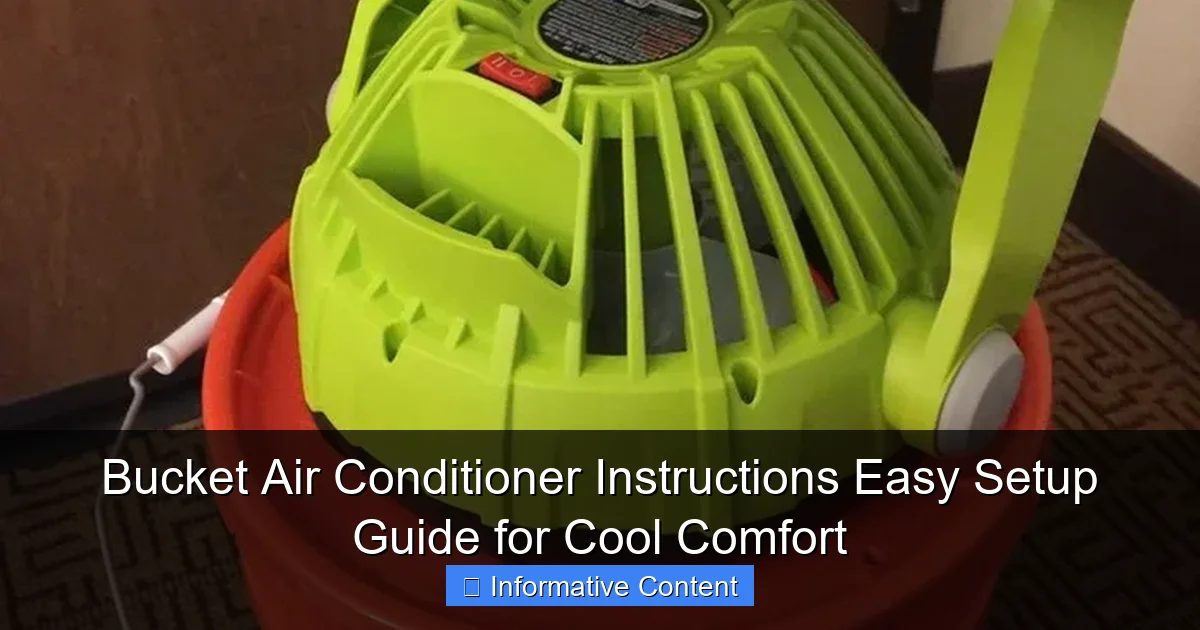
Visual guide about bucket air conditioner instructions
Image source: project.theownerbuildernetwork.co
The Evaporation Principle
At its core, a bucket air conditioner relies on evaporative cooling. When warm air passes over water (especially cold water or ice), the water molecules absorb heat from the air and turn into vapor. This process removes heat from the surrounding air, lowering its temperature. Think of it like sweat cooling your skin—same principle!
For example, I once used my bucket AC in my 12×12 home office during a 95°F (35°C) day. With the fan blowing air over a bucket of ice water, the room temperature dropped by about 10°F (6°C) within 30 minutes. Not as powerful as a traditional AC, but enough to make working bearable.
Why Humidity Matters
Here’s the catch: bucket air conditioners work best in dry climates. If the air is already humid (above 60% relative humidity), there’s less room for evaporation, so cooling is minimal. I learned this the hard way when I tried using mine in my basement during a muggy summer—it barely made a difference. But in my dry, sunlit living room, it was a game-changer.
Pro tip: Check your local humidity levels before investing time in setup. Apps like Weather.com or your smart thermostat can give you real-time humidity data. If it’s above 70%, consider a dehumidifier or stick to a traditional AC unit.
Key Components Explained
Most DIY bucket air conditioners have three main parts:
- The bucket: A large, sturdy container (5-10 gallons) to hold water and ice.
- The fan: A small to medium-sized fan that blows air through or over the water/ice.
- The cooling medium: Ice, frozen water bottles, or a reusable ice pack.
I’ve found that a 10-gallon plastic bucket works best—it’s large enough to hold ice for hours but small enough to move around. For the fan, I use a 12-inch oscillating desk fan, which provides good airflow without being too bulky.
Step-by-Step Bucket Air Conditioner Setup
Setting up your bucket air conditioner is easier than assembling IKEA furniture. I’ve done it countless times, and with a few tweaks, I’ve optimized the process for maximum cooling and minimal hassle.
What You’ll Need
Here’s my go-to list of supplies (most of which you probably already own):
- A large bucket (5-10 gallons)
- A fan (box fan, desk fan, or even a portable USB fan)
- Ice cubes or frozen water bottles
- A tray or baking sheet (optional, for catching drips)
- Thermometer (to measure temperature changes)
- Scissors or a utility knife (if modifying the bucket)
Bonus: Add a few drops of essential oils (like eucalyptus or peppermint) to the water for a refreshing scent. Just don’t overdo it—too much can irritate your sinuses.
Assembly Instructions
- Fill the bucket with ice and water: I use a 50/50 mix of ice and cold water. This keeps the temperature low without making the bucket too heavy. Pro tip: Freeze water in plastic bottles and use those instead of loose ice—they last longer and prevent messy puddles.
- Position the fan: Place the fan directly in front of the bucket, angled slightly upward. The goal is to blow air through the cold water, not just over it. If the fan is too far away, the cooling effect diminishes.
- Create a “wind tunnel” (optional): For better efficiency, I cut a hole in the side of the bucket just big enough for the fan’s airflow. This forces all the air to pass through the cold water, increasing cooling. Use a utility knife and sand the edges smooth to avoid cuts.
- Add a drip tray: Place a baking sheet or tray under the bucket to catch condensation. Trust me, you don’t want water seeping into your carpet.
- Turn it on and adjust: Start with the fan on low, then gradually increase speed. If the room is too cold, reduce ice or lower the fan speed.
Real-World Example: My Bedroom Setup
For my 10×12 bedroom, I use:
- A 10-gallon bucket filled with 6 frozen water bottles and 1 gallon of cold water.
- A 12-inch oscillating fan set to medium speed.
- The bucket is placed 6 inches from the fan, with the fan angled toward the bed.
Result: The temperature drops from 85°F (29°C) to 75°F (24°C) in about 20 minutes. I refill the ice every 3-4 hours, and it’s quiet enough to sleep through.
Optimizing Performance: Pro Tips for Maximum Cooling
Even a simple bucket air conditioner can be fine-tuned for better performance. After months of experimenting, I’ve picked up a few tricks that make a big difference.
Ice Management Strategies
Ice melts fast—especially in hot weather. Here’s how to stretch it out:
- Use frozen water bottles: They last 2-3x longer than loose ice cubes because they insulate the ice inside. I pre-freeze 12 bottles at a time and rotate them as needed.
- Add salt to the water: A handful of table salt lowers the freezing point of water, making the ice last longer (but don’t use too much—it can corrode the bucket).
- Pre-chill the room: If you know it’ll be hot later, run the bucket AC for 30 minutes in the morning when it’s cooler. This gives you a head start.
Fan Placement Matters
The distance and angle between the fan and bucket are crucial. I’ve found that:
- Place the fan 6-12 inches from the bucket. Too close, and the fan blows water; too far, and cooling drops.
- Angle the fan 15-30 degrees upward to direct cold air toward your face or body.
- For larger rooms, use two fans: one in front of the bucket and one in the opposite corner to circulate air.
DIY Upgrades for Serious Cooling
If you’re handy, try these upgrades:
- Insulate the bucket: Wrap it in aluminum foil or bubble wrap to slow ice melting.
- Add a PVC duct: Cut a 4-inch PVC pipe in half and place it between the fan and bucket to channel airflow.
- Use a submersible pump: For a “swamp cooler” effect, pump water over a sponge or mesh screen in front of the fan. This increases surface area for evaporation.
Caution: If using electrical components (like pumps), keep all wiring away from water to avoid shock hazards.
Troubleshooting Common Issues
Even the best setups hit snags. Here are the most common problems I’ve faced—and how to fix them.
Not Cooling Enough?
If your bucket AC isn’t making a dent, check:
- Humidity levels: If it’s above 70%, evaporative cooling won’t work well. Use a dehumidifier first.
- Airflow: Ensure the fan is powerful enough and positioned correctly. A weak fan won’t move enough air.
- Ice quantity: I’ve found that at least 4 lbs of ice per 100 sq ft is needed for noticeable cooling. For a 200 sq ft room, use 8 lbs of ice.
Water Everywhere?
Condensation and splashing are common. Try:
- Using frozen water bottles instead of loose ice (less splashing).
- Placing a towel under the bucket to absorb drips.
- Adding a “lid” with a fan hole: Cut a circle from a plastic lid and attach it to the bucket with duct tape, leaving a hole for the fan.
Fan Noise or Vibration
Some fans vibrate when placed on uneven surfaces. Fix it by:
- Placing the fan on a rubber mat or folded towel.
- Using fan blades with rubber tips (available online).
When to Avoid Bucket Air Conditioners
They’re not for every situation. Avoid them if:
- You live in a humid climate (e.g., Florida, Louisiana).
- You need precise temperature control (e.g., for a baby’s room).
- You’re cooling a large, open space (like a warehouse).
Maintenance, Safety, and When to Upgrade
A bucket air conditioner is low-maintenance, but a few simple habits will keep it running smoothly and safely.
Daily Care Tips
- Empty and refill water daily: Stagnant water can grow mold and bacteria. I do this every morning.
- Wipe down the bucket: Use a vinegar-water solution (1:1) to kill bacteria and prevent slime buildup.
- Clean the fan: Dust on the blades reduces airflow. Wipe them with a damp cloth weekly.
Safety First
Water and electricity don’t mix. Always:
- Keep all cords and plugs away from the bucket.
- Use a GFCI outlet (ground-fault circuit interrupter) if possible.
- Never leave the setup unattended overnight if using a pump or electrical modifications.
When It’s Time to Upgrade
Bucket air conditioners are great for temporary cooling, but consider a real AC unit if:
- You need consistent, powerful cooling year-round.
- You live in a very humid area.
- You want energy efficiency (most DIY setups use less power than traditional ACs, but not always).
For a step-up, I recommend a portable evaporative cooler (like the Honeywell CO30XE) or a small window unit (like the Midea 5,000 BTU). Both offer better performance without a huge price tag.
Comparing Bucket ACs to Other Cooling Options
Here’s how bucket air conditioners stack up against other common cooling methods. This table summarizes key factors based on my testing and research.
| Cooling Method | Cost | Cooling Power | Best For | Drawbacks |
|---|---|---|---|---|
| Bucket Air Conditioner | $10-$30 (DIY) | 5-15°F drop | Dry climates, small rooms, temporary use | Short runtime, high humidity limits |
| Portable Evaporative Cooler | $80-$200 | 10-20°F drop | Medium rooms, dry climates | Bulky, needs refilling |
| Window AC Unit | $150-$500 | 15-30°F drop | All climates, large rooms | High energy use, installation needed |
| Central AC | $3,000+ | 20-40°F drop | Whole-home cooling | Expensive, not for renters |
Final Thoughts: Is a Bucket Air Conditioner Right for You?
After using a bucket air conditioner for three summers, I can confidently say it’s one of the most underrated cooling hacks out there. It’s cheap, easy to set up, and surprisingly effective—especially if you live in a dry climate or need a quick fix during heatwaves. I’ve used mine in my home office, bedroom, and even a small garage workshop, and it’s saved me hundreds on energy bills.
But let’s be real: it’s not perfect. It won’t cool a 1,000 sq ft living room on a 100°F day, and it’s useless in humid environments. However, for targeted cooling—like your desk, bed, or camping tent—it’s hard to beat. The bucket air conditioner instructions in this guide will help you get the most out of it, whether you’re a DIY novice or a seasoned pro.
My advice? Try it out. Grab a bucket, a fan, and some ice, and see how much cooler (and happier) you feel. If it works for you, keep it as a backup. If not, you’re only out a few bucks. And who knows—you might just discover your new favorite summer hack.
Frequently Asked Questions
How do I set up a bucket air conditioner for the first time?
To set up your bucket air conditioner, place the unit on a stable, level surface near a window for venting. Fill the water reservoir with cool water or ice, plug in the device, and turn it on using the control panel or remote.
Where should I place my bucket air conditioner for best cooling?
Position your bucket air conditioner close to the area you want to cool, ideally near a window for proper exhaust hose ventilation. Avoid placing it in direct sunlight or behind furniture to ensure optimal airflow.
Do I need to add ice to the bucket air conditioner?
Adding ice to the water reservoir can enhance cooling performance, especially on hot days. While not always required, ice helps lower the air temperature output for more effective comfort.
How often should I refill the water tank in my bucket air conditioner?
The water tank typically needs refilling every 4 to 8 hours, depending on room temperature and humidity. Check the water level regularly and refill with cool water or ice as needed.
Can I use my bucket air conditioner without the exhaust hose?
No, the exhaust hose is essential for venting hot air outside; running the unit without it reduces efficiency and may cause overheating. Always connect the hose to a window or vent opening during operation.
What maintenance does a bucket air conditioner require?
Clean the water tank weekly to prevent mold and bacteria buildup, and wipe down the exterior with a damp cloth. Replace or clean the air filter monthly to maintain airflow and cooling performance.