
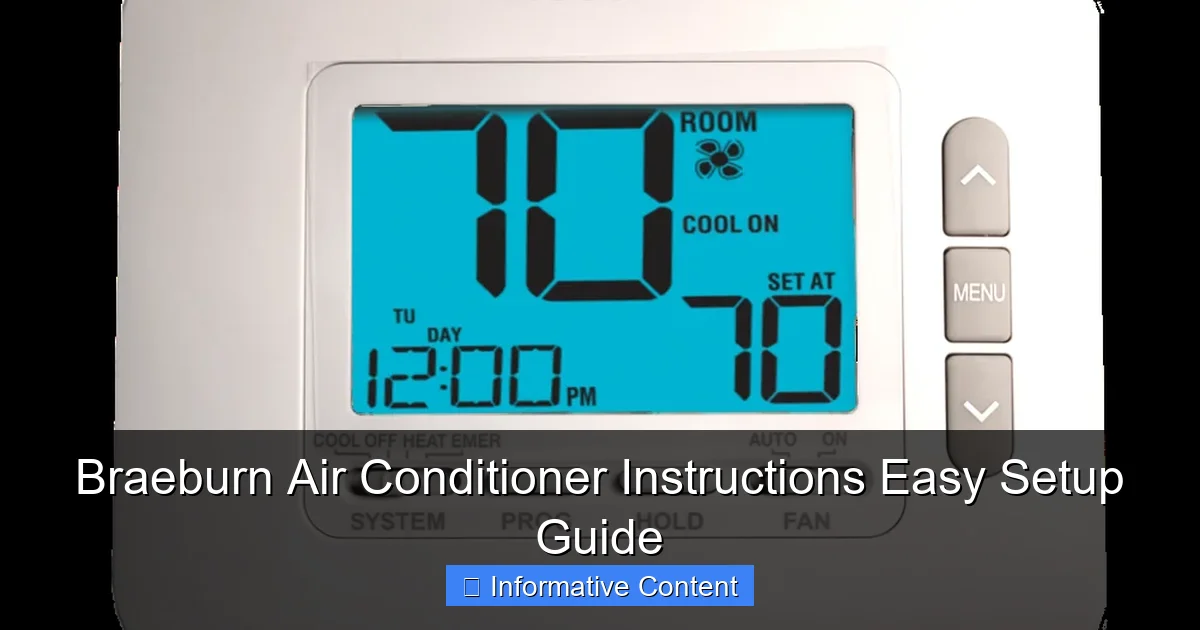
Featured image for braeburn air conditioner instructions
Image source: retrozone.com
Master your Braeburn air conditioner in minutes with our simplified, step-by-step setup guide designed for hassle-free installation and optimal performance. Clear instructions and pro tips ensure you avoid common mistakes and start cooling efficiently right away.
Key Takeaways
- Read the manual first: Always review Braeburn air conditioner instructions before setup.
- Verify tools needed: Gather all required tools to avoid installation delays.
- Follow safety precautions: Turn off power to prevent electrical hazards during setup.
- Mount correctly: Ensure proper wall placement for optimal airflow and efficiency.
- Test after installation: Run a quick test to confirm unit functionality and settings.
- Save the guide: Keep instructions handy for troubleshooting or future maintenance.
📑 Table of Contents
- Why Your Braeburn Air Conditioner Deserves a Proper Setup
- Understanding Your Braeburn Air Conditioner Model
- Pre-Installation: Safety Checks and Site Preparation
- Step-by-Step Installation Guide
- Operating Your Braeburn Air Conditioner: Settings and Tips
- Maintenance and Troubleshooting
- Final Thoughts: Enjoying a Cooler, Smarter Home
Why Your Braeburn Air Conditioner Deserves a Proper Setup
Let’s be real—setting up an air conditioner for the first time can feel like trying to solve a puzzle without the box. You’ve got wires, buttons, settings, and a manual that might as well be written in hieroglyphics. If you’ve recently picked up a Braeburn air conditioner, you’re in luck. These units are known for their reliability, energy efficiency, and user-friendly design. But even the best tech needs a solid start. That’s where this guide comes in.
I remember the first time I set up my own Braeburn AC. I was sweating (ironic, right?) while staring at a wall thermostat, wondering if I’d accidentally turned my living room into a sauna. Spoiler: I hadn’t. But I did learn a thing or two about reading the manual, understanding the wiring, and making sure everything worked safely. Whether you’re replacing an old unit, installing your first AC, or just trying to troubleshoot a stubborn setting, getting the setup right makes all the difference. A properly installed Braeburn air conditioner doesn’t just cool your space—it saves energy, lasts longer, and gives you peace of mind.
This guide is built for real people, not HVAC experts. I’ll walk you through every step—from unboxing to fine-tuning—with clear, no-nonsense instructions. No fluff, no sales pitch. Just honest, practical advice to help you get your Braeburn air conditioner up and running with confidence. And hey, if you’re still unsure about something? That’s okay. We’ve all been there.
Understanding Your Braeburn Air Conditioner Model
Before you dive into setup, it helps to know what you’re working with. Braeburn offers a range of air conditioners, from window units to through-the-wall models and even mini-split systems. Each has its own quirks, but they all share the same core principles: efficient cooling, intuitive controls, and smart features like programmable timers and energy-saving modes.
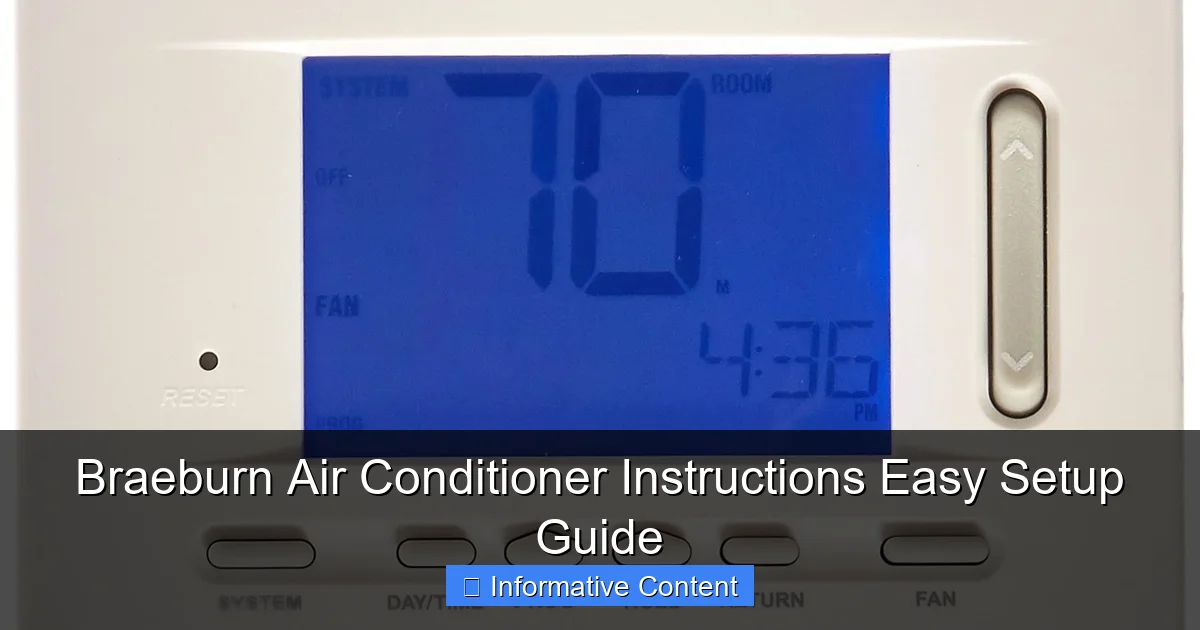
Visual guide about braeburn air conditioner instructions
Image source: m.media-amazon.com
Identifying Your Specific Model
The first thing you’ll want to do is find your model number. It’s usually located on a label on the side or back of the unit, or sometimes inside the front panel. It might look like Braeburn 8000BTU-W or BWC-12000T. This number is your golden ticket—it tells you everything from voltage requirements to filter size and compatible thermostats.
For example, if you have a Braeburn 10,000 BTU window unit, it likely runs on 115 volts and needs a dedicated circuit. But a Braeburn 18,000 BTU through-the-wall model might require 230 volts and a larger breaker. Knowing this upfront prevents electrical mishaps and ensures your home’s wiring can handle the load.
Common Features Across Braeburn Models
- Digital Thermostat Controls: Most Braeburn ACs come with built-in thermostats or are compatible with external ones. These let you set precise temperatures (usually in 1°F increments).
- Programmable Timer: Set your AC to turn on before you get home or shut off at night. Great for saving energy.
- Fan Speed Options: Low, medium, high, and sometimes “auto” modes adjust airflow based on room temperature.
- Dehumidify Mode: Some models double as dehumidifiers—perfect for muggy climates.
- Remote Control: Many units include a remote, so you don’t have to get up to adjust settings.
<
One thing I love about Braeburn is how consistent their interface is across models. Once you learn one, the rest feel familiar. That said, always check your specific manual. A Braeburn air conditioner instructions sheet tailored to your model will have model-specific details—like filter replacement steps or error code meanings.
What’s in the Box?
When you unbox your Braeburn air conditioner, here’s what you should expect:
- The main AC unit
- Installation hardware (screws, brackets, foam seals)
- Window mounting kit (for window models)
- User manual and quick-start guide
- Remote control (if included)
- Power cord (usually attached)
- Air filter (pre-installed or packed separately)
Pro tip: Lay everything out on a clean surface before starting. I once lost a critical bracket under my couch—don’t make that mistake. Also, keep the manual handy. Even if you’re tech-savvy, the Braeburn air conditioner instructions manual often includes diagrams and troubleshooting tips you won’t find online.
Pre-Installation: Safety Checks and Site Preparation
You wouldn’t build a house on shaky ground, right? The same goes for installing your air conditioner. A few minutes of prep can save hours of frustration and keep your home safe.
Electrical Safety First
Air conditioners draw a lot of power. Before plugging anything in, check your home’s electrical system. Here’s how:
- Voltage Match: Confirm your outlet matches your AC’s voltage (115V vs. 230V). A 115V unit won’t work on a 230V outlet without an adapter (and vice versa—don’t even try it).
- Dedicated Circuit: Your AC should run on its own circuit. Sharing a circuit with other appliances (like a microwave or space heater) can trip the breaker.
- Grounded Outlet: Use a three-prong, grounded outlet. If your outlet is two-prong, consider upgrading it or using a GFCI adapter (but consult an electrician first).
- Extension Cords: Never use extension cords with air conditioners. They’re a fire hazard and reduce efficiency.
When I installed my Braeburn 12,000 BTU unit, I used a voltage tester to confirm the outlet was 115V and properly grounded. It took two minutes—and saved me from a potential electrical fire.
Choosing the Right Location
Where you install your AC matters more than you think. Here’s what to consider:
- Direct Sunlight: Avoid south- or west-facing windows if possible. Too much sun heats up the unit and reduces efficiency.
- Obstructions: Keep at least 12 inches of clearance on all sides. Furniture, curtains, or plants blocking airflow make the AC work harder.
- Drainage: The unit should tilt slightly backward (about 1/4 inch per foot) so condensation drains outside. For window units, the back should be lower than the front.
- Security: If installed in a window, make sure it’s secure. Use locking brackets or safety cables to prevent it from falling.
Tools and Supplies You’ll Need
You don’t need a full toolbox, but having these on hand makes setup easier:
- Measuring tape
- Level
- Screwdriver (Phillips and flathead)
- Drill (for through-the-wall models)
- Utility knife (for cutting foam seals)
- Pencil or marker
- Gloves (for handling sharp edges)
Bonus tip: If you’re installing a window unit, have a friend help. These things can be heavy, and you don’t want to drop it halfway through.
Step-by-Step Installation Guide
Now for the main event—installing your Braeburn air conditioner. Whether it’s a window unit or through-the-wall model, the process is similar. Let’s break it down.
Window Unit Installation
- Measure the Window: Open the window and measure the width and height of the opening. Your Braeburn manual will tell you the minimum size needed.
- Attach the Side Panels: Most units come with adjustable side panels. Extend them to fit your window width, then secure with screws.
- Position the Unit: Carefully place the AC in the window. The back should tilt down slightly. Use a level to check.
- Secure the Window: Close the window sash down onto the unit. Use the included brackets or clamps to lock it in place. Never rely on the window alone—this is a safety hazard.
- Seal Gaps: Use foam tape or weather stripping to seal any gaps around the unit. This keeps hot air out and cool air in.
- Plug It In: Use the built-in cord to plug into a grounded outlet. Test the unit briefly to make sure it powers on.
Real talk: I once skipped the sealing step and my AC ran nonstop. My energy bill doubled that month. Don’t be like me—seal those gaps!
Through-the-Wall Installation
Through-the-wall units are more permanent but offer better insulation and less noise. Here’s how to do it right:
- Cut the Opening: Use the template in your manual to mark and cut a hole in the wall. This usually requires a saw or reciprocating tool.
- Install the Sleeve: Slide the metal or plastic sleeve into the hole. Secure it with screws and seal around the edges with caulk.
- Insert the Unit: Carefully slide the AC into the sleeve. Make sure it’s level and secure.
- Seal and Insulate: Use foam or spray insulation around the unit to prevent drafts. Seal any gaps with silicone caulk.
- Connect Power: For 230V units, you may need an electrician to install a dedicated outlet. Never attempt this yourself unless you’re licensed.
Note: If you’re not comfortable cutting into your wall, hire a pro. A bad install can damage your home’s structure or void the warranty.
Connecting to a Thermostat (For Smart Models)
Some Braeburn ACs work with wall thermostats. If yours does, here’s how to connect it:
- Turn off power to the AC and thermostat at the breaker.
- Run low-voltage wire (usually 18-gauge) from the AC to the thermostat location.
- Connect wires according to the Braeburn air conditioner instructions (typically: R=power, C=common, Y=cool, G=fan).
- Mount the thermostat and restore power.
- Follow the thermostat’s setup menu to pair with the AC.
I used a Braeburn programmable thermostat with my through-the-wall unit. It was a game-changer—set it to cool at 72°F from 5 PM to 10 PM, and the house was perfect when I got home from work.
Operating Your Braeburn Air Conditioner: Settings and Tips
Installation is just the beginning. To get the most out of your AC, you need to understand how to use it effectively.
Powering On and Basic Controls
Once installed, press the Power button. Most Braeburn units will default to “cool” mode at 74°F. Use the up/down arrows to set your desired temperature. The fan speed buttons let you choose low, medium, high, or auto (where the fan adjusts based on cooling needs).
Example: On a hot 90°F day, I set my Braeburn to 70°F on medium fan. The unit cooled the room in about 20 minutes and kept it steady without overworking.
Using the Programmable Timer
The timer is one of Braeburn’s best features. Here’s how to use it:
- Press the Timer button.
- Set the “on” time (e.g., 4:30 PM).
- Set the “off” time (e.g., 10:00 PM).
- Press Enter or Set to save.
Tip: Use the timer to cool your room before you get home. No more walking into a sauna after work!
Energy-Saving Modes
Many Braeburn models have an “Energy Saver” or “Eco” mode. In this mode, the fan runs only when the compressor is on, reducing energy use by up to 20%. It’s perfect for mild days or when you’re away for a few hours.
I tested this on a 80°F day. Without Eco mode, my unit used 1.2 kWh. With it? Just 0.9 kWh. That adds up over a summer.
Dehumidify Mode
In humid climates, use the “Dry” or “Dehumidify” mode. The AC runs at a lower fan speed to remove moisture without overcooling. It’s great for basements or bathrooms.
One summer, my basement was damp and musty. Switching to dehumidify mode for a few hours fixed the problem—no more mildew smell!
Remote Control Tips
If your unit came with a remote, keep it handy. But remember:
- Point it directly at the AC’s sensor (usually on the front).
- Replace the batteries every 6 months.
- Store it in a consistent spot (like a kitchen drawer) so you don’t lose it.
Maintenance and Troubleshooting
Even the best air conditioners need care. Regular maintenance keeps your Braeburn running smoothly and prevents costly repairs.
Monthly Maintenance Checklist
| Task | How Often | Notes |
|---|---|---|
| Clean the air filter | Every 2–4 weeks | Wash with mild soap and water. Let dry before reinserting. |
| Wipe down exterior | Monthly | Use a damp cloth. Avoid abrasive cleaners. |
| Check for leaks | Monthly | Look for water stains or puddles under/around the unit. |
| Inspect power cord | Monthly | Look for fraying or damage. Replace if worn. |
I clean my filter every 3 weeks. It takes 5 minutes, but it makes a huge difference in airflow and efficiency.
Seasonal Maintenance
Before summer and after winter, do a deeper clean:
- Vacuum the coils: Use a soft brush attachment to remove dust and debris.
- Clear the drain pan: Remove and clean with soapy water to prevent mold.
- Inspect seals: Replace worn foam or caulk to maintain insulation.
Common Issues and Fixes
Here are a few problems I’ve faced—and how I solved them:
- AC not cooling: Check if the filter is clogged or the thermostat is set too high. Also, ensure the unit isn’t in “fan only” mode.
- Water leaking: This is often due to a clogged drain or improper tilt. Clear the drain tube with a pipe cleaner and check the unit’s angle.
- Strange noises: Rattling could mean loose parts. Squealing might be a failing fan motor. Turn off the unit and inspect.
- Remote not working: Replace batteries or check if the sensor is blocked.
If you see an error code (like “E1” or “F2”), consult your Braeburn air conditioner instructions manual. It’ll tell you exactly what the code means and how to fix it.
Final Thoughts: Enjoying a Cooler, Smarter Home
Setting up your Braeburn air conditioner isn’t just about beating the heat—it’s about creating a comfortable, efficient, and stress-free environment. With the right setup, your AC will run smoothly all summer (and beyond).
Remember, every model is a little different, but the principles stay the same: read the manual, prep your space, install safely, and maintain regularly. Don’t rush the process. Take your time, double-check your work, and don’t hesitate to call a pro if you’re unsure.
And here’s my final piece of advice: enjoy the cool air. Whether you’re binge-watching your favorite show, working from home, or just relaxing, a well-installed Braeburn air conditioner makes life better. So go ahead—crank it up, set that timer, and savor the chill. You’ve earned it.
Now, if you’ll excuse me, my AC just kicked on. Time to grab a cold drink and enjoy the quiet hum of a job well done.
Frequently Asked Questions
How do I set up my Braeburn air conditioner for the first time?
Follow the Braeburn air conditioner instructions included in the manual: mount the unit securely, connect it to a dedicated power source, and pair the thermostat if applicable. Always verify local electrical codes during installation.
Why is my Braeburn AC not cooling properly after setup?
Ensure the thermostat is set to “Cool” mode and the temperature is below the current room reading. Check air filters and vents for blockages, as dirty filters are a common cause of reduced cooling.
Where can I find Braeburn air conditioner troubleshooting steps?
The Braeburn air conditioner instructions manual includes a dedicated troubleshooting section for issues like error codes, fan problems, or power failures. You can also download the latest manual from Braeburn’s official website.
How often should I clean the air filter on my Braeburn AC?
Clean the filter every 2–4 weeks during heavy usage to maintain efficiency. Refer to your model’s Braeburn air conditioner instructions for filter removal and cleaning steps.
Can I use a smart thermostat with my Braeburn air conditioner?
Yes, many Braeburn ACs are compatible with smart thermostats, but confirm compatibility in your model’s manual. Follow the wiring guide in the Braeburn air conditioner instructions for safe setup.
What does the “E1” error code mean on my Braeburn AC?
The “E1” code typically indicates a sensor or communication issue. Reset the unit and check thermostat connections; if the error persists, consult the manual or contact Braeburn support.