
Transform your cooling game with this DIY Arduino air conditioner guide that walks you step-by-step through building a smart, energy-efficient system using affordable components. Perfect for makers and tech enthusiasts, this Instructable combines coding, hardware, and innovation to create a customizable AC unit that’s both functional and fun to build.
Key Takeaways
- DIY Cooling Solution: Build a customizable Arduino-powered AC unit affordably.
- Easy-to-Follow Steps: Clear Instructable guide ensures smooth assembly.
- Smart Climate Control: Programmable logic for precise temperature regulation.
- Component Flexibility: Use common parts for easy sourcing and upgrades.
- Energy Efficiency: Optimize power usage with Arduino automation.
- Learning Opportunity: Gain hands-on experience with IoT and cooling systems.
📑 Table of Contents
- Build Your Own Arduino Air Conditioner Instructable Guide
- Why Build an Arduino Air Conditioner? The Benefits and Use Cases
- Essential Components for Your Arduino Air Conditioner Project
- Step-by-Step Assembly: Building Your Arduino Air Conditioner
- Programming Your Arduino Air Conditioner: Code and Logic
- Performance Data and Optimization Tips
- Conclusion: Cooling Smarter, Not Harder
Build Your Own Arduino Air Conditioner Instructable Guide
It was a sweltering summer afternoon when I first decided I’d had enough. My old window unit was loud, inefficient, and barely cooled my tiny apartment. I’d been tinkering with Arduino projects for a while—building smart lights, weather stations, even a plant watering robot—but I’d never tackled anything as ambitious as an air conditioner. Then it hit me: Why not build my own Arduino-powered air conditioner? It sounded crazy at first, but after some research, I realized it wasn’t just possible—it could actually be fun, educational, and surprisingly effective.
This journey led me to discover a growing community of makers who’ve taken on the challenge of creating DIY climate control systems using Arduino. From cooling small enclosures to regulating temperature in greenhouses or server racks, the Arduino air conditioner instructable has become a popular project for hobbyists, engineers, and eco-conscious DIYers alike. Whether you’re looking to save on energy bills, reduce your carbon footprint, or simply learn something new, building your own Arduino-based cooling system is a rewarding challenge that blends electronics, programming, and practical problem-solving.
In this guide, I’ll walk you through everything you need to know to build your own Arduino air conditioner. We’ll cover the core components, step-by-step assembly, programming tips, safety considerations, and even how to optimize performance. By the end, you’ll have a working system that not only cools your space but also gives you full control over temperature, timing, and energy use. And the best part? You’ll understand exactly how it works—because you built it.
Why Build an Arduino Air Conditioner? The Benefits and Use Cases
At first glance, building your own air conditioner might seem like overkill. After all, commercial units are readily available, right? But that’s exactly the point—commercial units are often one-size-fits-all, inefficient, and lack customization. An Arduino air conditioner, on the other hand, gives you precision, adaptability, and a deeper understanding of how cooling systems work. It’s not about replacing your central AC (though in some cases, it can supplement it), but about creating a smart, responsive, and energy-efficient solution tailored to your specific needs.
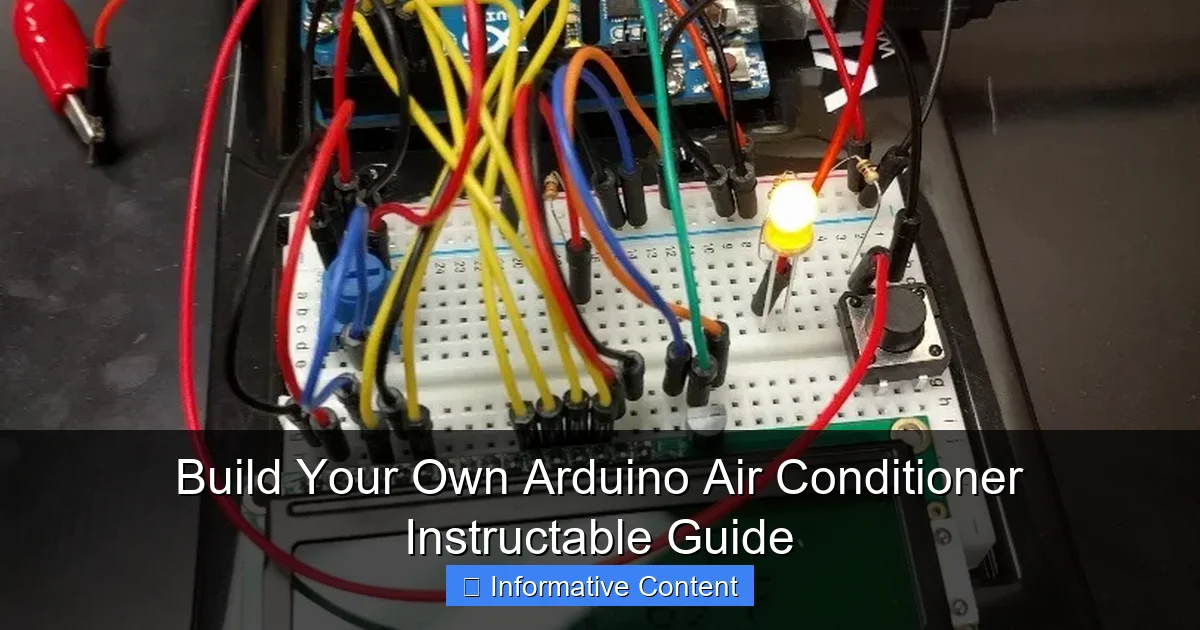
Visual guide about arduino air conditioner instructable
Image source: content.instructables.com
Energy Efficiency and Cost Savings
One of the biggest advantages of an Arduino-based system is energy efficiency. Traditional air conditioners often run at full blast regardless of the actual temperature, leading to wasted electricity. With an Arduino, you can program your unit to activate only when needed, using sensors to monitor ambient temperature and humidity. For example, you could set it to turn on when the room hits 78°F and shut off at 72°F—no more guessing, no more overcooling.
Let’s say your DIY unit uses a 12V Peltier module that draws 5 amps. That’s just 60 watts—less than a standard light bulb. Compare that to a typical window unit that can consume 500–1500 watts. Over time, especially in smaller spaces like a bedroom, closet, or electronics enclosure, the savings add up. Plus, you’re using a microcontroller to intelligently manage power, which means less wear and tear on components and longer system life.
Customization and Smart Features
Another major perk? Customization. Want your air conditioner to send you a text when the temperature spikes? Done. Need it to integrate with your smart home system via Wi-Fi? Easy with an ESP8266 or ESP32 module. You can even program it to run on a schedule—cooling your server rack at night when electricity is cheaper, or keeping your reptile tank at the perfect temperature 24/7.
I once built a version for my home office that included a DHT22 temperature and humidity sensor. It not only cooled the room but also logged data to an SD card so I could analyze trends over time. That kind of insight is impossible with off-the-shelf units. And because everything is open-source, you can tweak the code, add new sensors, or even connect it to a web dashboard for remote monitoring.
Practical Use Cases
So where does an Arduino air conditioner actually make sense? Here are a few real-world applications:
- Small Room Cooling: Perfect for dorm rooms, tiny houses, or sunrooms where a full AC unit is overkill.
- Electronics Enclosures: Servers, routers, and 3D printers generate heat. A small Arduino cooler can prevent overheating and extend component life.
- Greenhouses and Grow Tents: Maintain optimal growing conditions with precise temperature and humidity control.
- Reptile or Plant Habitats: Many species require stable climates. An Arduino system can automate cooling without disturbing the environment.
- Emergency Backup Cooling: In case of power outages or AC failure, a battery-powered Arduino unit can keep critical systems running.
Of course, it’s important to set realistic expectations. An Arduino air conditioner won’t cool an entire house like a central unit. But for targeted, efficient cooling in small spaces, it’s a game-changer. And the learning experience? Priceless.
Essential Components for Your Arduino Air Conditioner Project
Before you start soldering or writing code, you’ll need to gather the right components. The beauty of an Arduino air conditioner is that most parts are affordable, widely available, and beginner-friendly. You don’t need a PhD in engineering—just a basic understanding of circuits and a willingness to learn. Below, I’ll break down the core components you’ll need and explain why each one matters.
Arduino Board: The Brain of the Operation
The heart of your system is the Arduino board. The most popular choice is the Arduino Uno—it’s reliable, well-documented, and has plenty of I/O pins for sensors and actuators. If you want wireless capabilities, consider the Arduino Nano 33 IoT or an ESP32, which have built-in Wi-Fi and Bluetooth. These allow you to control your air conditioner remotely or integrate it with apps like Blynk or Home Assistant.
For beginners, I recommend starting with the Uno. It’s plug-and-play with the Arduino IDE, and there are thousands of tutorials online. Once you’re comfortable, you can upgrade to a more advanced board for added features.
Temperature and Humidity Sensor: Sensing the Environment
To make your air conditioner “smart,” you need to measure the environment. The DHT22 sensor is a favorite among makers because it’s accurate, affordable (around $5), and easy to use. It measures both temperature (±0.5°C accuracy) and humidity (±2-5% accuracy), which is crucial for effective climate control.
Alternatively, you can use the DS18B20 for temperature-only sensing. It’s waterproof and great for probing inside enclosures, but it doesn’t measure humidity. If you’re building a system for a server rack, the DS18B20 might be better. For a room cooler, the DHT22 is usually the way to go.
Cooling Mechanism: Peltier Modules vs. Compressors
This is where things get interesting. There are two main ways to generate cooling in a DIY system: Peltier (thermoelectric) modules and small compressors.
Peltier modules are solid-state devices that create a temperature difference when electricity is applied. They’re quiet, have no moving parts, and are perfect for small-scale cooling. A typical 12V, 60W Peltier can cool a small box or room by 10–15°F below ambient. The downside? They’re not very efficient and generate a lot of heat on the hot side, which must be dissipated with a heatsink and fan.
Compressors, like those in mini-fridges, are more efficient for larger cooling loads but are heavier, noisier, and harder to control. For most Arduino projects, Peltier modules are the practical choice. They’re easy to wire, respond quickly to changes, and work well with PWM (pulse-width modulation) for variable cooling.
Power Supply: Keeping It Safe and Stable
Your components need power, and choosing the right supply is critical. Peltier modules can draw 5–10 amps at 12V, so a standard USB power bank won’t cut it. You’ll need a 12V DC power supply with at least a 5A rating—look for a regulated switching power supply from a reputable brand.
Never power high-current devices like Peltiers directly from the Arduino’s 5V pin. That pin is only meant for low-power sensors and LEDs. Instead, use an external power source and connect the grounds together. This prevents damage to your board and ensures stable operation.
Relays and MOSFETs: Controlling High-Power Devices
Since the Arduino can’t handle high currents, you’ll need a way to switch your Peltier or fan on and off. That’s where relays or MOSFETs come in.
A relay acts like an electronic switch. When the Arduino sends a signal, the relay closes the circuit, powering the Peltier. Relays are simple and work well for on/off control. However, they can wear out over time and are slower than solid-state options.
A MOSFET (like the IRFZ44N) is a better choice for PWM control. It allows you to vary the power to the Peltier, enabling smoother temperature regulation. MOSFETs are faster, more efficient, and don’t have moving parts. Just make sure to use a logic-level MOSFET that can be driven by the Arduino’s 5V output.
Heatsinks and Fans: Managing Heat Dissipation
Here’s a critical point: Cooling one side of a Peltier module makes the other side hotter. If you don’t dissipate that heat, your system will overheat and fail. That’s why you need a heatsink and fan on the hot side.
Use a large aluminum heatsink (at least 4×4 inches) and a 12V fan to blow air over it. You can even use a second fan on the cold side to improve airflow. Thermal paste between the Peltier and heatsink ensures efficient heat transfer. Without proper cooling, your Peltier will lose effectiveness and may burn out.
Optional but Useful Add-ons
Want to take your project to the next level? Consider these extras:
- LCD Display: Shows real-time temperature and system status.
- SD Card Module: Logs data for analysis.
- Wi-Fi Module (ESP8266): Enables remote control and monitoring.
- Battery Backup: Keeps the system running during outages.
- Enclosure: Protects components and improves aesthetics.
With these components, you’re ready to build a functional, intelligent cooling system. In the next section, we’ll walk through the assembly process step by step.
Step-by-Step Assembly: Building Your Arduino Air Conditioner
Now that you have all your components, it’s time to put everything together. Don’t worry—this isn’t rocket science. With a little patience and attention to detail, you’ll have a working Arduino air conditioner in a few hours. I’ll guide you through the process as if we’re building it together in my garage, tools in hand and coffee in cup.
Step 1: Plan Your Layout
Before you start wiring, sketch out a simple diagram of how everything will connect. Think about where each component will go: the Arduino on a breadboard, the Peltier mounted between two heatsinks, the sensor placed where it can accurately read the room temperature. Planning ahead saves time and prevents mistakes.
For example, I like to place the DHT22 sensor away from direct airflow and heat sources—like the Peltier’s hot side—so it gives a true reading of the ambient environment. If it’s too close to the cooling unit, it might think the room is colder than it actually is, causing the system to overwork.
Step 2: Wire the Temperature Sensor
Start with the DHT22. It has three pins: VCC, GND, and DATA. Connect VCC to the Arduino’s 5V pin, GND to ground, and DATA to a digital pin (I use pin 2). Add a 10kΩ pull-up resistor between VCC and DATA to stabilize the signal. This ensures reliable communication between the sensor and the Arduino.
Pro tip: Use jumper wires with female connectors for easy attachment. If you’re building a permanent system, solder the connections for durability.
Step 3: Connect the Peltier Module
Now for the fun part—wiring the Peltier. Remember, it needs external power. Connect the positive lead of the Peltier to the positive terminal of your 12V power supply. Connect the negative lead to the drain (D) pin of your MOSFET. The source (S) pin of the MOSFET goes to ground, and the gate (G) pin connects to a PWM-capable pin on the Arduino (like pin 9).
This setup allows the Arduino to control the Peltier’s power using PWM. When the gate receives a signal, the MOSFET opens, letting current flow through the Peltier. By varying the PWM duty cycle, you can adjust cooling intensity—smooth, responsive control that a simple relay can’t match.
Step 4: Add the Heatsink and Fans
Mount the Peltier between two heatsinks using thermal paste. The cold side faces the area you want to cool; the hot side needs maximum airflow. Attach a 12V fan to the hot-side heatsink and wire it directly to the 12V power supply (or through a relay if you want to control it with the Arduino).
I once made the mistake of using a small heatsink. Within minutes, the Peltier overheated and shut down. Lesson learned: bigger is better when it comes to heat dissipation. Use the largest heatsink you can fit, and don’t skip the thermal paste—it makes a huge difference.
Step 5: Power It Up Safely
Double-check all connections before applying power. Make sure the Arduino and Peltier are on separate power circuits but share a common ground. This prevents voltage spikes from damaging the microcontroller.
Turn on the 12V supply first, then plug in the Arduino. If everything is wired correctly, the fan should spin, and the Arduino should boot up. Use the Serial Monitor in the Arduino IDE to check if the DHT22 is reading temperature correctly.
Step 6: Test and Troubleshoot
Run a quick test: set the cooling threshold to 75°F and see if the Peltier activates when the temperature rises. If it doesn’t, check your MOSFET wiring and PWM signal. If the sensor isn’t working, verify the pull-up resistor and data pin connection.
Common issues include:
- Peltier not cooling: Check polarity—reverse the wires to switch hot and cold sides.
- Arduino resetting: Likely a power issue—ensure the 12V supply is stable and grounds are connected.
- Inaccurate readings: Move the sensor away from heat sources or add shielding.
Once everything is working, you’re ready to upload the full code and enjoy your custom cooling system.
Programming Your Arduino Air Conditioner: Code and Logic
The real magic of an Arduino air conditioner lies in the code. This is where you define how the system behaves—when it turns on, how strongly it cools, and what it does with the data. Don’t worry if you’re new to programming; the Arduino IDE makes it surprisingly easy. I’ll walk you through a basic sketch and explain how to customize it.
Setting Up the Arduino IDE
First, download and install the Arduino IDE on your computer. Connect your Arduino via USB and select the correct board and port under the Tools menu. Install the DHT sensor library by going to Sketch > Include Library > Manage Libraries, then search for “DHT sensor library” by Adafruit and install it.
This library simplifies reading data from the DHT22. Without it, you’d have to write complex timing code to interpret the sensor’s signal. With the library, it’s just a few lines.
Basic Code Structure
Here’s a simple example that reads temperature and turns on the Peltier when it exceeds 75°F:
#include <DHT.h>#define DHTPIN 2
#define DHTTYPE DHT22
#define COOLING_PIN 9DHT dht(DHTPIN, DHTTYPE);
void setup() {
Serial.begin(9600);
dht.begin();
pinMode(COOLING_PIN, OUTPUT);
}void loop() {
float temp = dht.readTemperature() * 9.0 / 5.0 + 32; // Convert to Fahrenheit
float hum = dht.readHumidity();Serial.print("Temp: ");
Serial.print(temp);
Serial.print("°F, Humidity: ");
Serial.print(hum);
Serial.println("%");if (temp > 75) {
analogWrite(COOLING_PIN, 255); // Full power
} else {
analogWrite(COOLING_PIN, 0); // Off
}delay(2000);
}This code reads the temperature every 2 seconds. If it’s above 75°F, it sends full power (255) to the Peltier via PWM. Otherwise, it turns it off. You can adjust the threshold and add hysteresis (a small buffer to prevent rapid cycling) for smoother operation.
Adding Smart Features
Want more control? Here are some upgrades:
- Variable Cooling: Use a PID controller to adjust PWM based on how far the temperature is from the setpoint.
- Humidity Control: Add logic to activate a dehumidifier or fan when humidity is high.
- Scheduling: Use a real-time clock (RTC) module to run the system only during certain hours.
- Remote Monitoring: Add Wi-Fi and send data to a cloud dashboard like ThingSpeak.
For example, I modified my code to include a “quiet mode” that reduces fan speed at night. It’s amazing how much more comfortable a space feels when the cooling is intelligent and adaptive.
Performance Data and Optimization Tips
So how well does an Arduino air conditioner actually work? Let’s look at some real-world data and tips to get the best performance.
| Component | Specification | Performance Impact |
|---|---|---|
| Peltier Module | 12V, 60W | Cools small space by 10–15°F |
| Heatsink | 4" x 4" aluminum | Reduces hot-side temp by 20–30°F |
| Fan | 12V, 0.2A | Improves airflow and efficiency |
| Power Supply | 12V, 5A | Ensures stable operation |
To optimize your system:
- Use thermal paste on all contact surfaces.
- Insulate the cold side to prevent condensation.
- Clean fans and heatsinks regularly.
- Monitor power usage with a multimeter.
Conclusion: Cooling Smarter, Not Harder
Building an Arduino air conditioner isn’t just about beating the heat—it’s about understanding how technology can make our lives more efficient, sustainable, and personalized. From the first spark of an idea to the satisfying hum of a working cooling system, this project teaches valuable skills in electronics, programming, and problem-solving.
Yes, it has limitations. It won’t replace your central AC, and it requires careful assembly. But for targeted cooling in small spaces, it’s a powerful, customizable solution. And the pride of saying, “I built that”? That’s priceless.
So grab your Arduino, gather your parts, and start building. The future of DIY climate control is here—and it’s cooler than ever.
Frequently Asked Questions
What is an Arduino Air Conditioner Instructable?
An Arduino Air Conditioner Instructable is a step-by-step DIY guide that teaches you how to build a smart, programmable air conditioning system using an Arduino microcontroller. It combines cooling components like Peltier modules or mini-compressors with Arduino's automation for temperature control and energy efficiency.
Can I build an Arduino air conditioner without prior electronics experience?
Yes! This Arduino Air Conditioner Instructable is designed for beginners, with detailed wiring diagrams, code explanations, and safety tips. Basic soldering and tool-handling skills are helpful but not mandatory—most kits use plug-and-play modules.
How does the Arduino control the air conditioner's temperature?
The Arduino reads data from a temperature sensor (like the DHT22) and triggers cooling components (e.g., fans, Peltier tiles) via relays or MOSFETs when the temperature exceeds your set threshold. The Instructable includes pre-written code for seamless integration.
Is an Arduino-based air conditioner energy-efficient compared to traditional units?
While not as powerful as commercial ACs, Arduino air conditioners excel in localized cooling (e.g., small rooms or enclosures) and use minimal power. The Instructable emphasizes optimizing energy use with sleep modes and PWM fan control.
What components are needed for this Arduino air conditioner project?
Essential parts include an Arduino board, temperature/humidity sensor, Peltier module or small compressor, heat sinks, fans, power supply, and relays. The Instructable lists affordable, widely available options and alternative substitutions.
Can I add smart features like Wi-Fi or remote control?
Absolutely! The Arduino Air Conditioner Instructable includes optional upgrades like ESP8266 Wi-Fi modules for app-based control (e.g., Blynk or Home Assistant) or voice commands via Alexa/Google Assistant.

