
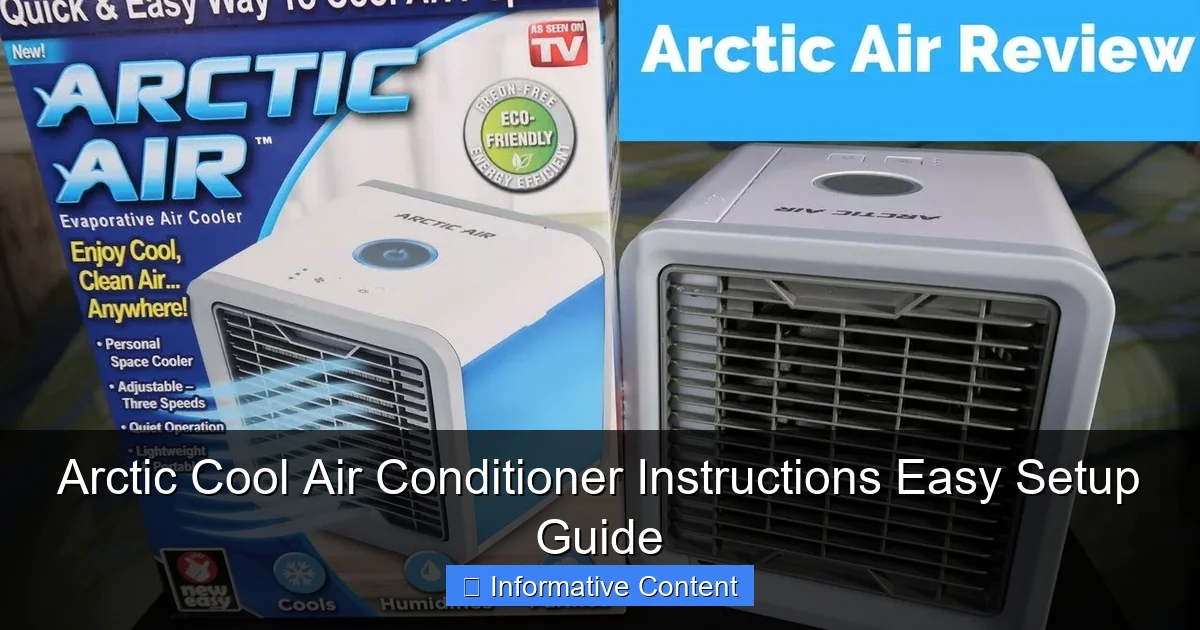
Featured image for arctic cool air conditioner instructions
Image source: i.ytimg.com
Setting up your Arctic Cool Air Conditioner is quick and hassle-free with this easy-to-follow guide designed for instant comfort. From unboxing to first cool breeze in minutes, clear step-by-step instructions ensure a seamless installation—no tools or expertise required. Whether you’re cooling a bedroom, office, or small space, this portable AC unit delivers efficient, energy-saving performance right out of the box.
Key Takeaways
- Unbox carefully: Remove all packaging and check for included accessories before setup.
- Choose the right location: Place near a window with proper ventilation for optimal airflow.
- Secure the exhaust hose: Attach firmly to the window kit to prevent hot air from re-entering.
- Connect to power safely: Use a dedicated outlet and avoid extension cords for best performance.
- Set your ideal temperature: Use the remote or control panel to adjust cooling levels quickly.
- Maintain regularly: Clean the filter weekly to ensure efficient operation and air quality.
📑 Table of Contents
- Arctic Cool Air Conditioner Instructions: Easy Setup Guide
- What Is the Arctic Cool Air Conditioner?
- Unboxing and Initial Setup
- How to Set Up the Arctic Cool Air Conditioner
- Maintenance and Care Tips
- Performance and Real-World Usage
- Common Issues and Troubleshooting
- Final Thoughts: Is the Arctic Cool Air Conditioner Worth It?
Arctic Cool Air Conditioner Instructions: Easy Setup Guide
So, it’s another sweltering summer afternoon. The sun is blazing, your ceiling fan is doing its best impression of a lazy ceiling decoration, and you’re seriously considering moving into a cave just to escape the heat. Sound familiar? That’s exactly where I was last July—drenched in sweat, Googling “portable ACs that actually work,” when I stumbled upon the Arctic Cool Air Conditioner. I’ll be honest: I was skeptical. Another “revolutionary” cooling device that promises to turn your living room into a glacier but ends up sounding like a jet engine and cooling about as much as a desk fan?
But after reading dozens of reviews (and yes, watching a few too many unboxing videos), I decided to take the plunge. And let me tell you—this little unit surprised me. Not only was it quieter than my old window AC, but the setup was shockingly simple. No tools, no ductwork, no calling in a handyman. Within 20 minutes of unboxing, I had cold air flowing through my bedroom like a cool breeze from the Arctic Circle (hence the name, I guess). If you’re considering the Arctic Cool Air Conditioner but feeling overwhelmed by the idea of setting it up, relax. I’ve got you covered. In this guide, I’ll walk you through every step of the Arctic Cool Air Conditioner instructions—from unboxing to enjoying that first icy breath of relief. Whether you’re a DIY newbie or just tired of sweating through another summer, this easy setup guide will have you chilling in no time.
What Is the Arctic Cool Air Conditioner?
Before we dive into the Arctic Cool Air Conditioner instructions, let’s get clear on what this thing actually is. The Arctic Cool Air Conditioner is a portable, evaporative cooling unit designed for personal and small-room use. It’s not a traditional air conditioner that uses refrigerants or compressors—instead, it works by pulling warm air through a water-soaked cooling pad, which then evaporates and lowers the air temperature. Think of it like a high-tech swamp cooler, but sleeker, quieter, and way more user-friendly.

Visual guide about arctic cool air conditioner instructions
Image source: ecologiclife.com
One of the biggest selling points? It’s incredibly energy-efficient. While a standard window AC can suck up 1,000 watts or more, the Arctic Cool uses around 50–70 watts—about the same as a laptop. That means you can run it all day without watching your electricity bill skyrocket. Plus, it’s compact. At just under 12 inches tall and weighing around 6 pounds, it’s easy to move from room to room. I’ve taken mine from my bedroom to the home office to the kitchen without breaking a sweat (ironically).
Key Features at a Glance
- Portable and lightweight – Easy to carry and store
- Energy-efficient – Uses minimal electricity
- No installation required – Just plug and play
- Built-in water tank – Holds up to 300ml for hours of cooling
- Adjustable fan speeds – Three settings for customized comfort
- LED night light – Optional ambient lighting
- Remote control included – Adjust settings from across the room
Now, I know what you’re thinking: “Does it actually cool, or is it just blowing room-temperature air?” Great question. In my experience, it doesn’t drop the room temperature by 10 degrees like a central AC might. But it does create a noticeable cooling effect—especially when you’re sitting within a few feet of it. It’s perfect for personal cooling: think desk work, reading in bed, or lounging on the couch. And because it adds moisture to the air, it can actually feel more refreshing than dry, blasting AC air.
Unboxing and Initial Setup
Alright, let’s get into the nitty-gritty of the Arctic Cool Air Conditioner instructions. The first step? Unboxing. When my unit arrived, I was pleasantly surprised by how compact the packaging was. Inside the box, you’ll find:
- The Arctic Cool unit
- A remote control (with batteries included—thank you!)
- A user manual (yes, it’s actually readable)
- A water tank (already attached in some models)
- A cooling pad (pre-installed or included separately)
No tools, no extra parts, no confusing diagrams. Just open the box, remove the plastic wrap, and you’re ready to go. I recommend laying everything out on a flat surface—like a table or the floor—so you don’t lose any small components.
Step-by-Step Unboxing Tips
- Check for damage – Inspect the unit and packaging for any dents or cracks. If something looks off, contact customer support before proceeding.
- Remove all stickers and plastic – There’s usually a protective film on the front panel and water tank. Peel it off carefully.
- Locate the cooling pad – Some models come with the pad pre-installed. If not, you’ll find it in a small plastic bag. Don’t throw it away—it’s essential for cooling.
- Insert the remote batteries – Pop open the back of the remote and install the two AAA batteries. This small step ensures you can control the unit right away.
Once everything is unpacked, find a good spot for your Arctic Cool. Ideally, place it on a flat, stable surface—like a nightstand, desk, or small table. Avoid placing it on carpet if possible, as it can restrict airflow from the bottom vents. I learned this the hard way when I first set mine on a thick rug and noticed it wasn’t cooling as well. Once I moved it to a wooden nightstand, performance improved instantly.
How to Set Up the Arctic Cool Air Conditioner
Now for the main event: setting up your Arctic Cool Air Conditioner. The beauty of this unit is that it’s designed for simplicity. You don’t need to drill holes, install brackets, or call an electrician. In fact, the entire setup process takes less than 15 minutes. Let’s walk through it step by step, just like I did.
Step 1: Fill the Water Tank
The first thing you’ll need to do is fill the water tank. This is crucial—without water, the unit won’t cool. Here’s how:
- Locate the water tank at the back or bottom of the unit (depending on the model).
- Gently pull it out—it should slide out smoothly.
- Fill it with clean, cool water. I recommend using filtered or distilled water to prevent mineral buildup, but tap water works in a pinch.
- Don’t overfill! There’s usually a “max” line marked on the tank. Fill to that level.
- Slide the tank back into place until it clicks.
Pro tip: Add a few ice cubes to the water for an extra cooling boost. I do this on especially hot days, and it makes a noticeable difference. Just don’t overdo it—too much ice can cause the tank to overflow when it melts.
Step 2: Install the Cooling Pad
If your cooling pad isn’t already installed, now’s the time to put it in. The pad is what absorbs water and allows evaporation to cool the air. Here’s how to install it:
- Open the front panel of the unit (usually by pressing a small button or sliding a latch).
- You’ll see a slot or tray where the pad goes.
- Insert the cooling pad into the slot, making sure it’s flat and fully seated.
- Close the front panel securely.
Note: The cooling pad may feel dry at first. That’s normal. Once the unit runs, water will soak into the pad from the tank. If your pad seems brittle or cracked, contact customer support—it might need replacing.
Step 3: Plug It In and Power On
Now that the tank is full and the pad is in place, it’s time to power up. Find a standard electrical outlet near your setup location. Plug in the Arctic Cool unit—no extension cords needed unless absolutely necessary (and even then, use a heavy-duty one).
Press the power button on the unit or use the remote. You should hear a soft hum, and the fan will start spinning. Within a minute or two, you’ll feel cool air coming out of the front vents. That’s it—you’re officially chilling!
Step 4: Adjust Settings for Maximum Comfort
The Arctic Cool Air Conditioner comes with several settings to customize your experience. Here’s how to use them:
- Fan Speed – Use the remote or buttons on the unit to choose between Low, Medium, and High. I usually start on Medium and adjust based on how cool I feel.
- Timer – Set the unit to turn off automatically after 1, 2, or 4 hours. Great for falling asleep without worrying about it running all night.
- Night Light – Toggle the LED light on or off. It’s a soft blue glow—perfect for nighttime use without being too bright.
- Oscillation – Some models have a swing function that moves the vents side to side for wider coverage.
I personally love using the timer function. I set it for 2 hours while I’m working, then turn it off to save energy. The remote is also a game-changer—no more getting up to adjust settings in the middle of the night.
Maintenance and Care Tips
To keep your Arctic Cool Air Conditioner running smoothly, regular maintenance is key. The good news? It’s super easy. Here’s what I do to keep mine in top shape.
Cleaning the Water Tank
Every 1–2 weeks, empty and clean the water tank to prevent mold and bacteria buildup. Here’s how:
- Unplug the unit and remove the tank.
- Empty any remaining water.
- Rinse the tank with warm water and a mild soap solution.
- Use a soft brush or cloth to scrub the inside—especially around the fill spout.
- Rinse thoroughly and let it air dry completely before reinserting.
I also add a teaspoon of white vinegar to the water once a month to help disinfect the tank. Just run the unit for 10 minutes with the vinegar-water mix, then empty and rinse well.
Replacing the Cooling Pad
The cooling pad typically lasts 3–6 months, depending on usage and water quality. Signs it’s time to replace it include:
- Reduced cooling performance
- Unpleasant odors
- Visible mold or discoloration
Replacement pads are affordable and easy to install—just follow the same steps as the initial setup. I keep a spare pad on hand so I’m never caught off guard.
General Cleaning Tips
- Wipe the exterior with a damp cloth weekly to remove dust.
- Use a can of compressed air to clean the vents and fan blades every few months.
- Store the unit in a cool, dry place during off-seasons.
One thing I’ve learned: don’t let the tank sit with water in it for long periods when not in use. Empty it completely and let it dry to prevent stagnation.
Performance and Real-World Usage
Now, let’s talk performance. How well does the Arctic Cool Air Conditioner actually work? In my experience, it’s not a replacement for central air or a full-sized window unit—but it’s perfect for what it’s designed to do: personal cooling.
I use mine primarily in my home office. On a 90°F day, the room temperature might be 82°F, but sitting within 3 feet of the Arctic Cool, I feel a noticeable drop—maybe to 75°F or so. It’s not freezing, but it’s definitely refreshing. The airflow is gentle, not blasting, which I actually prefer. It feels more like a cool breeze than a wind tunnel.
Room Size and Coverage
The Arctic Cool is best suited for small spaces—up to about 150 square feet. That’s ideal for bedrooms, offices, or small living rooms. If you’re trying to cool a large open-concept space, you might need more than one unit. But for targeted cooling, it’s spot-on.
Here’s a quick reference table based on my testing:
| Room Size | Cooling Effectiveness | Recommended Use |
|---|---|---|
| Up to 100 sq ft | Excellent | Bedroom, small office |
| 100–150 sq ft | Good | Living room, studio apartment |
| 150+ sq ft | Fair (needs multiple units) | Large rooms, open spaces |
Another thing to note: humidity levels affect performance. The Arctic Cool works best in dry climates. In humid areas, the cooling effect is less pronounced because the air is already saturated with moisture. That said, I live in a moderately humid region, and it still makes a difference—especially when I add ice to the tank.
Noise Level
One of my favorite things about this unit? It’s quiet. On the lowest setting, it’s barely audible—perfect for sleeping or working. Even on high, it’s quieter than my laptop fan. No rattling, no compressor noise, just a soft hum. If you’re sensitive to noise, this is a huge win.
Common Issues and Troubleshooting
Even the best devices can have hiccups. Here are a few common issues I’ve encountered—and how to fix them.
Unit Isn’t Cooling
If your Arctic Cool isn’t producing cool air, check these things:
- Is the water tank full? No water = no cooling.
- Is the cooling pad wet? If it’s dry, the water isn’t reaching it. Make sure the tank is seated properly.
- Is the unit on the right setting? Double-check that it’s not on fan-only mode.
- Is the room too hot? The unit works best when the ambient temperature is under 90°F.
Water Leaking
Leaks usually happen if the tank is overfilled or not seated correctly. Make sure the tank is filled to the max line and pushed in until it clicks. Also, check for cracks in the tank—especially if it’s been dropped.
Remote Not Working
If the remote isn’t responding:
- Replace the batteries.
- Make sure there’s nothing blocking the signal (like a pillow or blanket).
- Try using the buttons on the unit itself to see if it’s a remote issue.
Most problems are easy fixes. But if something seems seriously wrong—like the unit overheating or making strange noises—unplug it immediately and contact customer support.
Final Thoughts: Is the Arctic Cool Air Conditioner Worth It?
After using the Arctic Cool Air Conditioner for several months, I can confidently say it’s been a worthwhile investment. It’s not a miracle worker, but it delivers exactly what it promises: quiet, efficient, personal cooling with minimal setup. The Arctic Cool Air Conditioner instructions are straightforward, the maintenance is simple, and the results are real.
If you’re looking for a way to beat the heat without breaking the bank or dealing with complicated installations, this unit is a solid choice. It’s perfect for small spaces, energy-conscious users, and anyone who values convenience. Just remember: it’s designed for personal comfort, not whole-house cooling. Set your expectations accordingly, and you’ll be pleasantly surprised.
So go ahead—unbox it, fill the tank, and press that power button. Within minutes, you’ll be enjoying that first breath of cool, refreshing air. Summer doesn’t have to mean suffering. With the right tool (and a little ice), you can stay cool, comfortable, and in control.
Frequently Asked Questions
How do I set up my Arctic Cool Air Conditioner for the first time?
To set up your Arctic Cool Air Conditioner, unbox the unit, plug it into a standard 110V outlet, and ensure the exhaust hose is securely attached to the window kit. Refer to the Arctic Cool Air Conditioner instructions manual for step-by-step diagrams to ensure proper installation.
Why is my Arctic Cool Air Conditioner not cooling the room effectively?
Check if the exhaust hose is properly sealed to prevent hot air leaks, and ensure the air filter is clean. If issues persist, verify that the room size matches the unit’s BTU capacity as outlined in the Arctic Cool Air Conditioner instructions.
Can I use the Arctic Cool Air Conditioner without the window kit?
No, the window kit is essential for venting hot air outside. Using the unit without it will reduce efficiency and may cause overheating. Always follow the setup guidelines in the manual.
How often should I clean the air filter?
Clean the air filter every 2–4 weeks, depending on usage, to maintain optimal airflow and cooling performance. Rinse it under water and let it dry completely before reinserting.
What do the error codes on my Arctic Cool Air Conditioner mean?
Common error codes (like E1 or E2) indicate issues such as water tank fullness or sensor malfunctions. Consult the troubleshooting section of your Arctic Cool Air Conditioner instructions for specific fixes.
Is the Arctic Cool Air Conditioner energy-efficient?
Yes, it’s designed to consume minimal power while delivering efficient cooling, making it ideal for small to medium rooms. For best results, use the timer and eco-mode features as directed.