
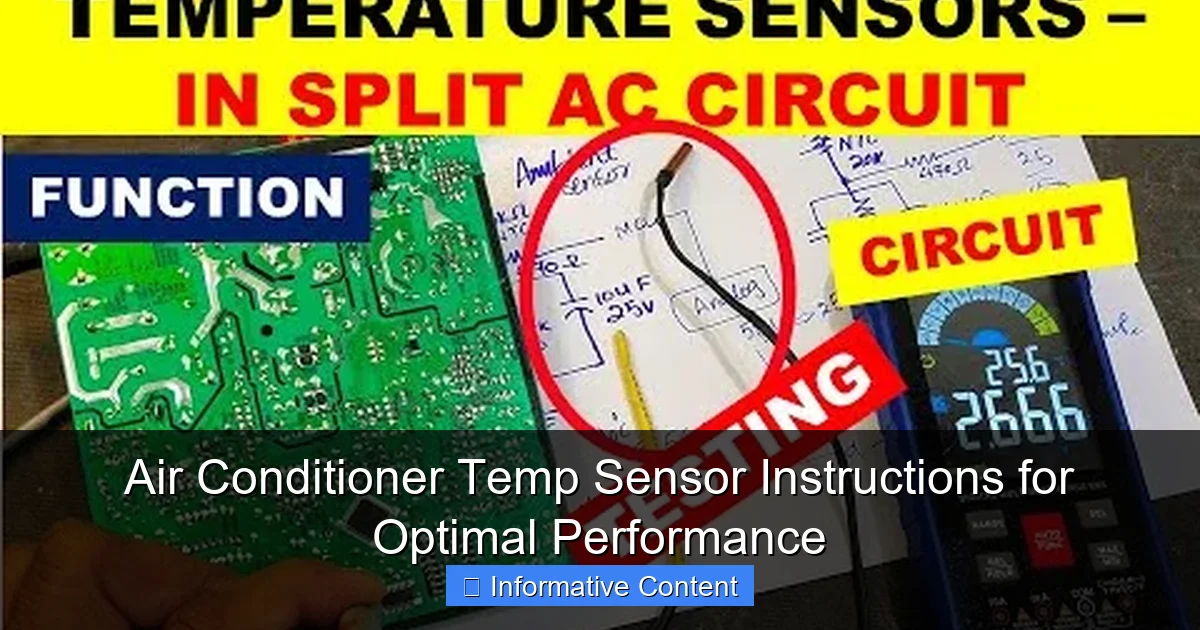
Featured image for air conditioner temp sensor instructions
Image source: i.ytimg.com
Properly calibrating your air conditioner’s temperature sensor is essential for accurate cooling and energy efficiency. Follow the manufacturer’s instructions to locate, clean, and position the sensor correctly—avoiding direct sunlight or drafts—for optimal performance. Regular maintenance ensures consistent comfort and prevents unnecessary system strain.
Key Takeaways
- Calibrate regularly: Ensure accuracy by testing the temp sensor monthly.
- Clean sensor coils: Dust buildup reduces efficiency—wipe gently with a soft cloth.
- Check placement: Install sensors away from heat sources for true readings.
- Monitor fluctuations: Sudden changes may signal sensor or system issues.
- Use manufacturer settings: Follow brand-specific guidelines for optimal performance.
- Upgrade if faulty: Replace malfunctioning sensors promptly to avoid energy waste.
📑 Table of Contents
- Air Conditioner Temp Sensor Instructions for Optimal Performance
- What Is an Air Conditioner Temperature Sensor and Why Does It Matter?
- How to Locate and Identify Your AC Temperature Sensor
- Step-by-Step Air Conditioner Temp Sensor Instructions for Testing and Replacement
- Common Mistakes to Avoid When Handling AC Temperature Sensors
- Maintenance Tips to Keep Your AC Sensor Working Properly
- When to Call a Professional for Sensor Issues
- Conclusion: Master Your AC’s Performance with Proper Sensor Care
Air Conditioner Temp Sensor Instructions for Optimal Performance
It was a sweltering July afternoon when I first noticed something was off with my air conditioner. The house felt warm, sticky, and far from the cool sanctuary I expected. I checked the thermostat—set to 72°F—but the air blowing from the vents was barely cooler than room temperature. At first, I thought it might be a refrigerant issue or a clogged filter. But after some troubleshooting, I discovered the real culprit: a malfunctioning temperature sensor.
That experience taught me how critical the temperature sensor is to your AC’s performance. It’s not just a small component tucked away inside the unit—it’s the brain behind your cooling system’s decision-making. Without accurate readings, your air conditioner can’t regulate temperature properly, leading to discomfort, higher energy bills, and even system damage over time. Whether you’re a homeowner trying to stay cool or a technician looking to fine-tune a system, understanding air conditioner temp sensor instructions is essential for optimal performance.
In this guide, I’ll walk you through everything you need to know about air conditioner temperature sensors—from what they do and how they work, to step-by-step instructions for testing, replacing, and calibrating them. You’ll also get practical tips to keep your AC running efficiently all season long. Let’s dive in.
What Is an Air Conditioner Temperature Sensor and Why Does It Matter?
The air conditioner temperature sensor—often called a thermistor or temperature probe—is a small but mighty component that monitors the temperature of the air entering and leaving your AC system. It sends real-time data to the thermostat and control board, allowing the system to adjust cooling output accordingly. Think of it as the “thermometer” that tells your AC whether to keep running, cycle off, or increase fan speed.
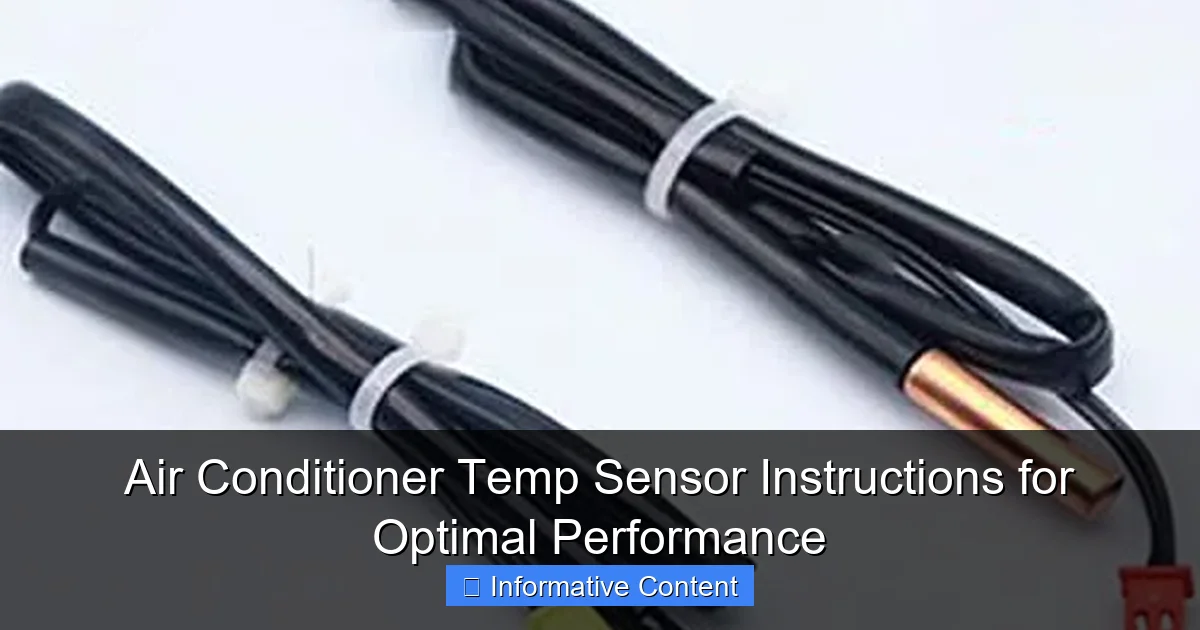
Visual guide about air conditioner temp sensor instructions
Image source: m.media-amazon.com
Most modern air conditioners use one or more sensors located in key areas: near the evaporator coil, inside the return air duct, or attached to the refrigerant line. These sensors are typically made of materials that change resistance with temperature, allowing the system to interpret temperature changes electronically. Without accurate sensor readings, your AC might overcool, undercool, or short-cycle—turning on and off too frequently, which wears out components faster.
Common Signs of a Faulty Temperature Sensor
- Inconsistent cooling: Rooms feel too warm or too cold despite thermostat settings.
- Short cycling: The AC turns on and off rapidly without completing a full cooling cycle.
- High energy bills: The system runs longer than necessary due to incorrect temperature feedback.
- Frozen evaporator coils: A sensor misreading can cause the compressor to run nonstop, leading to ice buildup.
- Thermostat displaying incorrect temperatures: The display may show a temperature that doesn’t match the actual room temperature.
For example, I once helped a neighbor whose AC was constantly freezing up. After inspecting the system, we found the suction line sensor was coated in dust and giving false low-temperature readings. The compressor kept running, thinking the coil was too cold, when in reality it was overheating. Cleaning and recalibrating the sensor solved the problem immediately.
Types of Temperature Sensors in Air Conditioners
Not all sensors are the same. Here are the most common types you’ll find in residential and light commercial AC units:
- Thermistors: These are the most common. They change electrical resistance based on temperature and are highly sensitive. Most thermostats use a thermistor to read room temperature.
- RTDs (Resistance Temperature Detectors): More accurate and stable than thermistors, often used in high-end or commercial systems.
- IC Sensors (Integrated Circuit Sensors): Digital sensors that provide precise readings and are often found in smart thermostats or advanced HVAC controls.
- Bimetal Sensors: Older mechanical sensors that use two metals with different expansion rates to trigger switches. Less common in modern units.
Understanding which type your system uses can help you choose the right replacement and follow the correct air conditioner temp sensor instructions during installation or troubleshooting.
How to Locate and Identify Your AC Temperature Sensor
Finding the temperature sensor in your air conditioner isn’t always straightforward—especially if you’re not familiar with HVAC components. But with a little guidance, you can locate it quickly and safely.
Step-by-Step Guide to Finding the Sensor
- Turn off the power: Always shut off the power to your AC unit at the breaker panel before inspecting internal components. Safety first!
- Access the indoor unit: Most temperature sensors are located in the indoor air handler or furnace. Remove the front panel or access door.
- Look near the evaporator coil: The primary temperature sensor is often clipped to the suction line (the large copper pipe) near the evaporator coil. It’s usually a small, bullet-shaped probe with two wires attached.
- Check the return air duct: Some systems have a sensor mounted in the return air duct, typically near the air filter. It may be wired directly to the thermostat or control board.
- Consult your owner’s manual: If you’re unsure, the manual will often include a diagram showing sensor locations for your specific model.
For instance, in my own system, the main sensor is clipped to the suction line about six inches from the evaporator coil. It’s held in place with a plastic clip and connected to a two-wire harness. I use a flashlight and mirror to get a clear view without disassembling too much.
Identifying Sensor Wires and Connections
Once you’ve located the sensor, take note of the wire colors and how they’re connected. Most sensors use two wires—often white and yellow, or red and white—that plug into a connector on the control board. Some systems may have three or four wires if the sensor includes additional functions like humidity sensing.
Pro tip: Take a photo of the wiring before disconnecting anything. This makes reinstallation much easier and reduces the risk of incorrect connections.
Common Sensor Locations by AC Type
| AC Type | Typical Sensor Location | Notes |
|---|---|---|
| Central Air Conditioner | Suction line near evaporator coil | Often clipped or strapped in place |
| Ductless Mini-Split | Indoor unit, near heat exchanger | May be integrated into the control board |
| Window Unit | Behind front panel, near evaporator | Smaller sensor, often soldered to circuit board |
| Heat Pump | Both indoor and outdoor units | Multiple sensors for defrost and mode control |
Knowing where to look saves time and frustration. If you can’t find the sensor after checking these locations, it may be embedded in the control board or require professional disassembly.
Step-by-Step Air Conditioner Temp Sensor Instructions for Testing and Replacement
Testing and replacing a faulty temperature sensor is one of the most effective ways to restore your AC’s performance. With the right tools and a bit of patience, you can do this yourself—no HVAC license required.
Tools You’ll Need
- Multimeter (digital preferred)
- Screwdrivers (Phillips and flathead)
- Needle-nose pliers
- Replacement sensor (check model compatibility)
- Electrical tape or wire connectors
- Safety gloves and goggles
How to Test the Temperature Sensor
Testing the sensor involves checking its resistance at different temperatures. Here’s how:
- Turn off power to the AC unit.
- Locate the sensor and disconnect the wires. Note the wire colors and positions.
- Set your multimeter to the ohms (Ω) setting. For most thermistors, you’ll want the 20kΩ range.
- Touch the multimeter probes to the sensor wires. Do not touch the metal tips with your fingers.
- Record the resistance reading at room temperature. A typical thermistor should read between 5,000 and 30,000 ohms at 77°F (25°C), depending on the type.
- Compare the reading to the manufacturer’s specifications. You can usually find this in the service manual or online.
- Test again after warming the sensor. Use a hair dryer to gently heat the sensor and watch for a change in resistance. If the resistance doesn’t change, the sensor is likely faulty.
For example, my system uses a 10kΩ thermistor. At room temperature (75°F), it reads about 10,500 ohms. When I warmed it with a hair dryer, the resistance dropped to around 7,000 ohms—showing it was responding correctly to temperature changes. If it had stayed the same, I’d know it was dead.
Replacing the Temperature Sensor
If testing confirms the sensor is faulty, it’s time to replace it. Follow these air conditioner temp sensor instructions carefully:
- Turn off power at the breaker.
- Remove the old sensor. Unclip it from the suction line or unscrew it from the duct. Disconnect the wires.
- Install the new sensor. Position it in the same location as the old one. Secure it with a clip, zip tie, or mounting bracket.
- Reconnect the wires. Match the colors and ensure a snug connection. Use wire nuts or electrical tape if needed.
- Restore power and test the system. Turn the AC back on and monitor performance for 15–20 minutes.
One thing I’ve learned: don’t just tape the sensor to the pipe. It needs to make firm contact with the copper line to read temperature accurately. A loose sensor can give false readings and cause the same problems you’re trying to fix.
Calibrating the Sensor (If Applicable)
Some advanced systems allow for sensor calibration through the thermostat or control board. This is especially common in smart thermostats like Nest or Ecobee. Calibration adjusts the sensor’s reading to match the actual room temperature.
To calibrate:
- Use a separate, accurate thermometer to measure room temperature.
- Compare it to the thermostat reading.
- Adjust the offset in the thermostat settings (usually under “Preferences” or “Sensors”).
- For example, if the room is 74°F but the thermostat shows 76°F, set a -2°F offset.
This simple step can improve comfort and efficiency without replacing any hardware.
Common Mistakes to Avoid When Handling AC Temperature Sensors
Even with the best intentions, it’s easy to make mistakes when working with temperature sensors. I’ve made a few myself—like accidentally shorting wires or installing a sensor backward. Here are the most common pitfalls and how to avoid them.
Using the Wrong Replacement Sensor
Not all sensors are interchangeable. A 10kΩ thermistor won’t work in a system designed for a 5kΩ sensor. Always check the part number and specifications before buying a replacement. You can usually find this info on the old sensor or in the owner’s manual.
Pro tip: Take a photo of the old sensor’s label and search online for “compatible replacements.” Many HVAC suppliers offer cross-reference tools.
Improper Sensor Placement
Placing the sensor too far from the coil or in a drafty area can lead to inaccurate readings. The sensor should be in direct contact with the suction line or mounted securely in the return air stream.
I once saw a technician tape a sensor to the outside of a duct wrap—completely insulated from the airflow. No wonder the system was short-cycling!
Ignoring Wire Polarity (When Applicable)
While most two-wire sensors are non-polarized, some digital or three-wire sensors have a specific orientation. Reversing the wires can damage the sensor or control board. Always follow the wiring diagram.
Skipping the Multimeter Test
Don’t assume a sensor is bad just because the AC isn’t cooling well. Other issues—like low refrigerant or a dirty coil—can mimic sensor problems. Always test the sensor before replacing it.
Forgetting to Restore Power Safely
After replacing the sensor, double-check all connections before turning the power back on. A loose wire can cause a short circuit or damage the control board.
These mistakes might seem small, but they can lead to bigger problems—and unnecessary expenses. Take your time, follow the air conditioner temp sensor instructions carefully, and when in doubt, consult a professional.
Maintenance Tips to Keep Your AC Sensor Working Properly
Like any part of your air conditioner, temperature sensors benefit from regular maintenance. A little prevention goes a long way in avoiding breakdowns and ensuring accurate performance.
Clean the Sensor Regularly
Dust, dirt, and pet hair can coat the sensor, insulating it and causing false readings. Every 1–2 months, gently wipe the sensor with a dry cloth or use compressed air to blow away debris. Avoid using water or cleaning sprays—moisture can damage the electronics.
I clean my sensor during my monthly filter change. It only takes a minute and makes a noticeable difference in system responsiveness.
Check Sensor Placement During Repairs
Whenever you open the indoor unit for filter changes or coil cleaning, take a moment to inspect the sensor. Make sure it’s still securely attached and hasn’t shifted out of position.
Monitor Thermostat Accuracy
If you notice temperature inconsistencies, compare your thermostat reading to a standalone thermometer. A difference of more than 2°F may indicate a sensor issue—or a need for calibration.
Schedule Annual HVAC Tune-Ups
A professional technician can test all sensors, clean components, and verify system performance. This is especially important for older units or those in dusty environments.
Upgrade to a Smart Thermostat
Smart thermostats often include advanced sensor diagnostics and remote monitoring. Some even use room sensors to average temperatures across multiple locations, improving comfort and efficiency.
For example, I upgraded to a smart thermostat last year and noticed my AC ran more consistently. The system now adjusts based on actual room conditions, not just the sensor near the return duct.
When to Call a Professional for Sensor Issues
While many sensor problems can be fixed at home, some situations require expert help. Don’t hesitate to call an HVAC technician if:
- You’re unsure about wiring or sensor type.
- The sensor is embedded in the control board and difficult to access.
- Multiple sensors are failing or the system has complex controls.
- You suspect a deeper issue, like a faulty control board or refrigerant leak.
- You’ve replaced the sensor but the problem persists.
HVAC professionals have specialized tools—like thermal cameras and advanced multimeters—that can diagnose sensor issues more accurately. They can also ensure your system is operating safely and efficiently.
Remember: working with electrical components and refrigerants can be dangerous. If you’re not confident, it’s always better to call in a pro.
Conclusion: Master Your AC’s Performance with Proper Sensor Care
The temperature sensor may be small, but its impact on your air conditioner’s performance is huge. From ensuring consistent cooling to preventing system damage, this little component plays a big role in your comfort and energy efficiency. By following proper air conditioner temp sensor instructions—testing, replacing, and maintaining your sensor—you can keep your AC running smoothly all season long.
Whether you’re troubleshooting a warm house or performing routine maintenance, understanding how your sensor works empowers you to make informed decisions. And while DIY fixes are often effective, don’t hesitate to seek professional help when needed. Your comfort—and your wallet—will thank you.
So the next time your AC acts up, don’t just blame the weather. Check the sensor. It might just be the key to cooler days ahead.
Frequently Asked Questions
What is an air conditioner temp sensor and how does it work?
An air conditioner temp sensor is a component that measures the temperature of the air inside your home or the refrigerant in the system. It sends this data to the thermostat and control board, ensuring your AC unit cools efficiently and maintains the desired temperature.
How do I know if my air conditioner’s temperature sensor is malfunctioning?
If your air conditioner turns on and off frequently, fails to reach the set temperature, or runs continuously, the temp sensor might be faulty. You can verify this by checking for error codes on the thermostat or using a multimeter to test the sensor’s resistance.
Can I replace the air conditioner temp sensor myself?
Yes, replacing the air conditioner temp sensor is a manageable DIY task if you’re comfortable with basic HVAC components. Turn off power to the unit, locate the sensor (usually near the evaporator coil), disconnect the old sensor, and install the new one according to the manufacturer’s air conditioner temp sensor instructions.
Where should the temperature sensor be placed for optimal performance?
The sensor should be placed in a location that accurately reflects the room’s ambient temperature, typically near the evaporator coil or return air duct. Avoid placing it near heat sources, vents, or direct sunlight, as this can cause inaccurate readings.
How often should I calibrate my air conditioner’s temperature sensor?
Most modern air conditioner temp sensors are factory-calibrated and don’t require frequent adjustments. However, if you notice inconsistent cooling or temperature swings, recalibrate or replace the sensor as per the manufacturer’s air conditioner temp sensor instructions.
Do all air conditioners use the same type of temperature sensor?
No, different AC models use various types of temperature sensors, such as thermistors, infrared sensors, or thermocouples. Always check your unit’s manual or consult the manufacturer to ensure compatibility when replacing your air conditioner temp sensor.

