
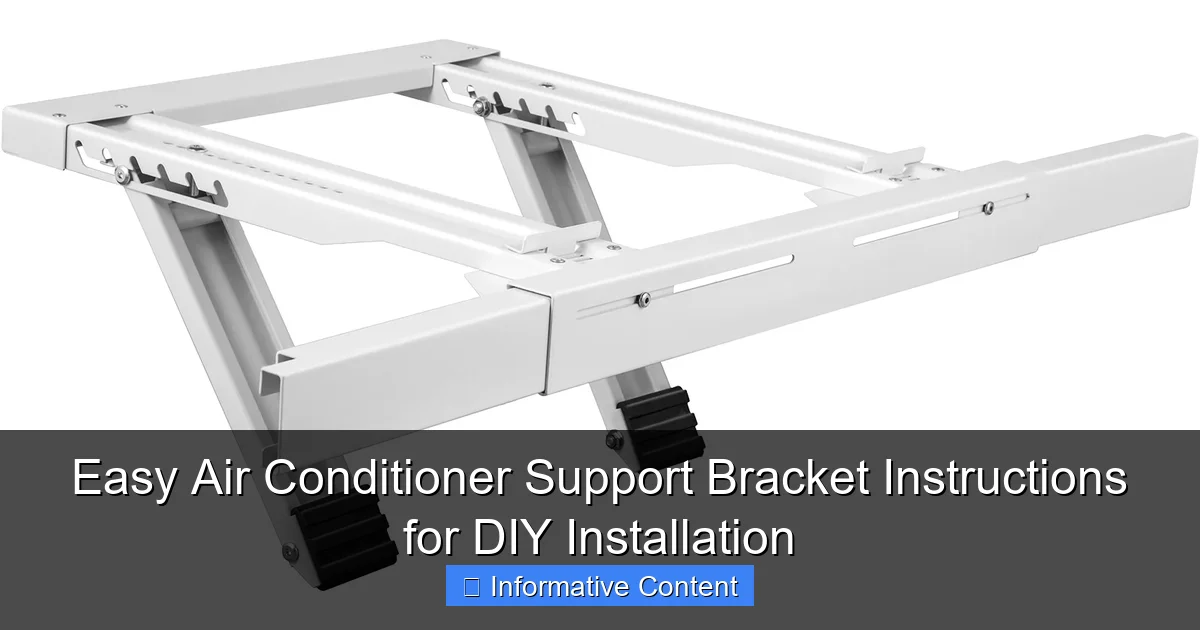
Featured image for air conditioner support bracket instructions
Image source: d2qc09rl1gfuof.cloudfront.net
Installing an air conditioner support bracket yourself is simple and secure with the right instructions. This guide walks you through each step—measuring, drilling, and mounting—using basic tools and clear, safety-focused directions. Perfect for DIYers, it ensures a sturdy, level fit that protects your AC unit and home exterior.
Key Takeaways
- Measure twice before drilling to ensure accurate bracket placement.
- Use a level to keep the bracket perfectly horizontal for safe support.
- Secure to wall studs for maximum stability and weight capacity.
- Check local codes to comply with safety and installation regulations.
- Tighten all bolts firmly to prevent bracket movement or vibration.
- Inspect annually for rust, looseness, or structural damage.
📑 Table of Contents
- Easy Air Conditioner Support Bracket Instructions for DIY Installation
- Why You Need an Air Conditioner Support Bracket
- Choosing the Right Support Bracket for Your AC Unit
- Tools and Materials You’ll Need
- Step-by-Step Air Conditioner Support Bracket Instructions
- Common Mistakes to Avoid
- Maintenance and Long-Term Care
- Final Thoughts
Easy Air Conditioner Support Bracket Instructions for DIY Installation
So, you’ve decided to install your window air conditioner yourself—great choice! Not only can you save a few hundred bucks on professional labor, but there’s also something deeply satisfying about completing a home improvement project with your own two hands. But before you pop that AC unit into the window and call it a day, there’s one critical component you absolutely shouldn’t skip: the air conditioner support bracket.
I remember my first time installing a window AC unit. I was so excited to beat the summer heat that I almost just slid the unit into place and called it done. Then my neighbor—a retired contractor—stopped by and gently reminded me, “That thing weighs 80 pounds and sticks out three feet from your wall. You need more than just window pressure holding it up.” He was right. A support bracket isn’t just a suggestion—it’s a safety essential. It prevents your AC from crashing down, protects your home’s structure, and gives you peace of mind every time you flip the switch.
In this guide, I’ll walk you through everything you need to know about air conditioner support bracket instructions—from choosing the right bracket to step-by-step installation tips. Whether you’re a seasoned DIYer or tackling your first home project, these instructions are designed to be clear, practical, and easy to follow. Let’s get your AC installed safely, securely, and without breaking a sweat (well, not too much).
Why You Need an Air Conditioner Support Bracket
Let’s start with the basics: why even bother with a support bracket? After all, your window seems sturdy enough, and the AC unit fits snugly, right? Well, not quite. A typical window air conditioner weighs between 60 and 100 pounds, and much of that weight extends beyond the exterior wall. Relying solely on the window frame and sash to hold that load is risky—especially over time.
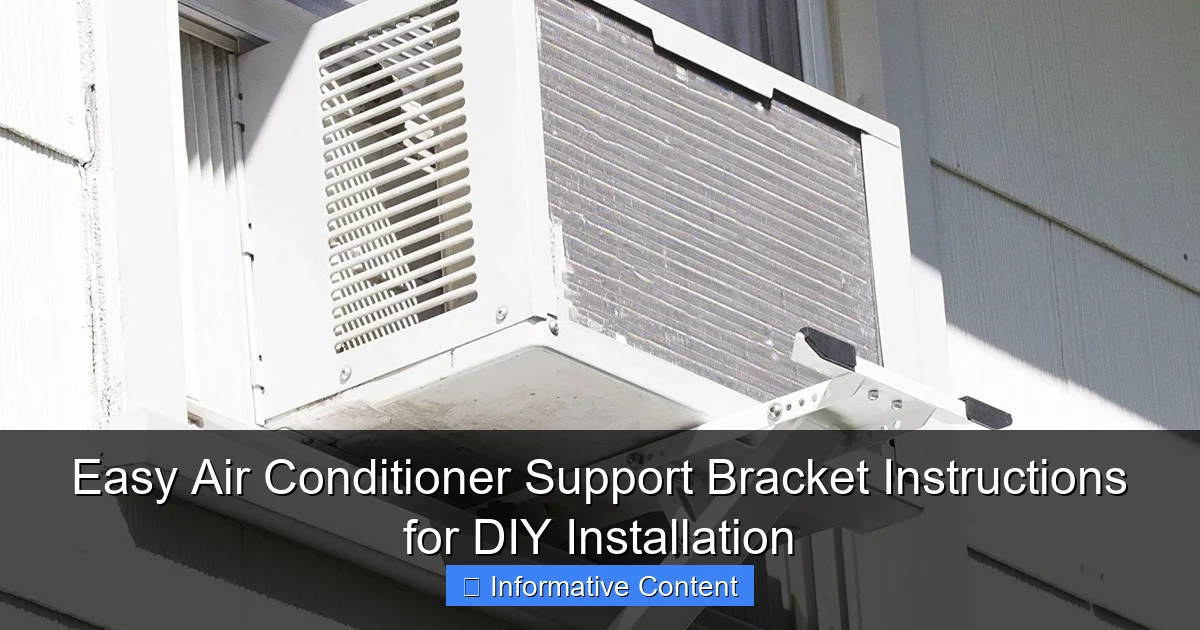
Visual guide about air conditioner support bracket instructions
Image source: i.pinimg.com
Window frames, especially in older homes, weren’t designed to support heavy, cantilevered loads. Over time, the constant pressure can warp the frame, crack the glass, or even cause the entire unit to shift or fall. And trust me, a falling AC unit isn’t just dangerous—it’s expensive to replace and could seriously injure someone below.
Prevents Structural Damage
One of the biggest benefits of using a support bracket is protecting your home’s exterior. Without proper support, the weight of the AC can stress the siding, brick, or wood around your window. In brick homes, repeated stress can crack mortar joints. In wood-sided homes, it can cause rot or warping. A support bracket redistributes the weight to the building’s structural frame, reducing strain on the window and surrounding materials.
Enhances Safety and Stability
Safety should always come first. A properly installed support bracket anchors your AC unit securely to the exterior wall, preventing it from tipping, shifting, or falling. This is especially important in areas with strong winds, earthquakes, or heavy rain. Even a slight shift can cause the unit to lose its seal, leading to drafts, energy loss, or water leaks.
Extends the Life of Your AC Unit
When your air conditioner is properly supported, it operates more efficiently. Vibration and movement can loosen internal components, reduce cooling performance, and shorten the lifespan of your unit. A stable installation means less wear and tear, fewer repairs, and better long-term performance.
Meets Building Codes and Insurance Requirements
Many local building codes now require support brackets for window AC installations, especially in multi-story buildings or areas prone to high winds. Some insurance companies may even deny claims related to AC-related damage if a support bracket wasn’t used. Installing one isn’t just smart—it might be mandatory.
Bottom line: skipping the support bracket is like driving without a seatbelt. It might seem fine until it’s not. Investing in a quality bracket and following proper air conditioner support bracket instructions is a small step that makes a huge difference in safety, performance, and peace of mind.
Choosing the Right Support Bracket for Your AC Unit
Not all support brackets are created equal. Choosing the right one depends on several factors, including your AC unit’s weight, window type, exterior wall material, and local climate. Let’s break down what to look for so you can make an informed decision.
Weight Capacity and Compatibility
The first thing to check is the bracket’s weight rating. Most standard brackets support between 100 and 200 pounds, which covers the majority of window AC units. However, larger units—like those used in commercial settings or oversized residential models—may require heavy-duty brackets rated for 300 pounds or more.
Always check your AC unit’s manual or product label for its exact weight. Don’t guess. A 70-pound unit might seem light, but when you factor in the cantilevered load (the part sticking out), the effective weight on the bracket can be significantly higher. Choose a bracket with a capacity at least 25% greater than your unit’s weight for a safety buffer.
Wall Material Compatibility
Your exterior wall material plays a big role in bracket selection. Here’s a quick guide:
- Wood Siding: Most brackets work well, but ensure the mounting hardware is compatible with wood studs. Use lag screws or heavy-duty screws that penetrate at least 2 inches into the stud.
- Vinyl Siding: Requires special care to avoid cracking. Look for brackets with vinyl-safe mounting kits or use a backer board behind the bracket to distribute pressure.
- Brick or Masonry: You’ll need a bracket with masonry anchors or sleeve anchors. Drilling into brick requires a hammer drill and carbide-tipped bits.
- Stucco: Similar to brick, but more fragile. Use anchors designed for stucco and avoid over-tightening.
Adjustability and Fit
Look for a bracket that’s adjustable in height and depth. This allows you to fine-tune the fit based on your window’s dimensions and the AC unit’s footprint. Some brackets come with extendable arms or sliding rails, which are especially helpful if your window sill is narrow or uneven.
Also, consider the bracket’s clearance from the window. You’ll want enough space to slide the AC unit in and out easily, but not so much that it creates a gap for drafts or pests. A good rule of thumb is 2–4 inches of clearance between the bracket and the window frame.
Weather Resistance and Durability
Since the bracket will be exposed to the elements, it should be made of rust-resistant materials like galvanized steel, aluminum, or powder-coated metal. Avoid cheap brackets made of thin, untreated steel—they’ll rust quickly and fail prematurely.
Check for features like drainage holes (to prevent water pooling) and rubberized pads (to protect your siding). Some high-end brackets even include built-in leveling tools or anti-vibration pads.
Ease of Installation
If you’re doing this yourself, look for a bracket with clear instructions, pre-drilled holes, and all necessary hardware included. Some brands offer video tutorials or customer support, which can be a lifesaver if you run into issues.
Popular brands like Frost King, AC-Safe, and Koldfront are known for user-friendly designs and reliable performance. Reading customer reviews can also give you insight into real-world installation experiences.
Pro tip: If you’re unsure which bracket to buy, take a photo of your window and AC unit to a local hardware store. The staff can often recommend a compatible model based on your setup.
Tools and Materials You’ll Need
Before you start installing your air conditioner support bracket, it’s important to gather all the necessary tools and materials. Having everything ready beforehand saves time, reduces frustration, and ensures a smoother installation process. Here’s a comprehensive list of what you’ll need.
Essential Tools
- Drill: A cordless drill with variable speed is ideal. You’ll need it for drilling pilot holes and driving screws.
- Drill Bits: Include a standard wood bit (for wood siding) and a masonry bit (for brick or concrete). A 1/4-inch bit is usually sufficient for pilot holes.
- Level: A 24-inch spirit level ensures your bracket is perfectly horizontal. A crooked bracket can cause the AC unit to tilt, leading to drainage issues or instability.
- Tape Measure: For measuring the window opening, bracket placement, and AC unit dimensions.
- Pencil or Marker: To mark drill points and alignment lines.
- Screwdriver: Either manual or as part of your drill. You’ll need it for tightening screws and adjusting brackets.
- Safety Gear: Safety glasses, work gloves, and sturdy shoes are a must, especially when working at height.
Mounting Hardware
Most support brackets come with basic hardware, but you may need to supplement depending on your wall type. Here’s what to have on hand:
- Lag Screws: For wood framing. Use 3/8-inch diameter screws, at least 3 inches long, to secure the bracket to the studs.
- Masonry Anchors: For brick or concrete walls. Sleeve anchors or wedge anchors are reliable choices.
- Washers and Nuts: To distribute pressure and prevent loosening over time.
- Silicone Caulk: To seal around the bracket and prevent water intrusion.
- Rubber Pads or Neoprene Strips: To protect your siding and reduce vibration.
Optional but Helpful Tools
- Stud Finder: Helps locate wall studs for secure mounting. Essential for wood-framed homes.
- Hammer Drill: Required for drilling into brick, concrete, or stucco. A regular drill won’t cut it.
- Ladder or Step Stool: Make sure it’s stable and tall enough to reach your window safely.
- Helper: Installing a support bracket is much easier with two people—one to hold the bracket in place while the other drills.
- Chalk Line: For marking straight lines across wide surfaces.
Materials Checklist
Here’s a quick reference table of common materials and their uses:
| Material | Use | Recommended For |
|---|---|---|
| Galvanized Steel Bracket | Main support structure | All wall types |
| Lag Screws (3/8″ x 3″) | Secure bracket to wood studs | Wood siding, wood framing |
| Masonry Anchors | Secure bracket to brick/concrete | Brick, concrete, stucco |
| Silicone Caulk | Seal around bracket | All installations |
| Rubber Pads | Protect siding, reduce vibration | Vinyl, wood, stucco |
| Level | Ensure bracket is horizontal | All installations |
Pro tip: Always double-check your bracket’s instruction manual for specific hardware requirements. Some manufacturers include proprietary fasteners that work best with their design.
And remember—safety first. If you’re working on a second-story window or feel unsure about any part of the process, don’t hesitate to call in a professional. It’s better to be safe than sorry.
Step-by-Step Air Conditioner Support Bracket Instructions
Now that you’ve chosen the right bracket and gathered your tools, it’s time to install it. Follow these step-by-step air conditioner support bracket instructions to ensure a secure, professional-looking installation. I’ll walk you through each stage, from measuring to final adjustments.
Step 1: Measure and Plan
Start by measuring your window opening and the base of your AC unit. You’ll need to know:
- The width of the window sill
- The depth of the AC unit (how far it extends from the window)
- The height from the ground to the bottom of the window
Next, determine where the bracket will attach to the wall. Ideally, it should be mounted directly below the window, centered under the AC unit’s footprint. Use a stud finder to locate wall studs—these provide the strongest anchor points. Mark the stud locations with a pencil.
Pro tip: If your window is centered between two studs, you may need to install a horizontal backer board (like a 1×4 or 2×4) between the studs to distribute the load. This is especially important for vinyl or stucco walls.
Step 2: Position the Bracket
Hold the support bracket against the wall, aligning it with your marks. Use a level to ensure it’s perfectly horizontal. Even a slight tilt can cause the AC unit to lean, leading to drainage problems or instability.
Once level, trace the outline of the bracket’s mounting holes onto the wall with a pencil. This will serve as your drilling guide.
If your bracket has adjustable arms, extend them to match the depth of your AC unit. Most brackets allow you to slide the support arms in or out. Set them so the AC will sit level and secure.
Step 3: Drill Pilot Holes
Using the appropriate drill bit for your wall type, drill pilot holes at the marked locations. For wood, a 1/4-inch bit is usually sufficient. For brick or concrete, use a masonry bit slightly smaller than your anchor diameter (e.g., 3/8-inch bit for 1/2-inch anchors).
Drill straight and steady—don’t force it. For masonry, let the hammer drill do the work. Go slow to avoid cracking the material.
Pro tip: Drill slightly deeper than the anchor length to ensure a snug fit. Blow out any dust from the holes with compressed air or a straw.
Step 4: Secure the Bracket
Place the bracket back in position, aligning the holes with the pilot holes. Insert your mounting hardware:
- For wood: Use lag screws with washers. Tighten with a wrench or socket driver until snug—don’t over-tighten, as this can strip the wood.
- For masonry: Insert the anchor into the hole, then place the bracket over it. Insert the screw and tighten gradually. The anchor will expand as you tighten, creating a secure hold.
Double-check that the bracket is level and firmly attached. Give it a gentle shake to test stability. It shouldn’t move at all.
Step 5: Add Protective Padding
Before installing the AC unit, place rubber pads or neoprene strips on the top surface of the bracket where the AC will rest. This protects your siding from scratches and reduces vibration noise.
If your bracket doesn’t come with pads, you can cut pieces from an old yoga mat or purchase adhesive-backed rubber strips from a hardware store.
Step 6: Install the Air Conditioner
With the bracket securely in place, it’s time to install the AC unit. Enlist a helper—this part is much easier with two people.
Carefully slide the AC unit into the window, aligning its base with the support bracket. Lower it gently until it rests securely on the bracket. Make sure the unit is level and centered.
Once in place, secure the window sash to the top of the AC unit using the provided brackets or foam seals. This prevents the unit from shifting forward.
Step 7: Seal and Finish
Apply a bead of silicone caulk around the edges of the bracket where it meets the wall. This prevents water from seeping behind the bracket and causing damage.
Check all screws and anchors for tightness. Over time, vibrations from the AC can loosen hardware, so it’s good practice to inspect the bracket seasonally.
And that’s it! You’ve successfully installed your air conditioner support bracket using clear, easy-to-follow instructions.
Common Mistakes to Avoid
Even with the best instructions, DIY projects can go sideways if you’re not careful. Here are some common mistakes people make when installing air conditioner support brackets—and how to avoid them.
Mounting to Weak or Non-Structural Surfaces
One of the biggest errors is attaching the bracket directly to siding, drywall, or insulation without reaching the wall studs or structural frame. These materials can’t support the weight of an AC unit, especially over time.
Always use a stud finder to locate solid wood or metal framing. If you can’t hit a stud, install a backer board between two studs and mount the bracket to that.
Ignoring Weight Limits
Using a bracket rated for 100 pounds to support a 120-pound AC unit is a recipe for disaster. Always choose a bracket with a weight capacity that exceeds your unit’s weight by at least 25%.
Check the manufacturer’s specs—don’t rely on vague terms like “heavy-duty.” Look for exact pound ratings.
Skipping the Level
A crooked bracket might not seem like a big deal, but it can cause the AC unit to tilt, leading to poor drainage, water leaks, or even motor strain. Always use a level during installation and double-check before tightening the final screws.
Over-Tightening Screws
While it’s important to secure the bracket firmly, over-tightening can strip wood, crack vinyl siding, or damage masonry anchors. Tighten until snug, then give it a quarter-turn more—no more.
Neglecting Weatherproofing
Failing to seal around the bracket can lead to water intrusion, mold, or rot. Always apply silicone caulk around the edges, especially at the top and sides.
Installing Without a Helper
Support brackets can be awkward to hold in place while drilling. Trying to do it alone increases the risk of misalignment or injury. Ask a friend or family member to assist—it’s safer and faster.
By avoiding these common pitfalls, you’ll ensure a safe, durable installation that lasts for years.
Maintenance and Long-Term Care
Once your air conditioner support bracket is installed, the work isn’t over. Regular maintenance ensures it continues to perform safely and effectively. Here’s how to keep your bracket in top condition.
Seasonal Inspections
At the start of each cooling season, inspect the bracket for signs of wear, rust, or loosening. Check all screws and anchors—tighten any that feel loose. Look for cracks in the bracket or corrosion on metal parts.
Clean and Lubricate
Wipe down the bracket with a damp cloth to remove dirt and debris. If your bracket has moving parts (like adjustable arms), apply a light coat of silicone lubricant to keep them sliding smoothly.
Reapply Caulk as Needed
Over time, silicone caulk can dry out or crack. Inspect the seal around the bracket annually and reapply caulk if necessary. This prevents water damage and maintains a clean appearance.
Monitor for Movement
If you notice your AC unit shifting, vibrating excessively, or making unusual noises, check the bracket immediately. It could indicate a loose mount or structural issue.
With proper care, a quality support bracket can last 10–15 years or more—longer than many AC units themselves.
Final Thoughts
Installing an air conditioner support bracket might seem like an extra step, but it’s one of the most important parts of a safe and successful AC installation. By following these air conditioner support bracket instructions, you’re not just protecting your home and your investment—you’re ensuring your family’s safety every time you cool your space.
Remember, the goal isn’t perfection—it’s practicality and peace of mind. Take your time, use the right tools, and don’t hesitate to ask for help when needed. With a little effort now, you’ll enjoy cool, comfortable summers for years to come—without worrying about your AC taking a tumble.
Frequently Asked Questions
What is an air conditioner support bracket and why do I need one?
An air conditioner support bracket is a metal frame designed to securely hold your window AC unit, distributing its weight to prevent damage to the window frame or sill. It’s essential for safe, long-term installation, especially for heavier units or older windows. Most brackets include detailed air conditioner support bracket instructions for easy setup.
How do I install an air conditioner support bracket by myself?
Start by measuring your window opening and selecting a bracket compatible with your AC unit’s weight. Follow the air conditioner support bracket instructions to attach the bracket to the window sill, adjust the arms for level support, and secure the unit with safety straps or screws.
Can I use the same bracket for different AC models?
Not all brackets are universal—always check the manufacturer’s weight and size compatibility before use. Some brackets feature adjustable arms to accommodate multiple models, but exceeding the weight limit can compromise safety.
Do I need special tools to assemble the support bracket?
Most kits require only basic tools like a screwdriver, wrench, or drill, as specified in the air conditioner support bracket instructions. Always use the provided hardware to ensure proper fit and stability.
How do I ensure my AC bracket is level and secure?
Use a bubble level to check the bracket’s alignment before placing the AC unit. Tighten all bolts and screws, and test stability by gently shaking the bracket—it should not wobble or slide.
Can I leave the support bracket installed year-round?
Yes, if the bracket is weather-resistant (e.g., powder-coated steel), but remove it during off-seasons to reduce wear on your window frame. Store it indoors to prolong its lifespan for future use.