
Featured image for air conditioner gauge instructions
Image source: m.media-amazon.com
Master your AC system with confidence using these simplified air conditioner gauge instructions. Learn how to properly connect, read, and interpret pressure levels to diagnose issues, recharge refrigerant, and ensure peak performance—saving time and costly technician visits. Clear, step-by-step guidance makes HVAC maintenance accessible for DIYers and pros alike.
Key Takeaways
- Always zero gauges before connecting to ensure accurate pressure readings.
- Match hose colors to ports: blue for low, red for high pressure.
- Check refrigerant levels against manufacturer specs using gauge readings.
- Isolate the system before testing to prevent inaccurate results.
- Monitor both pressures to diagnose issues like undercharging or blockages.
- Store gauges properly to protect calibration and extend tool life.
📑 Table of Contents
- Why Air Conditioner Gauges Matter (And Why They Don’t Have to Be Scary)
- Understanding Air Conditioner Gauges: The Basics You Need to Know
- Step-by-Step Guide: How to Use an Air Conditioner Gauge Set
- Reading the Numbers: What Your Gauge Tells You About AC Health
- Common Mistakes (And How to Avoid Them)
- Data Table: Pressure-Temperature Reference for Common Refrigerants
- When to Call a Pro (And When You Can Handle It Yourself)
Why Air Conditioner Gauges Matter (And Why They Don’t Have to Be Scary)
Let’s be honest—when someone mentions an air conditioner gauge, most of us picture a confusing tangle of hoses, cryptic dials, and a mechanic muttering things like “low-side pressure” and “superheat.” If you’ve ever stood in front of your AC unit wondering whether it’s working properly or just pretending to, you’re not alone. I remember the first time I tried to check my AC system’s pressure. I had a borrowed gauge set, a YouTube video that assumed I knew what a Schrader valve was, and a growing sense of panic. After two hours of frustration, I realized I was just overcomplicating things. The truth? Air conditioner gauge instructions don’t have to be intimidating. Once you understand the basics, you’re not just troubleshooting—you’re taking control.
Whether you’re a DIY homeowner trying to save on repair bills, a weekend warrior with a garage full of tools, or just someone curious about how your AC actually works, this guide is for you. We’re going to break down everything you need to know about using air conditioner gauges in plain, simple language. No jargon. No assumptions. Just practical, step-by-step advice that walks you through setup, reading, interpreting, and troubleshooting—so you can confidently say, “Yeah, I checked the pressures. Here’s what I found.”
Understanding Air Conditioner Gauges: The Basics You Need to Know
Before we dive into the nitty-gritty of how to use an air conditioner gauge, let’s start with what it actually is. Think of the gauge set as the “vital signs monitor” for your AC system. Just like a doctor checks your blood pressure and temperature, these tools measure the pressure and temperature of the refrigerant flowing through your air conditioner. This helps you (or a technician) figure out if the system is working efficiently—or if something’s gone wrong.
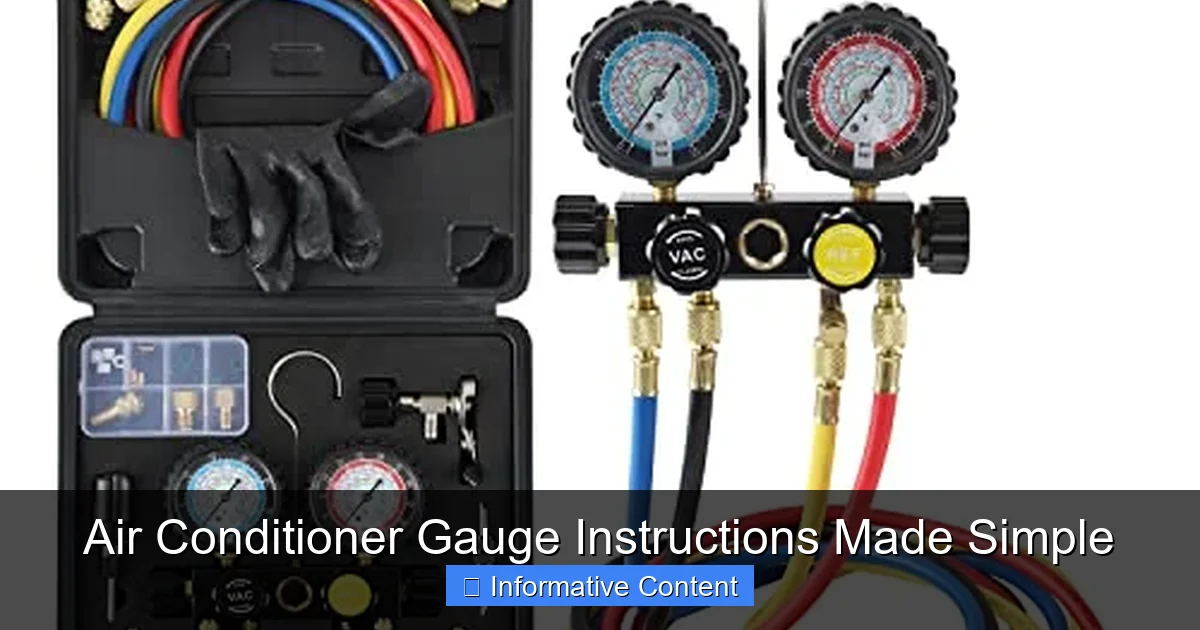
Visual guide about air conditioner gauge instructions
Image source: m.media-amazon.com
Types of AC Gauges: What’s in the Set?
A standard air conditioner gauge set (often called a manifold gauge set) includes three main components:
- Low-pressure gauge (blue): Measures the pressure on the suction side of the system (where refrigerant returns as a gas).
- High-pressure gauge (red): Measures the pressure on the discharge side (where refrigerant is sent as a high-pressure liquid/gas).
- Center manifold with hoses and valves: Connects to your AC system and allows you to control refrigerant flow during testing or charging.
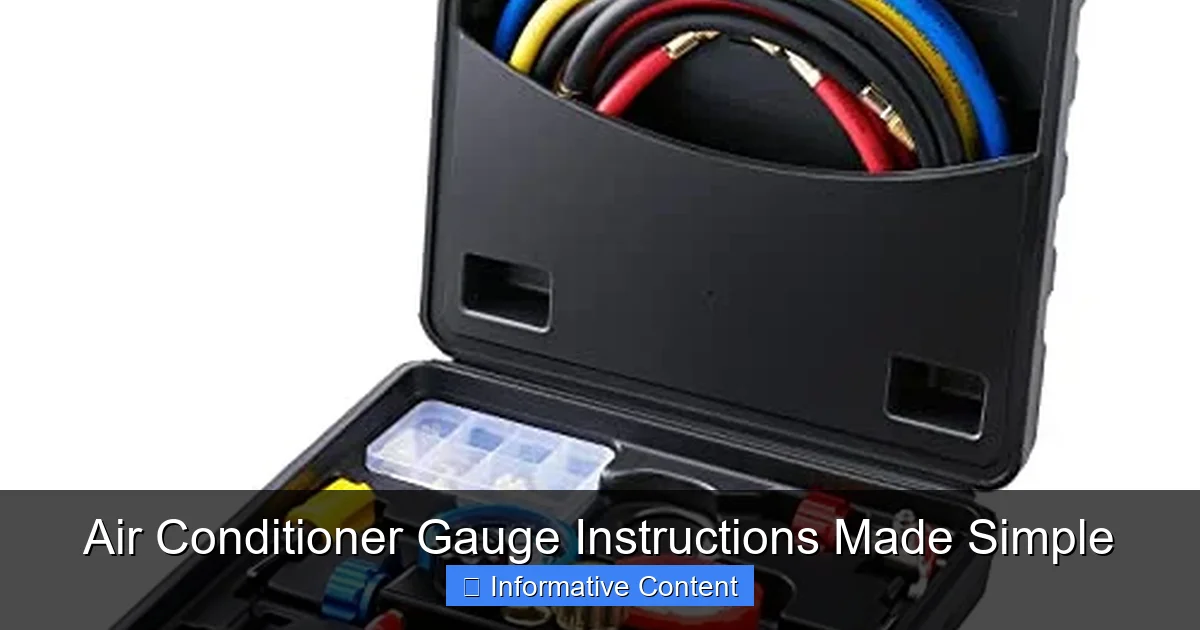
Most sets come with three hoses: blue (low), red (high), and yellow (service hose, used for vacuuming or adding refrigerant). The yellow hose is your “Swiss Army knife”—it’s not connected to a gauge but is essential for service tasks.
How Gauges Work with Your AC System
Your air conditioner runs on a closed loop of refrigerant (like R-410A or R-22, depending on your system’s age). When the system is running:
- The low-side (blue gauge) shows lower pressure because the refrigerant is evaporating and absorbing heat from your home.
- The high-side (red gauge) shows higher pressure because the refrigerant is being compressed and releasing heat outside.
For example, on a 75°F day, a healthy R-410A system might show 120–150 psi on the high side and 120–135 psi on the low side. These numbers aren’t random—they’re based on the refrigerant’s pressure-temperature (P-T) relationship, which we’ll cover later.
Key Terminology to Know
Before you touch a gauge, get familiar with these terms:
- PSI (pounds per square inch): The unit of pressure. Higher numbers = more force.
- Superheat: The temperature difference between the actual refrigerant vapor and its boiling point. Too high or too low? That’s a problem.
- Subcooling: The temperature drop below the refrigerant’s condensation point. It tells you if the refrigerant is fully liquid before returning to the compressor.
- Vacuum: When you remove all air and moisture from the system using a vacuum pump (measured in microns).
Pro Tip: Don’t worry about memorizing every term. Focus on PSI readings and temperature first. The rest will click as you practice.
Step-by-Step Guide: How to Use an Air Conditioner Gauge Set
Now that you know the basics, let’s walk through using the gauge set. I’ll use a real-world example: checking your AC because it’s blowing lukewarm air. Here’s how to do it safely and accurately.
Step 1: Safety First—Turn Off the Power
Before touching anything, shut off the power to your outdoor unit (the condenser). This isn’t just about avoiding electric shock—it also prevents the compressor from kicking on while you’re connected, which could damage the system or the gauges.
Step 2: Locate the Service Ports
Your AC has two service ports: one on the low-pressure (suction) line and one on the high-pressure (liquid) line. They look like small metal valves, often covered with a cap (like a bike tire valve). The low-side port is usually larger and insulated. The high-side port is smaller and bare.
Real-World Example: In my 15-year-old Trane unit, the low-side port is behind the access panel near the compressor, and the high-side port is near the refrigerant lines leading to the indoor coil.
Step 3: Attach the Gauges
- Remove the caps from both ports.
- Attach the blue hose to the low-side port. Hand-tighten, then give it a quarter-turn with a wrench.
- Attach the red hose to the high-side port (same tightening method).
- Leave the yellow hose disconnected for now (it’s only used for charging or vacuuming).
Critical: Never force the hoses. If it doesn’t thread easily, stop and check the port type. Some older systems use different thread sizes (SAE vs. metric).
Step 4: Turn the System Back On and Take Readings
- Restore power to the unit.
- Turn on the AC and let it run for 10–15 minutes to reach steady-state operation.
- Check the gauge readings. The low-side gauge (blue) should show moderate pressure (e.g., 70–110 psi for R-22; 120–135 psi for R-410A). The high-side gauge (red) should show much higher pressure (e.g., 250–350 psi for R-410A).
Tip: If the gauges jump erratically, the system might have air or moisture in the lines—or a blockage.
Step 5: Interpret the Readings
Let’s say you see:
- Low side: 50 psi (R-410A system)
- High side: 200 psi
This suggests low refrigerant (undercharge). Why? Because the low pressure is too low, and the high pressure is too low. The system isn’t moving enough refrigerant to create proper pressure differential.
Another example:
- Low side: 150 psi
- High side: 500 psi
This screams overcharge or blockage (e.g., a dirty condenser coil). The compressor is working too hard to push refrigerant through a restricted system.
Reading the Numbers: What Your Gauge Tells You About AC Health
Your gauges aren’t just showing pressure—they’re telling a story. Let’s decode it.
Normal vs. Abnormal Readings
Here’s a quick reference for R-410A systems (common in newer units):
- Normal:
- Low side: 115–135 psi
- High side: 250–350 psi
- Superheat: 10–20°F (measured at the evaporator)
- Subcooling: 8–12°F (measured at the condenser)
- Low Refrigerant (Undercharge):
- Low side: 60–90 psi
- High side: 150–220 psi
- Symptoms: Ice on the evaporator coil, weak airflow, warm air from vents.
- Overcharge:
- Low side: 140+ psi
- High side: 400+ psi
- Symptoms: High pressure shutoff, noisy compressor, reduced efficiency.
- Dirty Condenser Coil:
- Low side: Normal or slightly high
- High side: 400+ psi
- Symptoms: Unit overheats, trips on high-pressure switch.
- Blocked Airflow (Dirty Air Filter/Frozen Coil):
- Low side: 30–60 psi
- High side: 100–200 psi
- Symptoms: Ice buildup, system shuts off due to low pressure.
Using Temperature to Confirm Issues
Pressure alone isn’t enough. You need temperature to get the full picture. Here’s how:
- Use a digital thermometer or infrared gun to measure:
- Temperature of the low-side line (near the evaporator)
- Temperature of the high-side line (near the condenser)
- Air temperature entering and leaving the evaporator
- Compare these to the refrigerant’s boiling point at your current pressure (use a P-T chart or app).
Example: If your low-side pressure is 120 psi (R-410A), the refrigerant boils at ~40°F. If the line is 50°F, your superheat is 10°F—normal. If it’s 70°F, superheat is 30°F—too high (undercharge or airflow issue).
When to Use the Yellow Hose
The yellow hose is for:
- Adding refrigerant: Connect it to a refrigerant can (with a tap valve). Open the low-side valve to charge the system slowly.
- Evacuating the system: Connect it to a vacuum pump. Run the pump for 30–60 minutes to remove air/moisture (critical after repairs).
Never open the high-side valve when adding refrigerant—it can damage the compressor.
Common Mistakes (And How to Avoid Them)
Even with the best air conditioner gauge instructions, mistakes happen. Here’s what to watch for.
1. Not Letting the System Stabilize
Taking readings too soon? You’ll get false data. Always wait 10–15 minutes after turning on the AC. The system needs time to reach equilibrium.
2. Forgetting to Check Ambient Temperature
Your readings depend on outdoor temperature. A 100°F day will naturally have higher pressures than a 70°F day. Always note the ambient temp when recording readings.
3. Cross-Connecting Hoses
It’s easy to mix up the blue and red hoses. If you connect the red hose to the low-side port, you could damage the gauge. Double-check before tightening.
4. Overcharging the System
Adding refrigerant without measuring superheat/subcooling is like pouring medicine without reading the label. Use the yellow hose sparingly, and stop when pressures and temperatures normalize.
5. Ignoring the Vacuum Step
After replacing a coil or compressor, you must evacuate the system. Moisture in the lines creates acid that destroys the compressor. Run a vacuum pump for at least 30 minutes and check for leaks.
6. Using the Wrong Refrigerant
R-22 and R-410A systems use different pressures. Never mix refrigerants. Check your unit’s label to confirm the type.
Data Table: Pressure-Temperature Reference for Common Refrigerants
Below is a quick-reference table for R-410A and R-22. Use it to interpret your gauge readings. Remember: these are approximate and vary with ambient temperature.
| Refrigerant | Pressure (psi) | Boiling Point (°F) | Typical Low-Side Reading | Typical High-Side Reading |
|---|---|---|---|---|
| R-410A | 100 | 15.3 | 115–135 psi (75°F ambient) | 250–350 psi (75°F ambient) |
| R-410A | 120 | 32.1 | ||
| R-410A | 140 | 47.3 | ||
| R-410A | 160 | 60.9 | ||
| R-22 | 70 | 20.5 | 70–110 psi (75°F ambient) | 200–275 psi (75°F ambient) |
| R-22 | 90 | 38.3 | ||
| R-22 | 110 | 52.5 | ||
| R-22 | 130 | 64.5 |
Note: Always verify your system’s refrigerant type before using this table. R-410A pressures are roughly double R-22’s.
When to Call a Pro (And When You Can Handle It Yourself)
DIY AC troubleshooting is empowering, but some jobs require a licensed technician. Here’s how to decide.
You Can DIY If:
- You’re checking pressures to diagnose low refrigerant (but only if you’re comfortable with the next steps).
- You’re evacuating a system after replacing a coil (with a vacuum pump).
- You’re cleaning the condenser coil (which often fixes high-side pressure issues).
- You’re replacing a filter or fixing airflow blockages (common cause of low-side pressure drops).
Example: My AC had a frozen evaporator coil last summer. After checking the gauges (low-side: 40 psi), I discovered a clogged filter. Replacing it fixed the issue—no refrigerant needed.
Call a Pro If:
- You find a refrigerant leak (requires EPA-certified technician to recover and recharge).
- Your compressor is failing (high-side pressure won’t rise, even with refrigerant).
- You need to replace major components (evaporator, condenser, compressor).
- You’re unsure about handling refrigerants (safety and legal risks).
Real Talk: I once tried to recharge my AC without fixing a leak. It worked for a month—then the refrigerant vanished. A pro found a corroded line and charged me $200 to fix it. Lesson learned: fix the leak first.
Tools That Make It Easier
Invest in:
- Digital manifold gauge set (shows superheat/subcooling automatically).
- Infrared thermometer (for quick line temperature checks).
- Vacuum pump (essential for post-repair evacuation).
- Refrigerant scale (to charge by weight, not pressure).
Using an air conditioner gauge doesn’t have to feel like decoding a secret language. With the right tools, a little patience, and these air conditioner gauge instructions, you can diagnose common AC problems like a pro. Remember: start with the basics—safety, steady-state readings, and temperature checks. Don’t rush to add refrigerant; often, the issue is airflow, a dirty coil, or a simple blockage. And when in doubt, call a pro. Your AC is a complex system, and sometimes, the best DIY move is knowing your limits. But now, when someone mentions “manifold gauge,” you won’t panic. You’ll smile, grab your tools, and say, “Let’s see what the numbers tell us.”
Frequently Asked Questions
What are air conditioner gauge instructions and why are they important?
Air conditioner gauge instructions guide you on how to properly use manifold gauges to check refrigerant levels and system pressure. Following these instructions ensures safe operation, prevents damage to your AC unit, and helps maintain optimal cooling performance.
How do I read the gauges on an air conditioner manifold set?
The low-pressure side (blue gauge) shows suction pressure, while the high-pressure side (red gauge) displays discharge pressure. Always refer to your AC unit’s specifications to interpret readings correctly and avoid overcharging or undercharging the system.
Can I use air conditioner gauges without professional training?
While basic gauge operation is straightforward, interpreting readings and handling refrigerants safely requires knowledge and certification. If you’re unsure, it’s best to consult a licensed HVAC technician to avoid injury or system damage.
What do I do if my AC gauge shows low pressure?
Low pressure may indicate a refrigerant leak or insufficient charge. Check for leaks using a detector or soap solution, and never add refrigerant without identifying and fixing the root cause first.
How often should I check my air conditioner with gauges?
Routine checks are recommended during seasonal maintenance or if you notice reduced cooling. Regular monitoring helps catch issues early and keeps your system running efficiently year-round.
Are there different types of air conditioner gauges for different systems?
Yes, gauges vary by refrigerant type (e.g., R-22, R-410A) and system design. Always use the correct manifold gauge set compatible with your AC unit to ensure accurate readings and safe operation.

