
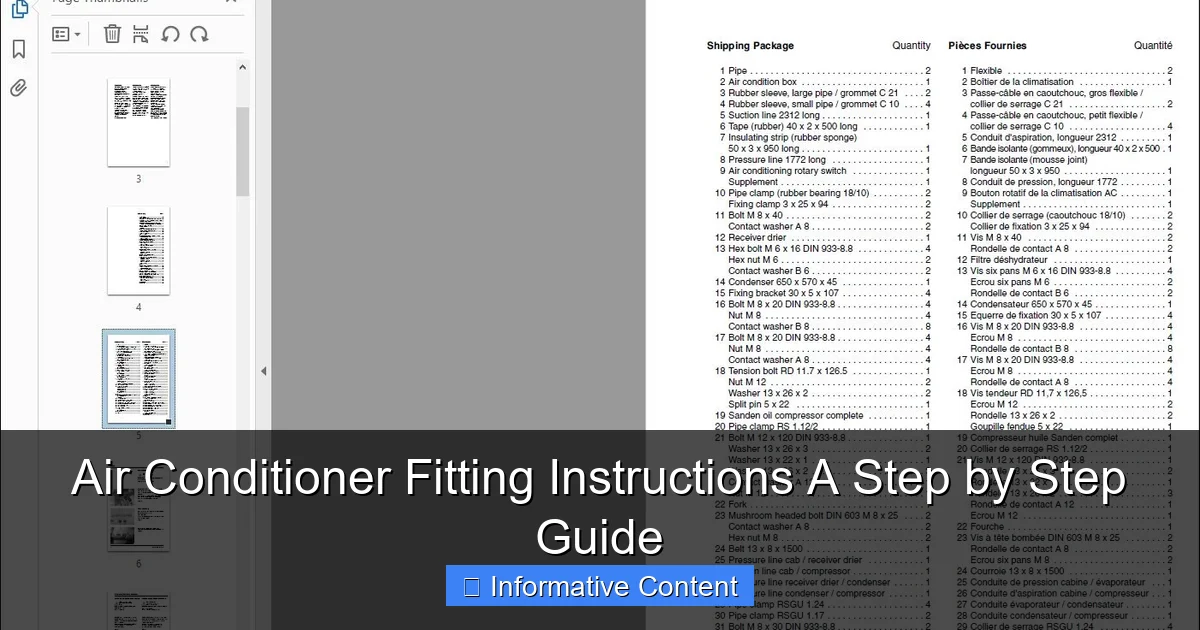
Featured image for air conditioner fitting instructions
Image source: heydownloads.com
Proper air conditioner fitting is crucial for optimal performance, energy efficiency, and safety—never skip manufacturer guidelines. This step-by-step guide walks you through secure mounting, correct refrigerant line routing, and safe electrical connections to ensure a hassle-free installation. Whether you’re a DIY enthusiast or a pro, following these instructions minimizes leaks, maximizes cooling, and extends your unit’s lifespan.
Key Takeaways
- Plan the installation location: Choose a spot with proper ventilation and structural support.
- Turn off power supply: Always disconnect electricity before starting any installation work.
- Secure the mounting bracket: Ensure it’s level and firmly attached to prevent unit movement.
- Connect refrigerant lines carefully: Avoid kinks and ensure airtight seals to maintain efficiency.
- Test the system after setup: Run a trial cycle to check for leaks and proper cooling.
- Follow manufacturer guidelines: Adhere to specific instructions for your AC model and type.
📑 Table of Contents
- Why Proper Air Conditioner Fitting Matters
- 1. Choosing the Right Spot for Your Air Conditioner
- 2. Gathering Tools and Materials for a Smooth Installation
- 3. Step-by-Step Air Conditioner Fitting Instructions
- 4. Sealing and Insulation: The Unsung Heroes of AC Efficiency
- 5. Final Checks and Testing for Optimal Performance
- 6. Maintenance Tips to Extend Your AC’s Lifespan
- Wrapping Up: Your AC Is Ready to Beat the Heat
Why Proper Air Conditioner Fitting Matters
Imagine this: you’ve just spent a good chunk of change on a brand-new air conditioner, excited to beat the summer heat. You set it up, turn it on… and nothing. Or worse, it runs, but your room still feels like a sauna. What went wrong? Chances are, it wasn’t the unit—it was the air conditioner fitting process.
Getting the installation right isn’t just about comfort. It’s about efficiency, safety, and even saving money in the long run. A poorly fitted AC can lead to higher energy bills, frequent breakdowns, or even damage to your home. Think of it like buying a new pair of shoes—no matter how expensive they are, if they don’t fit right, you’re not going to enjoy them. The same goes for your air conditioner.
Whether you’re tackling a window unit, a split system, or a portable AC, the air conditioner fitting instructions you follow (or ignore) will make or break your experience. In this guide, I’ll walk you through every step—from choosing the right spot to sealing the deal with proper insulation. I’ll share real-life tips, common mistakes to avoid, and even a few “why didn’t I think of that?” moments I’ve picked up over the years. No fancy jargon, just straight talk from someone who’s been there, done that, and learned the hard way.
1. Choosing the Right Spot for Your Air Conditioner
Consider the Room Layout and Airflow
Before you even think about drilling holes or unboxing your AC, take a step back and look at the room. Where’s the heat coming from? Is there a big window facing the sun? Are there furniture arrangements that block airflow? These details matter more than you might think.
Visual guide about air conditioner fitting instructions
Image source: static.mywebsites360.com
For example, placing a window unit directly under a sunny window might seem logical—but if it’s blocked by a curtain or blinds, the airflow gets restricted. Instead, aim for a spot where cool air can circulate freely. Think about where you spend the most time. If you’re always on the couch, position the AC so it blows cool air across the room, not just at the wall.
Here’s a simple trick: use the “hand test.” Stand in different parts of the room and feel for drafts or warm spots. You want to install the AC where it can cool the entire space evenly, not just one corner.
Check for Electrical Accessibility
Nothing kills momentum like realizing you’re too far from an outlet. Before you commit to a location, check the distance to the nearest electrical socket. Most air conditioners come with a cord that’s 5 to 7 feet long—so if your outlet is on the opposite side of the room, you’re out of luck (or at least, you’ll need an extension cord, which isn’t ideal for safety reasons).
Pro tip: Avoid power strips or extension cords for permanent installations. They can overheat and become fire hazards. If you’re stuck, consider hiring an electrician to install a dedicated outlet nearby. It’s a small investment for peace of mind.
Evaluate Window and Wall Conditions
Not all windows or walls are created equal. A window unit needs a sturdy, horizontal sash window (double-hung or sliding) that can support the weight. If your window is old, cracked, or doesn’t close tightly, you’ll need to reinforce it or choose another location.
For split systems, wall strength is critical. You’ll be drilling into the wall to mount the indoor unit and run refrigerant lines. Use a stud finder to locate the strongest part of the wall—usually a stud or concrete block. Avoid hollow spots or drywall with weak support.
And don’t forget about the outside. The outdoor condenser unit (for split systems) needs space for airflow. Keep it at least 12 inches away from walls, plants, or anything that could block the fan. I once saw a unit installed behind a bush—needless to say, it didn’t last the summer.
2. Gathering Tools and Materials for a Smooth Installation
Essential Tools You’ll Need
You don’t need a full workshop, but having the right tools makes all the difference. Here’s a checklist to get you started:
- Measuring tape (for precision)
- Level (to avoid a crooked AC)
- Drill and drill bits (for mounting brackets and holes)
- Screwdrivers (Phillips and flathead)
- Wrench or adjustable spanner (for split system connections)
- Caulk gun and weatherproof sealant
- Utility knife (for trimming foam or insulation)
- Safety gear (gloves, goggles, and a mask for dust)
For window units, you might also need foam insulation strips, window mounting brackets, and a support brace. Split systems require refrigerant line insulation, mounting hardware, and possibly a vacuum pump if you’re doing a DIY refrigerant charge (though I’d recommend leaving that to the pros).
Materials to Have on Hand
Beyond tools, stock up on materials:
- Insulating foam strips (for sealing gaps)
- Weatherproof caulk or silicone sealant
- Refrigerant line insulation (for split systems)
- Mounting brackets and screws (check your AC manual for specs)
- Drain pan (for units that produce condensation)
- Plastic conduit (to protect refrigerant lines from UV damage)
Here’s a personal tip: buy a little extra insulation and sealant. You’ll likely need it for touch-ups, and running out halfway through is a real mood-killer.
When to Call a Professional
Let’s be real—some jobs are better left to the experts. If you’re installing a split system, handling refrigerant lines, or dealing with complex wiring, don’t risk it. HVAC professionals have the training and tools to do it safely. Plus, many units require a licensed technician for warranty validation.
That said, for simple window or portable ACs, DIY is totally doable. Just know your limits. If you’re unsure about electrical work or structural integrity, stop and call someone. It’s not worth a trip to the ER.
3. Step-by-Step Air Conditioner Fitting Instructions
Installing a Window Air Conditioner
Window units are the most common for renters and homeowners alike. Here’s how to do it right:
- Measure the window opening and compare it to your AC’s dimensions. You’ll need at least 1-2 inches of extra space for the mounting brackets.
- Open the window fully and remove the screen (if possible). Clean the sill to ensure a flat surface.
- Attach the mounting brackets to the window frame. Use the level to make sure they’re perfectly horizontal. This prevents water from pooling inside the unit.
- Slide the AC into place, resting it on the brackets. Have a friend help—window units can be heavy!
- Lower the window sash to secure the top of the AC. Most models come with a locking bracket to attach to the sash.
- Install side panels (if included). These fill gaps between the AC and window frame, keeping bugs and hot air out.
- Seal the gaps with foam strips and caulk. Pay extra attention to the top—this is where most leaks happen.
- Plug in the unit and test it. Make sure the window can still be opened slightly for emergency escape (a safety requirement).
Common mistake: forgetting to tilt the AC slightly backward (about 5 degrees). This lets condensation drain outside instead of into your room.
Installing a Split System (Indoor Unit)
Split systems are more complex but offer better cooling and quieter operation. Focus on the indoor unit first:
- Mark the mounting location on the wall. Use the template provided with your AC for hole placement.
- Drill holes for the mounting bracket and anchor screws. Use a stud finder to hit solid support.
- Attach the bracket and double-check it’s level.
- Drill a 3-inch hole through the wall for refrigerant lines, power cable, and drain hose. Angle it slightly downward (toward the outside) to prevent water ingress.
- Run the lines and cables through the hole. Bundle them with electrical tape and wrap with insulation.
- Mount the indoor unit onto the bracket. Secure it with screws.
- Connect the drain hose to the unit’s drain pan. Route it to a floor drain or outside.
Pro tip: Label each wire and line before disconnecting anything. A miswired unit won’t cool properly—or worse, could short-circuit.
Installing the Outdoor Condenser (Split System)
The outdoor unit needs a stable, ventilated spot:
- Place the condenser on a concrete pad or sturdy platform. Never put it directly on the ground—this invites pests and moisture.
- Connect the refrigerant lines to the condenser. Use a wrench to tighten the flare nuts, but don’t over-torque.
- Connect the power cable to the condenser’s terminal block. Match the wire colors (L1, L2, N, GND).
- Secure the drain hose to the condenser’s drain port.
- Vacuum the lines (if you’re charging the system yourself) to remove air and moisture.
- Open the refrigerant valves (if pre-charged) or call a pro to add refrigerant.
Warning: Refrigerant work is regulated. If you’re not certified, skip this step. A licensed HVAC tech can handle it in under an hour.
4. Sealing and Insulation: The Unsung Heroes of AC Efficiency
Why Sealing Matters
You might think the AC itself does all the work—but the seal around it is just as important. Gaps let hot air sneak in and cool air escape, making your unit work harder and your bills higher.
I learned this the hard way when my first window AC ran 24/7 but only cooled half the room. Turns out, a tiny gap near the top was letting in a steady stream of hot air. Once I sealed it, the room cooled down in half the time.
Best Materials for Sealing
- Foam tape or strips: Perfect for window units. Cut to size and press into gaps.
- Weatherproof caulk: Use for permanent seals (like around split system wall holes). Choose a flexible, mold-resistant type.
- Reflective insulation: For split systems, wrap refrigerant lines with foil-backed insulation to prevent heat gain.
- Expanding foam: Great for irregular gaps, but use sparingly—it can warp window frames if over-applied.
Step-by-Step Sealing Process
- Inspect all gaps around the AC, window, and wall. Use a flashlight to spot light leaks.
- Clean the surfaces with rubbing alcohol to ensure adhesion.
- Apply foam tape or strips to window units. Press firmly to create a tight seal.
- Fill larger gaps with caulk. Smooth it with a damp finger for a clean finish.
- Insulate refrigerant lines with foam or foil tape. Overlap seams by at least 1 inch.
- Test the seal by running the AC and checking for drafts with your hand.
Bonus tip: Reapply sealant every 2-3 years. Sunlight and temperature changes can crack it over time.
5. Final Checks and Testing for Optimal Performance
Electrical Safety Checks
Before you hit the power button, double-check:
- All wires are connected securely (no loose strands).
- The circuit breaker is rated for the AC’s amperage (check the manual).
- No extension cords or damaged plugs.
- GFCI outlet is installed (required for outdoor units).
I once skipped the GFCI test and ended up with a tripped breaker during a thunderstorm. Not fun.
Testing Cooling and Drainage
Turn on the AC and let it run for 15-20 minutes. Watch for:
- Even cooling across the room.
- No unusual noises (buzzing, grinding, or hissing).
- Condensation draining properly (no puddles inside).
- Thermostat accuracy (use a separate thermometer to verify).
If the unit cycles on and off too quickly, check the thermostat placement. It should be away from direct airflow or heat sources.
Common Post-Installation Issues (and Fixes)
- Water leaks inside: Check the tilt (should slope outward) and drain hose (shouldn’t be kinked).
- Weak cooling: Ensure the air filter is clean and vents aren’t blocked.
- Unit vibrates or wobbles: Tighten mounting screws and use rubber pads for vibration dampening.
- Error codes: Refer to the manual—most are easy fixes (like a clogged filter or low refrigerant).
6. Maintenance Tips to Extend Your AC’s Lifespan
Monthly Maintenance
You don’t need to be a mechanic to keep your AC happy. A few simple tasks go a long way:
- Clean the air filter with warm water and mild soap. Let it dry completely before reinstalling.
- Wipe down the exterior with a damp cloth to remove dust.
- Check the drain pan and hose for clogs. Pour a cup of bleach down the hose monthly to prevent algae growth.
Seasonal Maintenance
- Inspect seals and insulation before summer and winter. Replace any cracked or loose materials.
- Clean the outdoor condenser coils with a garden hose (turn off power first). Avoid using pressure washers—they can damage fins.
- Cover the outdoor unit in winter (if you live in a cold climate). Use a breathable cover to prevent moisture buildup.
Annual Maintenance
- Schedule a professional tune-up every 1-2 years. They’ll check refrigerant levels, electrical connections, and overall performance.
- Replace old units if they’re over 10 years old or need frequent repairs. Newer models are more energy-efficient.
| Maintenance Task | Frequency | Tools Needed | Estimated Time |
|---|---|---|---|
| Clean air filter | Monthly | Warm water, mild soap | 10-15 minutes |
| Inspect seals | Every 3 months | Flashlight, caulk | 20 minutes |
| Clean condenser coils | Annually | Garden hose | 30 minutes |
| Drain pan check | Monthly | Cup of bleach | 5 minutes |
| Professional tune-up | Every 1-2 years | HVAC technician | 1-2 hours |
Wrapping Up: Your AC Is Ready to Beat the Heat
And there you have it—your complete guide to air conditioner fitting instructions. From choosing the perfect spot to sealing every gap, each step plays a crucial role in keeping you cool and your wallet happy.
Remember, a well-fitted AC isn’t just about comfort. It’s about efficiency, safety, and longevity. Take your time, follow the steps, and don’t hesitate to call a pro when needed. After all, the best AC in the world won’t help if it’s installed wrong.
So go ahead, crack that window (just a little), fire up your unit, and enjoy the cool breeze. You’ve earned it. And if you ever run into a hiccup, don’t sweat it—just refer back to this guide. Happy cooling!
Frequently Asked Questions
What tools do I need for air conditioner fitting instructions?
You’ll typically need a drill, level, screwdriver, wrench, measuring tape, and safety gear. Always check the manufacturer’s air conditioner fitting instructions for model-specific tool requirements.
Can I install an air conditioner myself, or do I need a professional?
While DIY installation is possible for window or portable units, split-system ACs often require a licensed technician for refrigerant handling. Follow the air conditioner fitting instructions carefully, but prioritize safety and local regulations.
How do I ensure proper drainage during air conditioner installation?
Position the indoor unit slightly tilted backward (about 1-2 degrees) to allow condensate water to flow toward the drain pipe. Secure the drain hose without kinks and route it to a suitable discharge point.
What are the most common mistakes when following air conditioner fitting instructions?
Skipping the level check, over-tightening connections, or improper insulation are frequent errors. Always double-check measurements and follow the steps in the air conditioner fitting instructions to avoid leaks or inefficiency.
How long does it take to install an air conditioner using the guide?
A window unit may take 1-3 hours, while split-system installations can take 4-8 hours depending on complexity. Rushing through steps in the air conditioner fitting instructions can compromise performance.
Do I need to recharge refrigerant after installation?
Pre-charged split systems typically don’t require recharging unless there’s a leak. Never attempt to handle refrigerant yourself—consult a professional if your air conditioner fitting instructions indicate a need.

