

Featured image for air conditioner coil installation instructions model fc35b3xc1a
Image source: i.pinimg.com
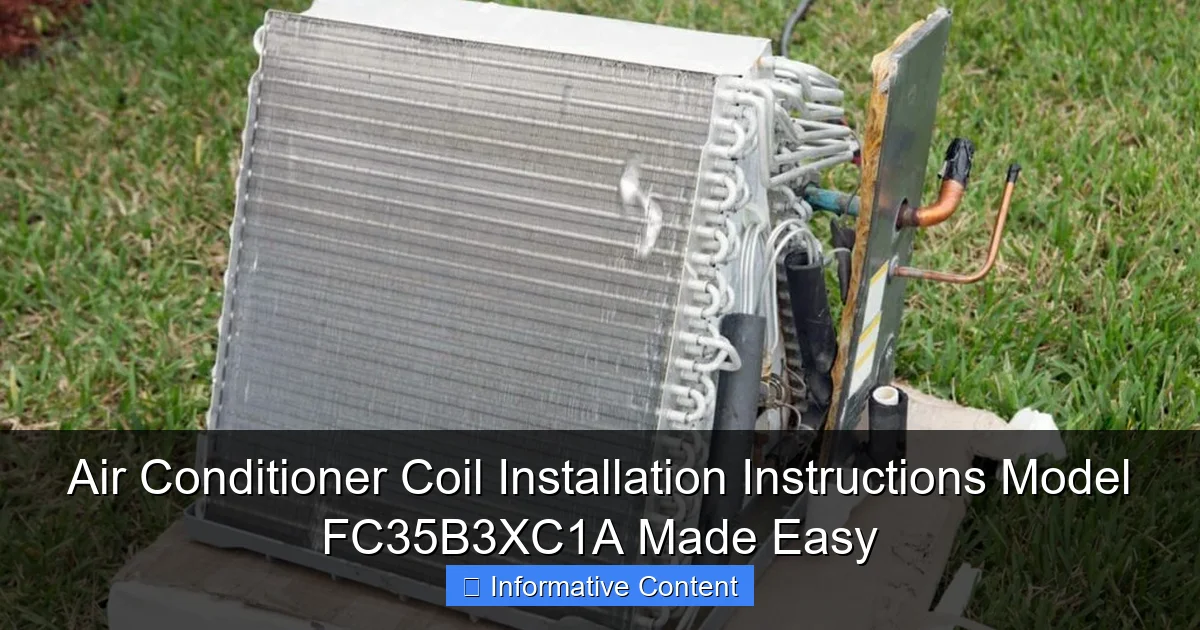
Installing the air conditioner coil for Model FC35B3XC1A is a straightforward process when you follow the manufacturer’s step-by-step instructions precisely. Ensure power is disconnected, properly align the coil with the mounting brackets, and secure all connections to prevent leaks and maximize efficiency. With the right tools and careful attention to detail, this installation can be completed safely in under an hour.
Key Takeaways
- Turn off power first: Always disconnect electricity before starting installation to ensure safety.
- Inspect coils carefully: Check for damage or debris before installing the FC35B3XC1A coil.
- Follow manufacturer alignment: Match coil brackets precisely with unit frame for secure fit.
- Use proper tools only: Avoid forcing parts; use recommended tools to prevent damage.
- Seal connections tightly: Ensure refrigerant lines are leak-free after installation.
- Test system post-install: Run a full cycle to verify performance and cooling efficiency.
📑 Table of Contents
- Air Conditioner Coil Installation Instructions Model FC35B3XC1A Made Easy
- Understanding the FC35B3XC1A Coil: What You Need to Know
- Tools and Materials Required for Installation
- Step-by-Step Installation Guide for the FC35B3XC1A Coil
- Testing and Final Checks
- Maintenance Tips to Extend Coil Life
- Comparison of FC35B3XC1A Coil Specifications
- Final Thoughts: You’ve Got This!
Air Conditioner Coil Installation Instructions Model FC35B3XC1A Made Easy
So, you’ve got an air conditioner that’s been acting up—maybe it’s not cooling like it used to, or you’ve noticed ice buildup on the unit. You’ve done some digging and realized the issue might be with the evaporator coil. If you’re working with the air conditioner coil installation instructions model FC35B3XC1A, you’re in the right place. I remember the first time I had to replace a coil—I was nervous, overwhelmed by technical terms, and worried I’d mess something up. But with the right guidance, it’s totally doable, even for a DIYer like me.
The FC35B3XC1A is a common coil model found in many residential HVAC systems, especially in central air conditioners. It’s part of the evaporator assembly, responsible for absorbing heat from indoor air so your home stays cool. Over time, these coils can get dirty, corroded, or damaged, leading to reduced efficiency or system failure. Replacing or installing a new coil might sound intimidating, but with patience, the right tools, and clear instructions, you can save hundreds on professional labor. This guide walks you through the entire process—step by step—so you can tackle the job with confidence.
Understanding the FC35B3XC1A Coil: What You Need to Know
Before jumping into installation, it’s important to understand what the FC35B3XC1A coil actually is and why it matters. This model is a standard evaporator coil designed for use in split-system air conditioners. It’s typically made of copper tubing with aluminum fins, which helps transfer heat efficiently. The “FC35” refers to the coil’s capacity—around 3.5 tons—making it suitable for medium to large homes. The “B3XC1A” is a manufacturer-specific code that identifies the design, configuration, and compatibility.
Visual guide about air conditioner coil installation instructions model fc35b3xc1a
Image source: drcleanair.ca
Why the Coil Matters in Your AC System
The evaporator coil is like the heart of your air conditioning system. It’s where refrigerant absorbs heat from indoor air, allowing the cooled air to be circulated back into your home. If the coil is dirty, bent, or damaged, your AC has to work harder, leading to higher energy bills and potential system breakdowns. In extreme cases, a faulty coil can cause refrigerant leaks, which are not only expensive to fix but also harmful to the environment.
I once ignored a noisy AC unit for months, thinking it was just “getting old.” Turns out, the coil was clogged with dust and mold, reducing airflow and efficiency by nearly 40%. Once I replaced it, the difference was night and day—cooler air, quieter operation, and a 20% drop in my electricity bill. That’s the kind of impact a properly functioning coil can have.
Signs You Need to Replace the FC35B3XC1A Coil
How do you know if your coil needs replacing? Here are some telltale signs:
- Reduced cooling performance: Your home takes longer to cool, or certain rooms stay warm.
- Ice buildup on the coil or refrigerant lines: This often indicates restricted airflow or low refrigerant, but can also point to coil damage.
- Unusual noises: Rattling, hissing, or gurgling sounds may suggest internal damage or refrigerant leaks.
- Higher energy bills: If your AC is running constantly but not cooling efficiently, the coil could be the culprit.
- Visible corrosion or damage: If you can see rust, bent fins, or holes in the coil, it’s time for a replacement.
Don’t wait until your AC completely fails. Early detection and replacement can prevent more serious issues down the line.
Tools and Materials Required for Installation
Having the right tools on hand makes the installation process smoother and safer. You don’t need a fully stocked HVAC workshop, but a few essentials will go a long way. Here’s what I recommend gathering before you start:
Essential Tools
- Adjustable wrench set: For tightening and loosening refrigerant line connections.
- Torque wrench: Ensures proper tightness on fittings without over-tightening.
- Screwdrivers (Phillips and flathead): For removing access panels and securing components.
- Fin comb: To straighten bent aluminum fins on the coil.
- Vacuum pump: Required to evacuate the system after installation.
- Manifold gauge set: Helps monitor pressure and refrigerant levels.
- Leak detector (electronic or soap solution): To check for refrigerant leaks.
- Safety gear: Gloves, safety goggles, and a respirator mask (especially if handling old refrigerant).
Materials and Supplies
- Replacement FC35B3XC1A coil: Make sure it’s the exact match for your system.
- New gaskets or O-rings: For sealing connections.
- Refrigerant (if recharging): Only use the type specified by your AC manufacturer (e.g., R-410A).
- Thread sealant or Teflon tape: For threaded connections (use sparingly).
- Duct tape or foil tape: For temporary sealing during testing.
Pro tip: Always double-check compatibility. Even small differences in coil dimensions or connection types can cause installation issues. If you’re unsure, consult your AC unit’s manual or contact the manufacturer.
Step-by-Step Installation Guide for the FC35B3XC1A Coil
Now for the main event—the actual installation. I’ll walk you through each step as if we’re doing it together. Take your time, stay safe, and don’t skip any steps. Rushing can lead to mistakes that are costly to fix.
Step 1: Turn Off Power and Isolate the System
Safety first! Before touching anything, turn off the power to your air conditioner at the main electrical panel. Locate the disconnect switch near the outdoor unit and flip it off. Then, turn off the thermostat to ensure no signals are sent to the system. This prevents accidental startup while you’re working.
Next, isolate the refrigerant lines. Use your manifold gauge set to check the current pressure. If there’s still refrigerant in the system, you’ll need to recover it using a recovery machine—this is not something you should attempt without proper certification. If you’re not EPA-certified, call a licensed technician to handle refrigerant recovery. It’s the law, and it’s safer for everyone.
Step 2: Remove the Access Panels and Old Coil
Once the system is safe and depressurized, remove the access panels on the indoor air handler unit. These are usually held in place by screws. Set them aside carefully—you’ll need them later.
Locate the evaporator coil housing. The FC35B3XC1A coil is typically mounted inside a sheet metal casing. You’ll see the refrigerant lines (suction and liquid) connected to the coil. Use your wrench to carefully disconnect these lines. Have a rag ready to catch any residual oil or refrigerant.
Now, remove the mounting brackets or screws holding the coil in place. Gently slide the old coil out. Be careful—coils are heavy and can be sharp. If it’s stuck, check for hidden clips or seals. I once spent 20 minutes trying to pull a coil out only to realize a small clip was still engaged. Patience pays off!
Step 3: Prepare the New FC35B3XC1A Coil
Unpack your new coil and inspect it for any damage during shipping. Check the fins—if they’re bent, use a fin comb to straighten them. Bent fins restrict airflow and reduce efficiency.
Compare the new coil to the old one. Make sure the dimensions, connection types, and orientation match. The suction and liquid line connections should align perfectly. If they don’t, double-check the model number. Installing the wrong coil can damage your entire system.
Apply a thin layer of refrigerant oil to the O-rings on the new coil’s fittings. This helps create a tight seal and prevents leaks. Don’t overdo it—just a light coat is enough.
Step 4: Install the New Coil
Carefully slide the new FC35B3XC1A coil into the housing. Make sure it sits flush and aligns with the mounting brackets. Secure it using the original screws or clips. Don’t overtighten—this can warp the housing or damage the coil.
Reconnect the refrigerant lines. Hand-tighten first, then use your torque wrench to tighten to the manufacturer’s specifications (usually found in the installation manual). Over-tightening can crack fittings; under-tightening can cause leaks.
Replace any gaskets or seals that look worn. Even if they seem fine, it’s a good idea to use new ones during a coil replacement. Old seals can degrade over time and fail prematurely.
Step 5: Evacuate and Recharge the System
This is a critical step. Before recharging with refrigerant, you must evacuate the system to remove air and moisture. Air in the system reduces efficiency and can cause compressor damage.
Connect your vacuum pump to the service ports using the manifold gauge set. Open the valves and run the pump for at least 30–45 minutes. Use a micron gauge to monitor the vacuum level—aim for 500 microns or lower. If the vacuum holds steady, you’re good to go.
Once evacuated, close the valves and disconnect the pump. Now, you can recharge the system with the correct type and amount of refrigerant. Refer to your AC unit’s label or manual for the exact charge. Overcharging or undercharging can seriously affect performance.
After charging, use your leak detector to check all connections. If you’re using soap solution, apply it to the fittings and look for bubbles. No bubbles? Great—you’re leak-free.
Testing and Final Checks
You’re almost done! Now it’s time to test your work and make sure everything is running smoothly.
Power Up and Monitor
Turn the power back on at the main panel and at the disconnect switch. Set your thermostat to cool and let the system run for 15–20 minutes. Listen for unusual noises and check for proper airflow from the vents.
Use your manifold gauge set to monitor suction and discharge pressures. Compare them to the manufacturer’s specifications. If the pressures are within range, your installation was successful.
Check the coil for ice buildup. If you see ice forming, it could indicate low airflow (dirty filter, blocked ducts) or incorrect refrigerant charge. Address these issues before they cause damage.
Common Issues and Troubleshooting Tips
Even with careful installation, problems can arise. Here are a few common issues and how to fix them:
- No cooling: Check the thermostat settings, air filter, and refrigerant charge. Also, ensure the coil isn’t blocked.
- Water leakage: This could be due to a clogged drain line or improper coil slope. Clear the drain and check the installation angle.
- High pressure readings: Could indicate a dirty condenser coil or overcharged system. Clean the outdoor unit and verify refrigerant levels.
- Strange noises: Rattling may mean loose panels; hissing could signal a leak. Tighten components and recheck connections.
If you’re unsure about any reading or symptom, don’t hesitate to consult a professional. It’s better to be safe than sorry.
Maintenance Tips to Extend Coil Life
Now that your new FC35B3XC1A coil is installed, you’ll want to keep it in top shape. Regular maintenance can prevent future issues and extend the life of your entire AC system.
Regular Cleaning and Inspection
Clean the coil at least once a year—preferably before the cooling season starts. Turn off the power, remove the access panel, and use a soft brush or coil cleaner to remove dirt and debris. Avoid using high-pressure water, which can bend the fins.
Check the fins for damage and straighten them with a fin comb if needed. Also, inspect the drain pan and line for clogs. A clogged drain can cause water damage and mold growth.
Change Air Filters Monthly
A dirty air filter restricts airflow, forcing the coil to work harder and increasing the risk of freezing. Replace your filter every 1–3 months, depending on usage and air quality. I keep a calendar reminder to change mine every 60 days—it’s a small habit that makes a big difference.
Schedule Professional Tune-Ups
Even with DIY care, it’s wise to have a licensed HVAC technician inspect your system annually. They can check refrigerant levels, test electrical components, and catch potential issues early. Think of it like a car tune-up—preventive care saves money in the long run.
During the inspection, ask the technician to verify that your FC35B3XC1A coil is functioning properly and that the system is balanced. They can also recommend upgrades, like a smart thermostat or UV light, to improve efficiency.
Comparison of FC35B3XC1A Coil Specifications
To help you understand how the FC35B3XC1A stacks up against similar models, here’s a quick comparison of key specifications:
| Model | Capacity (Tons) | Refrigerant Type | Dimensions (L x W x H) | Fins per Inch | Warranty |
|---|---|---|---|---|---|
| FC35B3XC1A | 3.5 | R-410A | 24″ x 20″ x 16″ | 14 | 5 years |
| FC30B2XC1A | 3.0 | R-410A | 22″ x 18″ x 14″ | 12 | 5 years |
| FC40B4XC1A | 4.0 | R-410A | 26″ x 22″ x 18″ | 16 | 10 years |
As you can see, the FC35B3XC1A offers a balanced combination of capacity, efficiency, and durability. It’s a reliable choice for most homes, especially when properly maintained.
Final Thoughts: You’ve Got This!
Replacing the coil in your air conditioner might seem like a daunting task, but as you’ve seen, it’s entirely manageable with the right preparation and mindset. The air conditioner coil installation instructions model FC35B3XC1A don’t have to be intimidating—they’re just a roadmap to a cooler, more efficient home.
I’ll be honest: my first coil replacement took me over six hours, and I made a few mistakes along the way. But each mistake taught me something valuable. Now, I can do it in under three hours with confidence. You can too. Take your time, follow the steps, and don’t be afraid to ask for help when needed.
Remember, a well-maintained coil doesn’t just keep you comfortable—it saves energy, reduces wear on your system, and extends the life of your AC unit. Whether you’re a seasoned DIYer or a first-timer, this project is a great way to take control of your home’s comfort and efficiency.
So go ahead—grab your tools, turn off the power, and get started. Your cooler, quieter, and more efficient air conditioner is just a coil replacement away.
Frequently Asked Questions
What tools do I need to install the air conditioner coil in model FC35B3XC1A?
You’ll need a set of screwdrivers, a wrench, a level, and safety gloves to safely install the air conditioner coil in model FC35B3XC1A. Make sure the power is off before starting to avoid electrical hazards.
How do I access the coil compartment in the FC35B3XC1A unit?
To access the coil compartment, remove the front panel of the FC35B3XC1A by unscrewing the mounting screws on the sides and top. Carefully lift the panel off to expose the coil housing.
Can I install the air conditioner coil myself, or do I need a professional?
While DIY installation is possible if you follow the air conditioner coil installation instructions model FC35B3XC1A carefully, it’s recommended to hire a certified technician to ensure proper handling and avoid warranty issues.
What should I do if the new coil doesn’t fit properly in the FC35B3XC1A?
Double-check the model number and ensure you have the correct replacement coil for FC35B3XC1A. If it still doesn’t fit, contact the manufacturer or supplier for a compatible part or installation support.
How do I ensure proper airflow after installing the coil in model FC35B3XC1A?
After installing the coil, reassemble the unit securely and make sure all seals are tight. Run a test cycle and check for even cooling and unobstructed airflow through the vents.
Are there any safety precautions I should take during FC35B3XC1A coil installation?
Always turn off the power at the circuit breaker before beginning installation. Wear safety goggles and gloves to protect against sharp edges and refrigerant exposure.

