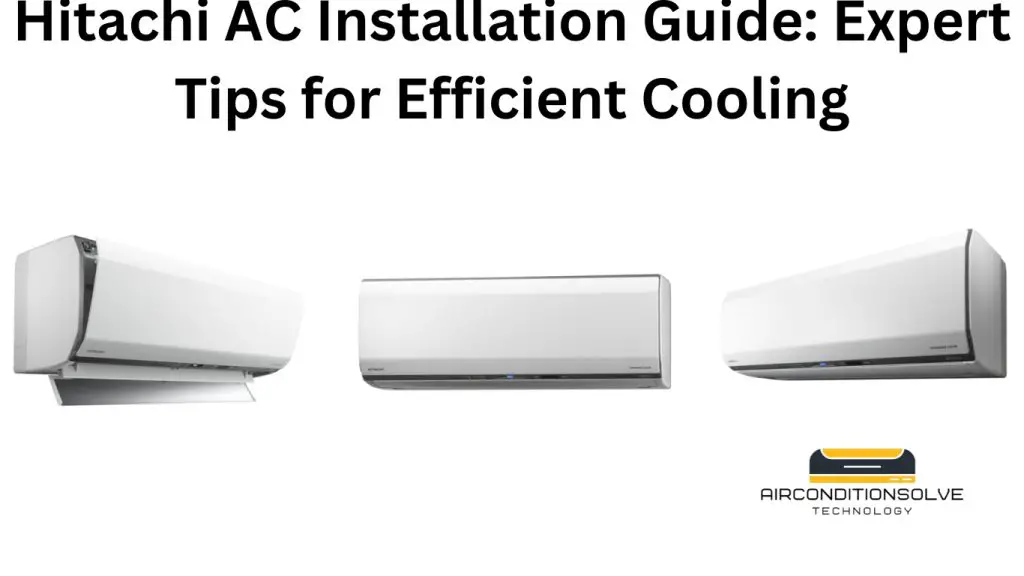
The Hitachi AC installation guide provides detailed instructions for installing your Hitachi air conditioner. In this guide, you will find step-by-step procedures to ensure a successful installation.
Are you considering installing a Hitachi air conditioner in your home or office? The installation process is crucial in ensuring optimal performance and longevity of your AC unit. To help you with this, Hitachi has provided a comprehensive AC installation guide that covers all the necessary steps and precautions.
We will provide a brief overview of the Hitachi AC installation guide and highlight some key points to keep in mind during the installation process. Whether you are a DIY enthusiast or planning to hire a professional, understanding the installation guide will help you make informed decisions and ensure a smooth installation experience. So, let’s dive in and explore the essential aspects of Hitachi AC installation.
Importance Of Proper Hitachi Ac Installation
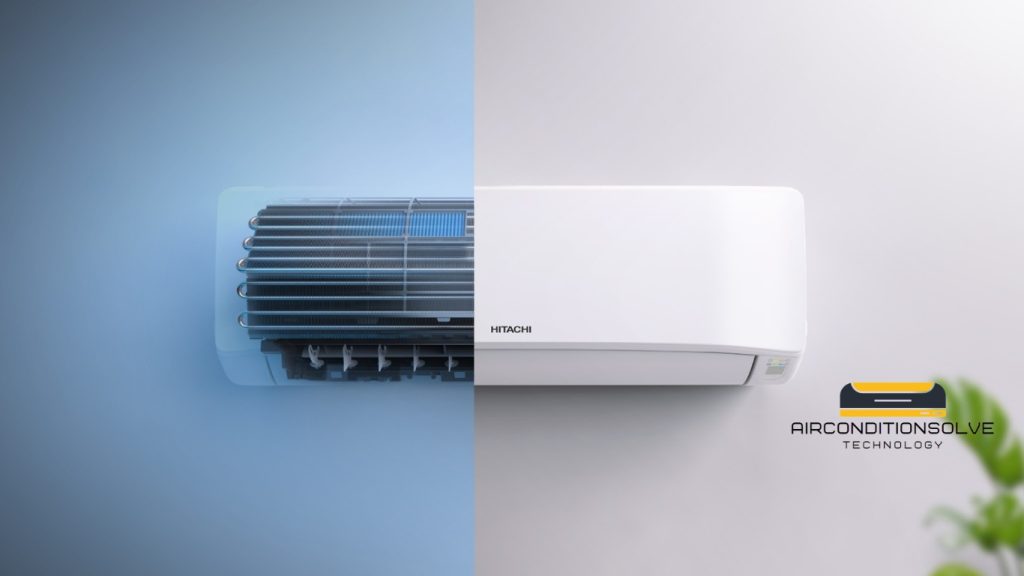
Efficient cooling starts with a professional installation. When it comes to your Hitachi AC, proper installation plays a crucial role in its overall performance, energy efficiency, and lifespan. Whether you are installing a new Hitachi AC or replacing an existing one, it is necessary to give careful attention to the installation process. By doing so, you can ensure that your Hitachi AC operates optimally, providing you with a comfortable and cool living space, all while minimizing energy consumption and reducing costs.
Efficient Cooling Starts With A Professional Installation
When it comes to Hitachi AC installation, entrusting the task to a professional is essential. Proper installation ensures that all components of the AC unit, including the indoor and outdoor units, refrigerant lines, and electrical connections are installed correctly and securely. A professional installer is well-versed in the installation process, following industry standards and manufacturer guidelines to optimize your AC unit’s performance and efficiency. Additionally, hiring a professional ensures the warranty remains intact, protecting your investment in the long run.
Factors That Affect Ac Performance And Energy Efficiency
Several factors can impact the performance and energy efficiency of your Hitachi AC. By understanding these factors, you can make informed decisions during the installation process:
- Proper sizing: Choosing the right-sized AC unit for your space is crucial. An undersized unit may struggle to cool adequately, while an oversized unit can lead to frequent cycling, inefficient operation, and higher energy bills. A professional installer can assess your space and recommend the appropriate sized unit for maximum efficiency.
- Optimal location: Placement of the outdoor and indoor units is essential for proper airflow and efficiency. The outdoor unit should be placed in an open area with good ventilation, away from direct sunlight, obstructions, and noise-sensitive areas. The indoor unit should be installed at a central location in the room, away from any obstructions, to ensure even distribution of cool air.
- Ductwork integrity: If your AC system operates with ducts, it is important to ensure their integrity. Properly sealed and insulated ductwork prevents air leaks and improves cooling efficiency. During installation, a professional can inspect the ductwork for any leaks or damages and address them accordingly.
- Refrigerant charging: Accurate refrigerant charging is vital for the optimal performance of your AC system. Improper refrigerant levels can lead to reduced cooling efficiency and potential compressor damage. A professional installer uses the correct techniques and tools to charge the refrigerant to the manufacturer’s specifications.
- Electrical connections: Appropriate electrical connections are crucial for the safe and efficient operation of your Hitachi AC. A professional installer ensures that all electrical connections are properly secured and comply with electrical codes, minimizing any potential hazards and ensuring optimal performance.
By adhering to these factors during the installation process, you can maximize the performance, energy efficiency, and lifespan of your Hitachi AC unit. Investing in professional installation will not only provide you with a comfortable living environment but also save you money in the long run through reduced energy consumption and minimized repair costs.
Pre-installation Preparation
Proper pre-installation preparation is crucial to ensure a smooth and successful Hitachi AC installation. In this section, we will guide you through the important steps you need to take before installing your AC unit. By following these steps, you can ensure the longevity and optimal performance of your air conditioning system. Let’s dive in!
Choosing The Right Location For The Ac Unit
When it comes to installing your Hitachi AC, selecting the right location is vital. You need to find a spot that not only allows efficient cooling but also avoids potential obstructions. Consider the following factors to choose the perfect location:
- Identify a central location in the room that provides even airflow throughout the space.
- Avoid placing the unit near heat sources such as direct sunlight, appliances, or other electronic devices. Heat sources can affect the AC’s performance and energy consumption.
- Make sure there is ample space around the unit for proper air circulation. Avoid walls or furniture that might hinder the airflow and cooling efficiency.
- Consider installing the AC unit away from areas prone to moisture, such as bathrooms or kitchens. Excessive humidity can impact the lifespan of your AC.
Clearing The Installation Area Of Obstructions
Prior to installing your Hitachi AC, it is crucial to clear the installation area of any obstructions. This ensures the smooth operation and accessibility of the unit. Here are some steps to follow:
- Remove any furniture, decor, or objects that might obstruct the installation process or limit the airflow.
- Ensure there are no curtains, blinds, or drapes hanging in front of the AC unit, as they can impede the air distribution.
- Check the area for any loose wires or cables that could interfere with the installation. Remove or secure them properly.
- Inspect the condition of the walls and ceiling for any cracks or damage. Repair them before installing the AC to prevent any leakage or structural issues.
Proper Electrical And Wiring Preparations
Before installing your Hitachi AC, it is essential to make proper electrical and wiring preparations. This ensures the safety of the installation and eliminates the risk of any electrical hazards. Follow these steps:
- Ensure that an appropriate electrical circuit is available near the installation area to power the AC unit. Consult an electrician if required.
- Check the voltage and amperage requirements specified in the AC unit’s manual and ensure that the circuit can handle the load.
- Ensure the power supply is turned off before starting any electrical wiring procedures. Safety should always be the highest priority.
- Carefully follow the wiring diagrams provided by the manufacturer and make secure connections, following the electrical codes and regulations.
By following these pre-installation preparation steps, you are setting the foundation for a successful Hitachi AC installation. Taking the time to choose the right location, clear the installation area, and make proper electrical and wiring preparations will contribute to the longevity and optimal performance of your AC unit. Preparing in advance ensures a hassle-free installation process and guarantees the comfort you desire. Now that you are ready, let’s move on to the next step: installation!
Installation Process
This short guide provides step-by-step instructions for installing your Hitachi AC unit at home. Take the stress out of the process and ensure optimal performance with this easy-to-follow installation guide.
Mounting The Indoor And Outdoor Units
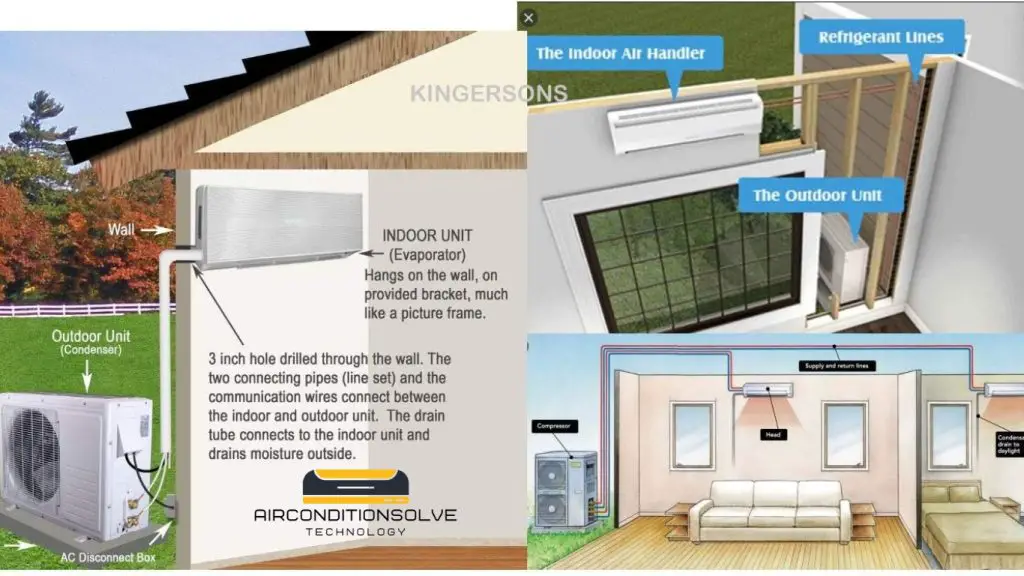
The first step in the Hitachi AC installation process involves mounting both the indoor and outdoor units. Proper mounting is crucial to ensure optimal cooling performance and efficiency. Here’s a breakdown of how to mount each unit:
-
- Mounting the indoor unit:
To start, select the appropriate location on the wall where you want to install the indoor unit. Make sure it is a sturdy wall that can support the weight of the unit. Use a spirit level to ensure the unit is perfectly level before marking the mounting holes. Once the holes are marked, drill them and insert the wall anchors. Carefully mount the indoor unit on the wall using screws. Ensure it is securely fastened.
-
- Mounting the outdoor unit:
Choose an appropriate spot for the outdoor unit that allows for proper airflow and is away from any obstructions. Ensure that the unit is placed on a flat surface to prevent vibration and noise. Attach the outdoor unit to the mounting bracket using screws. Make sure it is tightly secured to avoid any accidents or damage.
Connecting Refrigerant Lines And Electrical Wiring
After mounting the units, the next step in the installation process is to connect the refrigerant lines and electrical wiring. This step is crucial for proper functioning and efficient cooling. Follow these steps to connect the lines and wiring:
-
- Connecting the refrigerant lines:
Start by identifying the correct refrigerant lines and the valves on the indoor and outdoor units. Carefully attach the refrigerant lines to the corresponding valves, making sure they are firmly tightened to prevent any leaks. Use appropriate insulation material to cover the lines for better temperature retention.
-
- Connecting the electrical wiring:
Locate the electrical connection points on both the indoor and outdoor units. Strip the ends of the electrical wires and connect them according to the manufacturer’s instructions. Ensure that all connections are secure and tight. It is highly recommended to hire a qualified electrician for this step to guarantee safety and proper wiring.
Securing The Units For Stability And Safety
Once the refrigerant lines and electrical wiring are connected, the final step is to secure the units for stability and safety. This will prevent any accidents or damage to the units. Here’s what you need to do:
-
- Indoor unit:
Use appropriate brackets or mounts to secure the indoor unit to the wall. Make sure it is tightly fastened and doesn’t wobble or move. This will enhance stability and reduce any vibration or noise during operation.
-
- Outdoor unit:
To ensure the outdoor unit is secure, attach it to the mounting brackets using sturdy screws or bolts. Check that it is level and stable on the flat surface. Additionally, consider using rubber pads to absorb vibrations and reduce noise.
By following these installation guidelines and securing the units properly, you can enjoy optimal cooling performance from your Hitachi AC while ensuring the safety of both the units and the occupants.
Professional Tips For Proper Installation
When it comes to installing your Hitachi AC, following professional tips is essential to ensure optimal performance and efficiency. From ensuring proper insulation for refrigerant lines to correctly sealing and insulating ducts, every step plays a crucial role in the long-term performance of your air conditioning system. In this guide, we will walk you through these important steps for a successful installation process.
Ensuring Proper Insulation For Refrigerant Lines
One of the key aspects of a proper AC installation is ensuring the correct insulation for refrigerant lines. These lines carry the refrigerant between the outdoor and indoor units, and proper insulation is essential for preventing energy loss and maintaining the desired cooling efficiency.
To ensure proper insulation, consider the following tips:
- Use insulation material suitable for AC refrigerant lines, such as foam or rubber insulation tubes.
- Make sure the insulation material completely covers the refrigerant lines and is securely fastened to prevent any gaps that might cause energy loss.
- Inspect the insulation regularly to ensure it is not damaged or deteriorated. Replace any damaged insulation promptly to maintain optimum performance.
Properly Sealing And Insulating Ducts
In addition to insulating refrigerant lines, proper sealing and insulation of ducts are equally important for optimal cooling and energy efficiency. Leaky ducts can result in air loss and reduced overall performance of your AC system.
Follow these professional tips to ensure proper sealing and insulation of ducts:
- Seal all duct joints and connections using high-quality foil tape or mastic sealant to prevent air leakage.
- Insulate ducts in unconditioned spaces, such as attics or crawl spaces, to avoid temperature loss or gain.
- Inspect and clean ducts regularly to remove any debris, dust, or obstructions that may hinder airflow.
Correct Selection And Installation Of Air Filters
The air filter in your AC system plays a vital role in maintaining indoor air quality and preserving the lifespan of the unit. Choosing the right air filter and installing it correctly is essential for smooth operation and optimized performance.
Consider the following tips for selecting and installing air filters:
| Tips | Importance |
|---|---|
| Choose air filters with the appropriate Minimum Efficiency Reporting Value (MERV) rating for your specific AC unit. | Higher MERV ratings capture smaller particles but may affect airflow. Balance your filtration needs with system performance. |
| Follow the manufacturer’s guidelines for the correct size and type of air filter | Correct fit and compatibility are crucial for effective air filtration and preventing air bypass. |
| Replace air filters regularly according to manufacturer recommendations. | Dirty and clogged filters restrict airflow, reduce efficiency, and can potentially damage the AC system. |
By following these professional tips for proper installation, you can ensure optimum performance, energy efficiency, and longevity of your Hitachi AC system. Remember, a well-installed air conditioning system not only provides you with comfort but also saves you money in the long run.
Testing And Commissioning
In the process of installing a Hitachi AC unit, one crucial step is the testing and commissioning phase. This phase ensures that the system is functioning properly and meets the desired performance standards. In this section, we will discuss two essential aspects of testing and commissioning: checking for leaks and refrigerant charge, and verifying proper airflow and temperature control. These steps are crucial to optimize the performance of your Hitachi AC unit.
Checking For Leaks And Refrigerant Charge
One of the first tasks in testing and commissioning your Hitachi AC unit is checking for any leaks and ensuring proper refrigerant charge. Leaks can lead to inefficiencies in the system and can even cause damage to the compressor. To ensure there are no leaks, it is recommended to perform a thorough visual inspection of the refrigerant lines, joints, and fittings. Any signs of oil or refrigerant stains indicate a leak and should be repaired immediately.
To check the refrigerant charge, a pressure gauge is used to measure the pressure in the system. This reading should be compared to the manufacturer’s specifications to ensure the system has the correct amount of refrigerant. If the charge is incorrect, it can lead to poor cooling performance and increased energy consumption. If necessary, the refrigerant can be added or removed to achieve the optimal charge level.
Verifying Proper Airflow And Temperature Control
Another important aspect of testing and commissioning is verifying proper airflow and temperature control in your Hitachi AC unit. Proper airflow ensures that the conditioned air is distributed evenly throughout the room, providing consistent comfort. It is essential to check that air filters are clean and not blocked, as clogged filters can restrict airflow.
Temperature control is equally important, as it ensures that the desired set temperature is maintained. To verify temperature control, a thermometer can be placed in different areas of the room to measure the air temperature. This reading should be compared to the temperature set on the thermostat. If there is a significant difference, adjustments can be made to the unit’s settings to achieve the desired comfort level.
Taking the time to fine-tune the AC settings for optimal performance is well worth the effort. This step involves adjusting parameters such as fan speed and swing mode to meet your specific cooling needs. Experiment with different settings to find the balance between comfort and energy efficiency.
By following these testing and commissioning steps, you can ensure your Hitachi AC unit is installed correctly and operating at its best capacity. Remember to consult the manufacturer’s installation guide for detailed instructions specific to your model.
Frequently Asked Questions Of Hitachi Ac Installation Guide
How Do I Install A Hitachi Ac Unit?
To install a Hitachi AC unit, start by selecting a suitable location for the indoor and outdoor units. Follow the installation instructions provided in the manual or consult a professional technician. Ensure proper electrical connections, refrigerant piping, and secure mounting for efficient and safe installation.
What Tools Are Needed For Installing A Hitachi Ac Unit?
For installing a Hitachi AC unit, you may need tools like a measuring tape, level, screwdriver, drill machine, pipe cutter, flaring tool, and a vacuum pump. It is recommended to refer to the instruction manual or consult a professional for a complete list of tools required for installation.
Can I Install A Hitachi Ac Unit Myself?
While it is possible to install a Hitachi AC unit on your own, it is advisable to hire a professional technician for proper installation. They have the expertise, knowledge, and necessary tools to ensure a safe and efficient installation, saving you time and potential issues in the long run.
How Long Does It Take To Install A Hitachi Ac Unit?
The time taken to install a Hitachi AC unit depends on various factors such as the complexity of the installation, the size of the unit, the location, and the availability of necessary tools. On average, it may take around 4-8 hours for a professional technician to complete the installation process.
Conclusion
To wrap it up, this Hitachi AC installation guide provides a comprehensive and easy-to-follow step-by-step process to help you set up your air conditioning unit efficiently. From choosing the right location for installation to connecting the necessary components, this guide ensures a hassle-free experience.
Remember to follow the manufacturer’s instructions and seek professional assistance if needed. With this guide, you’ll be enjoying a comfortable and cool environment in no time.

