
Featured image for 2006 kia sedona air conditioner freon fill instructions
Image source: d2n97g4vasjwsk.cloudfront.net
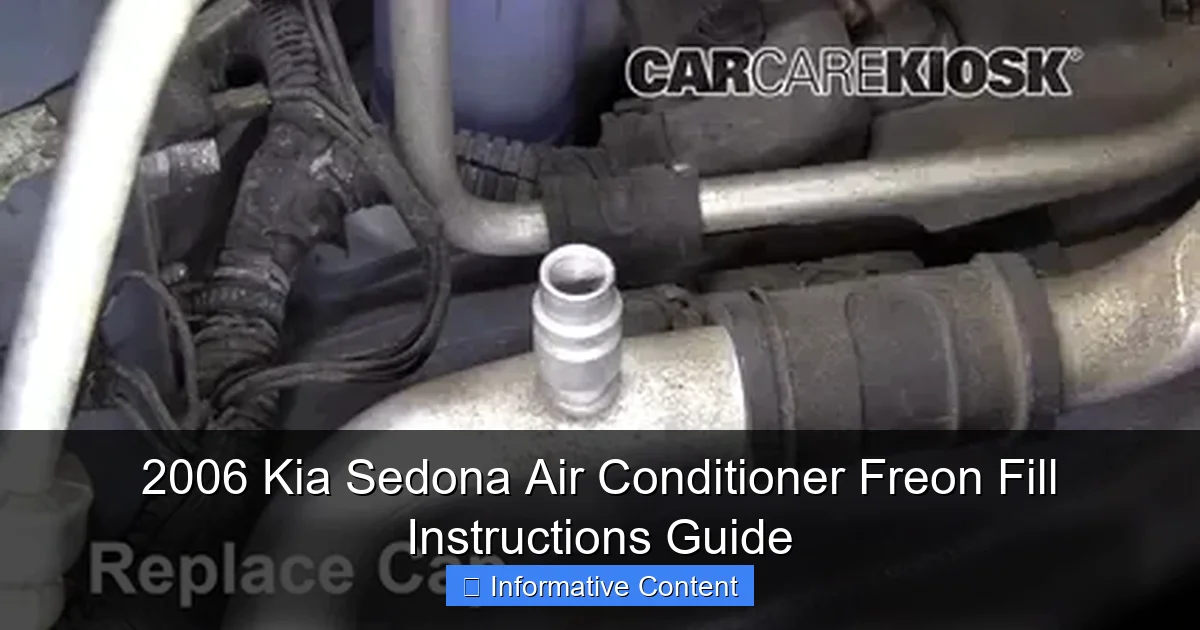
Properly recharging the air conditioner in a 2006 Kia Sedona requires the correct type and amount of Freon (R-134a), along with careful attention to safety and pressure levels. This guide provides step-by-step instructions to safely locate the low-pressure port, connect the recharge kit, and refill the system without overcharging or damaging components. Following these precise procedures ensures optimal cooling performance and extends the life of your AC system.
Key Takeaways
- Check refrigerant type: Use only R-134a for the 2006 Kia Sedona AC system.
- Inspect for leaks: Always test for leaks before adding freon to prevent future loss.
- Use proper tools: A manifold gauge set is essential for safe and accurate freon filling.
- Follow pressure guidelines: Monitor low and high-side pressures to avoid system damage.
- Charge slowly: Add freon gradually while the AC runs to ensure proper distribution.
- Wear safety gear: Protect eyes and skin when handling refrigerant.
📑 Table of Contents
- 2006 Kia Sedona Air Conditioner Freon Fill Instructions Guide
- Understanding Your 2006 Kia Sedona’s Air Conditioning System
- Tools and Materials You’ll Need
- Step-by-Step Guide to Recharging the AC
- Common Mistakes to Avoid
- Maintenance Tips to Keep Your AC Running Cool
- When to Call a Professional
- Summary Table: 2006 Kia Sedona AC Recharge Checklist
- Conclusion
2006 Kia Sedona Air Conditioner Freon Fill Instructions Guide
It’s a sweltering summer afternoon, and you’re cruising down the highway in your trusty 2006 Kia Sedona. The kids are in the backseat, the windows are down, and the sun is beating down like it’s trying to melt the asphalt. You reach for the air conditioning knob, twist it to “max cool,” and… nothing. Just warm air. Again.
We’ve all been there. The frustration of a failing AC system in a minivan—especially one as family-friendly and reliable as the 2006 Kia Sedona—can turn a simple trip into a sweaty ordeal. You might suspect low refrigerant, commonly known as freon, but you’re not sure how to check it, let alone refill it yourself. Maybe you’ve heard horror stories about overcharging the system or damaging the compressor. Or perhaps you’re just not confident enough to pop the hood and start poking around.
The good news? Refilling the air conditioner in your 2006 Kia Sedona isn’t as intimidating as it sounds—especially if you follow the right steps. With a few tools, some patience, and a little know-how, you can restore cool, crisp air to your cabin without spending hundreds at the mechanic. This guide will walk you through everything you need to know about diagnosing low freon, safely adding refrigerant, and maintaining your AC system for years to come. Whether you’re a DIY enthusiast or a first-time tinkerer, we’ve got you covered.
Understanding Your 2006 Kia Sedona’s Air Conditioning System
Before you grab a can of freon and start spraying, it’s important to understand how your 2006 Kia Sedona’s air conditioning system actually works. Think of it like your home’s HVAC system—just on a smaller, more mobile scale. The AC system in your Sedona uses a closed-loop refrigeration cycle to remove heat and moisture from the cabin air, leaving you feeling cool and comfortable.

Visual guide about 2006 kia sedona air conditioner freon fill instructions
Image source: cck-dl.s3.amazonaws.com
How the AC System Works
The system relies on a refrigerant—specifically, R-134a in the 2006 Kia Sedona—to absorb and release heat. Here’s a simplified breakdown of the cycle:
- Compressor: This is the heart of the system. It pressurizes the refrigerant gas, raising its temperature.
- Condenser: Located in front of the radiator, it cools the hot gas, turning it into a high-pressure liquid.
- Receiver-Drier: Filters moisture and debris from the refrigerant before it moves to the next stage.
- Expansion Valve: Regulates the flow of refrigerant into the evaporator.
- Evaporator: Inside the dashboard, this component absorbs heat from the cabin air, cooling it before it’s blown through the vents.
When the refrigerant level drops—due to a slow leak or age-related wear—the system can’t absorb enough heat, resulting in warm or lukewarm air from the vents. That’s your cue that it’s time to check the freon level.
Why Freon Levels Drop
Refrigerant doesn’t “burn out” like engine oil or coolant. It’s a sealed system, so under normal conditions, the freon should last the life of the vehicle. However, over time, small leaks can develop in hoses, seals, or the compressor shaft. Common causes include:
- Degraded O-rings or gaskets
- Cracked or worn AC hoses
- Loose fittings or connections
- Corrosion in the condenser or evaporator
If you notice your AC blowing warm air, especially after it’s been working fine for a while, low freon is a likely culprit. But don’t jump to conclusions—other issues like a faulty compressor clutch, blown fuse, or clogged cabin air filter can mimic low refrigerant symptoms.
Signs You Need to Recharge the AC
Here are some telltale signs that your 2006 Kia Sedona’s AC needs a freon recharge:
- Air coming from vents is warm or only slightly cool
- AC blows cold at first, then warms up after a few minutes
- Hissing sound near AC components (indicating a leak)
- Ice buildup on the evaporator or compressor
- Reduced airflow from vents
If you experience any of these, it’s time to inspect the system. But remember: adding freon without fixing a leak is only a temporary fix. The refrigerant will eventually escape again, and you’ll be back to square one.
Tools and Materials You’ll Need
Before you begin, gather the right tools and supplies. You don’t need a professional mechanic’s garage, but having the correct equipment will make the job safer and more effective.
Essential Tools
- AC Recharge Kit: This typically includes a can of R-134a refrigerant, a pressure gauge, and a hose with a trigger valve. Look for kits labeled “with gauge” or “professional grade” for better accuracy.
- Safety Goggles and Gloves: Refrigerant can cause frostbite on contact with skin or eyes. Always protect yourself.
- Flashlight: You’ll need good lighting to locate service ports and inspect components.
- Wrench Set: For accessing the low-pressure service port (usually 10mm or 13mm).
- Leak Detection Kit (Optional): UV dye or electronic leak detector can help locate hidden leaks.
Recommended Refrigerant
Your 2006 Kia Sedona uses R-134a refrigerant. Do not use R-12 or any alternative “drop-in” refrigerants—they’re incompatible and can damage the system. Always check the label on the can to confirm it’s R-134a.
Most recharge kits come with 12–14 ounces of refrigerant. The Sedona’s AC system typically holds about 20–24 ounces total, but you should never fully recharge it yourself unless you’re certain of the current level. Overcharging can damage the compressor.
Where to Buy Supplies
You can find AC recharge kits at auto parts stores like AutoZone, O’Reilly, or Advance Auto Parts. Prices range from $25 to $50, depending on the brand and included accessories. Some kits even come with a built-in thermometer to monitor vent temperature.
Pro Tip: Buy a kit with a reusable gauge and hose. Disposable ones often break or leak, and you’ll want to reuse your tools for future maintenance.
Step-by-Step Guide to Recharging the AC
Now that you’re prepared, let’s walk through the actual process of recharging your 2006 Kia Sedona’s air conditioner. This is a straightforward job, but safety and precision are key.
Step 1: Park and Prepare the Vehicle
Start by parking your Sedona on a level surface in a well-ventilated area—preferably outdoors or in a garage with the door open. Turn off the engine and let the AC system sit for at least 15 minutes. This allows pressure to equalize and gives you an accurate reading.
Pop the hood and locate the low-pressure service port. It’s usually on the aluminum line near the firewall (the wall between the engine and cabin), marked with an “L” or colored blue. The high-pressure port (red or marked “H”) should never be used for recharging—it’s dangerous and can cause injury.
Step 2: Check the Current Pressure
Attach the recharge hose to the low-pressure port. Make sure the valve on the hose is closed (trigger not pressed). Start the engine and turn the AC to the coldest setting with the fan on high. Let it run for 2–3 minutes to stabilize.
Now, slowly open the valve on the recharge hose and check the pressure reading on the gauge. The ideal pressure for R-134a at around 80°F (27°C) ambient temperature is between 25 and 45 psi. If the reading is below 25 psi, you’re low on refrigerant and can proceed with the recharge.
Example: If your gauge reads 18 psi on a warm day, that’s a clear sign of low freon. But if it’s 35 psi and the air is still warm, the issue might be mechanical—like a bad compressor or clogged condenser.
Step 3: Add Refrigerant Safely
Shake the refrigerant can well before attaching it to the hose. With the engine running and AC on max, slowly open the valve on the recharge kit. You’ll hear a hissing sound as freon enters the system.
Important: Add refrigerant in short bursts—no more than 1–2 seconds at a time. Watch the pressure gauge closely. Stop when the pressure reaches the middle of the green zone (around 35–40 psi). Overcharging can cause high pressure, which may damage the compressor or blow a seal.
As you add freon, you should notice the air from the vents getting progressively cooler. If the air doesn’t improve after adding a full can, there may be a significant leak or another issue.
Step 4: Monitor and Test
Once you’ve added refrigerant, let the system run for 5–10 minutes. Check the vent temperature with an infrared thermometer if you have one—ideal output is between 35°F and 45°F (2°C to 7°C).
Also, listen for unusual noises like knocking or squealing from the compressor. These could indicate mechanical problems unrelated to freon levels.
After testing, close the valve on the recharge hose, disconnect it from the service port, and replace the cap. Turn off the engine and store your tools.
Step 5: Check for Leaks (Optional but Recommended)
If your AC was very low on freon, there’s likely a leak. Use a UV leak detection kit: add the dye to the system (some recharge kits include it), run the AC for a few hours, then use a UV flashlight to inspect hoses, connections, and the compressor. Glowing spots indicate leaks.
For minor leaks, you can use a sealant additive (like AC Pro’s Stop Leak), but for larger leaks, professional repair is recommended.
Common Mistakes to Avoid
Even with the best intentions, it’s easy to make mistakes when recharging your AC. Here are some common pitfalls and how to avoid them.
Overcharging the System
This is the #1 mistake DIYers make. Adding too much freon increases pressure, which can blow seals, damage the compressor, or even cause the AC hose to rupture. Always monitor the gauge and stop when pressure is in the safe range.
Rule of thumb: Never exceed 45 psi on the low side unless you’re certain of the ambient temperature and system specs.
Using the Wrong Refrigerant
Some people try to save money by using “universal” or “R-12 replacement” refrigerants. These are not compatible with R-134a systems and can cause chemical reactions, corrosion, or complete system failure. Stick to R-134a only.
Ignoring Leaks
Recharging without fixing a leak is like refilling a tire with a hole. The freon will escape again, usually within weeks or months. If your AC loses refrigerant quickly, have a professional inspect it for leaks.
Recharging a Non-Running System
Never add freon to a cold, off system. The pressure reading won’t be accurate, and you risk undercharging or overcharging. Always run the AC for a few minutes before checking pressure.
Skipping Safety Gear
Refrigerant expands rapidly when released and can cause severe frostbite. Always wear gloves and goggles, and never inhale the fumes. Work in a well-ventilated area.
Maintenance Tips to Keep Your AC Running Cool
Recharging your AC is just one part of the equation. To keep your 2006 Kia Sedona’s air conditioner performing at its best, regular maintenance is essential.
Replace the Cabin Air Filter
A clogged cabin air filter restricts airflow, making the AC work harder and reducing cooling efficiency. Most Sedona models have a filter behind the glove box. Replace it every 12,000 to 15,000 miles or once a year.
Clean the Condenser
The condenser, located in front of the radiator, can get clogged with dirt, bugs, and debris. Use a garden hose to gently spray it clean from front to back. Avoid high-pressure washers, which can damage the fins.
Run the AC Regularly
Even in winter, run your AC for 10 minutes once a month. This keeps the compressor lubricated and prevents seals from drying out.
Inspect Hoses and Belts
Check the AC compressor belt for cracks or looseness. Also, inspect hoses for bulges, cracks, or oil stains—signs of wear or leaks.
Schedule Professional Service
Every 2–3 years, have a certified technician perform a full AC inspection, including leak testing, refrigerant level check, and performance evaluation. This can catch issues early and extend the life of your system.
When to Call a Professional
While DIY recharging is safe and effective for minor top-offs, some situations require expert help.
- No improvement after recharging: If the air is still warm after adding freon, the compressor, expansion valve, or condenser may be faulty.
- Visible leaks or oil stains: These indicate a breach in the system that needs repair.
- Strange noises or smells: Grinding, squealing, or musty odors could signal mechanical or mold issues.
- Electrical problems: If the AC won’t turn on at all, check fuses and relays first. If those are fine, a technician should diagnose the issue.
A professional can also recover and recycle old refrigerant, which is environmentally responsible and often required by law.
Summary Table: 2006 Kia Sedona AC Recharge Checklist
| Step | Action | Notes |
|---|---|---|
| 1 | Park on level ground, engine off | Let system rest 15+ minutes |
| 2 | Locate low-pressure service port | Blue cap, marked “L” |
| 3 | Start engine, turn AC to max cool | Fan on high |
| 4 | Attach recharge hose, check pressure | Ideal: 25–45 psi |
| 5 | Add R-134a in short bursts | Watch gauge, stop at 35–40 psi |
| 6 | Test vent temperature | Should be 35°F–45°F |
| 7 | Check for leaks (optional) | Use UV dye or electronic detector |
| 8 | Replace cap, store tools | Clean up workspace |
Conclusion
Keeping your 2006 Kia Sedona’s air conditioner running cool doesn’t have to be a mystery—or a money pit. With the right tools, a little patience, and this step-by-step guide, you can safely recharge your AC system and enjoy refreshing airflow all summer long.
Remember, low freon is often a sign of a leak, so while recharging can buy you time, it’s not a permanent solution. Regular maintenance, timely inspections, and knowing when to call a pro will keep your Sedona’s AC in top shape for years to come.
So next time the heat hits and your AC starts to fade, don’t sweat it—literally. Grab your recharge kit, follow these instructions, and get back to cool, comfortable driving. Your family (and your sanity) will thank you.
Frequently Asked Questions
How do I add freon to my 2006 Kia Sedona air conditioner?
To add freon to your 2006 Kia Sedona, locate the low-pressure service port (usually on the larger aluminum line near the firewall), attach a freon recharge kit, and slowly add refrigerant while the engine and A/C are running. Always follow the pressure guidelines on the freon can and your vehicle’s specifications.
What type of freon does a 2006 Kia Sedona use?
The 2006 Kia Sedona uses R-134a refrigerant. Make sure to purchase R-134a freon with a built-in gauge for safe and accurate refilling. Using the wrong type can damage the A/C system.
Can I recharge the A/C in my 2006 Kia Sedona myself?
Yes, you can recharge the A/C in your 2006 Kia Sedona yourself using a DIY freon recharge kit, but only if the system isn’t leaking and has sufficient pressure. Always wear safety goggles and gloves, and avoid overcharging to prevent compressor damage.
Where is the low-pressure port on a 2006 Kia Sedona?
The low-pressure port on a 2006 Kia Sedona is typically located on the aluminum refrigerant line near the firewall on the passenger side. It has a blue or black cap labeled “L” and is larger than the high-pressure port.
How much freon does a 2006 Kia Sedona A/C system hold?
The 2006 Kia Sedona A/C system holds approximately 24 to 26 ounces (about 1.5 to 1.6 pounds) of R-134a refrigerant. Overfilling can cause high pressure and damage the compressor, so monitor the gauge closely during refill.
Why isn’t my 2006 Kia Sedona A/C getting cold after adding freon?
If your A/C still isn’t cold after adding freon, there may be a leak, a faulty compressor, or a clogged expansion valve. Low refrigerant levels often indicate a leak, so consider having the system inspected by a professional if recharging doesn’t resolve the issue.

